Growing native plants successfully comes down to one core principle: match the plant to the place, not the other way around. Pick a species that naturally belongs in your region and your specific conditions (sun, soil, moisture), give it a proper start, and it will largely take care of itself once established. The tricky part is that "native" does not automatically mean "foolproof anywhere in your yard", and that gap between expectation and reality is where most beginners run into trouble.
How to Grow Native Plants: A Step-by-Step Guide

Marcus Holloway
2 May 2026
What "native plants" actually means and why they grow differently
The USDA defines a native plant as one that has developed as part of a region's natural balance over hundreds or thousands of years. That long history matters because it means the plant has co-evolved with local soils, rainfall patterns, insects, fungi, and wildlife. A black-eyed Susan that grew up in a Midwest prairie is genetically tuned to that environment in ways a non-native ornamental simply isn't.
This evolutionary history is why natives behave so differently from typical garden plants. They don't need the same fertilizer inputs, they support specific local pollinators and caterpillars that have depended on them for generations, and they're built to handle the extremes of your local climate. The USDA Forest Service points out that well-chosen natives also stabilize soil, reduce erosion, and resist the spread of invasive species, benefits you don't get from exotic ornamentals.
Here's the catch, though. NC State Extension is clear on this: native plants survive in the wild without human help, but that does not mean they'll thrive anywhere in your yard without thought. Put a sun-loving prairie species in deep shade, or a bog plant in fast-draining sandy soil, and it will struggle just as badly as any non-native would. Getting conditions right is still your job, natives just reward you much more generously when you do.
Choosing the right natives for your specific spot
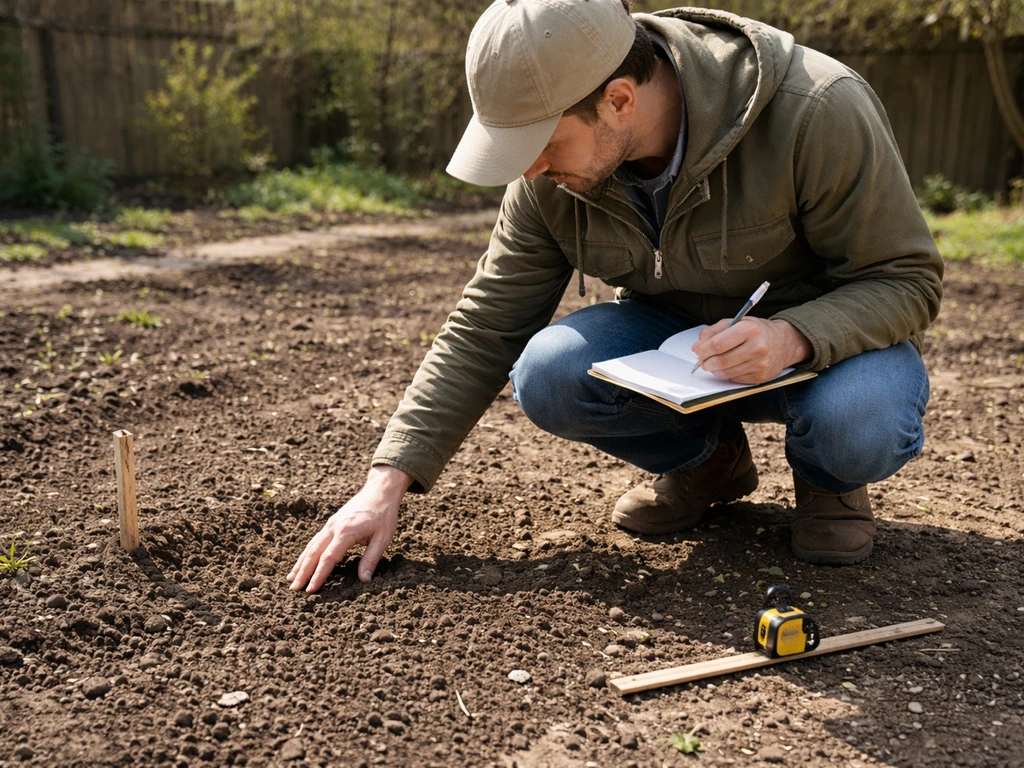
Before you buy a single plant or seed packet, answer four questions about your site: What hardiness zone are you in? How much sun does the spot get? What's your soil like? And how wet or dry does it stay? Getting these right is 80% of the battle.
Hardiness zone: your starting filter
The USDA Plant Hardiness Zone Map divides North America into zones based on the average annual extreme minimum winter temperature, running from zone 1 (the coldest, think interior Alaska) to zone 13 (tropical). Your zone tells you which plants can survive your winters, not which ones will actually perform well in your summers. Use it as a first filter. Once you know your zone, look for native species whose natural range includes your region, not just plants that are technically hardy to your zone but originate somewhere climatically very different.
Sun, soil, and moisture: the details that actually decide success
Stand in your planting spot and count real sun hours on a summer day. Full sun means six or more hours of direct sun; part shade is three to six; full shade is fewer than three. Most native wildflowers need full sun, while native woodland species like wild ginger or trillium thrive in shade. Match these numbers honestly, don't round up.
Soil texture matters just as much. Sandy soils drain fast and suit dry-prairie natives. Clay soils hold water and compact easily, which works for some natives (like many sedges) but kills others. Loamy, well-draining soil is the middle ground most natives appreciate. If you're unsure, dig a hole about 12 inches deep, fill it with water, and check how fast it drains. If it's still full an hour later, you have drainage problems that will affect your choices.
UGA Cooperative Extension makes an important point here: even drought-tolerant natives will not survive if their minimum water requirements aren't met. "Drought tolerant" means low water once established, not zero water ever. A plant like native switchgrass handles dry summers well once it has a root system, but it still needs consistent moisture in its first season.
Containers, indoor spaces, and small growing areas
Growing natives in containers or indoors is genuinely possible for some species, but the list narrows considerably. Compact ferns, native violets, some sedges, and certain wildflowers like columbine can work in large containers on a porch or balcony. The main constraints are pot size (roots need room), drainage (never let containers sit in standing water), and regular watering since containers dry out far faster than ground soil. UC ANR specifically flags that container-grown natives need regular watering adjusted to weather, plant type, and soil texture, there's no set-it-and-forget schedule for pots. For truly indoor growing in low light, most native species aren't a great fit unless you can provide supplemental grow lighting and mimic seasonal cues.
Seeds vs. seedlings: how to start your native plants
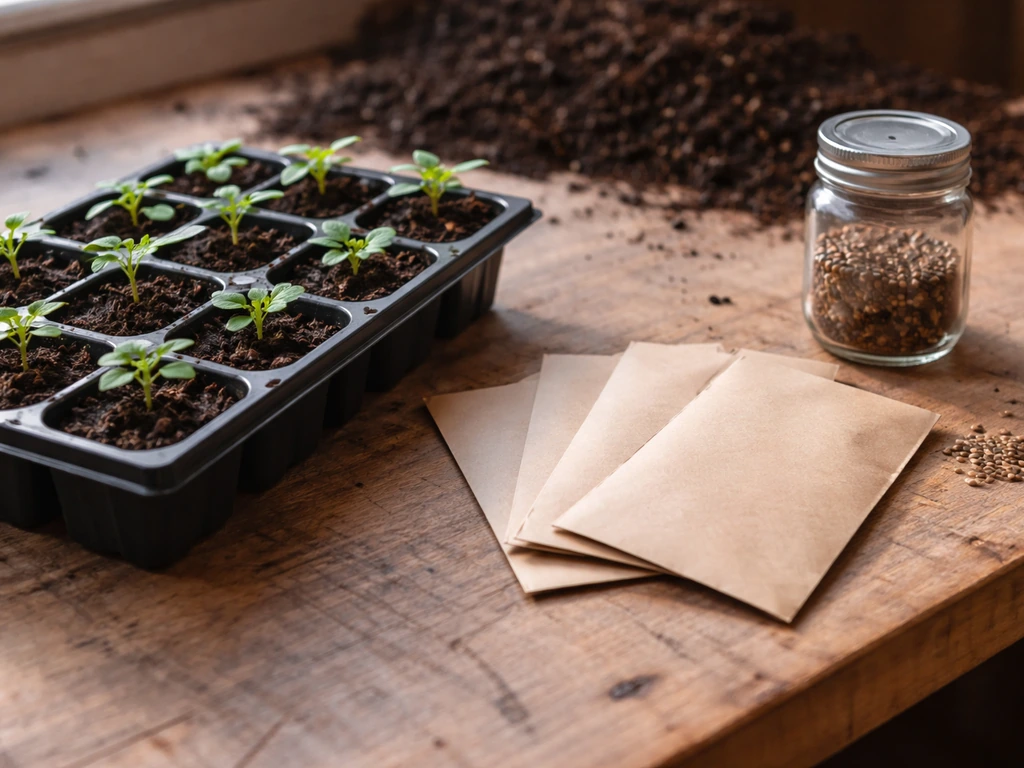
You have two main options for getting started: buying transplants (young plants from a nursery) or starting from seed. Both work, and both have trade-offs worth knowing.
| Approach | Cost | Time to establish | Effort level | Best for |
|---|---|---|---|---|
| Transplants (seedlings) | Higher upfront | Faster (1 season) | Lower — less prep | Beginners, small spaces, specific species |
| Starting from seed | Much cheaper | Longer (1–2+ seasons) | Higher — needs dormancy prep | Large plantings, rare species, budget-conscious growers |
If you go the seed route, the biggest thing beginners overlook is dormancy. Many native perennials, especially woodland species, will not germinate without going through a cold, moist period first, this is called cold stratification. The University of Maryland Extension confirms that most native perennials require stratification before sowing, and Iowa State University's restoration research shows that woodland species in particular see dramatically higher germination rates after cold, moist stratification.
How to stratify seeds
Cold stratification mimics what happens naturally when a seed falls in autumn, gets wet, and spends winter in the ground before germinating in spring. To do it yourself, mix seeds with slightly damp peat moss or vermiculite, seal them in a plastic bag, and refrigerate them for the period specified on the seed packet (typically 30 to 90 days). Keep the medium moist but not soaking, Iowa State research warns that overly wet stratification media can promote fungal growth and kill seeds before they get a chance to sprout.
An easier route, especially if you're dealing with large quantities, is winter sowing. Dane County UW Extension describes this method well: you sow seeds in covered outdoor containers in late winter, letting natural cold and moisture provide stratification conditions. It's low-tech and surprisingly effective for many natives. Some seeds, though, don't need any cold period at all, many warm-season native grasses, for example, germinate readily once soil temperatures stay consistently above 70°F.
Scarification and other dormancy-breaking tricks
Some seeds have hard seed coats that need to be physically nicked or chemically leached before water can penetrate and germination can start. Penn State Extension notes that dormancy-breaking methods include scarification (sanding or nicking the seed coat), leaching (soaking to remove germination inhibitors), and cold/moist stratification depending on the seed type. For most home gardeners, a quick overnight soak in warm water is a good first step for hard-coated native seeds like wild lupine or native baptisia.
Light and germination: one overlooked detail
Don't assume all seeds want light to germinate. Penn State Extension points out that many seeds actually germinate best in dark conditions, and for some species, light can actively inhibit germination. When in doubt, cover seeds lightly with soil or vermiculite rather than leaving them exposed on the surface, and check the specific guidance for your species.
Planting and early establishment
Soil prep: less is more with natives
Here's where native plant gardening is actually simpler than conventional gardening: don't over-amend your soil. UC ANR Master Gardeners specifically recommend filling the planting hole with native soil from the site and avoiding amendments or fertilizer in most cases. Natives evolved in your regional soil. Piling in compost or potting mix creates an artificially rich pocket that the roots settle into without ever reaching out into the surrounding native soil, which slows establishment and can even cause problems when that pocket dries out.
That said, if your soil is severely compacted, breaking it up before planting (without adding amendments) gives roots an easier path. And if you're planting in clay with drainage problems, consider raised beds or berms rather than trying to dig your way out of a poor-drainage situation.
Planting depth: get this right or pay for it later
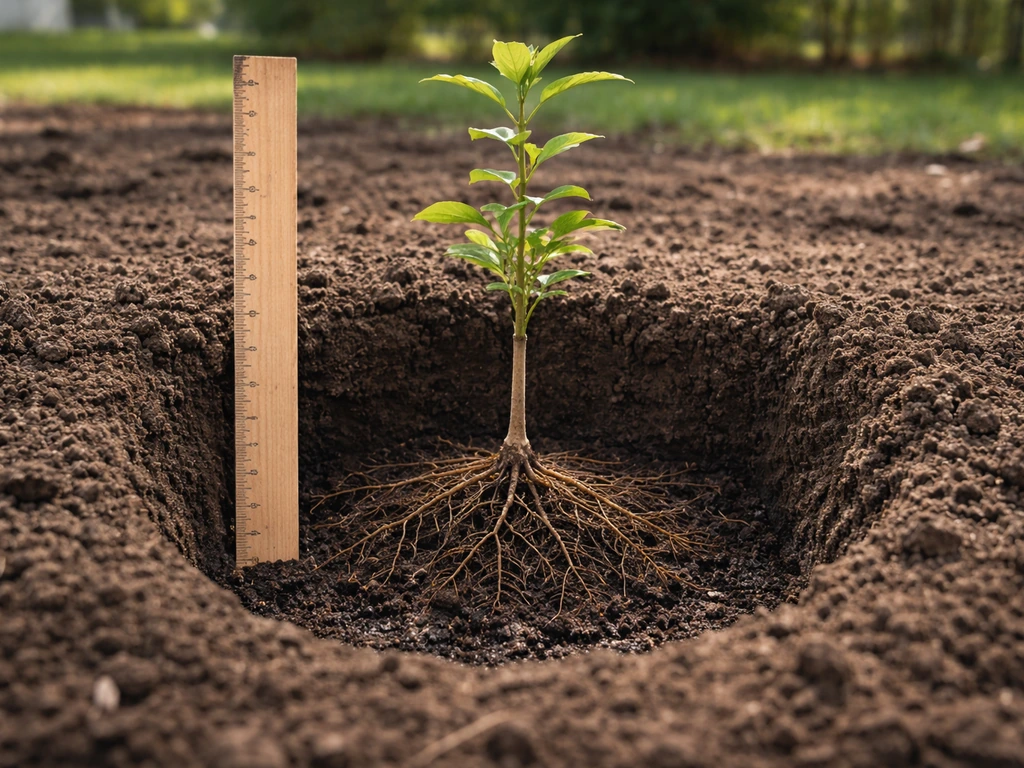
Planting too deep is one of the most common and most damaging mistakes. The University of Maryland Extension warns that trees planted too deeply develop bark deterioration at the soil line, which can kill them years later, well after you've stopped suspecting the original planting as the cause. For woody plants, the root flare (the point where the trunk widens at the base) should be at or slightly above the soil surface. For perennials and wildflowers, match the same depth they were growing in the nursery container. In poorly drained or compacted soil, Clemson Extension recommends planting slightly higher than the original root depth to prevent waterlogging.
Spacing and timing
Space plants based on their mature spread, not their current size. It's tempting to plant close together for an instant full look, but crowding increases disease risk and root competition. The best planting times for natives are generally fall (for woody plants and perennials in most climates, giving roots time to establish before summer heat) or early spring before temperatures spike. Avoid planting in midsummer heat unless you're committed to daily watering.
Watering during establishment
The first year is critical. UC ANR's native plant first-year guide is direct: water properly during year one, even for drought-tolerant species. Dry plants are handled differently from fresh cuts, but the same mindset of meeting the species needs makes them easier to grow and keep water properly during year one, even for drought-tolerant species.. "Established" means the plant has grown enough roots into surrounding soil to find its own water during dry spells, and that takes a full growing season, sometimes two. During year one, water deeply and infrequently rather than shallowly and often. Deep watering encourages roots to chase moisture downward, building drought resilience. Shallow watering keeps roots near the surface where they're vulnerable to heat and dry spells.
Ongoing care once plants are in the ground
Mulch: probably your single most useful tool
Apply 1 to 2 inches of organic mulch (wood chips, shredded bark, or straw) around newly planted natives. UC Master Gardeners of San Luis Obispo County give this specific guidance and also flag the critical crown-rot rule: keep mulch away from direct contact with the plant's crown (the point where stem meets roots). UC IPM is similarly direct about never covering the root crown or graft union with soil or mulch because persistent moisture at the crown is a fast track to Phytophthora root and crown rot, which kills plants. Cornell recommends keeping a mulch-free zone of 3 to 5 inches around the base of young woody plants, and a wider radius for mature trees.
Beyond that, mulch does serious work for you: it retains soil moisture, moderates soil temperature, suppresses weeds, and as it breaks down, gradually builds organic matter in the soil. Utah State University Extension confirms that organic mulch increases underlying soil nutrient fertility over time, which means mulched native plantings actually need even less fertilizer than they already do.
Fertilizing: mostly don't
Most established natives in the right conditions need no supplemental fertilizer. Over-fertilizing is actually a real problem with natives: OSU Extension warns that excess fertilizer stimulates lush new growth that demands more water and is more attractive to pests. If a native is growing slowly or showing pale leaves, check soil pH and drainage before reaching for fertilizer. University of Nevada Reno Extension notes that improper watering (either too much or too little) can prevent plants from absorbing nutrients even when they're present, and that most plants grow best in a pH range of 5.5 to 7.5. So fix the watering or pH first. If you do fertilize, use a slow-release, low-nitrogen option once in early spring and skip it entirely in dry years.
Pruning and seasonal care
Native perennials generally follow a simple pattern: they grow and bloom during the season, then die back in fall. Resist the urge to cut everything down in autumn. Leaving stems and seed heads standing through winter provides food for birds, shelter for overwintering insects, and nesting material for native bees. Cut them back in late winter or very early spring before new growth emerges. For woody natives like native shrubs, prune after flowering to avoid cutting off next season's buds. Remove dead or crossing branches any time of year.
When things go wrong: troubleshooting common failures
Seeds not germinating
If seeds aren't sprouting, the most likely culprits are skipped stratification, soil that's too cold or too warm for the species, seeds buried at the wrong depth, or old seeds with low viability. Check the specific germination requirements for your species. Many native seeds have a short shelf life, so if you've been storing seed packets for more than a year, do a quick germination test: put 10 seeds between damp paper towels in a warm spot and see how many sprout in two weeks.
Transplant shock and die-off
WSU Extension lists the most common causes of transplant shock: inadequate root systems, improper planting depth, overwatering or underwatering, transplanting at the wrong time of year, and roots drying out or freezing during the move. If a newly planted native wilts, don't immediately water more, check the soil moisture first. Wet, poorly drained soil around roots is just as damaging as dry soil, and the symptoms look similar (wilting, yellowing leaves). Dig down 3 to 4 inches near the plant and feel the soil before you water.
Crown rot and root rot
Crown rot shows up as soft, dark tissue at the base of the stem, often accompanied by a musty smell. It's almost always caused by mulch or soil piled against the crown, chronic overwatering, or both. Pull mulch back from the plant immediately, let the area dry out, and assess the damage. If the crown is mushy all the way around, the plant likely won't recover. Prevention is everything here.
Yellow or brown leaves
Yellowing leaves on natives usually signal one of four things: overwatering, underwatering, nutrient deficiency from pH problems, or normal seasonal die-back. Check soil moisture first. If the soil is consistently soggy, improve drainage or move container plants. If the soil is bone dry, increase watering frequency. Pale yellow leaves across the whole plant (not just older leaves) can indicate nitrogen deficiency, often linked to pH being too high or low for nutrient uptake. A simple soil pH test kit costs a few dollars and takes five minutes.
Pests and disease
Well-established natives in the right conditions are genuinely more pest-resistant than most garden plants, but they're not immune, especially during establishment. Look for physical damage (holes, chewing), sticky residue (aphids), or white powdery coating (fungal disease). The first response for most pest problems is a strong jet of water to knock insects off leaves, not pesticides. Pesticides harm the native pollinators you're trying to support. If disease persists, improve air circulation through pruning rather than reaching for chemicals.
Weeds outcompeting your natives
Weeds are the most persistent challenge in native plantings, especially in the first two years before the natives fill in. Cornell CALS recommends spreading mulch to a depth of 3 to 4 inches around transplanted natives immediately after planting as your primary weed-suppression tool. Hand-pull weeds early, before they set seed. Landscape fabric is tempting but NC State Extension specifically warns against it as an inappropriate practice for establishing trees and shrubs, it degrades, traps debris, and creates more problems than it solves. Stick with mulch and hand weeding, and know that weed pressure drops significantly once natives establish.
Building a planting that lasts: pollinators, weed control, and long-term resilience
Designing for pollinators
If supporting wildlife is part of your goal, think beyond just nectar plants. UMN Extension emphasizes that successful pollinator habitat needs both nectar plants for adult butterflies and bees, and host plants for caterpillars and larvae. A garden full of flowers but no host plants (like native milkweed for monarchs, or native oaks for hundreds of moth and butterfly species) is only doing half the job. OSU Extension drives this home: more than 75% of native bees need suitable nesting sites in the ground or in plant stems, so leaving bare patches of undisturbed soil and leaving hollow stems standing in winter matters as much as the blooms you plant.
Colorado State University Extension recommends planning your planting so something is blooming from early spring through late fall, not everything at once. This gives pollinators a continuous food source through the season rather than a brief feast and a long famine. And don't forget water: University of Maine Extension points out that pollinators need a continuously available water source while they're active. A shallow dish with pebbles (so insects can land without drowning) filled with fresh water every few days is easy to add and genuinely useful.
Long-term weed control strategy
Your weed management approach in the first few years directly shapes what your planting looks like in five years. Cornell CALS notes that weed management choices affect the seed bank in your soil and future weed pressure, so if you let weeds set seed early on, you're banking problems for later. OSU Extension adds that actively removing invasive and non-native plants and replacing them with natives supports healthy native pollinator communities over the long term. Think of weed control not as a chore to complete but as an ongoing investment in a system that gets easier every year.
Building soil health over time
One of the best things about a maturing native planting is that it builds its own fertility. Leaf litter and decomposing plant material return organic matter to the soil. The mulch you apply breaks down and feeds soil microbes. Root systems from native perennials and grasses grow deep, improving soil structure and drainage. Don't rake everything clean in fall, leave some leaf litter around plants as habitat and slow-release organic material. The more you let the system work the way a natural area would, the less work you'll need to do.
A simple plan to get started today
- Look up your USDA hardiness zone and identify three to five native plant species native to your specific region and suited to your site conditions (sun, soil, moisture).
- Decide whether to start from seed or transplants — if seeds, check whether stratification is needed and start the process now or plan for winter sowing.
- Prep your soil minimally: loosen compaction, remove weeds, and avoid heavy amendments.
- Plant at the correct depth (root flare at or above soil level for woody plants; match nursery depth for perennials), water thoroughly, and apply 1 to 2 inches of mulch immediately while keeping mulch away from the crown.
- Water consistently through the first growing season, checking soil moisture before each watering rather than watering on a fixed schedule.
- In year two, add host plants for local pollinators, plan for sequential bloom times, and set up a simple water source if supporting bees and butterflies is a goal.
- Reduce intervention over time — less watering, no fertilizing for established plants, and just the seasonal pruning and weed pulls needed to keep things in balance.
If you're also exploring other plant categories for your space, the principles here overlap with approaches used for decorative and exotic plants in terms of site-matching and establishment care, though natives give you the unique advantage of a deep evolutionary fit with your local conditions that those plants can't replicate. Growing natives is genuinely one of the most rewarding shifts you can make in how you garden, and once your planting is established, it asks remarkably little of you in return for everything it gives. If you want to go a step beyond natives, the same planning process helps you figure out how to grow exotic plants without losing hard-earned success.
FAQ
How do I choose native plants if I do not know my soil type or exact drainage?
Use a two-part check before buying. First, do the 12-inch drainage test (fill the hole with water and observe how long it stays). Second, note how the spot behaves in spring after rain, if it stays soggy or forms shallow puddles for more than a day, treat it as poorly drained and pick natives that naturally tolerate that moisture or plan for a berm or raised bed.
What does “drought tolerant” really mean for native plants in the first year?
It usually means the plant tolerates low water after establishment, not that it survives with no irrigation during establishment. In year one, water deeply and less frequently, but consistently enough that the root zone does not fully dry out for long stretches, especially during heat waves.
Can I mix native seeds and plants from different regions in the same bed?
Yes, but it is risky if the “native” plants come from climates that differ a lot from your site. Aim to use species whose natural range includes your locality, and avoid mixing in plants that come from much wetter, much drier, or much colder regions unless you can match those conditions within your micro-site.
Do natives still need fertilizer if they look unhealthy or pale?
Do not default to fertilizer. First confirm whether the issue is watering or drainage, then check soil pH because nutrient uptake depends on it. If growth is slow but the site conditions are correct, consider a low-nitrogen, slow-release option in early spring, and only for the specific plant showing the problem, not for the whole planting.
How do I know when a native is “established” enough that I can stop frequent watering?
Use a practical test: if the plant has grown enough roots into surrounding soil to keep green growth through a normal dry spell, it is closer to established. Another indicator is seasonal behavior, steady new growth after the first year and improved performance with reduced irrigation usually means the roots are reaching out beyond the original planting pocket.
What should I do if my native transplant wilts right after planting?
Check soil moisture before watering again. Wilting can come from both dry and overly wet conditions. Dig 3 to 4 inches near the plant and feel the soil, then adjust, if it is wet, improve drainage or delay irrigation, if it is dry, water deeply and then reassess.
How deep should I plant native perennials and woody plants to avoid problems?
For woody plants, keep the root flare at or slightly above the soil surface. For perennials and wildflowers, plant at the same depth as the nursery container. If your soil holds water or is compacted, planting slightly higher than the original root depth can help prevent waterlogging.
Can I use landscape fabric or weed barrier in native plantings?
It is usually a bad fit for natives, especially for establishing trees and shrubs. Fabric breaks down over time, traps debris, and can limit how roots and soil biology develop. Mulch plus early hand-weeding is the safer approach, and it protects the soil without blocking root access.
What is the safest way to mulch native plants without causing crown rot?
Apply 1 to 2 inches of mulch, keep it pulled back from the crown or stem base, and never bury the crown or graft union. Think in terms of a clear “breathing zone” around the plant base, if mulch touches the crown, moisture can accumulate there.
Why are my native seeds not sprouting even though I stratified them?
Common misses are wrong stratification timing, incorrect seed depth, and temperature mismatches. Re-check the seed packet for days of cold stratification, confirm you used the right moisture level (damp, not soaking), and cover lightly or at the recommended depth, some seeds germinate best in darkness.
How can I test whether my saved native seed is still viable?
Run a quick germination test using a small sample, place about 10 seeds between damp paper towels in a warm spot, and track how many sprout within the expected timeframe (often around two weeks). If viability is low, increase your sowing rate or switch to fresh seed rather than repeatedly re-stratifying the same batch.
Should I cut back native perennials in the fall or leave them until spring?
For many natives, leaving stems and seed heads through winter supports overwintering insects and provides food and shelter, then cut back in late winter or early spring before new growth starts. If a plant is diseased or severely flopped, selectively removing problem material can be reasonable, but avoid clearing everything if wildlife benefits are a goal.
What are the best first steps for controlling weeds in a young native planting?
Start with prevention and consistency. Mulch promptly after planting, hand-pull weeds early before they set seed, and avoid letting weeds establish seed in the first two years because those seeds build a future weed problem in the soil.
How do I create a native habitat that supports pollinators, not just blooms?
Include host plants for larvae and also provide nectar for adults. A garden with nectar alone can look great but does not support the full life cycle. Plan for something blooming from early spring through late fall, and add an accessible water source (a shallow dish with pebbles works well).
Do native plants require special pest or disease treatment compared to regular ornamentals?
Often they need less intervention, but during establishment they can still struggle. Start by diagnosing moisture and spacing, then use the least disruptive approach, such as a strong water spray for insect pests. Avoid broad pesticide use because it can harm native pollinators and beneficial insects.