You can grow rocket (arugula) at home from seed to first harvest in as little as 21–25 days for baby leaves, or around 40–45 days for full-size leaves. It works in a pot of soil on a windowsill, in a container under a grow light, or even in a jar of water with no soil at all. The key things that make or break it are keeping temperatures cool (50–65°F is the sweet spot), giving it enough light, and picking leaves before the plant gets stressed and turns bitter. If you've killed plants before, don't worry, rocket is genuinely one of the fastest, most forgiving greens you can grow.
How to Grow Rocket at Home: Seed to Harvest Indoors

Marcus Holloway
24 Apr 2026
What rocket actually is and what you're growing
When most people say 'rocket' in a home gardening context, they mean arugula, botanically Eruca sativa, a fast-growing leafy green in the Brassicaceae family (same family as mustard and broccoli). It has a distinctive peppery, slightly tart flavor. That peppery kick comes from natural compounds called glucosinolates, and when the plant gets stressed by heat, drought, or age, those compounds intensify, which is why rocket can sometimes taste aggressively bitter instead of pleasantly peppery.
You might also see 'wild rocket' or 'perennial rocket' on seed packets, that's usually Diplotaxis tenuifolia, a related but different plant with deeply cut, almost feathery leaves and a similarly peppery taste. It's slower to bolt and a bit more intense in flavor. Both are edible and grown the same way, but for beginners, standard arugula/Eruca sativa is the faster, more predictable choice and what this guide focuses on.
Picking seeds, timing your planting, and getting conditions right
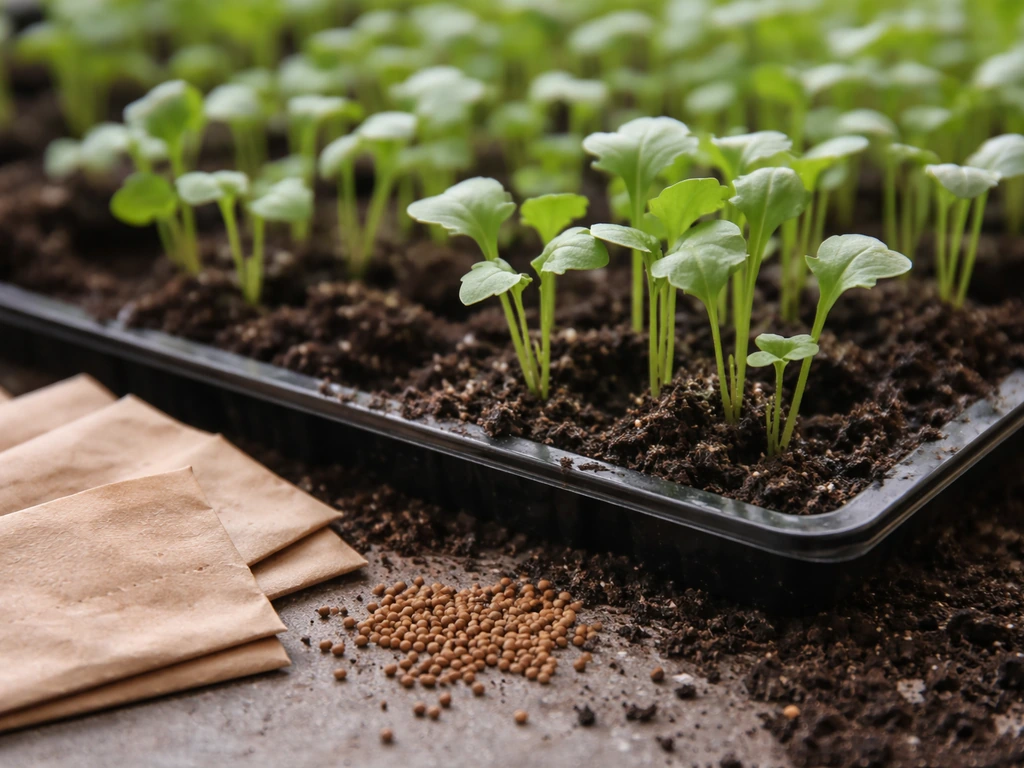
Almost any arugula seed variety will work indoors. Look for packets labeled 'arugula,' 'rocket,' or 'salad rocket', they're the same thing. If the packet mentions 'slow to bolt,' grab it, especially if your home runs warm. For seeds, expect germination in 3–7 days at room temperature, with baby leaves ready around day 21 and full-size leaves by day 38–45, depending on conditions and the specific variety.
Because rocket is a cool-season crop, it's ideal for growing indoors year-round as long as you control temperature. Outside, it thrives in spring and fall. Indoors, you're not locked into any season, a spare bedroom that runs cooler, or a spot away from heating vents, works beautifully. The main timing rule is: avoid placing it anywhere that gets above 70°F consistently, because heat is what pushes rocket toward bolting (flowering and going bitter) faster than almost anything else.
| Condition | Ideal Range | What Happens Outside This Range |
|---|---|---|
| Temperature | 50–65°F (10–18°C) | Above 70°F triggers bolting and bitterness; below 45°F slows growth significantly |
| Light (indoors) | 12–14 hours under LED grow light, or 4–6 hrs direct sun + supplemental | Too little light causes leggy, weak seedlings; too much heat from light raises temp risk |
| Watering frequency | Every 2–3 days, keeping soil consistently moist | Overwatering causes yellow, limp leaves; underwatering stresses plants and increases bitterness |
| Container depth | 6–8 inches minimum | Shallower pots dry out fast and restrict root development |
| Seed spacing (thinned) | 4–6 inches between plants (after thinning) | Overcrowding causes competition, poor airflow, and leggy growth |
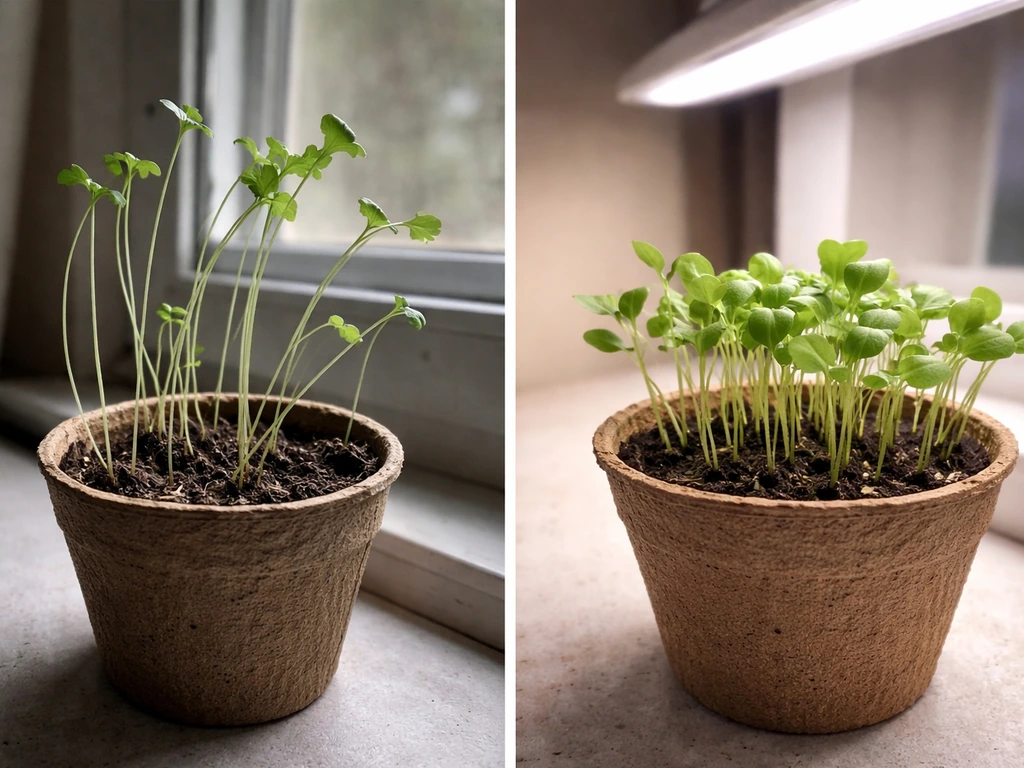
How to grow rocket in pots and soil indoors
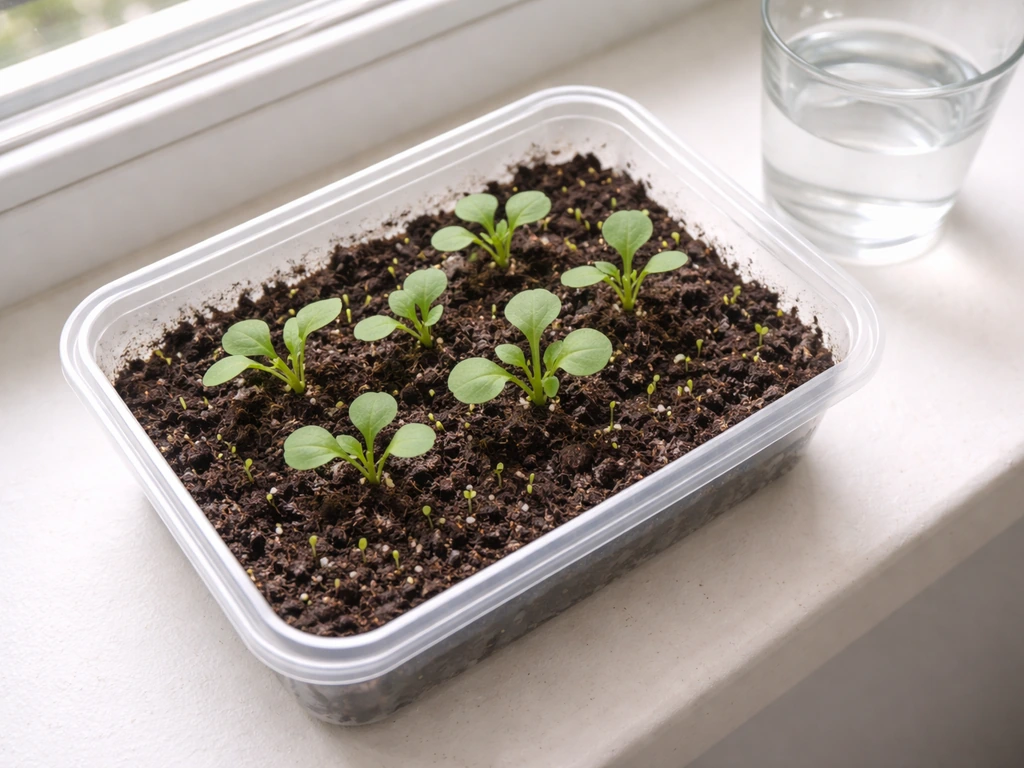
This is the most beginner-friendly route and what I'd recommend starting with. You don't need fancy equipment, a pot, some potting mix, seeds, and a reasonably bright spot is genuinely enough to get started. Once you know the basics with rocket, you can apply the same approach to grow easy plants at home with similar light and watering needs.
- Choose a container at least 6–8 inches deep with drainage holes. A standard 6-inch pot works for a small cluster of plants; a window box or shallow tray is great for a bigger harvest.
- Fill it with a well-draining potting mix — not garden soil, which compacts too much in containers. A standard multipurpose potting compost is fine.
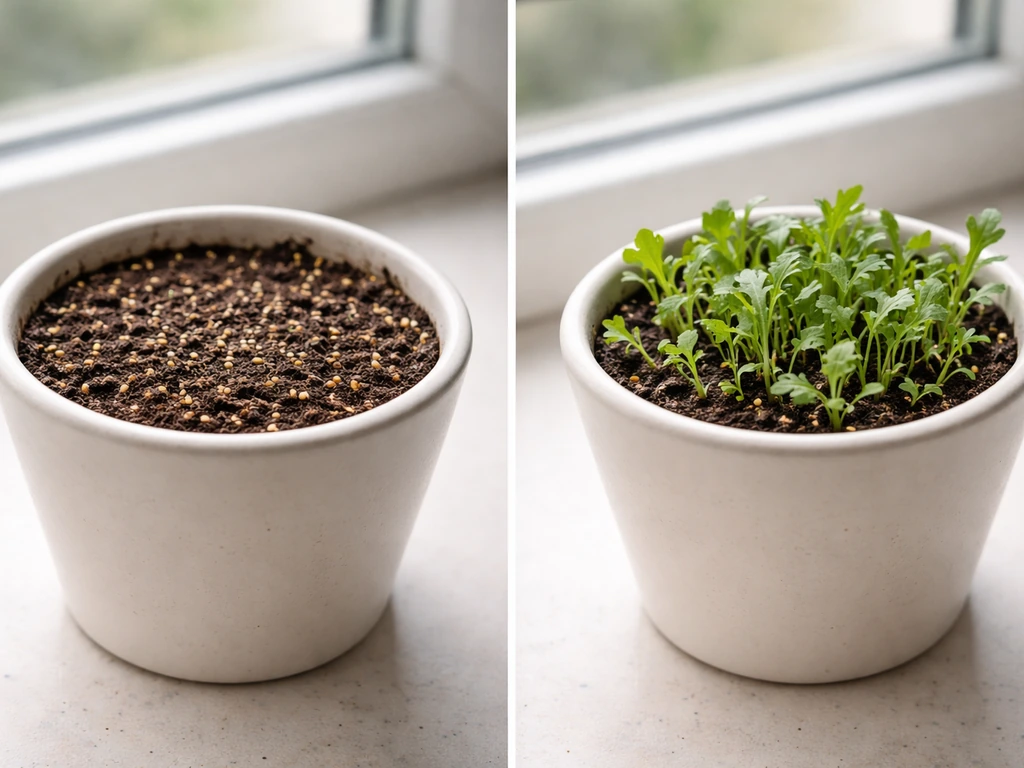
- Scatter seeds thinly across the surface, aiming for seeds about 1 inch apart. Cover lightly with about a quarter-inch of soil and gently water in.
- Keep the soil consistently moist but not waterlogged. Check it every day — stick your finger about an inch into the soil. If it's dry at that depth, water it. If it's still damp, leave it.
- Expect germination in 3–7 days. Once seedlings are about 2 inches tall, thin them to 4–6 inches apart by snipping the extras at soil level (don't pull them out — that disturbs the roots of neighboring seedlings).
- Place in your brightest spot, ideally with 4–6 hours of direct sun or 12–14 hours under a good LED grow light. Keep the location away from radiators, heating vents, and hot windowsills in summer.
- Start harvesting outer leaves once plants reach about 3 inches tall (roughly day 21–25). Cut individual leaves from the outside, leaving the center growing point intact for regrowth.
You don't need to fertilize heavily for a short leafy green crop, but if your potting mix is older or looks pale, a diluted half-strength liquid fertilizer once every two weeks won't hurt. Rocket grown for leaves doesn't need a lot of feeding, the goal is steady, moderate growth, not maximum size.
How to grow rocket in water (no-soil hydroponics)
If you want to skip soil entirely, rocket is actually a great candidate for a simple hydroponic setup. It doesn't need a complicated system, the Kratky method (a passive, non-circulating approach) and basic Deep Water Culture (DWC) are both well-suited to small leafy greens like arugula and are genuinely beginner-friendly.
The Kratky method (simplest option)
- Find a lidded container — a mason jar, a plastic tub, or any opaque vessel that holds water. Opaque is important: light hitting the water grows algae.
- Mix a leafy-green hydroponic nutrient solution according to the packet instructions, diluted to about half strength for seedlings. Aim for a pH of 5.5–6.5 (a cheap pH test kit or drops from a garden store works fine for checking this).
- Fill your container with the nutrient solution, leaving a small air gap at the top once you've placed your net pot or seedling holder. The roots need oxygen, and as they drink down the solution, that gap naturally grows — which is the Kratky method's elegance.
- Germinate seeds separately: place rocket seeds on a damp paper towel in a warm spot. After 3–5 days, once you see a tiny root, carefully transfer each sprouted seed into a small net pot filled with rockwool, clay pebbles, or even sponge material.
- Suspend the net pot so the bottom just touches the nutrient solution. The roots will grow down into the water while the stem and leaves grow up into the air.
- Top up the solution as levels drop, keeping pH in the 5.5–6.5 range. Every 2 weeks, do a partial solution change to refresh nutrients.
- Harvest exactly as you would with soil-grown rocket — outer leaves first, from around day 21 onward.
Hydroponic rocket tends to grow slightly faster than soil-grown rocket under the same light conditions because the roots have direct access to nutrients without needing to search through soil. The leaves can be a little milder in flavor too, since the plant experiences less stress. The tradeoff is that you do need to monitor pH and nutrient levels, which adds a small amount of ongoing attention. If you're new to hydroponics and want to explore this further, the core principles carry over well to other leafy greens too.
Getting the light, temperature, watering, and spacing right
Light is probably the variable most beginners underestimate. A north-facing windowsill in an apartment is usually not enough on its own, rocket needs at least 4–6 hours of direct sunlight daily, or 12–14 hours under a quality LED grow light. If your seedlings are thin, pale, and stretching toward the light source (called 'leggy'), insufficient light is almost always the cause. The fix is simple: move the plant closer to the window, add a grow light, or increase the daily light hours.
Temperature matters just as much. At 50–65°F, rocket grows steadily and produces tender, well-flavored leaves. If you want to try simple home remedies, focus on consistent light, steady moisture, and cool temperatures to support healthy growth home remedies help plants grow. Push it above 70°F consistently and you'll notice two things: the leaves start tasting more aggressively peppery or bitter, and the plant starts sending up a flower stalk (bolting).
A cool bedroom, a spot near a cooler window in spring or fall, or even a lower shelf away from ceiling heat can all help. In summer, if your home runs warm, a 30–50% shade cloth over the plant during the hottest part of the day can extend its productive life.
Watering is about consistency, not quantity. The goal is soil that stays evenly moist, not soggy, not bone dry. In a 6-inch pot indoors, this usually means watering every 2–3 days, but always check before watering rather than following a fixed schedule. Sticking your finger an inch into the soil tells you more than any timer. For hydroponic setups, keep the reservoir topped up and check pH regularly, that's your equivalent of 'watering' in a soil-free system.
Spacing is the last piece of the puzzle that beginners often skip. Sowing seeds densely and then skipping thinning leads to overcrowded plants that compete for light, airflow, and nutrients. Thin your seedlings to 4–6 inches apart once they're about 2 inches tall. It feels wasteful, but those thinned seedlings are edible microgreens, snip them off and add them to a salad.
Harvesting well, planting in succession, and keeping leaves tender
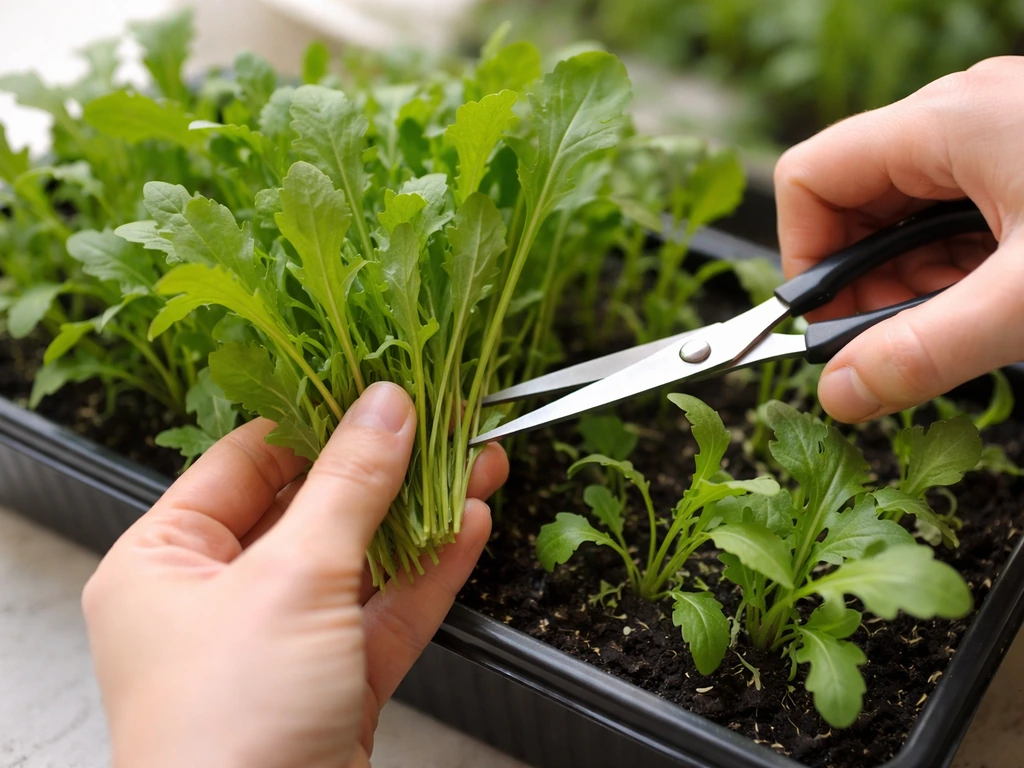
The single best thing you can do for rocket flavor is harvest early and often. Baby leaves at around 3 inches long (roughly day 21–25) are at their most tender and mildest. Leave them too long, especially in warmer conditions, and the glucosinolate content rises along with bitterness. Always cut outer leaves first, leaving the central growing point (the small cluster of youngest leaves in the middle) intact. This 'cut-and-come-again' approach means one plant can give you multiple rounds of leaves before it bolts.
Succession planting is what turns a single short harvest into a continuous supply. Every 2–3 weeks, sow a new small container or tray of seeds. By the time your first batch starts bolting or slowing down, your second batch is ready to harvest. For apartment growers with limited space, even two small pots staggered by three weeks makes a meaningful difference in how consistently you have fresh leaves available.
If you see a flower stalk forming (a tall central stem shooting up with small white or yellow flowers), the plant has bolted. At that point, the leaves already on the plant will be more pungent. You can still eat them, use them in smaller quantities as a flavoring rather than a salad base. But honestly, once bolting starts, the most practical move is to harvest what's usable and start a fresh pot. Rocket is fast enough that a restart is never a long wait.
Common problems and how to fix them quickly
Leggy, stretched seedlings
Thin, tall, floppy seedlings that lean toward light are almost always a light problem. Move the pot closer to a south- or west-facing window, or drop a grow light to about 6–12 inches above the seedlings and run it for 12–14 hours. Also check for overcrowding, too many seedlings competing for space can make the whole batch stretch. Thin them out and give remaining plants room to grow.
Yellow leaves
Yellow leaves in young rocket usually point to one of three things: overwatering (the most common culprit), insufficient light, or the normal die-off of the first seed leaves (cotyledons) as the plant matures, that last one is completely fine and not a problem at all. Check your watering frequency first. If the soil feels soggy or the pot feels very heavy, let it dry out a bit before watering again. If the soil is fine, look at your light setup.
Bitter or very pungent leaves
Bitterness in rocket is nearly always a stress response, heat, inconsistent watering, or the plant starting to bolt. First, check your temperature (aim for under 65°F). Second, harvest younger, smaller leaves, they're always milder than mature ones. Third, if the plant has bolted or is close to it, restart with a fresh sowing and keep the new batch cooler and consistently watered.
Slow or no germination
If seeds haven't germinated after 10 days, the most likely causes are soil that's too dry during the germination window, soil that's too cold (below 45°F), or old/poor-quality seeds. Cornell’s arugula growing guide notes that arugula germinates best in cool temperatures around 40°F to 55°F, so cold conditions can slow germination soil that's too cold (below 45°F). Keep the surface of the soil consistently moist (not soaked) during the first week, and make sure the spot is at least 50°F. If you suspect the seeds are old, try the paper towel germination test: place a few seeds between two damp paper towels in a warm spot and check after 5 days.
Pest problems
Indoors, pests are less common than outdoors, but flea beetles (tiny jumping black beetles that leave small holes in leaves) and aphids are the ones to watch for if you bring plants or soil in from outside. Flea beetles on indoor rocket are uncommon but possible. Aphids tend to cluster on new growth and undersides of leaves, a spray of diluted neem oil or even just a strong blast of water from a spray bottle deals with minor infestations. Check the undersides of leaves regularly as part of your watering routine.
Beginner troubleshooting checklist and your next steps
Use this checklist to diagnose what's going wrong with your rocket right now. Work through it top to bottom, most indoor growing problems come down to light, temperature, or water.
- Are leaves yellow or limp? Check if soil is soggy — if yes, stop watering and improve drainage. If soil is fine, increase light hours or move closer to window.
- Are seedlings thin and stretching toward the light source? Add a grow light or move to a brighter spot. Thin overcrowded seedlings to 4–6 inches apart.
- Are leaves very bitter or pungent? Check room temperature — if above 68–70°F, move the pot to a cooler spot. Harvest younger, smaller leaves and consider restarting if the plant has bolted.
- Has a flower stalk appeared? The plant has bolted. Harvest remaining leaves immediately, then start a new sowing.
- No germination after 7–10 days? Check soil moisture (should be consistently damp, not dry or flooded), check temperature (needs to be above 45–50°F), and test seed viability with the paper towel method.
- Holes in leaves? Check for flea beetles. Treat with neem oil spray and check for gaps in any covering if growing near an open window.
- Slow growth overall? Confirm light is running 12–14 hours daily for indoor plants, soil moisture is consistent, and temperature is in the 50–65°F range.
Your most practical next step depends on where you are right now. If you haven't started yet, grab a small bag of potting mix, a 6-inch pot with drainage, and a packet of arugula/rocket seeds, you can have seedlings in under a week. If you already have plants struggling, run through the checklist above and fix the most obvious variable first (usually light or watering).
If you want to experiment with soil-free growing, the Kratky method in a jar is genuinely as simple as it sounds and a great way to see how plants grow without soil. And if you're curious about expanding your indoor growing beyond rocket, the same principles around light, moisture, and temperature apply to most fast-growing leafy greens, rocket is a fantastic first crop precisely because it teaches you all the fundamentals so quickly.
These same light, temperature, and watering basics can also help you grow other plants healthy at home light, temperature, watering, and spacing tips. Once you get the hang of rocket, you can use the same light, temperature, and watering basics to grow other easy plants at home too. If you want more variety than rocket, the same light, temperature, watering, and spacing tips will help you grow other easy plants at home too.
FAQ
Can I start rocket seeds indoors and then move the plants outside?
Yes, but you still need to manage temperature. You can start seeds earlier indoors if the room stays under about 70°F, otherwise expect faster bitterness or bolting. If you move plants outside, harden them off over several days and avoid sunny midday exposure until they’re established, since heat swings are a common trigger indoors-to-outdoors.
How should I store rocket leaves after harvesting?
Storing is different for baby leaves versus larger leaves. Baby leaves stay crisp best when you harvest, rinse quickly, dry well, then store in a breathable container lined with paper towel in the fridge for a few days. If leaves are already thick or older, they wilt faster, so use them sooner or mix into cooked dishes to reduce harsh peppery notes.
What’s the best way to tell when rocket needs water in a pot?
If the pot feels heavy, it’s usually too wet, even if the top looks dry. Rocket prefers even moisture, so water only after the top inch loses that cool, wet feel, then water thoroughly until excess drains. In containers without drainage, bitterness and bolting risk increase because roots can experience swings in oxygen and moisture.
Is thinning really necessary, and what happens if I skip it?
Overcrowding is not just about competition, it also traps humidity near leaves and makes watering uneven. Thin to 4–6 inches once seedlings are about 2 inches tall, and remove the weakest seedlings rather than repeatedly harvesting them and leaving the rest crowded. If you want fewer plants, sow fewer seeds up front.
My rocket started bolting, can I still harvest it or should I restart?
If you see a flower stalk, harvesting can buy you time, but flavor usually declines quickly as the plant shifts energy. Cut the flower stalk off only if you still want to try extending production, and be aware it may regrow. The most reliable approach is to harvest what’s usable and start a fresh container right away, since rocket matures fast enough for continual supply.
How much light should I give rocket under a grow light, and should I follow a schedule?
For indoor rocket, a consistent light schedule matters more than total daily hours. Use 12 to 14 hours under a quality LED grow light, keep the light close enough to prevent stretching (often about 6 to 12 inches above seedlings), and rotate the pot every few days so one side doesn’t get more light and grow unevenly.
What’s the difference between nutrient deficiency, overwatering, and normal seed-leaf yellowing in rocket?
Most pale or yellowing seedlings early on are either insufficient light, overwatering, or normal cotyledon aging. Overwatering signs include heavy pot weight, slow growth, and yellowing that spreads with mushy soil. If your soil is evenly moist but plants look thin and stretched, that points to light first, not nutrients.
Do I need to fertilize rocket grown indoors, and how do I avoid overdoing it?
Fertilize lightly only if growth is clearly slow or the mix is old. Use a diluted half-strength liquid fertilizer once every two weeks, and stop at the first sign of tip burn or overly dark, lush growth. For most beginners in fresh potting mix, skipping fertilizer entirely until the second succession planting is often enough.
Is hydroponic rocket harder than soil rocket, and what should I watch for first?
Yes, but keep the water clean and monitor oxygen. In DWC, use proper net cups or supports so roots are fully submerged but the crown stays above water, and keep algae under control by covering reservoirs. pH and nutrient strength matter, if pH drifts you can see stunted growth and bitterness even when light is good.
If my rocket seeds don’t sprout, what’s the most likely cause and what should I do next?
Rocket seeds tolerate a slightly damp surface during germination, but they should not sit in waterlogged media. If germination stalls, check that the area stays at least around 50°F, then mist or water just enough to keep the top layer evenly moist. Old seed is common, so if no sprouts appear after about 10 days, it’s usually worth testing a few seeds with a paper towel method or starting a new batch.
How should I harvest rocket for regrowth, and when is it too much to cut at once?
Yes, and it’s a smart way to avoid waste. Cut outer leaves first, leave the center growing point intact, then wait to harvest again only when outer leaves reach baby-leaf size. Don’t take every leaf at once, because that can force stress and push the plant toward bitterness and earlier bolting.