Plants grow by converting light, water, and nutrients into energy through photosynthesis, using that energy to build roots, stems, leaves, and eventually flowers. Every stage of that process is controllable. If you give a plant the right light intensity, consistent water, a nutrient source matched to its growth stage, and temperatures in its comfort zone, it will grow reliably. When something goes wrong, it's almost always one of those four inputs being off. This guide walks you through exactly how that growth works and what to do at each stage, whether you're growing in soil on a windowsill, in a hydroponic setup, or inside a terrarium.
How Do Plants and Flowers Grow Step by Step Guide

Marcus Holloway
29 Apr 2026
How plants actually grow: seeds, roots, stems, leaves, and flowers
A plant's life starts with germination. The seed absorbs water, swells, and the embryo inside activates. The first thing to emerge is the radicle, which becomes the root system. Roots anchor the plant and absorb water and dissolved minerals from the growing medium. Once the root is established, the shoot pushes upward and the first leaves (cotyledons) unfold. These first leaves are the plant's initial energy source until the true leaves develop and take over photosynthesis.
Stems carry water and nutrients up from the roots and sugars down from the leaves through two separate internal highways: the xylem (up) and the phloem (down). Every new leaf, branch, or flower originates from a growth point called a meristem. Think of meristems as the plant's construction zones. The shoot apical meristem at the tip of the stem drives upward growth and branching.
When conditions are right for flowering, a chemical signal called florigen is produced in the leaves and travels down through the phloem to the shoot apical meristem, telling it to switch from making new leaves to making flowers. That transition from vegetative to reproductive growth is the key event you're managing when you're trying to get a plant to bloom.
Flowering is triggered by a combination of day length, temperature, and plant maturity. Many plants flower in response to shorter days (longer nights), which is why poinsettias bloom in winter and why your tomatoes fruit more reliably once summer days begin to shorten. The leaf detects the light/dark cycle and produces florigen, which signals the meristem to begin making flower structures instead of more leaves. If your plant isn't blooming, the most common reasons are insufficient light, wrong day length, too much nitrogen fertilizer keeping it in vegetative mode, or the plant simply not being mature enough yet.
Photosynthesis and light: what your plants actually need
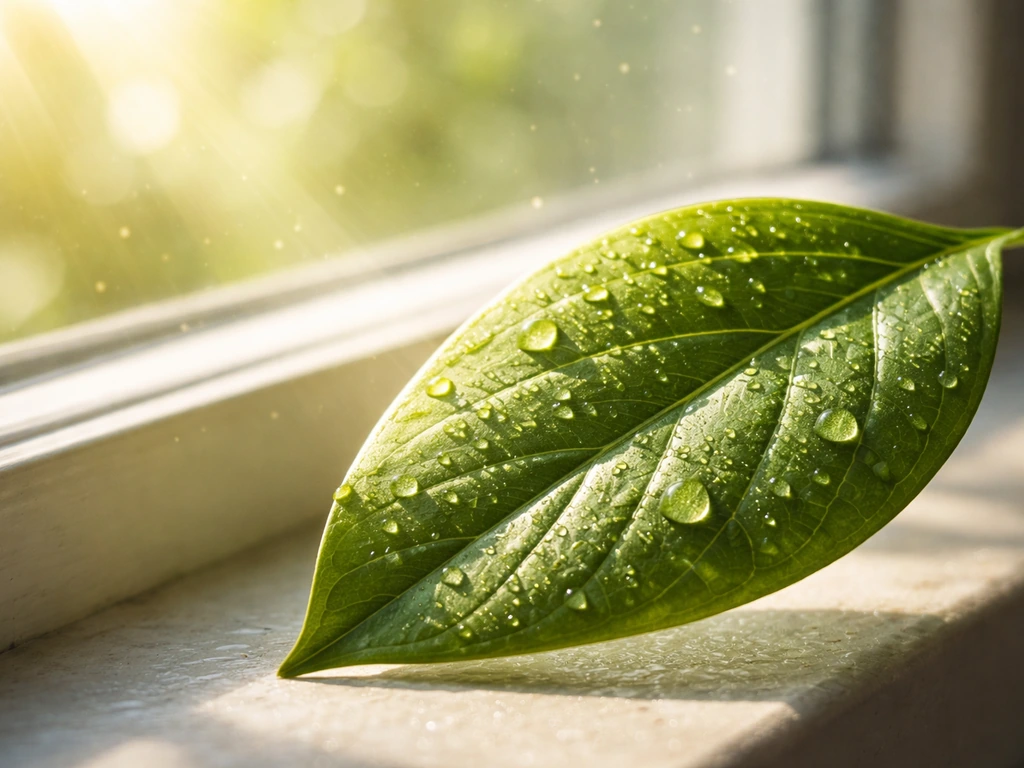
Photosynthesis is how a plant makes its food. Leaves capture light energy and use it to convert carbon dioxide from the air and water from the roots into glucose, which fuels all growth. Oxygen is the byproduct released into the air. The practical implication: without enough light, a plant can't produce enough energy to grow well, even if you're watering and fertilizing perfectly. Light is usually the first thing to audit when growth stalls.
Light levels by plant type
| Plant type | Light need | Practical placement | Hours per day |
|---|---|---|---|
| Succulents and cacti | Full sun (high) | South-facing window or grow light | 6-8 hours direct |
| Most vegetables and flowering plants | Full to partial sun | South or west-facing window, or grow light | 6-8 hours |
| Herbs (basil, mint, parsley) | Partial to full sun | Bright south or west window | 6 hours minimum |
| Foliage houseplants (pothos, philodendron) | Low to medium indirect | North or east window, 3-5 ft from south window | 4-6 hours indirect |
| Ferns and mosses (terrarium) | Low indirect | Away from direct sun, near a north window or low-output grow light | 4-6 hours indirect |
If you're growing indoors and natural light is limited, a basic LED grow light with a full-spectrum output of 2000-4000 lumens placed 6-12 inches above the plant for 14-16 hours a day covers most vegetables, herbs, and flowering houseplants. For low-light foliage plants, even a simple desk grow lamp on a timer is enough. Foliage plants tend to rely heavily on steady light and appropriate nutrients to keep producing new leaves low-light foliage plants. A quick test: if your plant is stretching toward the window with long, weak stems and pale leaves, it needs more light immediately.
Water and nutrients: what to give, when to give it
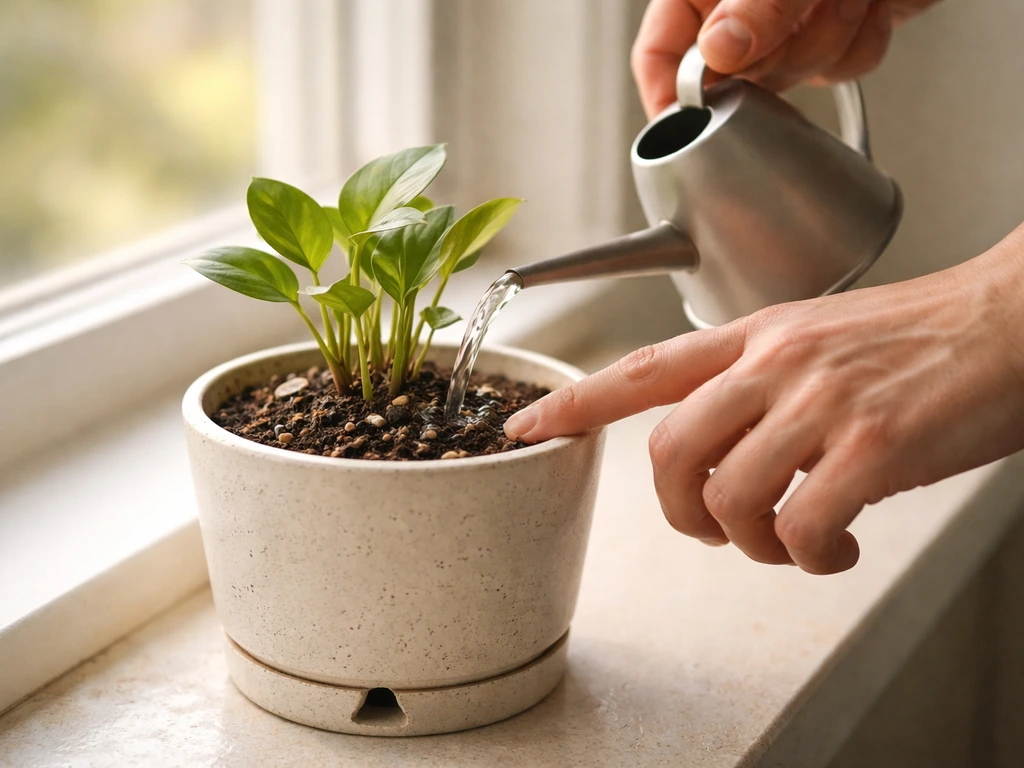
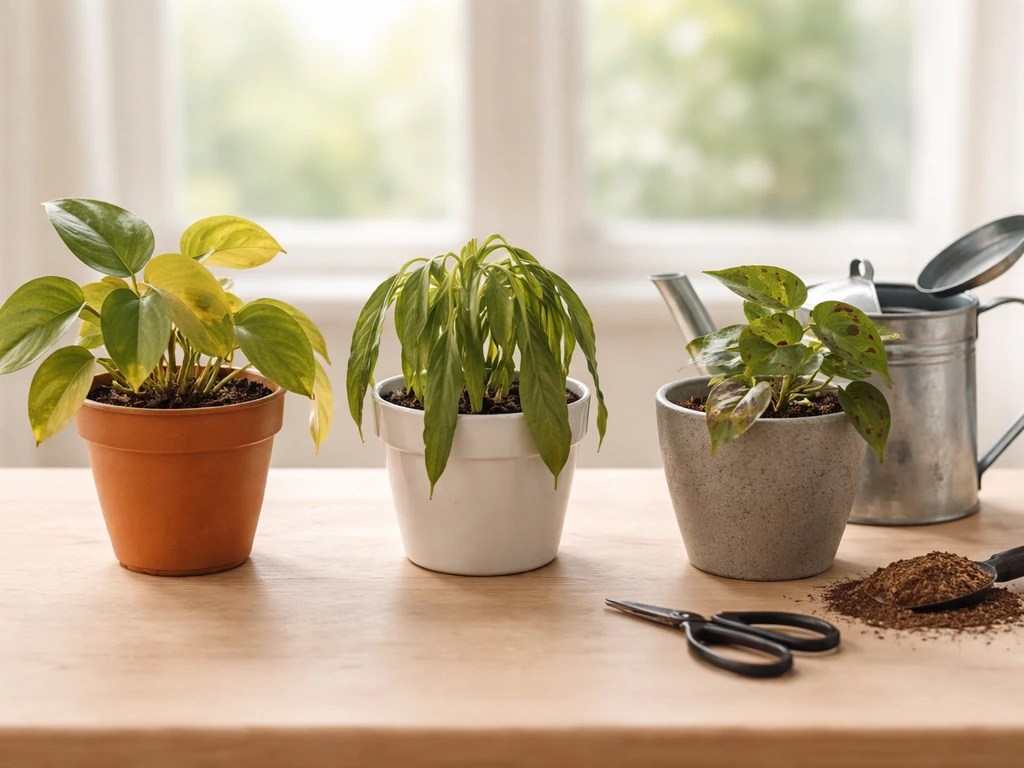
Most beginner plant deaths come from overwatering, not underwatering. Roots need both water and oxygen. blank" rel="noopener noreferrer">When soil stays soggy, the oxygen is pushed out and roots suffocate and rot. The rule of thumb for most houseplants and container vegetables: water thoroughly, then let the top 1-2 inches of soil dry out before watering again. A strong start with nursery plants means matching light, consistent moisture, and appropriate nutrients to their growth stage. Stick your finger in the soil. If it feels moist at your first knuckle, wait. If it feels dry, water until it drains freely from the bottom of the pot.
Frequency varies by plant, pot size, and environment. A 4-inch pot in a warm, bright room might need water every 3-4 days. A large pot in a cool, dim corner might only need water every 10-14 days. Build a watering schedule based on checking the soil, not the calendar. Succulents and cacti want the soil to dry out completely between waterings. Moisture-loving plants like ferns and peace lilies prefer consistently damp (not wet) soil.
Fertilizing basics
Plants need three main nutrients: nitrogen (N) for leafy green growth, phosphorus (P) for roots and flowers, and potassium (K) for overall plant health and disease resistance. These are the three numbers on any fertilizer bag or bottle, always listed in N-P-K order. For leafy plants and seedlings, a balanced fertilizer like 10-10-10 or a slightly nitrogen-heavy formula works well. For plants you're trying to get to bloom, switch to a low-nitrogen, high-phosphorus formula (like 5-10-5 or a bloom booster) once the plant is mature. Too much nitrogen at flowering time keeps plants in vegetative mode and delays or prevents blooms.
For soil grows, a liquid fertilizer diluted to half strength and applied every 2-4 weeks during the active growing season (spring through early fall) is a safe routine. Back off or stop fertilizing entirely in winter when most plants slow down. For soilless setups like hydroponics, nutrients are dissolved directly in the water and need to be replenished more frequently since there's no soil to buffer or store them.
Temperature, humidity, and seasons: timing your growth right
Most common houseplants and garden flowers do best between 60-80°F (15-27°C). Below 50°F, tropical plants slow down significantly and can suffer cold damage. Above 90°F, many plants wilt and flower production drops. If you're growing indoors, keep plants away from cold drafts near windows in winter and away from heating vents that create dry, hot air.
Humidity matters more than most beginners realize, especially for tropical plants, ferns, and anything in a terrarium. Most tropical houseplants prefer 50-60% relative humidity. Average indoor air runs around 30-40% in winter. Signs of low humidity include brown leaf tips, crispy edges, and bud drop on flowering plants. Fixes are simple: group plants together (they create a micro-humid zone), set pots on a tray of pebbles with water below the pot base, or use a small humidifier nearby.
Seasons affect not just temperature but day length, which directly controls flowering in many plants. If you want to trigger blooming in short-day plants (like chrysanthemums or poinsettias) outside their natural season, you can artificially shorten the day by covering the plant with a dark cloth for 14-16 hours a night for several weeks. This mimics the long nights of autumn and triggers the florigen response in the leaves. For long-day plants like most vegetables, keeping lights on for 14-16 hours a day pushes them toward flowering and fruiting.
Step-by-step setup for beginners
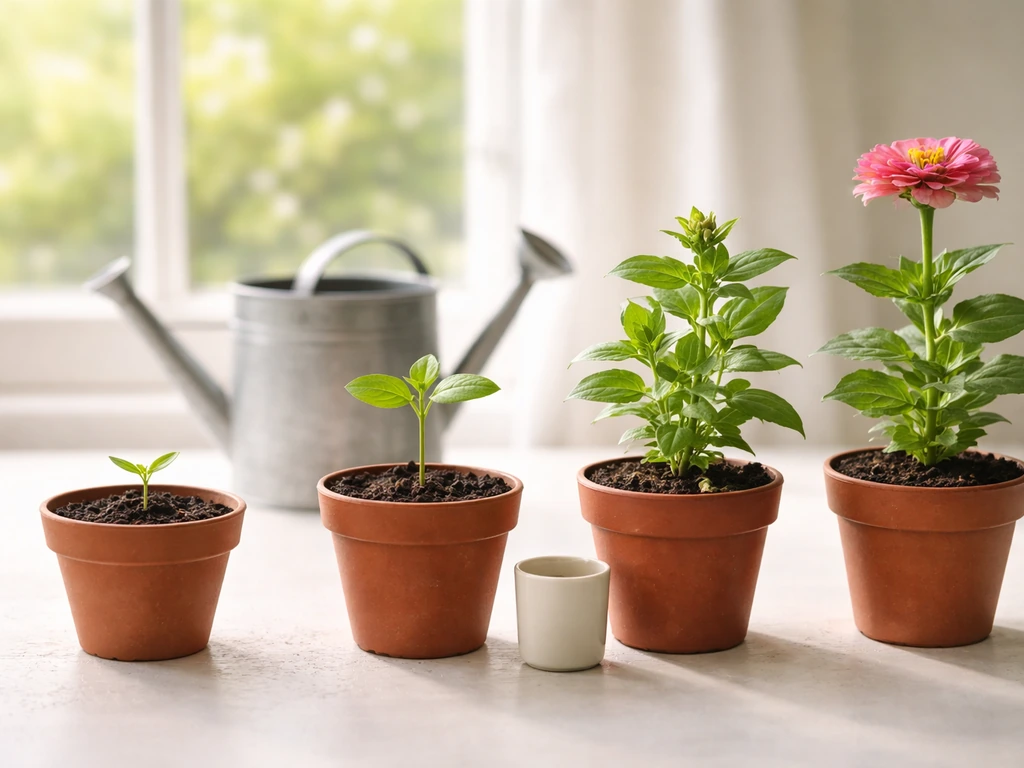
Whether you're starting from a seed, a cutting, or a nursery transplant, the setup process follows the same core steps. Nurseries grow plants by controlling inputs like light, water, nutrients, and temperature across each growth stage nursery transplant. Getting each one right from the start prevents most of the common problems that frustrate new growers.
Starting from seed
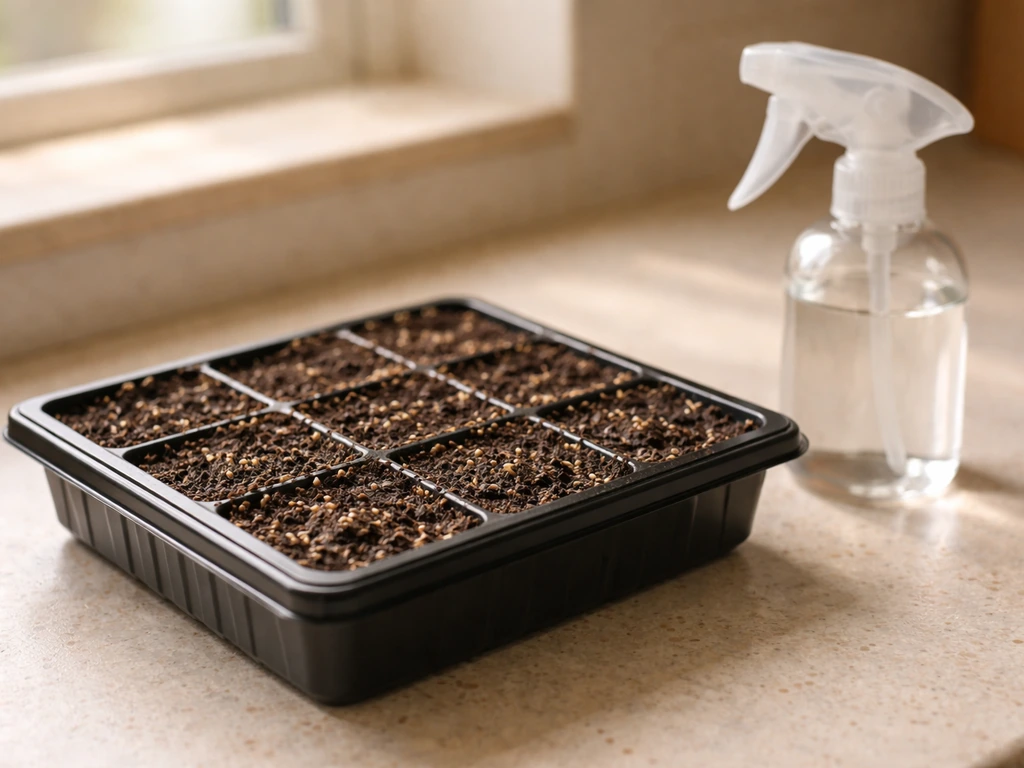
- Fill a small seed-starting tray or 3-4 inch pots with moist seed-starting mix (not regular potting soil, which is too dense for germination).
- Sow seeds at the depth listed on the packet, usually 2-3 times the seed's diameter. Tiny seeds like basil or snapdragon just need pressing onto the surface.
- Cover with a clear plastic dome or plastic wrap to hold in humidity. Place in a warm spot (65-75°F is ideal for most seeds). A heating mat speeds germination significantly.
- Check daily. Once you see sprouts, remove the cover immediately and move to your brightest light source or grow light.
- Water gently from below by setting the tray in a shallow dish of water and letting the soil wick it up. Top watering can knock over fragile seedlings.
- Once seedlings have two sets of true leaves, thin to one plant per cell or pot by snipping extras at soil level (don't pull, you'll disturb roots).
- Harden off seedlings going outdoors by placing them outside in a sheltered spot for 1-2 hours a day, gradually increasing over 7-10 days before transplanting.
Starting from a cutting or nursery plant
- For cuttings: take a 4-6 inch stem cutting just below a leaf node, remove lower leaves, and dip the cut end in rooting hormone powder.
- Place the cutting in moist perlite, a small pot of seed-starting mix, or directly in water (water works well for pothos, philodendrons, and many herbs).
- Keep in bright indirect light and consistent moisture until roots 1-2 inches long develop, usually 2-4 weeks.
- For nursery transplants: choose a pot 1-2 inches larger than the root ball. Too large a pot holds excess water and invites root rot.
- Use fresh potting mix appropriate for the plant type. Loosen the root ball gently before setting into the new pot.
- Water in thoroughly after transplanting, then hold off on fertilizer for 2-4 weeks while the plant adjusts.
Daily and weekly care routine
- Daily: Check soil moisture with your finger. Look for any wilting, yellowing, or pest activity. Rotate the pot a quarter turn so all sides get equal light.
- Weekly: Check light levels and adjust plant placement if growth looks stretched or pale. Wipe dust off large leaves with a damp cloth so photosynthesis isn't blocked.
- Every 2-4 weeks (growing season): Apply diluted liquid fertilizer. Check for root growth out of drainage holes, which signals it's time to repot.
- Monthly: Inspect undersides of leaves for pests. Flush soil with plain water occasionally to prevent fertilizer salt buildup.
Growing in different mediums: soil, water, hydroponics, and terrariums
The core growth biology is the same across all growing mediums. What changes is how you deliver water and nutrients, and how you manage oxygen at the roots. Here's how to adapt your approach.
Soil
Soil is the most forgiving medium for beginners because it buffers water and nutrients, meaning small mistakes don't immediately kill the plant. Use a quality potting mix (not garden soil in containers, which compacts and drains poorly). Add perlite at about 20-30% by volume to improve drainage and aeration. Match the soil type to the plant: cactus mix for succulents, orchid bark mix for epiphytes, standard potting mix for most vegetables and houseplants.
Water rooting and propagation
Many plants root well in plain water. This is a great way to start cuttings and watch root development clearly. Change the water every 5-7 days to prevent bacterial buildup. Once roots are 1-2 inches long, transition to soil gradually by mixing a little potting mix into the water container over a week so the roots adjust to the new medium without shock.
Hydroponics
In hydroponics, plants grow in an inert medium (like rockwool, clay pebbles, or net cups) with their roots in a nutrient-rich water solution. There's no soil to buffer mistakes, so precision matters more. You'll need to monitor and adjust nutrient concentration (measured in EC, electrical conductivity) and pH (aim for 5.
For hydroponics, Oklahoma State University Extension notes that nutrient-solution pH affects nutrient availability, so pH should be maintained in an optimum range with more frequent checking as needed monitor and adjust nutrient concentration (measured in EC, electrical conductivity) and pH. 5-6.
5 for most plants) regularly. The payoff is faster growth, often 30-50% quicker than soil, because roots have direct access to oxygen and nutrients without needing to search through soil. Start with a simple deep-water culture (DWC) setup or a Kratky method jar for herbs and leafy greens, which require almost no equipment.
Terrariums
Terrariums create a self-contained micro-environment with high humidity, which suits ferns, mosses, and small tropical plants perfectly. The key layers from bottom to top are: drainage layer (small pebbles or LECA), activated charcoal (to prevent odor and bacterial growth), and then a thin layer of moss followed by substrate appropriate for the plants. Closed terrariums largely water themselves through condensation, but check monthly that there's no pooling water at the base and no mold on plant material. Open terrariums need more frequent watering and suit succulents and cacti better than moisture-loving plants.
Common growth problems and quick fixes
Most plant problems show up in the leaves first. Learning to read those visual signals saves plants quickly. Here's what the most common symptoms usually mean and what to do about each one.
| Symptom | Most likely cause | Quick fix |
|---|---|---|
| Yellow leaves (lower, older) | Overwatering or nitrogen deficiency | Check soil moisture first. If soggy, let dry out and improve drainage. If dry, apply balanced fertilizer. |
| Yellow leaves (all over, newer growth) | Root rot or pH imbalance affecting nutrient uptake | Unpot and inspect roots. Trim black/mushy roots, repot in fresh dry mix. Check pH if in hydroponics. |
| Wilting despite moist soil | Root rot or compacted roots blocking water uptake | Unpot, check root health, repot with better drainage. Trim dead roots. |
| Wilting and dry soil | Underwatering or too much heat | Water thoroughly and move out of direct afternoon sun. |
| Leggy, stretched stems | Not enough light | Move closer to light source or add a grow light immediately. |
| Brown leaf tips or edges | Low humidity, fertilizer salt buildup, or inconsistent watering | Flush soil, increase humidity, and check watering consistency. |
| No flowers despite healthy leaves | Too much nitrogen, wrong day length, or plant not mature enough | Switch to bloom fertilizer, adjust light schedule, or wait for natural season change. |
| White powdery coating on leaves | Powdery mildew (fungal) | Remove affected leaves, improve air circulation, apply diluted neem oil or baking soda spray. |
| Sticky residue or tiny moving dots | Aphids, spider mites, or scale insects | Wipe leaves with soapy water, spray with diluted neem oil, isolate the plant from others. |
| White fuzzy patches on soil | Surface mold from overwatering or poor airflow | Scrape off, reduce watering frequency, improve air circulation around the plant. |
Preventing problems before they start
- Always use pots with drainage holes. No exceptions.
- Never let pots sit in standing water for more than 30 minutes after watering.
- Quarantine any new plant for 2 weeks before placing it near your other plants to catch pests early.
- Use fresh potting mix for new plants, not old soil from previous pots, which can harbor disease.
- Keep air moving around indoor plants with a small fan to reduce fungal disease and strengthen stems.
Your action plan: what to check first
If you're starting fresh, pick one plant that matches your actual light conditions (not your wishlist conditions) and start there. Audit your light first, then your watering habits, then your soil and nutrients in that order. Those three things solve about 90% of plant problems. If you're troubleshooting an existing plant, work through the same sequence: check the roots for rot, assess the light it's actually getting (not just where it's placed), and check when you last fertilized.
Growth stages also matter: a new cutting just needs light and moisture, not fertilizer. A mature plant that's stopped growing usually needs either more light or a nutrient boost. And if you've been curious about how different growing methods compare, experimenting with water-rooted cuttings or a small hydroponic herb setup alongside your soil plants is one of the fastest ways to understand what your plants actually need, because the feedback is immediate and visible.
FAQ
If my plant is alive but not growing, what’s the first thing I should check?
Usually not. Many houseplants and garden flowers can grow slowly or not bloom if they are underfed, but stalling growth is most often due to insufficient light, wrong watering (including low root oxygen), or temperature issues. If leaves are pale or stretching, prioritize light first even before adding fertilizer.
How can I tell whether my plant is getting enough light to grow and bloom?
Measure the actual light the plant receives. A “bright window” can still be too dim for flowering, especially in winter or on north-facing exposures. Indoors, use the timer and height consistently for a couple of weeks and watch for persistent stretching or leaf color change, those are faster indicators than growth speed alone.
When I try to force flowering with dark cloth, how strict does the “dark” need to be?
Day length control is not just about total hours, it is also about uninterrupted darkness. If the plant gets light leaks during the dark period (hallway lights, leaving a TV on nearby), many short-day plants will not switch into flowering. Use blackout covering that fully blocks stray light and keeps the schedule consistent.
Can too much fertilizer still cause poor growth even if I follow the label directions?
Yes, even with the “right” schedule. Over time, nutrients build up or become imbalanced, and soil salts can accumulate in containers. A practical fix is periodic thorough flushing (until water runs clear from the bottom), then resume a gentle feeding plan, especially if growth suddenly worsens while light and water seem unchanged.
Should I fertilize seedlings and cuttings right away?
Newly started plants often need less fertilizer than you think. Seedlings and fresh cuttings typically grow fine with water and light only, feeding only when you see active new leaves and established roots (and then at reduced strength). If you fertilize early, salts can stress young roots, slowing growth.
My plant gets plenty of light, but it still won’t bloom, what am I missing besides fertilizer?
Flowering can fail if the plant is not mature enough, even when light, nutrients, and temperature look perfect. Another common miss is switching fertilizers too late, too much nitrogen near flowering can keep plants in vegetative mode. Track the plant’s typical age-to-bloom timeline and adjust nitrogen downward only after it is mature.
Why does overwatering kill plants even if I let the surface dry out?
Root suffocation can happen without obvious wilting. In containers, the top may feel dry while the lower root zone stays wet if drainage is poor. If you notice persistent yellowing, sour soil smell, or black or mushy roots, switch to a better-draining mix and confirm the pot has drainage holes.
Is it harmful to move my plant around the house to find “better” light?
Most plants like stable conditions, frequent changes are stress. Sudden jumps in temperature or relocating plants from bright sun to shade (or vice versa) can cause leaf drop or slow flowering. Move gradually over several days, and avoid drafts from windows in winter and direct blasts from heating vents.
What should I do if I increase humidity but my plant gets moldy?
A common mistake is matching humidity help to the wrong plant. If you use a humidifier or closed terrarium for a plant that prefers drier air, you can encourage mold or fungal issues. Use the plant’s humidity preference as the guide, and increase airflow gently if you see persistent condensation or wet surfaces.
How do I know whether my plant problems are from care issues or pests?
You can reduce pest risk and improve growth by checking roots and stems during the same routine. For example, yellowing plus webbing or tiny specks may indicate pests, not just nutrient or watering problems. Inspect the undersides of leaves and new growth weekly, then correct conditions, pests often worsen under low light or stress.
My plant forms buds but drops them before opening, why?
Bud drop is often linked to environmental swings. Temperature changes, low humidity, inconsistent watering, and sudden light changes can all make plants drop buds. Stabilize watering to keep the root zone evenly moist for that plant type, keep temperature in range, and avoid moving the plant right before it blooms.
Can temperature override my day-length schedule for flowering?
Yes. Some plants are day-length sensitive only within certain temperature ranges, so cold nights can prevent short-day or long-day responses. If your plant is right on the edge, correct temperatures alongside day length and ensure it is mature, otherwise florigen signaling may not trigger properly.
When should I switch from a balanced fertilizer to a bloom booster?
Different growth stages need different nutrient needs, and “bloom fertilizer” can be wrong for non-mature plants. A mature plant may respond quickly to higher phosphorus, but a juvenile plant often needs more general support first. If you’re unsure, wait until the plant shows clear vegetative maturity (strong branching, enough leaf mass) before switching to a bloom-focused formula.