You can grow almost anything if you match the plant to your environment instead of forcing the environment to match the plant. That one shift in thinking is what separates people who kill every plant they touch from people who seem to grow things effortlessly. This guide walks you through every step: picking the right plant, setting up the right conditions, choosing a growing medium, caring for your plants on a realistic schedule, and fixing things when they go wrong. Whether you want tomatoes on a balcony, herbs on a windowsill, or a full hydroponic setup in a spare room, the same core principles apply.
How to Grow Almost Anything: A Practical Setup and Care Guide

Marcus Holloway
24 Mar 2026
Start with the right plant for your situation
The biggest beginner mistake is falling in love with a plant at the nursery and then trying to make it work in a completely wrong environment. Pick the plant after you understand your environment, not before. Ask yourself: How much light do I actually have? How much space? How much time each week do I want to spend on this? What's the temperature range in my growing space? The answers narrow your options quickly, and that's a good thing.
Realistic expectations matter too. Fruit trees, for example, often require cross-pollination from a different variety to produce a normal crop. Self-unfruitful varieties won't set fruit reliably when pollinated only by their own pollen, so planting just one tree of some varieties means you may get no fruit at all, regardless of how perfectly you care for it. This isn't something you can troubleshoot your way out of. Knowing these constraints upfront saves a lot of frustration.
Think in terms of categories. Food crops (vegetables, herbs, fruit) are grown mainly for harvest, which means timing and productivity matter. Houseplants and ornamentals are mostly about aesthetics and longevity, so stability is the goal. Each category has a different success metric, and knowing yours helps you make better decisions throughout the process.
Match your plant to your environment
Your environment is the ceiling on what you can grow. You can push against it with grow lights, heating mats, and humidity trays, but every dollar and hour you spend fighting your environment is energy you could spend enjoying plants that already fit. Here's how to read your environment honestly.
Outdoor growers: climate and hardiness zones
blank" rel="noopener noreferrer">USDA Plant Hardiness Zones give you a starting point by mapping average annual minimum winter temperatures across the country. But hardiness isn't just about how cold it gets. Soil moisture during winter, sun exposure causing internal temperature swings in plant tissue, wind, summer heat and humidity, and snow cover all play a role in whether a plant actually survives. A zone 6 garden in a low-lying frost pocket behaves differently from a zone 6 garden on a south-facing slope. Pay attention to your specific site conditions, not just the zone number. Local cultivar selection matters too. Some varieties of the same species are bred to be more resilient in specific conditions, and choosing the right cultivar can make a bigger difference than any intervention you make later.
Indoor growers: light is the real limiting factor
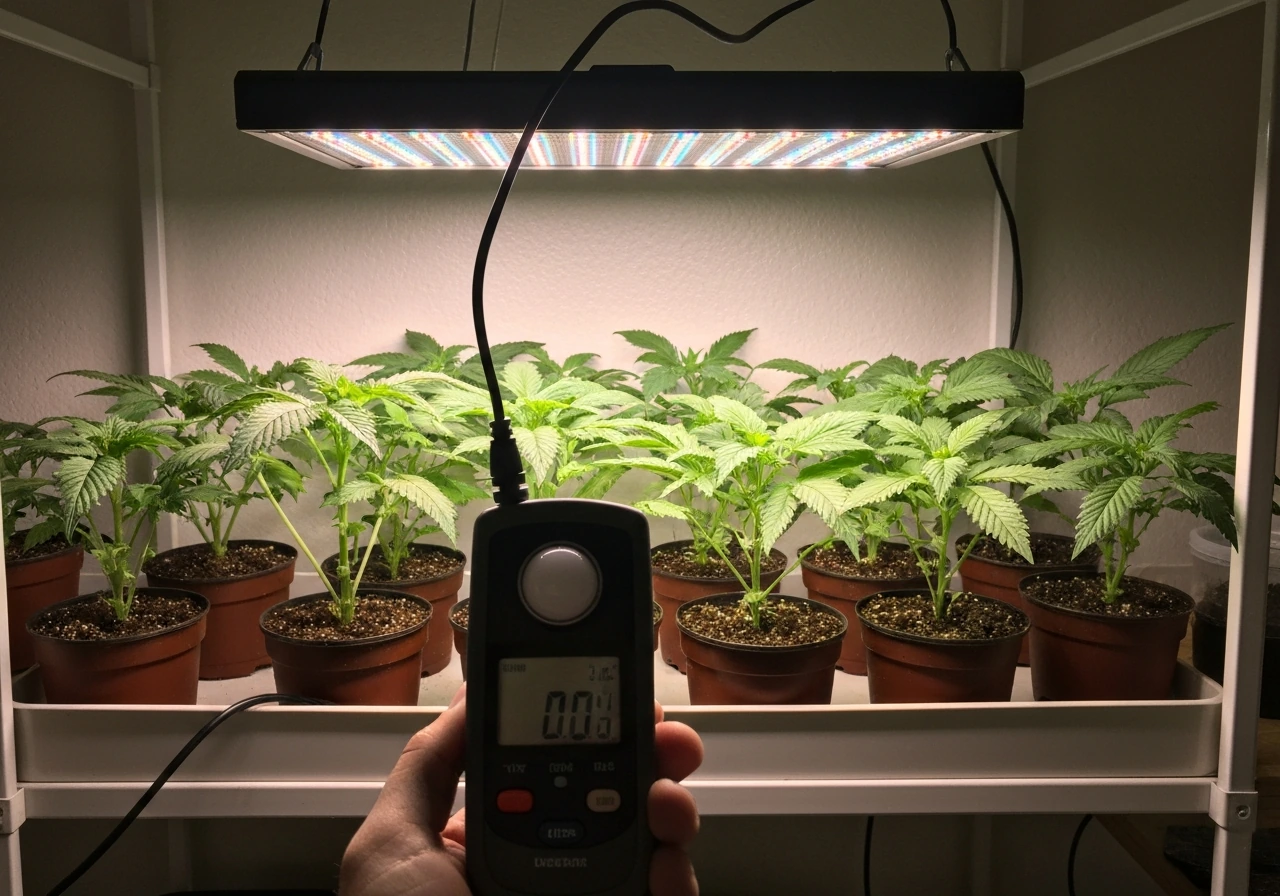
Indoors, light is almost always the most limiting factor. Most people dramatically overestimate how bright their home is. A sunny south-facing window might hit 1,000 foot-candles on a clear day right at the glass, but just a few feet back it can drop below 100 foot-candles. Many plants can't sustain themselves below about 50 foot-candles. The only reliable way to know what you're working with is to measure it. A basic light meter (or a smartphone app as a rough proxy) can measure in lux or foot-candles. The conversion is simple: 1 foot-candle equals about 10.764 lux. Check the light level at the exact spot where your plant will sit, at leaf level, during your brightest time of day. Then match plants to that number. Low-light survivors like pothos or ZZ plants can manage in dimmer spots. Most edibles and flowering plants need significantly more. how to grow food plants If you want a step-by-step approach, start with this guide on how to grow food plants how do i grow plants.
Temperature and humidity are secondary but still important. Most common houseplants prefer 60 to 80°F and moderate humidity. Tropical plants suffer near heating vents and air conditioners. Cacti and succulents tolerate dry air that would stress a fern. Match the plant to the microclimate of the specific room, not just the general indoor category.
Soil, soilless, or water: choosing your growing medium
Your growing medium is the foundation of everything. If you want a practical walkthrough of the full process, see how to grow food plants as a related next step. It determines how water, air, and nutrients reach plant roots. Get this wrong and you'll fight problems constantly. Get it right and most plants practically take care of themselves.
| Medium | Best For | Key Strengths | Main Challenges |
|---|---|---|---|
| Garden soil | Outdoor beds, established gardens | Natural nutrients, microbial life, low cost | Can compact, drain poorly, carry pests/disease |
| Potting mix (soilless) | Containers, indoor plants, seed starting | Good drainage and aeration, sterile, consistent | Needs regular fertilizing, can dry out fast |
| Coco coir | Hydroponics, containers, seed starting | Excellent water retention and aeration, near-neutral pH (5.5–6.8) | Needs added nutrients, can hold too much water if overused |
| Perlite / expanded clay | Hydroponic media, amending mixes | Maximum aeration, reusable, pH neutral | No nutrients, needs full hydroponic feeding |
| Rockwool | Seed starting in hydroponics | Sterile, excellent water/air ratio | Needs pH adjustment before use, not biodegradable |
| Water (hydroponics) | Fast-growing crops, controlled environments | Fastest growth, precise nutrient control | Requires monitoring pH, EC, and dissolved oxygen |
For most beginners, a quality potting mix is the right starting point. It's forgiving, widely available, and works for containers, raised beds, and indoor plants. If you're growing outdoors in the ground, amend your native soil with compost rather than trying to replace it entirely. Save soilless and water-based systems for when you have the basics down or when you're deliberately pursuing faster growth and greater control.
When to use coco coir
Coco coir sits between traditional potting mix and full hydroponics. Its naturally near-neutral pH (around 5.5 to 6.8) makes it easy to work with, and it holds moisture well while still letting roots breathe. It works great mixed with perlite for containers or as a standalone hydroponic medium. The catch is that coco coir has almost no inherent nutrients, so you need to feed from the start. Think of it as a very stable, well-aerated sponge that you fill with whatever nutrients your plant needs.
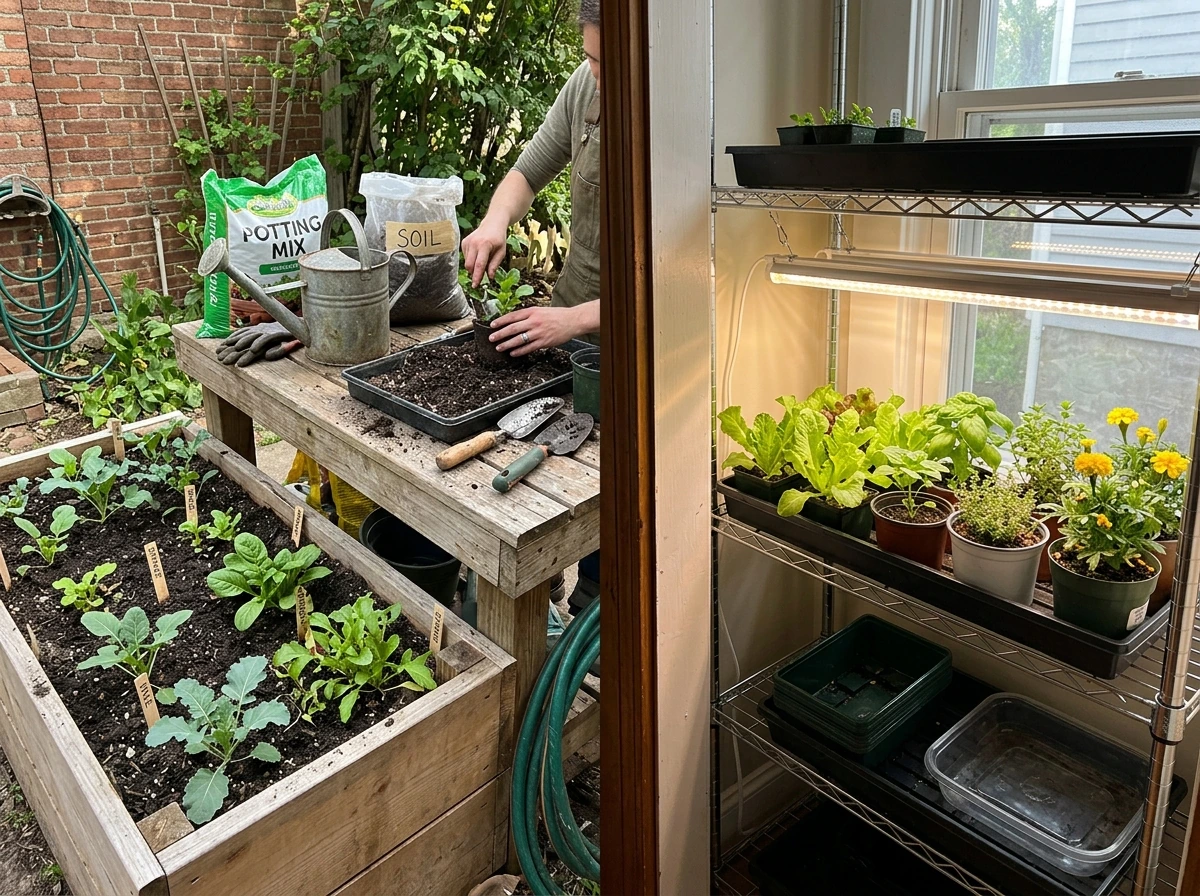
Get the basics right before anything else
Before you put a single plant in the ground (or in a pot, or in a reservoir), walk through this setup checklist. Skipping steps here is where most growing failures begin.
Setup checklist
- Measure your light: Use a light meter or app to check foot-candles or lux at plant level. Match your plant choice to the actual reading.
- Choose the right container: Pots 8 inches or smaller work for dwarf and small plants. Larger plants need proportionally larger containers. Every pot needs drainage holes large enough to prevent soil from clogging them.
- Select the right medium: Match the medium to your system (potting mix for containers, amended soil for beds, coco/perlite for hydroponics).
- Check your water: For hydroponics and sensitive plants, test your tap water pH before you start. Most plants want a root-zone pH between 5.5 and 7.0 depending on species.
- Plan your nutrients: Know whether your medium already contains fertilizer (most potting mixes do for 1–3 months) or whether you need to feed immediately (coco coir, perlite, rockwool).
- Set your timing: Know your first and last frost dates for outdoor growing. For seeds, check the packet for days to maturity and count back from your target harvest or transplant date.
- Establish a watering method: Decide how you'll water and test soil moisture before each session, not on a fixed schedule.
Light
For indoor growing without enough natural light, supplemental grow lights close the gap. LED grow lights have become affordable and energy-efficient. Position them at the manufacturer's recommended distance and run them on a timer that mimics natural day length (usually 14 to 16 hours for most vegetables, 12 hours for many flowering plants). More light hours does not always mean better growth, so don't just leave them on 24/7.
Watering
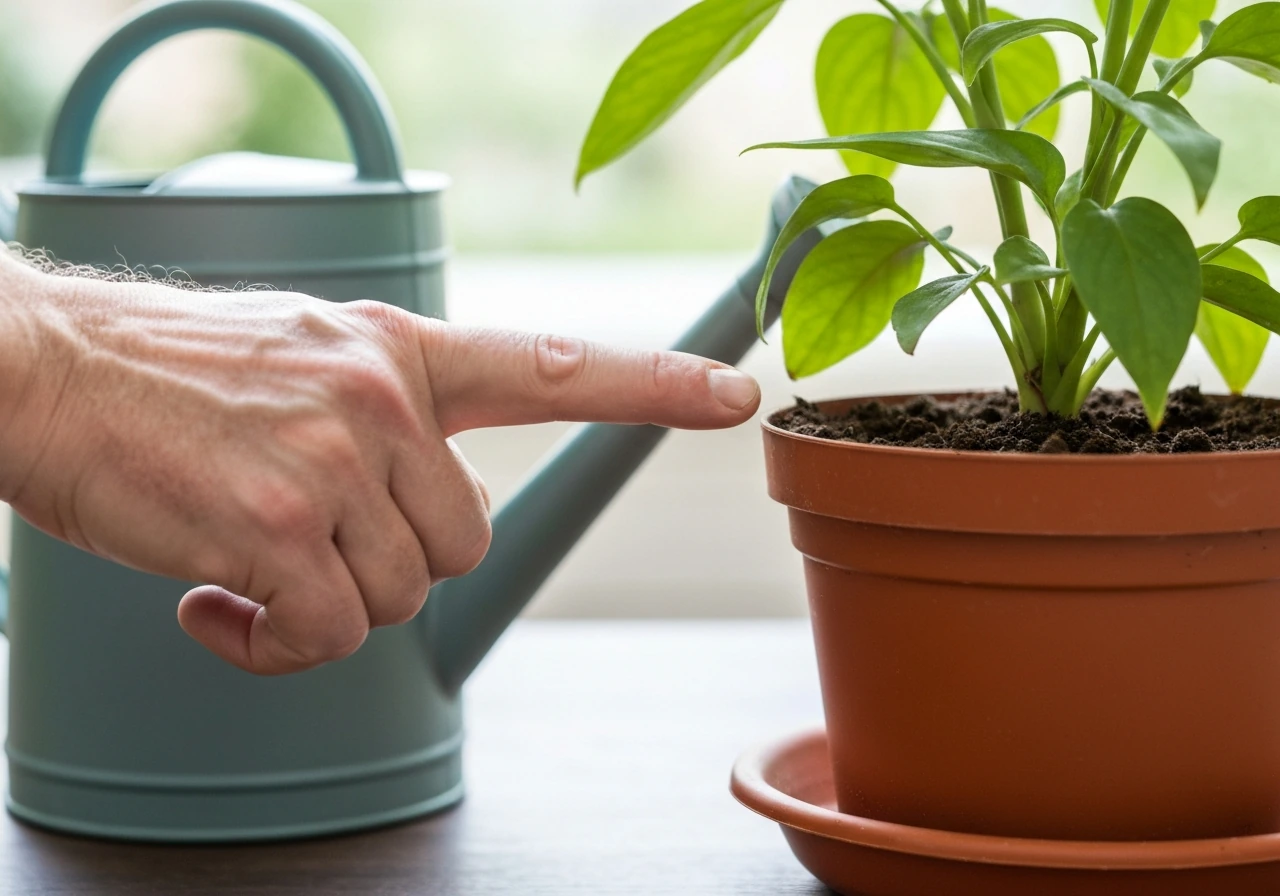
Forget fixed schedules. How fast a pot dries depends on pot size, medium type, plant size, temperature, humidity, and light levels. Instead, use the finger test: push your finger into the soil about two inches deep. If it feels moist, wait. If it feels dry, water thoroughly until it drains from the bottom. Wilting is not always a sign of underwatering. Overwatered plants with damaged roots can look just as wilted as thirsty plants. When in doubt, check the soil before you reach for the watering can.
Nutrients
Phosphorus is especially important in the early stages of plant growth, particularly for seedlings in cool or wet conditions. Nitrogen drives leafy green growth, but too much nitrogen can push lush foliage at the expense of flowers and fruit. A balanced approach is to start with a complete fertilizer and adjust based on what you observe. Pale green or yellowing leaves and slowed growth appearing a few weeks after planting often signal that plants need more nitrogen. Adjust and observe, then adjust again. That's the rhythm of feeding plants.
Seed depth and timing
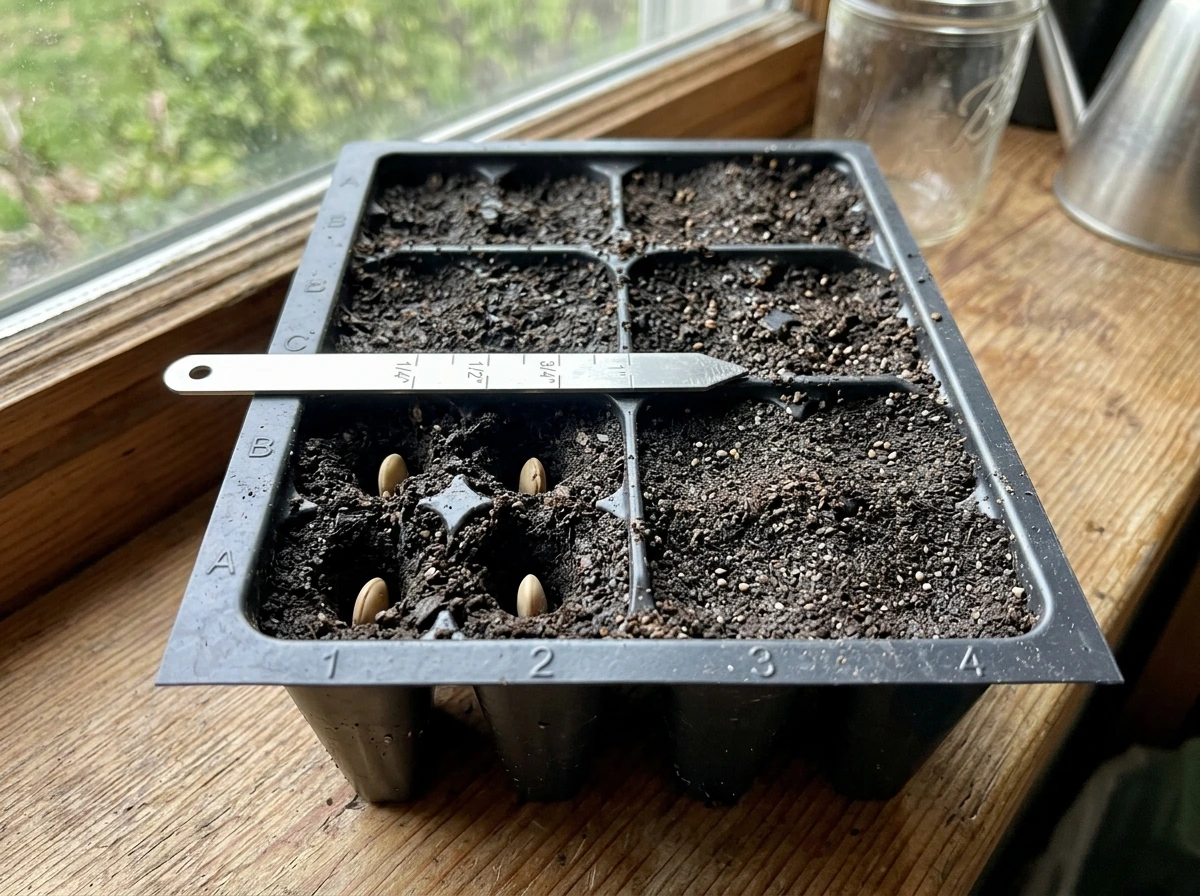
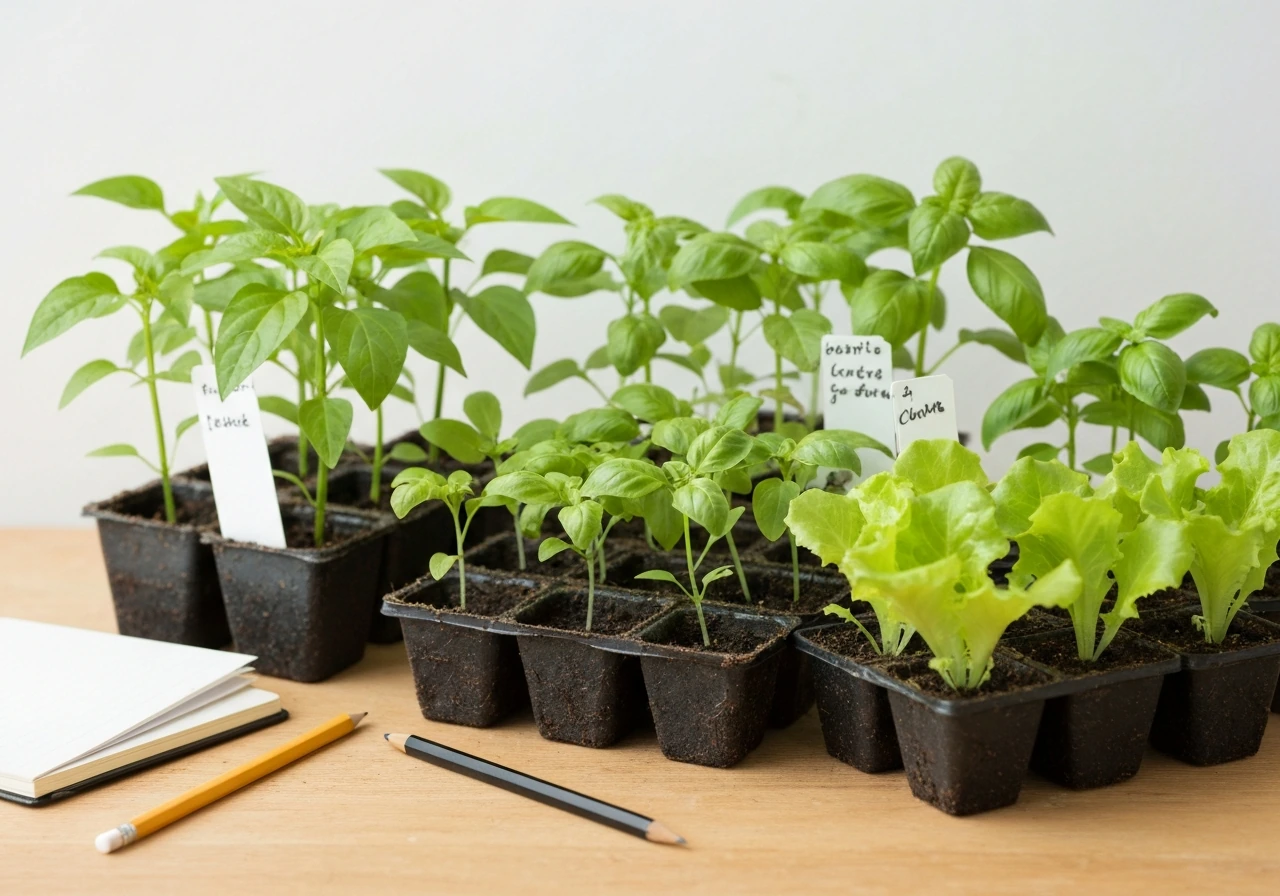
A reliable seed-depth rule: plant seeds at about three times their maximum width. Tiny seeds like lettuce or basil go barely below the surface. Larger seeds like beans and squash go an inch or more deep. For timing outdoors, work from your last frost date and use succession planting to spread out your harvest. Sowing the same crop at one to two week intervals means you get a continuous supply instead of a glut all at once.
Step-by-step for common plant categories
Food crops (vegetables and fruit)
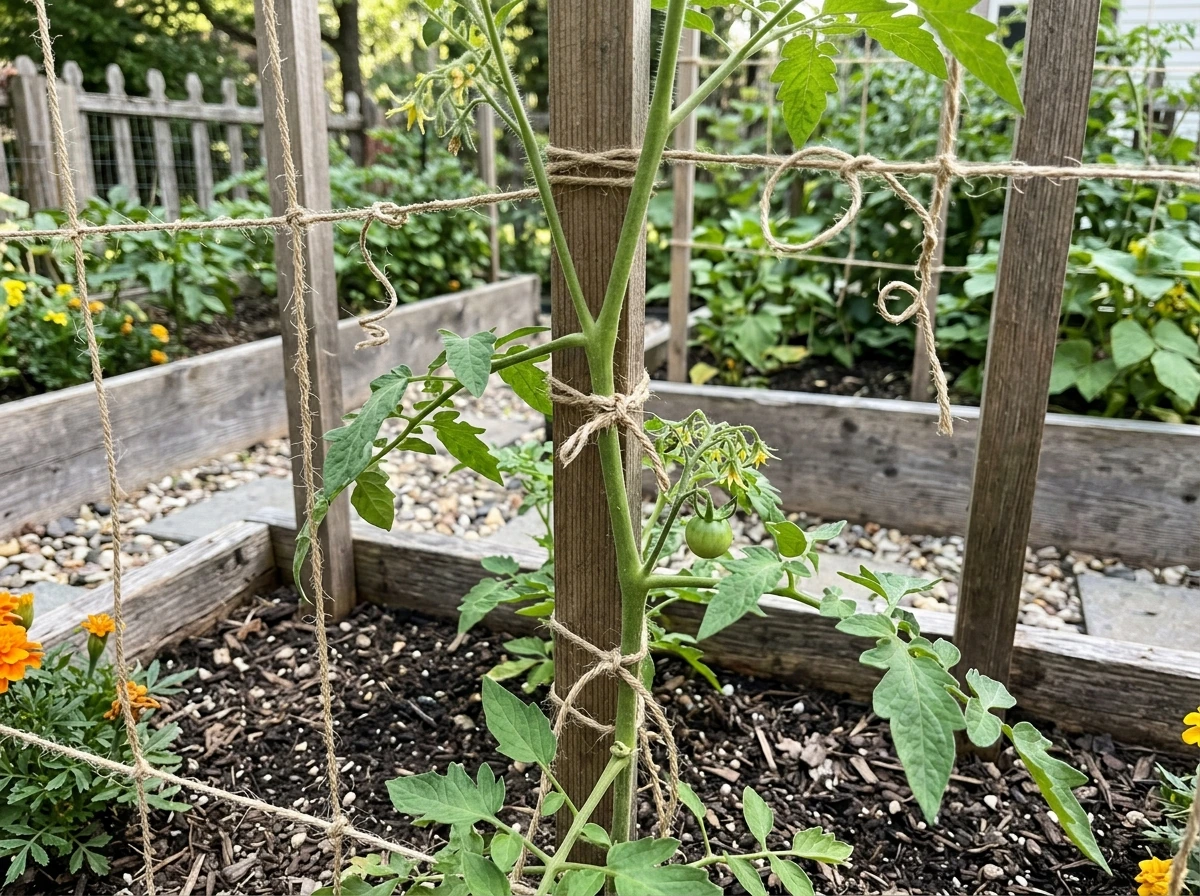
- Pick varieties suited to your climate and space. Compact or bush varieties work in containers; vining types need trellises or more ground space.
- Start seeds indoors 4 to 8 weeks before your last frost date for warm-season crops (tomatoes, peppers, squash). Direct-sow cool-season crops (lettuce, radishes, peas) as soon as the soil can be worked.
- Transplant seedlings outdoors only after hardening them off: set them outside in a sheltered spot for increasing hours each day over one to two weeks.
- Water deeply and less frequently rather than shallowly and often. Deep watering encourages roots to grow down.
- Feed regularly once the initial fertilizer in your potting mix is depleted, usually after 4 to 6 weeks. For fruiting crops, switch to a lower-nitrogen fertilizer once plants start flowering.
- For fruit trees needing cross-pollination, plant at least two compatible varieties within 50 to 100 feet of each other and check that their bloom times overlap.
- Use succession planting for crops like lettuce, beans, and radishes to keep harvests coming over weeks instead of all at once.
Herbs
- Most culinary herbs (basil, parsley, cilantro, chives) need at least 6 hours of direct light daily. A south- or west-facing windowsill often works indoors.
- Use a well-draining potting mix and containers with drainage holes. Herbs are especially prone to root rot in soggy soil.
- Harvest frequently by pinching stems above a leaf node. Regular harvesting keeps plants bushy and productive rather than leggy.
- Basil is warm-season and dies at frost. Chives, thyme, rosemary, and many Mediterranean herbs are more cold-tolerant and can overwinter in mild climates.
- Start new basil and cilantro plants every few weeks because they bolt (go to seed) quickly, especially in heat.
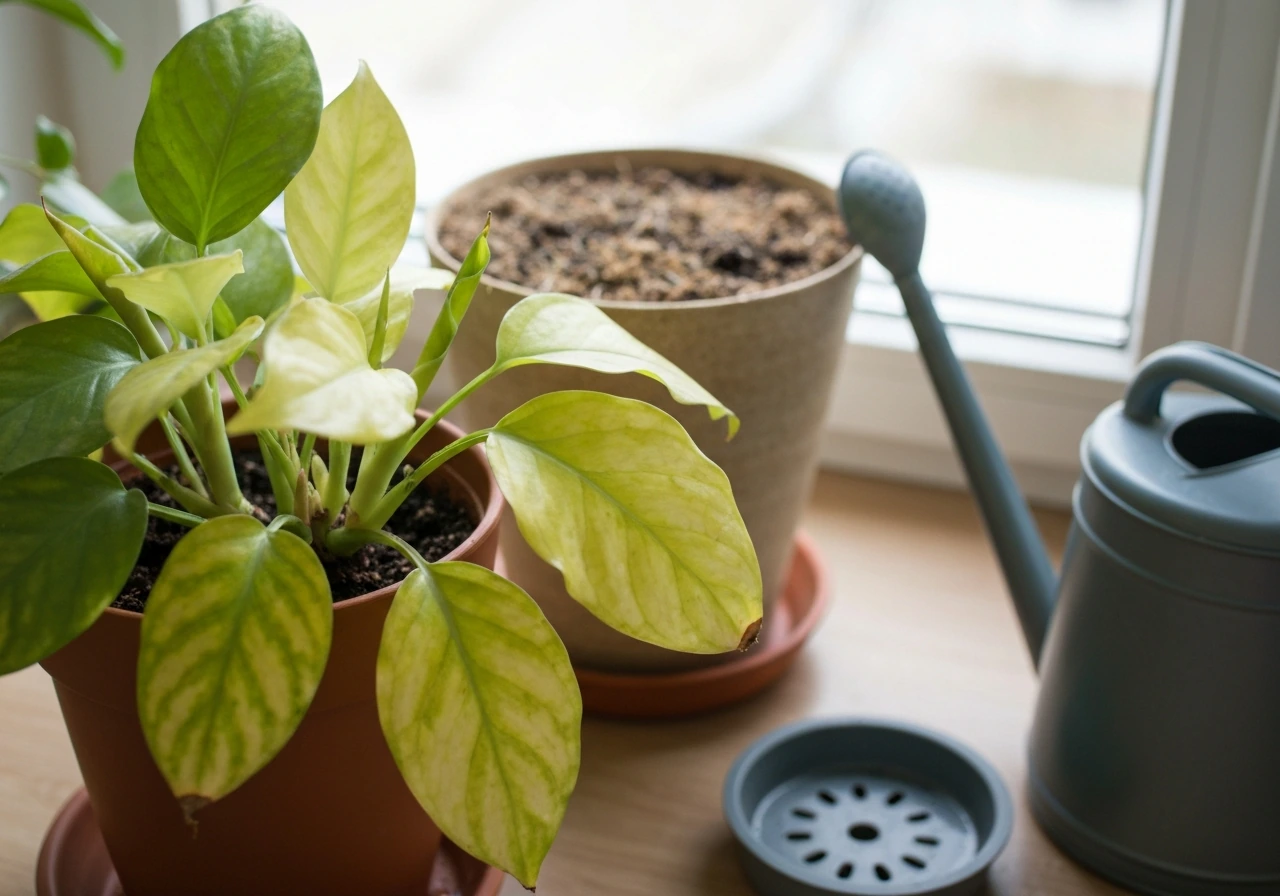
Houseplants
- Match the plant to your light level before anything else. Low-light areas (under 200 lux) suit pothos, snake plants, and ZZ plants. Bright indirect light (1,000 to 5,000 lux) suits most tropicals like monsteras and peace lilies. Direct indoor sun suits cacti, succulents, and some herbs.
- Choose a pot one size larger than the root ball, not dramatically larger. Oversized pots hold too much water and increase root rot risk.
- Water when the top two inches of soil are dry. Most tropical houseplants prefer to dry slightly between waterings.
- Fertilize during the active growing season (spring through early fall) and reduce or stop feeding in winter when growth slows.
- Repot every one to two years or when roots start circling the pot or growing out of drainage holes.
Ornamentals and flowering plants
- Annual flowers (marigolds, zinnias, petunias) grow, flower, and die in one season. Plant after your last frost date outdoors.
- Perennials (coneflowers, black-eyed Susans, hostas) come back each year. Choose varieties rated for your hardiness zone, but factor in your site's specific conditions like sun exposure and soil drainage.
- Deadhead spent blooms on most annuals and many perennials to extend the flowering period.
- Avoid excess nitrogen for flowering plants. Too much promotes leaves over flowers.
- Bulbs (tulips, daffodils, hyacinths) need a cold period to bloom. Plant in fall for spring flowers in cold-winter climates.
When things go wrong: troubleshooting guide
Almost every plant problem comes down to a handful of root causes. The tricky part is that different problems can look identical on the surface. Yellow leaves, for example, can come from overwatering, underwatering, too little light, too much light, nitrogen deficiency, root rot, or sap-sucking insects. Diagnose by checking the most likely causes first.
Yellowing leaves
- Check soil moisture first. Dry soil suggests underwatering; consistently wet soil suggests overwatering or root rot.
- Check light levels. Both too much and too little light can cause pale or yellow leaves.
- Check for pests. Look under leaves and along stems for tiny bugs, webbing, or sticky residue.
- Pale green to yellow color with slowed growth a few weeks after planting often points to nitrogen deficiency. Feed with a balanced fertilizer and monitor for improvement over 1 to 2 weeks.
- If roots look brown and mushy when you remove the plant from its pot, root rot is the problem. Trim affected roots, repot in fresh dry medium, and reduce watering frequency.
Leggy, stretched growth
Leggy, stretched stems reaching toward the light mean your plant isn't getting enough. Move it closer to a light source or add a supplemental grow light. Pruning the leggy stems back to a healthy node will encourage bushier growth once the light issue is fixed. Fixing just one without the other gives you a pruned plant that stays leggy.
Overwatering and drainage problems
Overwatering is the most common way people kill plants, and it's usually not about how much water you give but how often. A plant sitting in wet soil for days loses access to oxygen at the root zone, and roots begin to die. The fix is to let the soil dry appropriately between waterings, ensure your pot has functional drainage holes, and never let pots sit in standing water in a tray for more than an hour or two. If root rot has set in, remove the plant, trim any brown mushy roots with clean scissors, let the roots air out briefly, and repot in fresh medium.
Common pests
The most common indoor pests are spider mites, scale, and mealybugs. Spider mites thrive in hot, dry conditions and leave fine webbing under leaves. Scale looks like small brown bumps on stems. Mealybugs appear as white cottony clusters in leaf joints. Outdoors, aphids, whiteflies, and fungus gnats are frequent visitors. When you spot any pest, isolate the affected plant immediately to prevent spread. Yellow sticky traps work well to catch and monitor flying pests like whiteflies, aphids, and fungus gnats. For spider mites and mealybugs, insecticidal soap or neem oil applied thoroughly to all plant surfaces (especially undersides of leaves) is effective when used consistently over two to three weeks.
Nutrient problems
- Nitrogen deficiency: Pale green or yellow older leaves (bottom of plant first), slowed growth. Feed with a nitrogen-containing fertilizer.
- Phosphorus deficiency: Purplish discoloration on undersides of leaves, especially in cool conditions. Apply a phosphorus-rich fertilizer.
- General deficiency in container plants: If you haven't fertilized in months and your medium is older potting mix, assume nutrients are depleted and begin a regular feeding program.
- Nutrient excess (overfertilizing): Brown leaf tips, crusty white deposits on soil surface, or wilting despite moist soil. Flush the pot thoroughly with plain water to dilute excess salts.
Level up: hydroponics, terrariums, and limited-space growing
Once you've got the basics down, these methods open up a whole new range of what you can grow, especially when space or environment is a limiting factor. Hydroponics, terrariums, and limited-space growing can help you keep expanding even if conditions aren’t perfect.
Hydroponics
Hydroponics grows plants in a nutrient solution without traditional soil. Roots are supported by an inert medium (perlite, expanded clay pellets, coco coir, or rockwool) and bathed directly in nutrients. The payoff is faster growth and precise control. The requirement is consistent monitoring. You need to track three things constantly: pH (which controls nutrient availability), EC (electrical conductivity, which estimates how concentrated your nutrient solution is), and dissolved oxygen (which roots need to survive in water). Oklahoma State University Extension also recommends keeping hydroponic nutrient solution pH between 5.0 and 6.0 (often around 5.5) to maintain a root-environment pH about 6.0 to 6.5 pH (which controls nutrient availability). A dissolved oxygen level above 6 ppm is considered optimal. Air pumps with air stones supply oxygen by bubbling the solution in reservoir-based systems. The right pH and EC targets vary by crop. Leafy greens tolerate a wider EC range; fruiting plants need tighter management. If root disease gets into a hydroponic system, the best path is often to disinfect everything and start fresh rather than trying to salvage infected plants.
Terrariums
Closed terrariums create their own microclimate, cycling moisture internally. They're excellent for humidity-loving plants like mosses, ferns, and small tropicals. The setup matters: clean the container thoroughly before planting, add a drainage layer at the bottom, and include horticultural-grade charcoal to help manage moisture and reduce organic buildup inside the closed environment. Once sealed, a healthy closed terrarium needs almost no watering. If condensation is always heavy and plants look waterlogged, crack it open briefly to let excess moisture escape. Open terrariums work better for succulents and cacti that need lower humidity and more airflow.
Growing in limited space
Limited space is not a reason to give up on growing. It's a reason to be strategic. Containers let you grow on balconies, patios, rooftops, and windowsills. Vertical gardening with trellises, wall planters, and hanging baskets multiplies your growing surface without using more floor space. The key rule for limited-space growing is to always check the mature size of your plant before you commit. A plant that needs three feet of horizontal space won't be happy long-term in a small pot on a narrow ledge, no matter how well you care for it. Choose compact varieties bred for container or small-space growing, and you'll get far better results than trying to contain a full-sized plant.
The progression most growers follow is to start with a few easy plants in containers or a small garden bed, build confidence through observation and small adjustments, then branch into more specialized methods once the fundamentals feel natural. If you're wondering how to grow anything, the same path applies: start simple, observe closely, and adjust conditions as you learn. Hydroponics, terrariums, and vertical systems are tools, not shortcuts. They work best when you already understand how plants respond to light, water, and nutrients, because that understanding is what lets you interpret what you're seeing and make the right call.
FAQ
If I don’t know my light level, how do I choose plants that won’t fail indoors?
Pick plants based on the light level at the exact plant location (leaf level), then choose a variety that matches your space. If your light is below about 50 foot-candles, avoid most fruiting crops and many flowering plants, and focus on low-light foliage options or plan to supplement with grow lights.
Why do my plants keep dying even though I’m watering regularly, and what should I do instead?
Plan for watering variability by using the same check method every time, not a fixed schedule. For potting mix, check about two inches down with your finger, water only when it is dry at that depth, and empty saucers/trays after watering so roots never sit in standing water.
What are the most common reasons seedlings fail right after germination?
Yes. Seedlings often fail because the mix stays too wet or too cool, and because they need steady light soon after germination. Use a sterile or clean starting mix, keep surface moisture even (not soggy), and provide light as soon as sprouts emerge to prevent leggy growth.
How do I tell whether yellowing leaves mean fertilizer problems or something else?
Most “nutrient deficiency” symptoms are ambiguous, especially early on. Before adding fertilizer, confirm light and watering first, since both can mimic deficiency. If you feed, start with a complete fertilizer at a modest rate, then adjust based on new growth color and speed rather than trying to correct everything at once.
How can I create a watering routine that actually works with my specific pots and room conditions?
Watering frequency isn’t one-size-fits-all because pot size, medium, and environment change drying time. Instead of guessing, use one metric you can repeat, like the two-inch finger test for soil mixes, or weight-based watering (lift the pot when dry vs after watering) for consistent results.
Do I always plant seeds at three times their width, or are there exceptions?
Use the “three times the seed width” rule as a starting point, but adjust for very tiny seeds by planting barely covered. Also, ensure good seed-to-mix contact (lightly firming the surface) and keep even moisture for faster, more uniform germination.
If my fruit tree flowers but doesn’t set fruit, what’s the first thing I should check?
Many fruit trees and some other perennials need cross-pollination, or they produce poorly without a compatible partner. Check whether your chosen variety is self-fruitful, then plan for two compatible varieties flowering at the same time, or expect limited yields even with perfect care.
What’s the biggest “make or break” factor for hydroponic success?
For hydroponics, the most important choice after equipment is monitoring routine. Keep pH and EC within the crop’s target range, and maintain aeration because low oxygen can cause root disease quickly. If you get a disease outbreak, disinfect the system and restart rather than trying to nurse infected roots back.
My closed terrarium is always foggy. Does that mean I’m overwatering?
Closed terrariums can build up moisture even when you think you’re being careful. If condensation stays heavy and plants look waterlogged, crack the lid briefly to vent, and reduce watering or add airflow only after the condensation pattern improves.
How do I manage microclimates when one room is too dry for some plants and okay for others?
Match humidity-loving plants to high-humidity microclimates, and keep succulents and cacti away from vents and constant AC drafts. Group plants by their humidity and airflow needs so you can manage one cluster, rather than forcing every plant to tolerate the same room conditions.
What should I do when my plant becomes leggy, trim it right away or change something first?
When a plant is leggy, fix the cause, not just the symptom. Leggy growth usually means insufficient light over time, so move it closer to the light or adjust your grow light placement and timing first, then prune back to a healthy node afterward.
What’s the best strategy to stop pest problems from spreading in my home?
Isolate at the first sign of pests because many infestations spread quickly. For indoor outbreaks, verify the pest type (spider mites vs scale vs mealybugs), then treat thoroughly and repeatedly for two to three weeks, covering undersides of leaves. Also wipe nearby plant leaves and check surrounding foliage.
What’s the most common mistake people make with limited-space container growing?
Start with compact, container-ready varieties and confirm mature size, then plan for root growth space. If a plant outgrows its container, yields and health drop even with perfect light and feeding, so choose “meant for containers” cultivars rather than trying to stunt full-size plants.