blank" rel="noopener noreferrer">Trim a stem just below a node (the bump where a leaf attaches), remove the lower leaves, and stick that cutting into moist perlite or a glass of water. That is the core of it. The rest is managing moisture, warmth, and light so the cutting stays alive long enough to push out roots. Once those roots form, the new plant can start taking in water and nutrients and eventually grow into a full plant above the soil push out roots. This guide walks you through every step, from picking the right stem to knowing when to transplant, including what to do when things go sideways.
How to Trim a Plant and Grow Roots Step by Step

Marcus Holloway
7 May 2026
Trimming for propagation vs. trimming to prune: know which you're doing
Regular pruning and propagation trimming look similar but have completely different goals. When you prune, you are shaping the plant or removing dead growth, and the cutting usually goes in the bin. When you trim for propagation, every decision, where you cut, what you remove, how long the stem is, is made to give that cutting the best chance of growing its own root system.
Propagation trimming is intentional. You are essentially telling a piece of stem: "You are on your own now, make roots." The stem has to support itself before it can absorb water or nutrients the normal way, so every leaf you leave on is a liability (it loses moisture) and every node you keep is an asset (it is where roots will form). Understanding that tension is what makes good propagation decisions click into place.
One other thing worth removing before you start: blank" rel="noopener noreferrer">any flower buds on your cutting. A flowering stem puts its energy into blooming, not rooting. Pinch buds off so the cutting focuses entirely on building a root system.
Picking the right cutting and the right time to take it
Not all stems propagate equally. The most reliable cuttings come from healthy, actively growing stems with no signs of disease, pests, or stress. Avoid stems that are flowering heavily, yellowing, or very old and woody unless you are specifically working with a hardwood species.
Softwood vs. semi-hardwood vs. hardwood timing
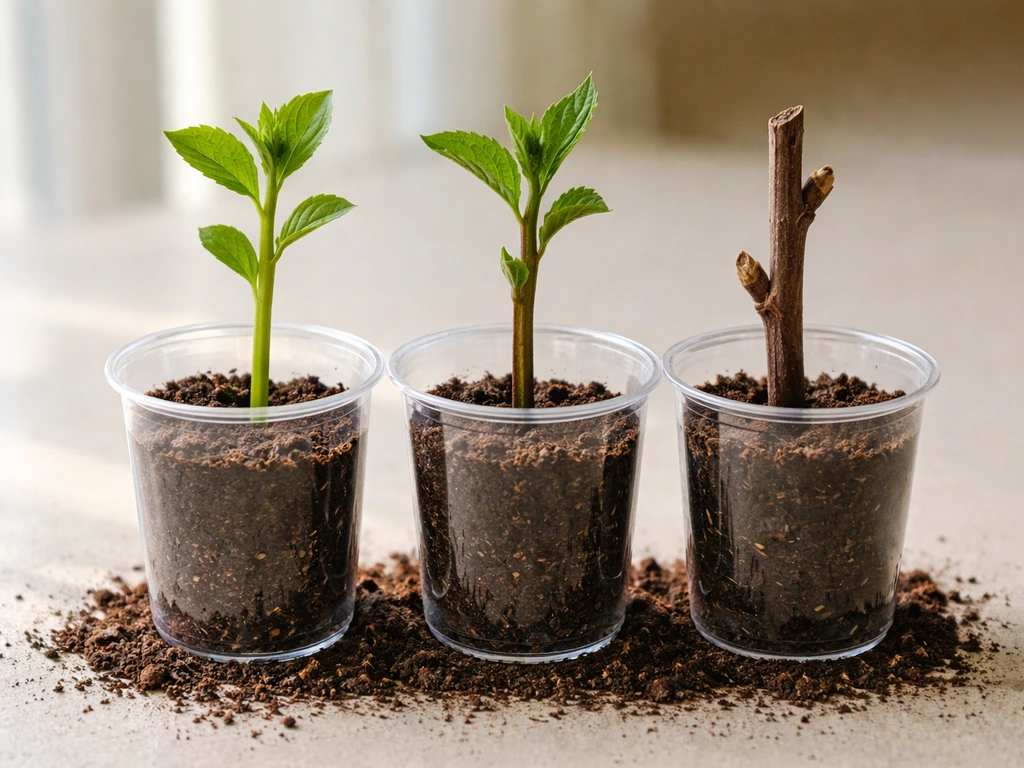
The maturity of the stem you cut affects how and when it roots. Softwood cuttings come from new, flexible growth taken in late spring or early summer, they root fastest but wilt easily. Semi-hardwood cuttings, taken in late summer or fall from stems that have started to firm up, are a middle ground: more stable but still capable of rooting within weeks. Hardwood cuttings are collected during winter dormancy from fully mature stems, they are tougher, but they can take months to root. For most houseplants and common garden perennials, you are working with softwood or semi-hardwood, and spring through early summer is your sweet spot.
As a practical example: roses root well from softwood or lightly wounded cuttings taken in spring and summer, while rosemary does better from semi-hardwood terminal cuttings taken in fall or winter. The same logic applies to your houseplants. Pothos, philodendron, and impatiens root readily from softwood almost any time of year indoors. Woody herbs or shrubs need more patience and timing precision.
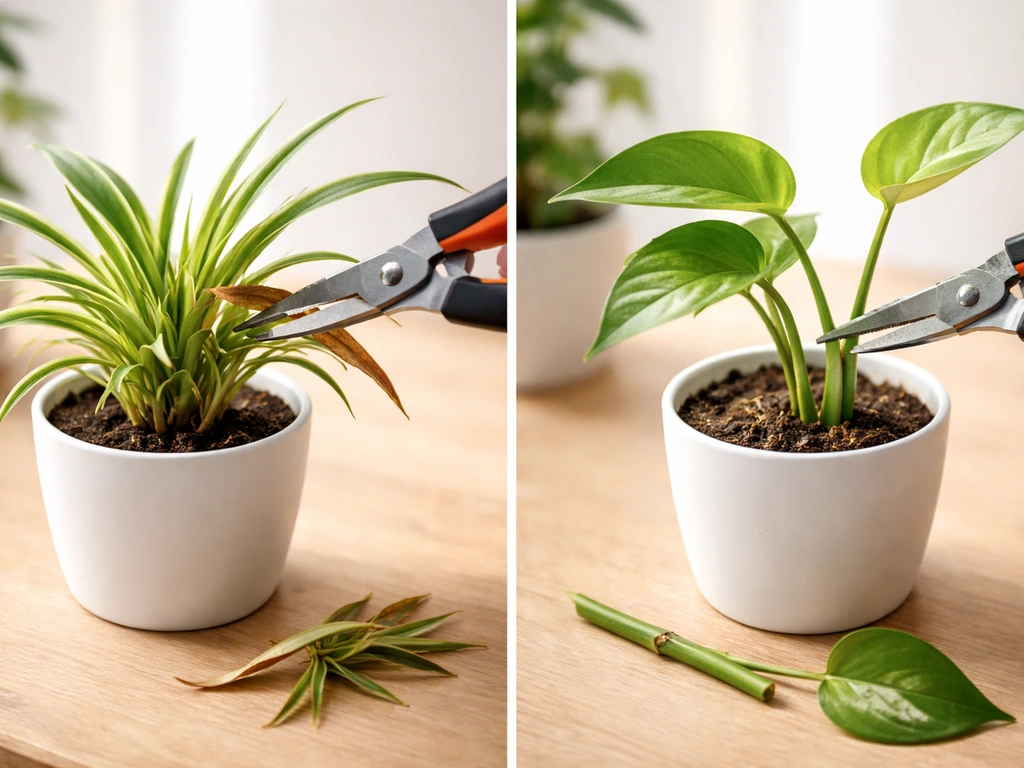
How to make the cut: tools, technique, and where to snip
Before you touch the plant, sterilize your cutting tool. Dip the blade in denatured alcohol and let it air dry, or wipe it down. This takes ten seconds and prevents you from spreading any disease from one plant to another. A sharp knife or sharp bypass pruners are ideal. Dull tools crush the stem tissue instead of slicing it cleanly, and crushed tissue rots faster than a clean cut.
Where exactly to cut
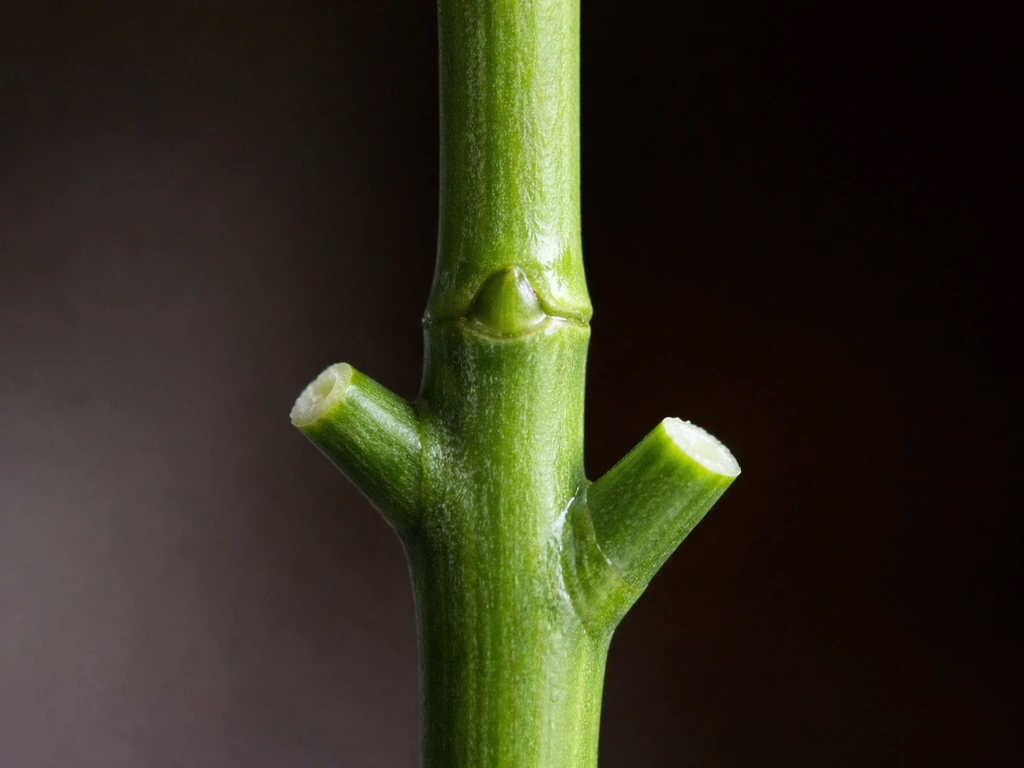
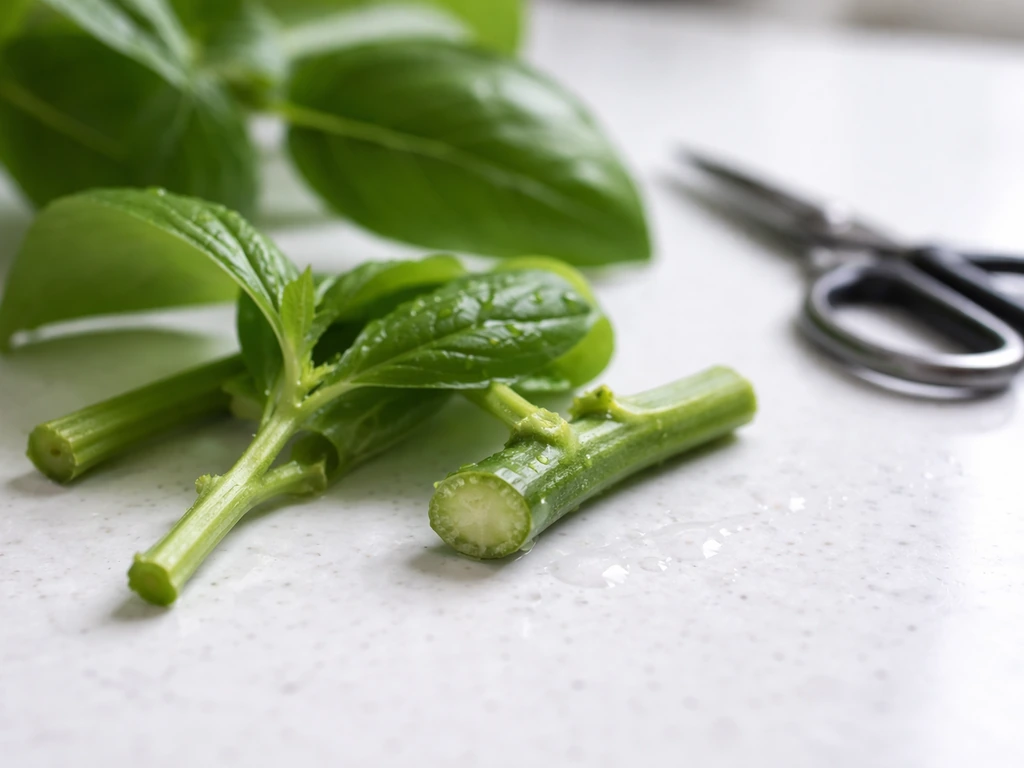
Make a smooth, angled cut just below a node. The node is the slight bump or joint on the stem where a leaf emerges. This is the most important part of the whole process: roots form at and near nodes, so if your cutting does not include one, it will not root. Once you understand that rooting happens near nodes, you can follow a step-by-step approach to learn how to get a plant to grow roots reliably. The angled cut (roughly 45 degrees) increases the surface area exposed to your rooting medium, which helps. Your cutting should generally be 3 to 6 inches long with at least one or two nodes.
What to remove from the cutting
Strip off all leaves on the lower half of the cutting. Any leaf that would sit below the soil line or waterline will rot, and rotting leaves introduce bacteria and fungus that can kill your cutting before it ever roots. Keep a few leaves at the top so the cutting can still photosynthesize. If the remaining leaves are large (think fiddle leaf fig or a large tropical), cut them in half horizontally. This reduces the moisture the cutting loses through its leaves, which matters a lot when it has no roots yet to replace that moisture.
Optional: wounding the stem base
For woody or harder-to-root stems, wounding the base of the cutting can help. You can scratch 1 to 2 inches of bark lightly with a knife, or make a very shallow slice to expose the green tissue beneath. Another option is a basal split: use a blade to split the bottom half inch to one inch of the stem lengthwise. This wounding triggers extra cell activity at the base and gives rooting hormone (if you use it) more surface to absorb into.
Using rooting hormone
Rooting hormone is not required, but it genuinely speeds things up and increases the odds of success, especially for semi-hardwood or difficult species. You can find it as a powder, gel, or liquid at any garden center. Dip only the very base of the cutting (the bottom inch) into the hormone, tap off any excess powder, and proceed. Here is the beginner mistake to avoid: more is not better. Too much rooting hormone actually slows root development. A thin, even coat is all you need.
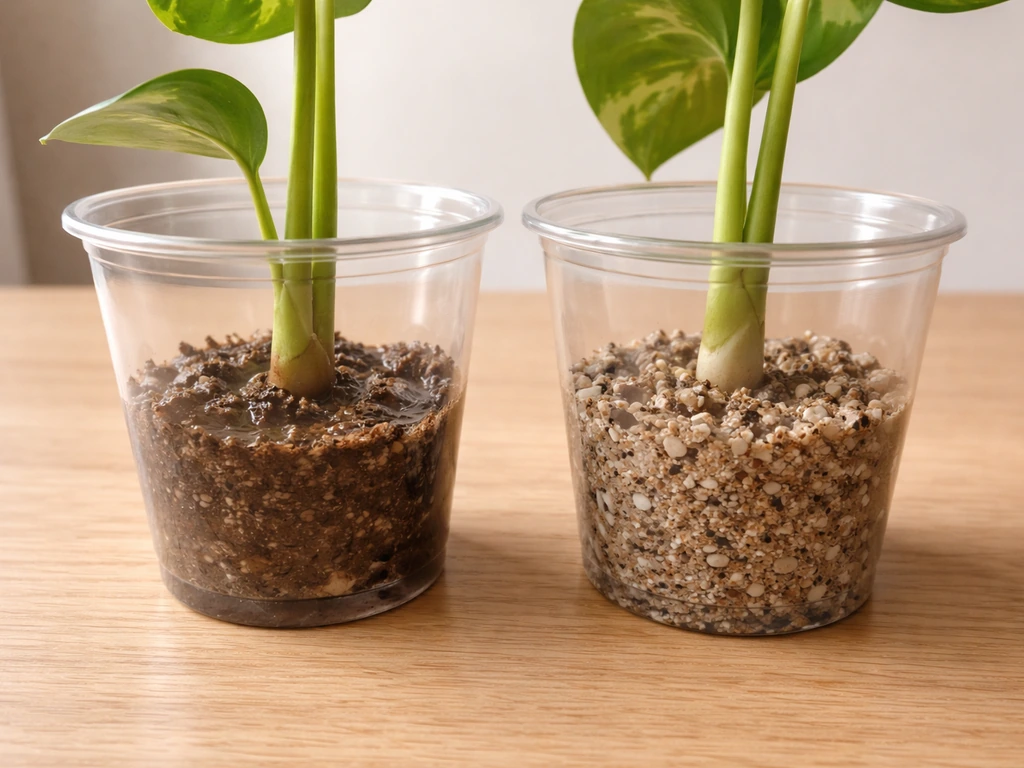
Which rooting method to use: water, soil, or other media
You have a few solid options for where to root your cutting, and the right choice depends on your plant and your patience level. Here is an honest comparison:
| Method | Best for | Pros | Cons | Transplant risk |
|---|---|---|---|---|
| Water | Soft-stemmed houseplants (pothos, coleus, impatiens) | Easy to monitor root growth, no media needed | Roots formed in water can be weak and struggle to adapt to soil | Moderate: transfer shock is real, transition gradually |
| Perlite or vermiculite | Most houseplants and softwood cuttings | Light, sterile, good drainage, roots adapt easily to potting mix | Can dry out faster, requires more attention to moisture | Low: roots are already used to a solid medium |
| Peat/perlite mix | Softwood and semi-hardwood cuttings | Retains moisture better than pure perlite, still well-draining | Slight pathogen risk if not fresh/sterile | Low |
| Hydroponics/LECA | Experienced growers, long-term water-based setups | No soil shock if keeping plant in hydro long-term | Requires more setup, not beginner-friendly | Very low if staying in hydro |
| Humidity box (terrarium-style) | Ferns, tropical cuttings, moisture-loving plants | Maintains high humidity passively, great for tricky cuttings | Can encourage rot if airflow is zero | Low to moderate |
My honest recommendation for most people: start with perlite or a 50/50 perlite and potting mix blend. It is forgiving, drains well enough to prevent rot, and the roots that form in it will transition to a normal pot without drama. Water propagation is satisfying because you can watch the roots appear, but the transfer from water to soil is a real stress point for the plant. If you do root in water, move the cutting to soil once roots are about an inch long and do it gradually by mixing a little soil into the water over several days.
It is also worth knowing that some plants simply root better in soil than water. Hydrangeas are a classic example: they root far more reliably in a soil medium than in a glass of water, even though they love moisture. When in doubt, go with a light sterile medium over water for woody or semi-hardwood cuttings.
Planting depth and polarity
Insert the cutting about 1 to 3 inches deep into your medium, making sure at least one node is below the surface. Keep the cutting oriented the same way it grew on the plant: bottom end down, top end up. This sounds obvious, but stems have a natural direction of auxin (rooting hormone) flow from top to base. If you accidentally flip a cutting upside down, it will not root, full stop. Label your cuttings if you are working with multiple batches so you do not mix them up.
The environment that actually makes roots form
The cutting is in the medium. Now the environment does the work. These four factors are what separate a cutting that roots in two weeks from one that sits there for two months and rots.
Light: bright but indirect
During rooting, your cutting needs diffuse light, not direct sun. Direct sun heats up the stem and increases moisture loss from leaves that the cutting cannot replace yet. A bright windowsill with a sheer curtain, or a spot a few feet back from a south-facing window, is ideal. Once you see roots forming and the cutting starts putting out new growth, you can gradually increase light intensity.
Temperature: warm medium, not just warm air
Root initiation happens fastest when the growing medium is around 72 to 75 degrees Fahrenheit. Air temperature matters, but media temperature matters more. If your home runs cool (below 65 degrees in winter, for instance), consider a seedling heat mat under the tray or pot. Cold media dramatically slows root formation. On the flip side, media that gets too warm (above 80 degrees) creates favorable conditions for fungal pathogens, so avoid placing cuttings on top of radiators or heat vents.
Humidity: high but not stagnant
Cuttings root best at relative humidity around 90 to 95 percent. That sounds extreme, but you can approximate it easily by placing a clear plastic bag loosely over the cutting (propped up so it does not touch the leaves), or putting a clear plastic dome over the container. This is sometimes called a propagation box or humidity tent. The key word is loosely: crack it open for 30 minutes each day or poke a few small holes in the bag so there is some airflow. Zero airflow invites botrytis (gray mold) and other fungal problems.
Moisture: the thing most people get wrong
The most common propagation mistake is overwatering. A waterlogged medium suffocates the stem base and causes rot before roots ever form. The medium should feel like a wrung-out sponge: moist throughout but not dripping. When you pick up the pot, it should feel damp and light, not heavy and soggy. If you have a humidity tent in place, you probably will not need to water more than once a week. Misting the leaves lightly is fine, but heavy daily misting can keep the medium surface so wet that it breeds rot at the exact spot you need to stay clean.
After roots form: transplanting, troubleshooting, and what comes next
How to know when roots are ready
If your cutting is in water, you can see the roots directly. Aim to transplant when roots are about 1 inch long. Much longer and they become brittle and tangled, making transplanting harder. If your cutting is in a solid medium, the signs are indirect: new leaf growth appearing at the top of the cutting usually means roots have established below. You can also give the stem a very gentle tug. If it resists being pulled out, roots have anchored it. Do not do this repeatedly, once is enough.
How to transplant
- Choose a small pot rather than a large one. A small container keeps moisture levels more manageable and encourages roots to spread rather than sit in wet unused soil.
- Use fresh, well-draining potting mix. Avoid compost-heavy garden soil, which can introduce pathogens.
- Make a hole in the mix before inserting the cutting so you do not scrape off the new roots.
- Firm the mix gently around the stem so there are no air pockets.
- Water thoroughly right after transplanting, then hold off until the top inch of soil dries slightly.
- Keep the newly transplanted cutting out of direct sun for a week while it adjusts, then gradually move it to its permanent spot.
Troubleshooting: when things go wrong
- Cutting goes limp and mushy at the base: this is stem rot, almost always from too much moisture. If the rot is minor (less than half an inch), trim off the rotted section with a clean blade, let the cut callous for an hour, and re-insert. If the stem is mostly rotted, cut your losses and take a fresh cutting from the parent plant.
- Cutting wilts but the stem stays firm: this is moisture stress, not rot. The cutting is losing more water than it can hold. Increase humidity with a bag or dome, and check that the medium is moist. Move it out of any direct sun.
- No roots after 4 to 6 weeks: check the medium temperature first. Cold media is the quiet killer. Also confirm your cutting has at least one node below the surface. If neither is the issue, try a fresh cutting with rooting hormone this time.
- Leaves turn yellow and drop: some leaf drop is normal, especially on the lower leaves. If the whole cutting is yellowing, root rot or cold media is usually the cause.
- Roots formed in water but the plant dies after soil transfer: this is water-to-soil shock. Next time, transition gradually by mixing a small amount of potting mix into the water every two days over a week before fully potting up.
Setting yourself up for long-term success
Once your cutting is transplanted and showing new growth, treat it like a young plant: consistent moisture (not wet), good indirect light, and patience. Roots need time to fill the pot before the plant can grow at full speed. Give it four to six weeks in its new container before you start fertilizing, and even then, start at half strength.
The more you understand about what roots actually need to develop, including the right environment, available moisture, and the role of hormones and cell division, the easier propagation becomes. If you want to dig deeper, exploring what roots need to grow and what conditions trigger root initiation will help you troubleshoot any future cutting that stalls. The fundamentals here apply whether you are working in a small apartment with a single pothos cutting or building out a full propagation station with multiple species and mediums.
Start with one cutting from a plant you already own. Trim just below a node, pull off the lower leaves, and push it into a cup of moistened perlite covered loosely with a clear bag near a bright window. Check it in two weeks. You will almost certainly see something happening, and that first little root tip is genuinely one of the most satisfying things in all of growing.
FAQ
What’s the fastest way to tell if my cutting is actually rooting and not just staying alive?
Look for new growth that comes from the top (fresh leaf or stem elongation), plus a stem base that feels more anchored when you apply a single gentle tug. If there’s only green color with zero new growth after a few weeks (especially in soil or perlite), it’s often not rooting yet.
Can I reuse the same perlite or potting mix for multiple cuttings?
You can, but only if you sanitize and refresh it. Old medium can carry fungus and rot organisms. For best results, use fresh sterile perlite (or a fresh blend) for each batch, especially if any cuttings previously rotted.
Do I need to remove all leaves, or can I leave some on the cutting to help photosynthesis?
You should remove leaves that would sit below the waterline or medium surface because they rot. Keep some leaves at the top for energy, and if the leaves are large, cut them in half to reduce moisture loss while the cutting has no roots.
How deep should I stick the cutting into perlite, and does “node placement” matter more than depth?
Depth matters, but node placement matters most. Insert deep enough that at least one node is below the surface, typically about 1 to 3 inches depending on cutting length. If the node stays above the medium, root formation usually will not take off.
Why do my cuttings wilt even though the humidity tent is on?
Wilt usually means moisture loss is outpacing what the cutting can replace. Common causes are direct sun heating, leaves left on too large a surface area, or a medium that’s too dry. Increase light diffusion, trim large leaves, and aim for evenly moist (wrung-out-sponge) medium, not dry dust or soggy mud.
What’s the correct way to use rooting hormone so I don’t mess up?
Dip only the very base, about the bottom inch. Tap off excess so the cutting has a thin, even coating. Avoid re-dipping after touching the bag or bottle to used material, since contaminated hormone can increase rot risk.
My water-propagation cutting looks fine, but roots don’t form. What’s different about water vs perlite?
In water, low oxygen and stagnant conditions can slow rooting, and transfers to soil often fail if the cutting is delayed too long in water. Try changing the water more often (every few days) and keep the water level stable, or switch to a sterile perlite-based medium for cuttings that stall.
When should I transplant from water to soil, and how do I reduce shock?
Transplant when roots are about 1 inch long, not much longer. To reduce shock, transition gradually by mixing a little soil into the water over several days, then pot in the final medium and keep light indirect.
Can I take cuttings anytime of the day? Does time of day matter?
Morning or cooler parts of the day are usually better because stems are less stressed than midday heat. If the cutting dries out before it’s placed in medium, rooting often slows. Once you cut, get it into water or perlite promptly.
How many cuttings can I put in one container without causing problems?
Use enough space that leaves do not crowd and touch the humidity bag or dome. Crowding traps moisture on leaves and increases mold risk. If you’re using a propagation box, spread cuttings so airflow can move around each one.
What should I do if my cutting develops mushy black tissue at the base?
Mushy or blackening at the base usually signals rot. Remove the cutting from the medium, cut away to healthy firm tissue if you can salvage a fresh node area, then restart in fresh sterile medium. Also reduce watering and ensure airflow in the humidity tent.
Is 90 to 95% humidity always necessary, or can I skip the tent?
A humidity tent speeds success, especially indoors, but you can sometimes root without one if your environment is naturally humid and you keep leaves trimmed and avoid overwatering. If cuttings consistently stall or dry out, add a tent and crack it open for daily airflow.
Can I fertilize before the cutting roots?
Generally no. Fertilizer before roots form can stress the cutting and can also increase microbial growth in the medium. Wait until you see sustained new growth after transplanting, then start at half strength after about 4 to 6 weeks.