Growing plants in pon is genuinely one of the most rewarding switches you can make, but it trips people up because the system works so differently from soil. The short answer: pon is an inert, porous growing medium (think expanded clay pellets or LECA) that holds your plant in place while a dilute nutrient solution delivers everything the roots need. Done right, it produces fast-growing, healthy plants with almost no pests and very little mess. Done wrong, you get root rot and yellow leaves within weeks. This guide walks you through every step so you land in the first camp. If you want the full walkthrough on how to grow plants in pon, follow the steps in this guide from setup to maintenance how to grow plants nms.
How to Grow Plants in Pon: Setup, Care, and Troubleshooting

Marcus Holloway
21 Apr 2026
What 'pon' actually means and which setup you're using
The word 'pon' gets used loosely online to mean a few different things, so let's sort it out before you buy anything. At its core, pon refers to growing in a porous, inert substrate (one that has no nutrients of its own) that holds your plant's roots while a nutrient solution does the feeding. The most common material is LECA, which stands for Lightweight Expanded Clay Aggregate. Those round, reddish-brown pellets you see everywhere are pon in its most popular form. Some growers also use pumice, perlite-heavy mixes, or proprietary mineral substrates under the 'pon' umbrella.
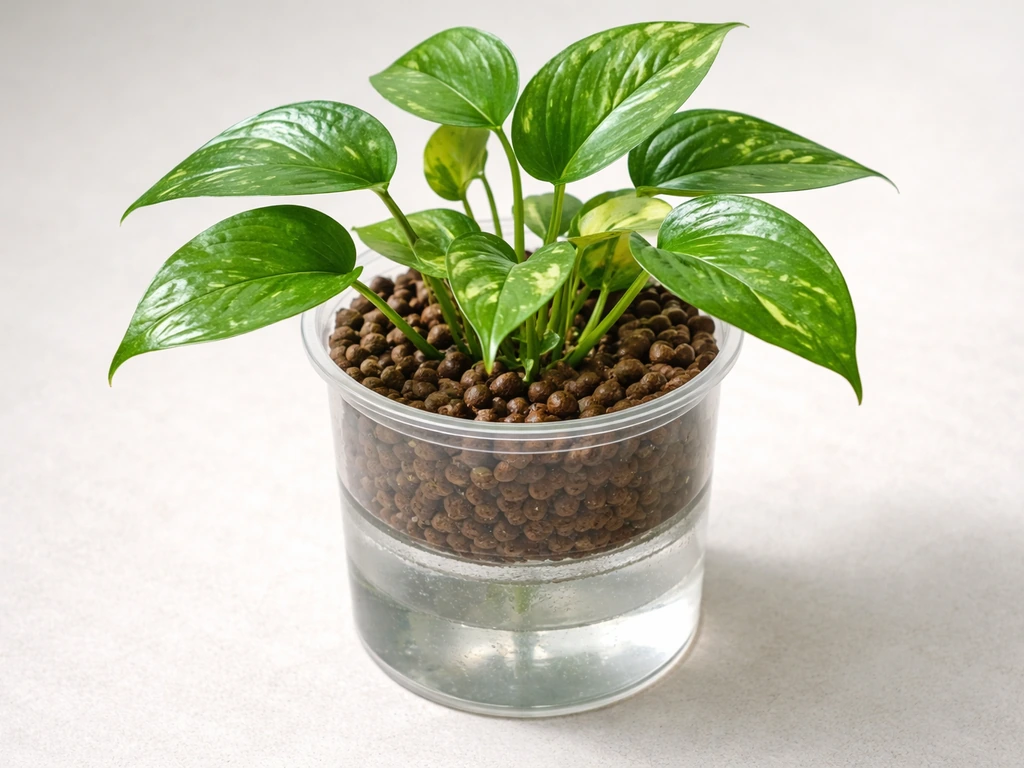
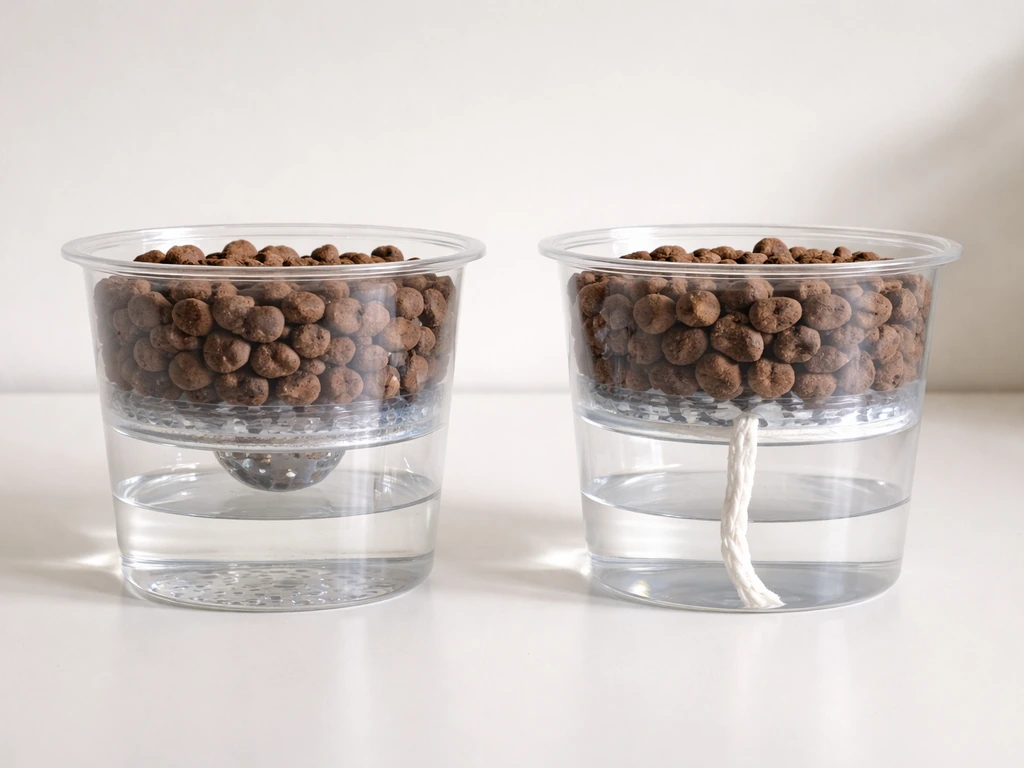
Beyond the medium itself, you'll choose one of two main approaches. The first is semi-hydroponics (sometimes called passive hydroponics): your plant sits in a solid pot filled with LECA, and a small reservoir at the bottom wicks water and nutrients up to the roots by capillary action. No pumps, no timers. The second is an active system, such as deep water culture (DWC), where roots hang directly into an oxygenated nutrient solution, or ebb-and-flow, where the medium floods periodically and then drains. For most houseplant growers and beginners, semi-hydro with LECA is what people mean when they say 'growing in pon.' That's the setup this guide focuses on, though the nutrient and troubleshooting advice applies broadly.
One thing that confuses people switching from soil: pon has zero nutrient buffer. Soil slowly releases nutrients over time, forgives missed feedings, and has a built-in pH buffer. Pon does none of that. Every nutrient your plant gets comes directly from the solution you add, which means you have more control but also more responsibility. Once you get the rhythm, it's actually simpler than soil, not harder.
Which plants actually thrive in pon
Almost any houseplant can be transitioned to pon, but some take to it much faster than others. Tropical aroids are the superstars: pothos, monsteras, philodendrons, and hoyas all adapt quickly and grow vigorously once their roots convert. Orchids (especially phalaenopsis) have been grown semi-hydroponically for years with excellent results. Peace lilies, spider plants, dracaenas, and Chinese evergreens also do very well. If you're propagating cuttings, pothos is the easiest starting point because cuttings root in roughly 2 to 4 weeks and forgive a lot of beginner mistakes.
Plants that are harder to transition include succulents and cacti (they hate the consistent moisture), as well as plants that need a true dry period between waterings. Fruiting vegetables and herbs can work in pon, especially in active systems, but they demand more precise nutrient management and more light than the average apartment can provide. Start with a forgiving tropical plant, get your system dialed in, and expand from there.
Preparing cuttings and transplants
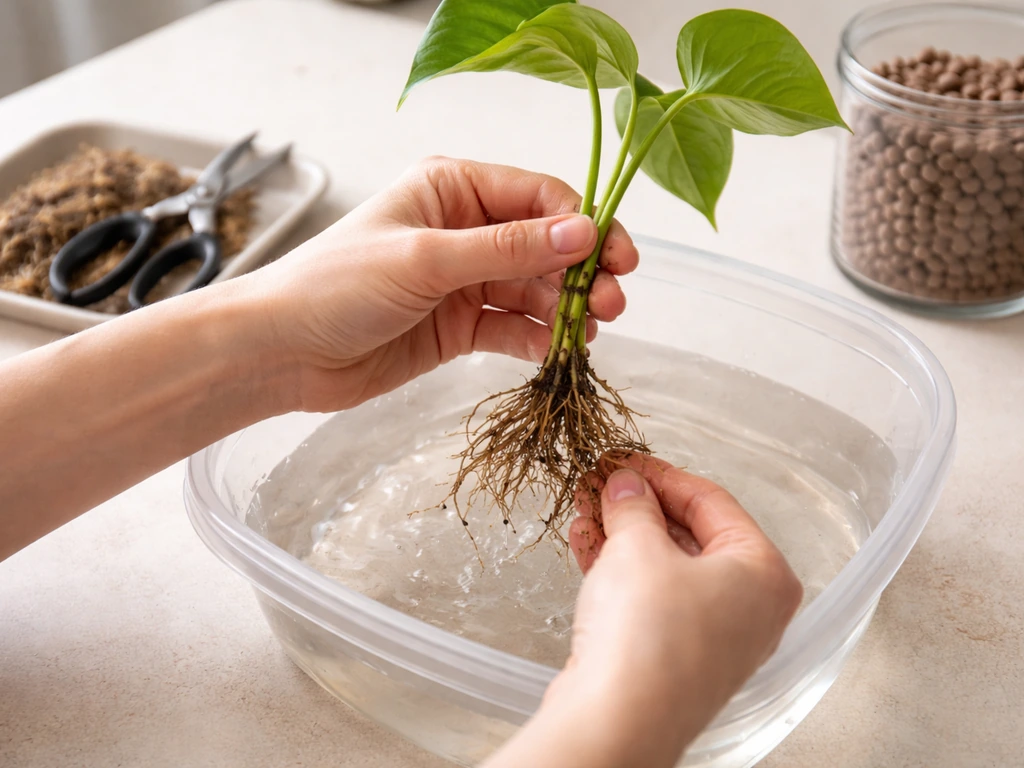
You have two routes into pon: starting from a cutting or transplanting an existing soil plant. Cuttings are easier. For pothos, cut a stem roughly 20 to 30 cm long with at least one node (the little bump where a leaf meets the stem). Strip the lowest leaves so they don't rot in water, then place the cutting in plain water in a bright spot. Change the water every 2 to 3 days to keep it fresh. When roots reach about 2 inches (5 cm), they're ready to move into pon. At that length, roots are established enough to handle the transition without shock.
Transplanting from soil is messier but totally doable. Gently remove the plant, then rinse every bit of soil off the roots under lukewarm running water. This step matters more than people realize: soil particles trapped among the roots will rot in the wet pon environment and invite disease. Once the roots are clean, let the plant sit in plain water for a day or two before moving it into pon. This helps the roots start adjusting to the new moisture environment. Expect some transplant shock (drooping, a few yellow leaves) in the first one to two weeks. That's normal. Don't overreact by adding extra fertilizer or changing the setup.
Setting up your containers, drainage, and airflow
Your container choice sets up the whole system. For semi-hydro, you need a pot with no drainage holes (to hold the reservoir at the bottom) or a dedicated semi-hydro pot with a built-in water level indicator. A clear or translucent pot works great when you're starting out because you can see the water level and the roots without disturbing anything. Opaque pots work too, but you'll need to check water levels by lifting or using a skewer. One important rule: the outer container or pot must block all light from reaching the water reservoir. Light plus nutrients equals algae, and algae is one of the most common frustrations in pon systems.
Airflow around the plant and at the root zone is critical, especially in semi-hydro. The porous structure of LECA creates natural air pockets around the roots, which is one of its biggest advantages over dense potting mix. To keep that air space working, don't pack the LECA too tightly. You want the pellets to sit loosely enough that air can circulate between them. If you're running an active system like DWC, add an air stone connected to an aquarium pump inside the reservoir. This keeps dissolved oxygen levels high (aim for 6 to 8 ppm for leafy plants, above 8 ppm for fruiting crops) and is your single best defense against root rot.
Step-by-step: planting in pon and getting roots established
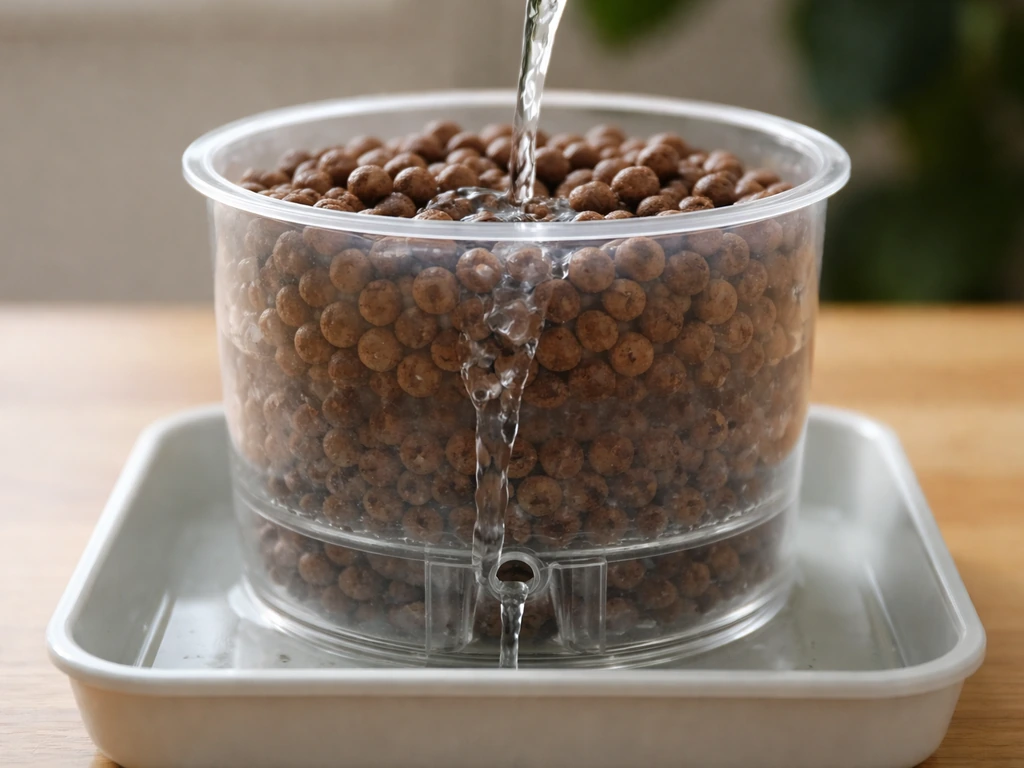
- Rinse your LECA thoroughly before use. Run it under water and agitate until the water runs completely clear. This removes clay dust and fine particles that would cloud your reservoir and clog air pockets. Skipping this step leads to murky water and poor root performance.
- Fill the bottom quarter of your pot with rinsed LECA to create a base layer.
- Hold your cutting or transplant in place at the height you want (roots pointing down, the base of the stem just above the medium level) and pour more LECA around it, filling to within an inch of the pot rim. Don't bury the stem crown or the junction between stem and roots.
- Add your diluted nutrient solution to the reservoir. For the first week or two, keep the water level low, roughly 1 to 2 cm at the base, so the roots are not sitting submerged but can still wick moisture upward. This encourages roots to grow downward searching for water, which builds a stronger root structure.
- Place the plant in a warm, bright (but not direct-sun) spot. Temperatures between 65 and 80°F work well for most tropical houseplants.
- Check the water level every few days. When it drops near empty, top up with fresh nutrient solution. Do not let the reservoir stay bone dry for more than a day or two, but do let it drop before refilling so the roots get some air exposure.
- After 2 to 4 weeks, you should see new root tips (white and firm) poking through the LECA at the bottom of the pot or visible through a clear container. New leaf growth is your signal that the plant has established successfully.
The establishment phase is when most people panic and over-intervene. If the plant looks okay but isn't pushing new growth yet, give it more time. Roots are establishing underground where you can't see them. As long as leaves aren't yellowing rapidly and roots aren't slimy or black, the plant is doing its job.
Nutrients, pH, and EC: what you actually need to know
Pon has no nutrient buffer, so every feed matters. You'll use a liquid hydroponic fertilizer mixed into water at a specific concentration. The two numbers you need to track are pH (acidity of the solution) and EC (electrical conductivity, which tells you how concentrated the nutrients are). Most plants in a pon system do best with a pH between 5.5 and 6.5. That slightly acidic range keeps all the major nutrients available for roots to absorb. In soilless and hydroponic nutrient solutions, pH is typically maintained around 5.5 (about 5.0 to 6.0) to support proper nutrient availability at the root zone blank" rel="noopener noreferrer">pH between 5.0 and 6.0 for nutrient availability. If pH drifts outside that window, roots can't take up certain nutrients even if they're present in the solution, which is what causes many so-called 'deficiencies' in hydroponic systems. The MU Extension nutrient guidance notes a common 5.5 to 6.5 pH management window and warns that nutrient lockout risk increases when pH moves outside that band blank" rel="noopener noreferrer">pH drifts outside that window.
EC tells you how strong your nutrient solution is. A low EC means a weaker solution; high EC means more concentrated. For seedlings and fresh cuttings, start dilute. Young plants are sensitive, and a solution that's too strong will burn new roots. As plants mature and are pushing active growth, you can bring EC up. The table below gives you practical starting targets for common plant categories in pon.
| Plant Type | Target pH Range | Target EC (mS/cm) | Notes |
|---|---|---|---|
| Cuttings / Seedlings | 5.8–6.2 | 0.5–1.0 | Use RO or low-EC water as base; keep it dilute |
| Leafy greens / Herbs | 5.8–6.3 | 1.2–2.0 | Herbs lean toward the higher end of that EC range |
| Tropical houseplants (pothos, philodendron) | 5.8–6.5 | 1.0–1.8 | Go gentle; these are forgiving but don't need heavy feeding |
| Orchids in semi-hydro | 5.5–6.5 | 0.5–1.2 | Orchids prefer very dilute fertilizer, fed with every watering |
| Fruiting / high-demand crops | 5.5–6.5 | 2.5–3.5 | Requires more active management; not ideal for beginners |
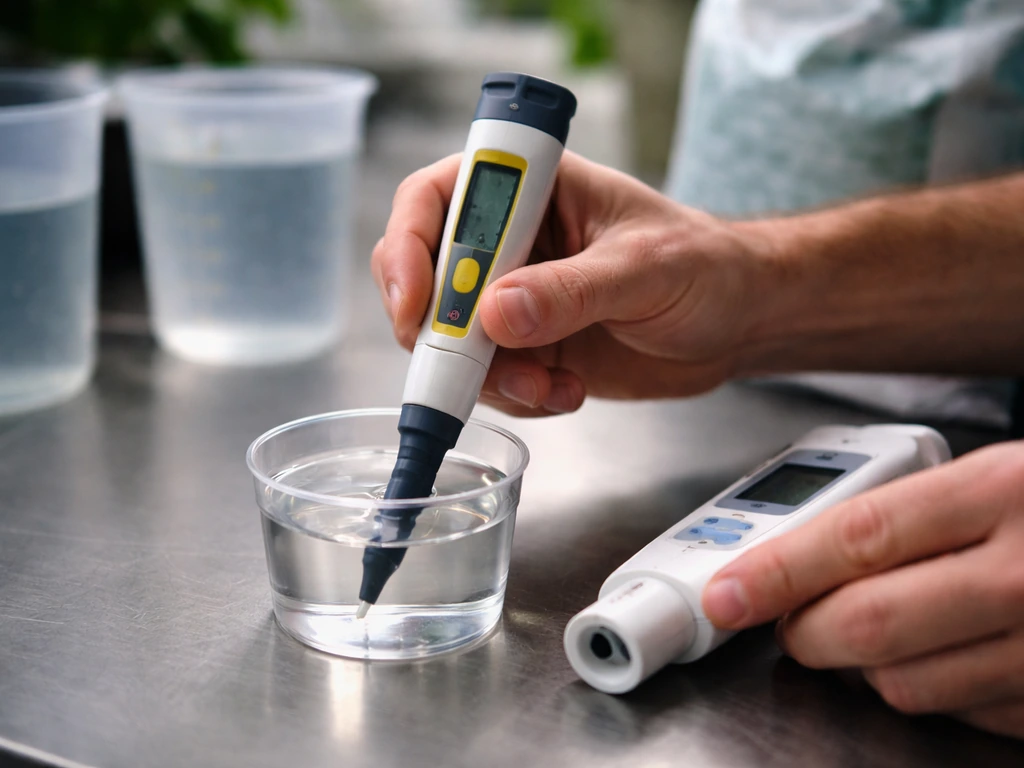
Measure pH and EC every time you mix a fresh batch of nutrient solution, and check your reservoir pH every few days. In an inert system with no buffering, pH can drift surprisingly fast, especially as plant roots absorb certain nutrients preferentially. A cheap digital pH pen and EC meter (often sold as a combo for under $20) are non-negotiable tools. Adjust pH using pH Up (potassium hydroxide) or pH Down (phosphoric acid) solutions sold at any hydroponics shop. Add small amounts, stir, then retest. It takes a minute to get used to how reactive the solution is, but you'll get the feel for it quickly.
When mixing nutrients, always add fertilizer to water (not water to a concentrated fertilizer) and mix thoroughly before measuring pH. Some nutrients interact and can precipitate out of solution if you add them in the wrong order. Follow the instructions on your specific fertilizer, and if you're using a two or three-part formula, add each part separately with stirring in between.
Day-to-day and weekly maintenance
Topping up and water management
In semi-hydro, your main daily task is checking the reservoir level. Let it drop to near empty before topping up, rather than constantly refilling to the same level. This wet-dry cycle at the root zone is what mimics natural conditions and keeps roots oxygenated. When you do top up, use fresh nutrient solution at the right pH and EC. Don't just add plain water repeatedly, because this dilutes your nutrient solution and the EC drops over time.
Keep your reservoir temperature below 75°F. Warm water holds less dissolved oxygen, and low oxygen is the primary trigger for root rot. If your space gets hot in summer, keep the pot away from heat sources and consider using a slightly larger, insulated outer pot to buffer temperature swings.
Flushing to prevent salt buildup
Every 4 to 6 weeks, flush your system with plain, pH-adjusted water (pH 5.5 to 6.0). To do this, pour plain water slowly through the LECA until it runs freely out the bottom or drains the reservoir fully, then repeat once more. This rinses out accumulated fertilizer salts that have built up in the pellets over time. Salt buildup burns roots and causes the same leaf symptoms as nutrient deficiency, so flushing is not optional. After flushing, wait a day, then resume your normal nutrient solution.
Algae control
Algae grows when light reaches nutrient-rich water. The fix is simple: block the light. Use opaque pots, wrap clear containers in dark tape or a fabric sleeve, and keep the water surface covered. If you already have algae, empty the reservoir, rinse the pot and LECA with a dilute hydrogen peroxide solution (about 3% concentration is commonly used for this), then set up with light-blocking measures before refilling. Hydrogen peroxide breaks down into water and oxygen, so it won't harm your plants if properly diluted and rinsed. Bleach can also be used for sanitizing empty containers between grows, but rinse thoroughly before adding plants back.
Troubleshooting the most common pon problems
Root rot
Root rot in inert systems is almost always caused by low oxygen, not by overwatering the way it is in soil. The culprit is usually a water-borne pathogen like Pythium that thrives when dissolved oxygen drops. Symptoms: roots turn brown, slimy, and smell bad. Leaves yellow and wilt even though the reservoir is full. The fix: remove the plant, trim all brown/slimy roots with sterilized scissors, rinse the roots and LECA in dilute hydrogen peroxide, let the roots air for 30 minutes, then replant. Going forward, let the reservoir drop fully before refilling, keep temperatures below 75°F, and add an air stone if you're using an active system. If you're dealing with plants in a stranded, survival-style setup, you can use the same oxygen, nutrient, and light principles described in how to grow plants stranded deep. If root rot keeps recurring, your water is too warm or your reservoir sits full too constantly.
Nutrient deficiencies and yellowing leaves
Yellow leaves in pon are almost never a sign that the plant needs more fertilizer. More often, pH drift is the cause. When pH is outside the 5.5 to 6.5 range, roots can't absorb certain nutrients even if they're present in the water. Check your pH first, always. If pH is fine, check EC. If EC has dropped a lot (because you've been topping up with plain water repeatedly), mix a fresh batch of nutrient solution at the correct strength. True deficiencies, where a specific nutrient is simply missing, are less common with a complete hydroponic fertilizer, but they do happen. Yellowing that starts on older (lower) leaves while newer growth stays green often points to a mobile nutrient like nitrogen being too low. Yellowing that starts on new growth first can signal iron or calcium issues, which are typically pH-related.
Transplant shock
Moving a plant from soil to pon almost always causes some visible stress in the first one to two weeks. Drooping, a few dropped or yellowed leaves, and slow growth are all normal. The roots that were optimized for soil need time to grow new, water-adapted roots. Don't fertilize at full strength during this period. Keep the nutrient solution dilute (EC around 0.5 to 1.0), maintain a stable warm temperature, and be patient. Most plants bounce back and start pushing vigorous new growth within three to four weeks.
Pests and mold on media
One of the real advantages of pon is that it drastically reduces soil-based pests like fungus gnats (their larvae need moist organic matter to survive, and LECA has none). However, spider mites, mealybugs, and aphids can still appear on leaves from outside. Treat them the same way you would on any houseplant: insecticidal soap, neem oil, or rubbing alcohol on a cotton swab for small infestations. White residue on the surface of LECA is usually mineral/salt deposit, not mold. It's harmless but a sign you should flush soon. Actual mold (fuzzy, white or grey growth) on the surface usually means the top layer is staying too wet. Improve airflow and let the surface dry out between waterings.
Long-term habits that keep pon plants thriving
Once you get past the establishment phase, pon is low-maintenance compared to soil. The main habits that separate thriving pon plants from struggling ones come down to consistency and light. Most houseplants in pon want bright indirect light for at least 6 hours a day. The system can't compensate for inadequate light, and slow or stunted growth in an otherwise well-managed pon setup is almost always a light problem.
- Check the reservoir level every 2 to 3 days and let it run low before topping up.
- Test pH and EC every time you mix fresh nutrient solution, and spot-check the reservoir pH every few days.
- Flush with plain, pH-adjusted water every 4 to 6 weeks to clear salt buildup.
- Do a full reservoir clean and LECA rinse every 3 to 4 months, or whenever you notice buildup, odor, or algae.
- Keep reservoir temperatures below 75°F, especially in summer.
- Block all light from your reservoir or outer pot to prevent algae.
- Adjust nutrient concentration as plants grow: increase EC slightly when a plant is actively pushing new growth, back off during rest periods or winter.
One thing worth mentioning: pon rewards observation. You don't need to be in the weeds checking every parameter every day, but spending 30 seconds looking at your plants when you walk past them means you'll catch problems early, when they're easy to fix. A slightly yellow leaf today is much easier to address than a plant in full decline next month.
Scaling up and exploring other systems
Once you have the rhythm of semi-hydro pon down, it's natural to get curious about more active systems. DWC and ebb-and-flow setups allow you to grow more plants, push faster growth rates, and handle higher-demand crops like tomatoes and herbs. The core principles are the same: inert medium, nutrient solution, pH and EC management, and oxygen at the root zone. The main difference is mechanical complexity and the consequences of power outages or pump failures. If you're interested in going further down that path, the same nutrient management fundamentals you've learned in semi-hydro translate directly.
The pon approach fits neatly into a broader interest in non-soil growing. If you've ever wondered about growing plants in other unconventional setups or environments, the nutrient science and root-zone thinking you develop in pon makes those explorations much easier to understand. If you are playing Raise a Floppa 2 and want to apply the same non-soil, nutrient-solution thinking, see how to grow plants in Raise a Floppa 2 for game-specific guidance. In V Rising, you can use similar indoor hydroponic-style thinking for controlled watering and nutrient management so your plants grow more reliably how to grow plants in v rising. If you are playing Corvette NMS and want plant growth in that environment, the same pon basics apply, with a few game-specific tweaks how to grow plants in corvette nms. Start with one plant, get it established, and give yourself a full growth cycle before judging the system. Most people who stick with pon through that first cycle don't go back to soil. If you are looking for a version that is easier to follow in Tamil, search for how to grow plants in tamil for region-friendly tips and wording.
FAQ
Can I use tap water for pon, or do I need filtered water?
You can start with tap water, but check it first. If your tap has high alkalinity, it often pushes pH upward fast and makes pH control harder. If pH keeps drifting out of range quickly, switch to filtered (or RO) water and then re-adjust pH. Also, avoid water that smells strongly of chlorine, and let stored water sit out briefly if you suspect heavy treatment.
How often should I refill the reservoir, and should I ever top up with plain water?
In semi-hydro, aim to let the reservoir drop close to empty before topping up, then refill with fresh nutrient solution at the correct pH and EC. Never top up with plain water as a habit, because it dilutes EC and can cause sudden swings in nutrient strength. A small top-up is okay only if you immediately replace with the properly mixed solution during the next mixing cycle.
What do I do if the pH keeps drifting up or down even after I adjust it?
Re-test with a fresh calibration if your meters might be off, then look for a mixing mistake (for example, adding concentrated nutrients in the wrong order) or inconsistent solution replacement. Also confirm you are not adding plain water intermittently. If drift remains strong, flush and restart, then consider using a different water source with less alkalinity.
Do I need to measure EC and pH every day?
No. The practical routine is to mix fresh solution with measured pH and EC, re-check reservoir pH every few days, and verify EC when you notice changes in plant color or when you are about to mix a new batch. Daily full testing is usually unnecessary for beginners and can lead to over-correcting.
Why do my roots look healthy but my plant still stops growing?
Most often the issue is light, not roots. If roots are not brown or slimy and the plant is not yellowing rapidly, check that it is getting bright indirect light for at least 6 hours. Rotate the plant regularly, and avoid placing it farther from the window than you did in soil because pon has no nutrient buffering and can expose light problems quickly.
Is it normal for plants to lose some leaves after moving to pon?
Yes, some drooping or a few yellowed leaves during the first 1 to 2 weeks is common due to root adaptation. What is not normal is ongoing rapid yellowing on many leaves or stem collapse. If that happens, lower stress by using a more dilute nutrient mix (lower EC) and verify oxygen and temperature conditions.
Can I grow pon plants without any meters (no pH pen or EC meter)?
You can attempt it, but it is much easier to fail because pon has no nutrient buffer and pH can drift quickly. A common workaround for learning is to use meters for the first few cycles to dial in your routine, then test less frequently once your reservoir stays stable. If you truly have no meters, plan for slower growth and more frequent corrective flushing.
What EC and pH should I start with for seedlings or fresh cuttings?
For fresh cuttings and young plants, start dilute. Keep EC in the low range (around 0.5 to 1.0) and aim for pH roughly in the mid 5s to about 6.5 so roots can absorb nutrients effectively. Once you see active new growth, you can gradually increase EC rather than jumping to mature-plant targets.
How can I tell mineral salt buildup from mold on the LECA surface?
White residue or crust on LECA is usually mineral or nutrient salt that precipitated, it is not fuzzy and does not spread like a living growth. Mold tends to look fuzzy, and may appear as grey or white patches that expand over time. If you see fuzzy growth, improve airflow and allow the top to dry more between wetting cycles, then consider a partial flush.
What’s the best way to prevent algae if my container still gets light?
Light must not reach the nutrient reservoir. Use an opaque outer pot or wrap the reservoir area so it is completely dark, and keep the water surface covered or shielded. If you have a clear inner container, make sure it is surrounded by a light-blocking sleeve or sits inside an opaque reservoir wrapper.
Root rot keeps coming back, even when I think I’m not overwatering. What should I check?
Check oxygen and temperature first. Warm reservoir water reduces dissolved oxygen and encourages pathogens. Confirm you fully drain or let the reservoir drop between refills (semi-hydro), and if you are in an active system, confirm your air stone is running and positioned well. If conditions are stable and rot persists, inspect for persistent contamination and do a more thorough reset, including rinsing and trimming and using a dilute peroxide rinse as described in the troubleshooting steps.
Can I use pon for plants that need a true dry rest period, like some succulents?
It is usually not the easiest fit because the roots remain in a consistently moist environment, and succulents and cacti often struggle with continuous moisture and nutrient availability. If you try anyway, you would need to run much drier cycles and be very careful with nutrient strength. For best results, start with plants known to adapt well to semi-hydro.
Should I remove all roots when trimming during rot treatment?
Trim only the brown, slimy, or clearly dead sections, not every root indiscriminately. Keep as much healthy, firm root tissue as possible to speed recovery. After trimming, rinse thoroughly and allow a short air period so the damaged areas stop being waterlogged before replanting.
Do I need to flush my system even if my plants look fine?
Yes, periodic flushing helps prevent hidden salt buildup that can gradually stress roots and mimic deficiency symptoms. If you are regularly topping up with properly mixed nutrient solution, salts can still accumulate in LECA over weeks. A flush every 4 to 6 weeks is the best preventive habit for consistent results.
What should I do if my plant shows nutrient deficiency signs in the middle of a warm season?
Before increasing fertilizer, verify pH and check EC. In warm conditions, pH drift and faster nutrient uptake can lead to mismatch between what the plant needs and what the roots can absorb. If pH is out of range, correct pH first. If EC has dropped, mix a fresh batch at the target strength instead of guessing with extra feed.