You can absolutely see a visible sprout or early root growth within 5 days, but only if you pick the right plant and nail a few key conditions. Radishes, microgreens, mung beans, and lentils are your best bets. Radishes sprout in as little as 3 days under warm conditions. Mung beans sprouted in a jar can show tails in about 3 days. Microgreens like radish, pea, or sunflower shoots can push through soil by Day 4 or 5 when you keep temps around 74°F and light running 18 hours a day. What you won't get in 5 days is a mature plant, harvestable crop, or anything that needs a long head start. But visible, living growth? Absolutely achievable.
How to Grow a Plant in 5 Days: Step-by-Step Plan

Marcus Holloway
2 May 2026
Reality check: what "grow in 5 days" can and can't mean
It helps to be honest with yourself about what you're working toward, because the word "grow" means very different things depending on what you've read or imagined. In 5 days, you are aiming for germination and early emergence, which means a sprout breaking the soil surface, a tiny root emerging from a soaked seed, or cotyledons (the first baby leaves) starting to open. That is genuinely exciting and satisfying, and it proves your setup works.
What you won't see in 5 days: true leaves, a plant big enough to transplant outdoors, flowers, or anything resembling a mature specimen. Sunflowers, for instance, take about 11 days just to emerge under good field conditions, so they're not a Day-5 win. Tomatoes, peppers, and herbs like basil typically need 7 to 14 days just to germinate. Choosing the wrong plant is the single biggest reason people feel like they failed when really they just had unrealistic expectations for that species.
Think of Day 5 as a proof-of-life milestone. You're confirming that your environment, moisture, and seed quality are all working together. Once you hit that milestone, you shift into a regular care routine and let the plant do its thing. The 5-day window is about getting the start right, not finishing fast.
Fast-start plant types and choosing the right seed or cutting
Your plant choice makes or breaks a 5-day goal. If you want the Wisconsin version of this plan, focus on how to grow fast plant varieties that match your short growing timeline and conditions fast plant types. Stick to fast germinators and skip anything that needs stratification, soaking for multiple days, or slow tropical warmth. Here are the most reliable options based on how quickly you can expect visible results.
| Plant | Method | Expected Visibility | Difficulty |
|---|---|---|---|
| Radish (seed) | Soil or microgreen tray | Day 3–5 | Very easy |
| Mung bean (seed) | Jar sprouting | Day 2–3 | Very easy |
| Lentils (seed) | Jar sprouting | Day 2–4 | Very easy |
| Radish microgreens | Tray with moist medium | Day 3–5 | Easy |
| Pea shoots (microgreen) | Tray with moist medium | Day 4–5 | Easy |
| Bean (seed) | Bag/paper towel method | Day 3–5 | Easy |
| Sunflower (microgreen) | Tray with moist medium | Day 5–7 | Easy, but slower |
| Basil (seed) | Soil | Day 7–14 | Not a Day-5 pick |
| Tomato (seed) | Soil | Day 7–14 | Not a Day-5 pick |
For soil growing, radish seeds are your most reliable choice. They germinate in 3 to 8 days even in imperfect conditions, though warmth pushes them toward the faster end of that range. Cold temps below around 60°F slow things down noticeably. For water-based methods like jar sprouting, mung beans and lentils are practically foolproof and can show growth even faster than radishes in soil.
If you want to use a cutting rather than a seed, understand that cuttings don't "germinate," they root. Pothos or mint cuttings placed in water can show visible root nubs within 5 to 7 days, though results vary. It's a valid approach, just not as predictable on a tight 5-day window as sprouting a fast seed. If you've killed plants before and want the most satisfying, reliable result, start with mung beans in a jar or radish seeds in a tray.
One underrated step before you commit: run a quick germination test. Wrap 5 to 10 seeds in a damp paper towel, seal them in a bag, and check in 2 days. If most haven't sprouted by Day 3 in warm conditions, your seeds may be old or low-viability. This catches a common failure point before you invest time in a full setup.
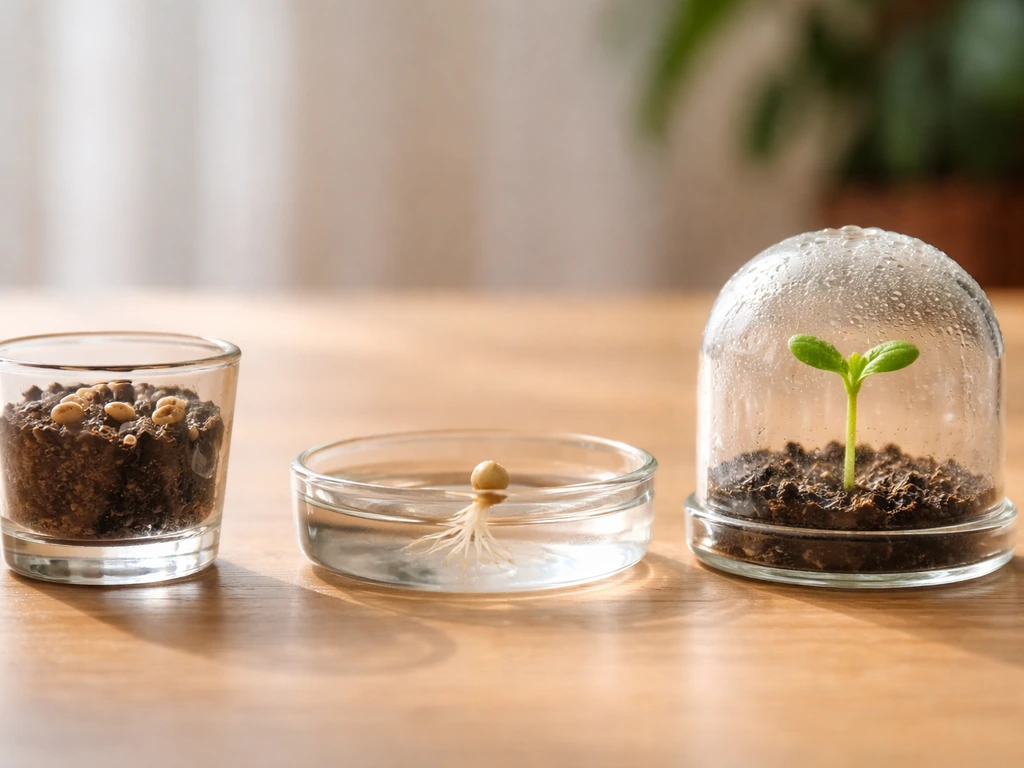
5-day growth plan by method: soil, water/hydro, and terrarium
The core principles are the same across all methods: right temperature, right moisture (moist but never soggy), and enough light once sprouts emerge. What changes is how you deliver water and where your seeds sit. Here's how each method plays out over 5 days.
Soil method (best for radishes and microgreens)
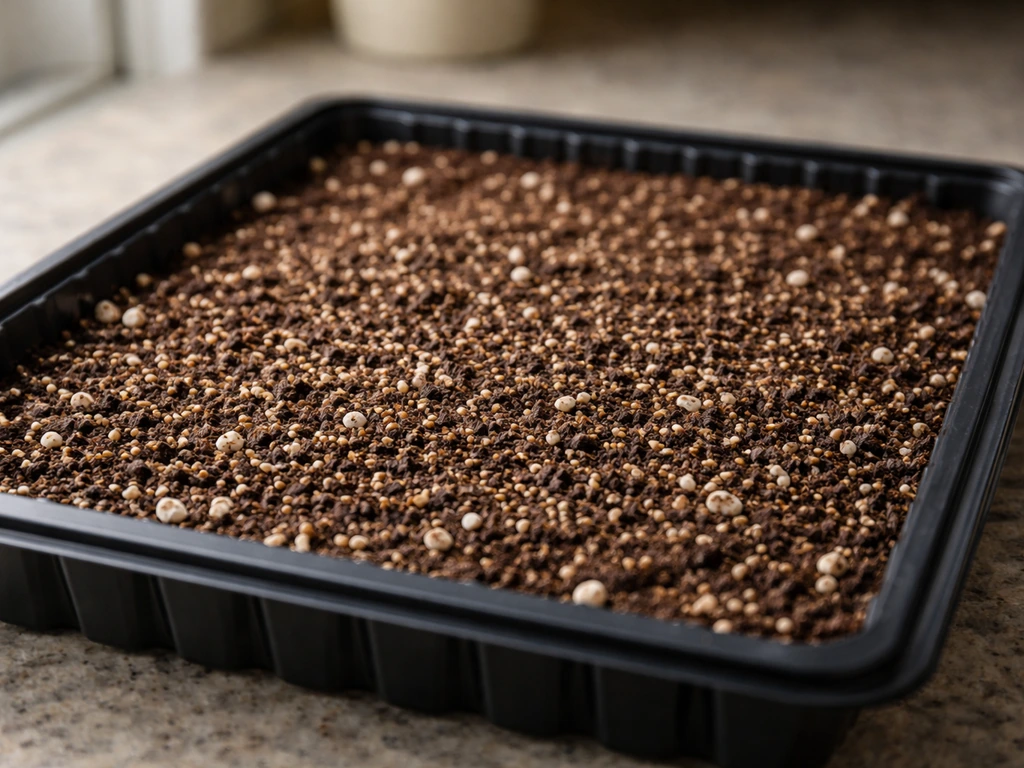
Fill a shallow tray or small pot with a peat and perlite mix, which drains well and resists mold better than heavy potting soil. Soak large seeds like peas or sunflower in water for 6 to 12 hours before planting to speed germination. Radish seeds don't need soaking. Scatter seeds densely if growing microgreens, or space radish seeds about an inch apart for individual plants. Press them gently into the surface, cover with a thin layer of medium or a humidity dome, and mist thoroughly. Keep the tray somewhere that stays around 70 to 74°F. Mist every 12 hours and check that the surface stays damp but never pooling with water. Once sprouts emerge (typically Day 3 to 5), remove any cover and get light on them immediately.
Jar sprouting method (best for mung beans and lentils)
This is the fastest, most visual method and requires almost no equipment. Put a tablespoon of mung beans or lentils in a jar, cover with a few inches of water, and soak overnight (8 to 12 hours). In the morning, drain and rinse them thoroughly, then tilt the jar upside-down at an angle so air circulates and any residual water drains out. Rinse and drain every 8 to 12 hours. On Bob’s Red Mill, the mung bean sprout method follows an 8 to 12 hour soak, then rinsing and draining every 8 to 12 hours for 2 to 3 days (longer for bigger sprouts). Within 2 to 3 days you'll see small white tails. By Day 4 or 5 you'll have inch-long sprouts. No soil, no light needed until you want to green them up, and almost zero failure rate if you keep up the rinse cycle.
Paper towel bag method (great for beans and testing any seed)
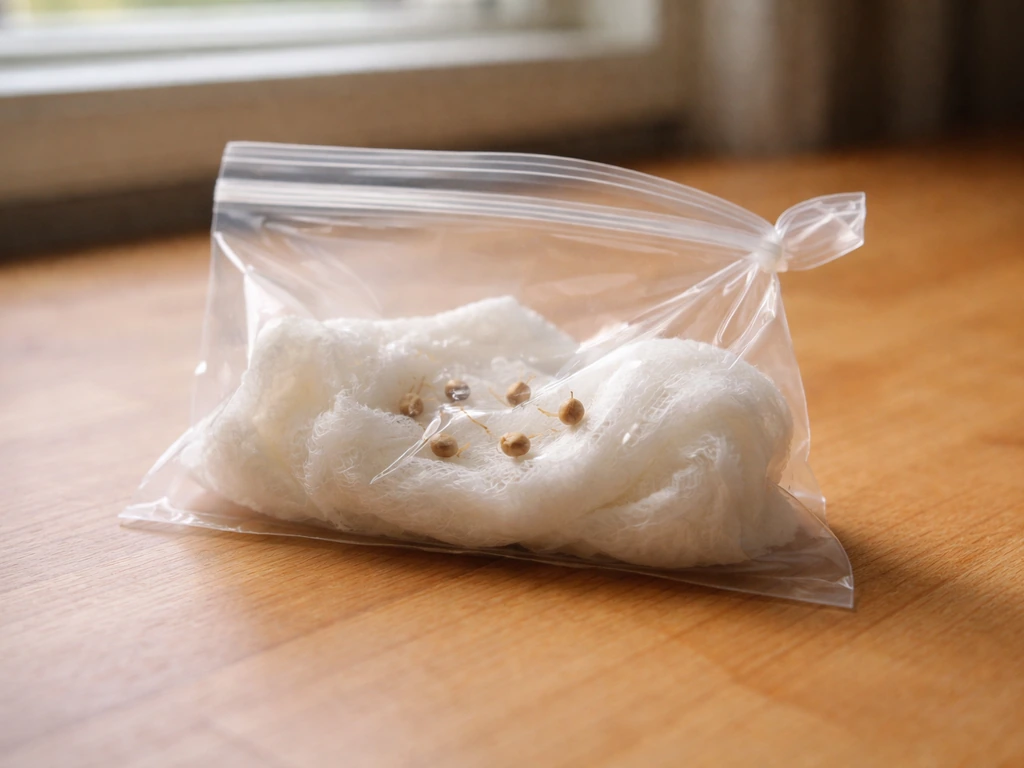
Dampen a paper towel so it's wet but not dripping, wrap your seeds inside, and seal it in a sandwich bag. Leave it somewhere warm (70 to 75°F) and check every 24 hours. Most fast-germinating seeds will show a root by Day 2 to 3 and a visible shoot by Day 4 to 5. This method is also perfect for confirming seed viability before you commit to a full tray setup. Once you see a good root, you can carefully transplant the sprout into soil or water.
Hydroponic method (Kratky or basic water culture)
For a simple, no-pump hydroponic start, the Kratky method works well. Fill a container with water mixed with a diluted hydroponic nutrient solution. Adjust pH to 5.8 to 6.2 before you add anything (a basic pH test kit from a garden store is all you need). Place a net pot with a rockwool cube or small amount of clay pebbles at the water surface so the cube stays moist but the seed isn't submerged. Radish, lettuce, or pea microgreens work well here. Keep water temperature around 65 to 72°F. For the first 5 days you're largely just germinating and waiting for emergence, same as soil, but the roots will be dangling into nutrient water almost immediately once they emerge. Light schedule and temperature matter just as much here as in soil.
Terrarium method
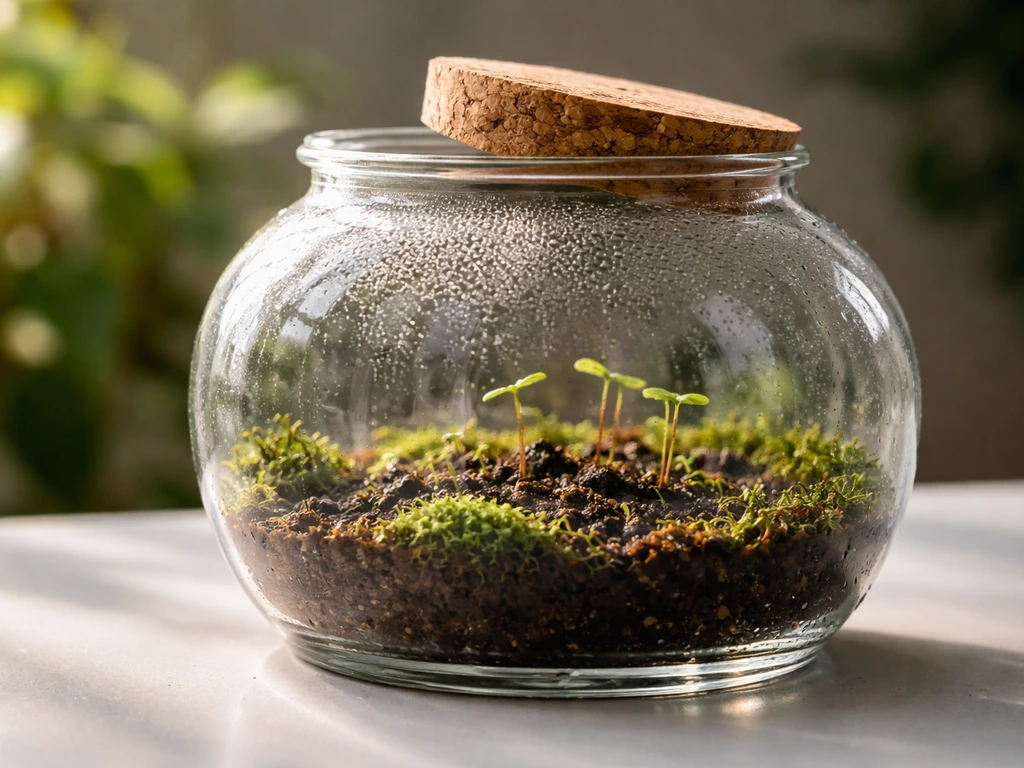
A closed or semi-closed terrarium creates a humid microclimate that can speed germination by keeping moisture consistent. The risk is the same as any sealed setup: if it gets too wet and too cold, mold wins fast. Use a well-draining substrate rather than heavy garden soil. Sow small fast seeds like radish or grass seed and crack the lid slightly if you see condensation pooling heavily. Terrariums don't need much watering once sealed, so resist the urge to add more water every day. Your main job is temperature management and monitoring for white fuzzy mold, which you address immediately by increasing ventilation.
Day-by-day checklist: Day 1 through Day 5
Day 1: setup and sow
- Choose your method (soil tray, jar, paper towel bag, hydro, or terrarium) and gather materials before you start.
- Soak large seeds like peas, sunflowers, or mung beans in water for 6 to 12 hours if using soil or hydro methods. Radish seeds can go straight in.
- Fill your tray or container, plant seeds at the correct depth (most microgreens just get pressed to the surface; radishes go about a quarter-inch deep).
- Mist soil or medium thoroughly until evenly damp but not waterlogged.
- Set temperature to 70 to 74°F. Use a seedling heat mat if your space runs cool.
- Cover tray with a humidity dome or plastic wrap to hold moisture. No light needed yet.
- For jar sprouting: soak overnight, then drain and rinse in the morning. Set jar at an angle to drain.
Day 2: maintain moisture and warmth
- Check moisture. Mist lightly if the surface is starting to dry. Don't soak it again if it still feels damp.
- Confirm temperature is still in the 70 to 74°F range. A $5 thermometer placed near the tray is worth it.
- For jar sprouts: rinse and drain again. You may already see tiny white root tips.
- Do not remove the humidity dome yet. Seeds need consistent moisture to break dormancy.
- Watch for any pooling water at the bottom of trays. If there's standing water, lift the tray to drain or poke a drainage hole.
Day 3: watch for first signs of life
- Radishes and fast microgreens may start to crack the surface today. Look for tiny white loops pushing up.
- Jar sprouts should show visible tails by now. Continue rinsing every 8 to 12 hours.
- If you see any white fuzzy mold on soil or seeds, increase airflow immediately by cracking the dome.
- Mist the surface only if it looks dry. Overwatering at this stage is the most common failure.
- If nothing is happening with soil seeds, resist panic. Confirm temperature is warm enough. Cool rooms below 65°F will stall germination.
Day 4: first sprouts emerge, light goes on
- As soon as any sprout breaks the surface, remove the humidity dome and introduce light immediately.
- Set grow lights 3 to 4 inches above microgreen trays. For seedlings, keep lights 4 to 6 inches above. Run lights for 16 to 18 hours per day.
- For jar sprouts that are well-developed, you can move them to indirect light to start greening up.
- Check soil moisture by pressing a finger to the surface. Water only if the top feels dry to the touch.
- Do not fertilize yet. Seeds have enough stored energy for the first week.
Day 5: assess, adjust, and celebrate
- You should see either cotyledons (first baby leaves) or a root-and-shoot on most fast seeds. Jar sprouts are likely 1 to 2 inches long.
- Check for legginess (long, pale, thin stems stretching toward light). If present, lower your light source closer to the plant.
- Continue the 16 to 18 hour light schedule. Maintain 70 to 74°F during lights-on.
- Water soil from below if possible by setting the tray in a shallow dish of water for 10 minutes, then letting it drain. This avoids disturbing fragile new roots.
- Take a photo. Seriously. It's useful for tracking growth and motivating yourself to keep going.
Light, temperature, watering, and fertilizing for maximum speed
These four variables determine whether you hit Day 5 with a sprout or a pot of nothing. Getting them right isn't complicated, but the specifics matter more than most beginners expect.
Light
During germination (Days 1 to 3), seeds don't need light at all. They need warmth and moisture. But the moment a sprout emerges, light becomes the most important variable. Without enough light, seedlings stretch upward desperately, producing tall, weak, pale stems that fall over. This is called etiolation, and it's basically the plant panicking. For microgreens and seedlings, blank" rel="noopener noreferrer">run grow lights 16 to 18 hours per day and keep the lamp only 3 to 4 inches above the canopy. For hydroponic lettuce or herbs, 12 to 14 hours is sufficient. If you only have a sunny windowsill, a south-facing window in spring can work, but supplement with a basic LED grow light if seedlings start leaning toward the glass.
Temperature
Aim for 74°F during germination and the first few days. Once lights are on and sprouts are up, 70 to 72°F during the light period and 68°F overnight is a good target. Temperature below 65°F slows germination dramatically, which is why seeds can take 10 days or longer in a cool garage or basement even when the packet says 3 to 5 days. A basic seedling heat mat under your tray makes a meaningful difference if your home runs cool. Check the mat with a thermometer to make sure it isn't overheating the medium above 78°F, which can dry things out too fast.
Watering
The single most repeated beginner mistake is overwatering. Moist but not soggy is the standard, but that phrase is frustratingly vague until you've felt it. Press a finger about half an inch into the soil. If it feels damp, leave it alone. If it feels dry, water lightly. For microgreens in a tray, misting every 12 hours keeps things consistent without flooding the medium. Standing water at the bottom of a tray is a red flag. Drain it immediately. For jar sprouts, rinsing is your version of watering, and the key is draining completely each time so seeds never sit in pooled water.
Fertilizing
Don't fertilize during the first 5 days in soil. Seeds carry enough stored energy to germinate and push through the first cotyledons without any added nutrients. Adding fertilizer too early can actually burn fragile new roots. For hydroponic setups, a diluted starter nutrient solution from Day 1 is fine because the plant has no soil reserves to draw from. Keep the EC (electrical conductivity) low, around 1.2 to 1.8 mS/cm for most leafy starts, and don't overdose thinking it will speed things up. It won't.
Troubleshooting common failure points within 5 days
Most 5-day failures come down to a small list of problems, and almost all of them are fixable if you catch them early. Here's what to look for and what to do.
Nothing sprouted by Day 4 or 5
Check temperature first. If your growing area is below 65°F, germination stalls. Add a heat mat or move the tray somewhere warmer. Next, check seed viability with the damp paper towel test described earlier. Old seeds from last season may have low germination rates. Finally, confirm you didn't bury seeds too deep. Most fast-germinating microgreen seeds just need surface contact, not burial.
Leggy, pale, falling-over seedlings
This means not enough light reached the seedlings fast enough after emergence. Lower your grow light to 3 to 4 inches above the canopy and increase daily light time to 16 to 18 hours. Leggy seedlings can't be un-stretched, but you can bury the extra stem slightly deeper when transplanting to compensate. Going forward, get the light in place before Day 4 so it's ready the moment sprouts appear.
Mold or white fuzz on the soil or seeds
White surface mold is almost always caused by too much moisture with not enough airflow. Crack or remove your humidity dome. Back off misting for 12 to 24 hours. If it's on jar sprouts, you're probably not rinsing often enough or not draining well enough. Mold on seeds doesn't necessarily mean those seeds are dead, but act fast. OSU Extension notes that seeds and seedlings can rot quickly in conditions that are too wet and too cold, so both moisture and temperature need correcting together.
Damping off (seedlings that suddenly fall over and collapse)
Damping off is a fungal problem that looks like the stem at the soil line has gone mushy and tan. It moves fast and kills seedlings within a day of appearing. The cause is almost always keeping seedlings too wet, especially in cool conditions. Once it hits a seedling, that plant is gone. Remove it immediately to prevent spread. For the rest of your tray, let the surface dry out, improve airflow, and switch to bottom watering instead of misting from above. Use clean water from a tap rather than water that has been sitting in a container that touched contaminated soil.
Seedlings not emerging despite visible germination
Sometimes seeds germinate (you can see the root if you peek under the medium) but the shoot fails to push through. This usually means the medium has crusted over or is too compacted. Mist gently to soften the surface, and check that you haven't buried seeds more than a quarter-inch deep. For tiny microgreen seeds, surface-sowing or a very shallow cover is all they need.
Hydroponic pH or nutrient issues
In a hydroponic setup, if your seedling looks yellow or stunted by Day 5, check pH first. A pH outside the 5.8 to 6.2 range locks out nutrients even when they're present in the water. Get a basic pH test kit, adjust with pH-up or pH-down solutions, and recheck. This is an easy fix once you know to look for it.
After Day 5: keeping growth going and building a routine
Reaching Day 5 with a visible sprout is the starting line, not the finish line. The next two weeks are where the plant either builds real structure or stalls out because care got inconsistent. Here's how to transition from "5-day experiment" to something you actually maintain.
Keep the same light schedule running. For seedlings destined for outdoor life, you'll gradually harden them off after two to three weeks by moving them outside for increasing amounts of time each day. For indoor grows, your 16 to 18 hour light schedule becomes the permanent routine. Dim natural light on a windowsill alone usually isn't enough to keep a fast-grown seedling from going leggy, so keep that grow light involved.
Start a very light fertilizing routine at around Day 7 to 10 for soil plants, once the first true leaves appear. A diluted liquid fertilizer at half the recommended strength is enough. Don't rush this. Microgreens don't need fertilizer at all if you harvest them young (which you will, since they're typically ready in 7 to 21 days total). For hydroponic plants, maintain your nutrient solution and top up with fresh mixed solution as the water level drops.
If you grew radishes or microgreens, you're actually close to harvest territory. Radish microgreens are typically ready to cut when they're 1 to 3 inches tall with cotyledons open. Full radish roots take 3 to 4 weeks. This is a good time to start a second tray or pot on a staggered schedule so you have continuous growth happening. That's the shift from "I grew a plant in 5 days" to "I grow plants regularly," and it's genuinely easier than the first round because you now know your environment.
The same principles that made Day 5 work, consistent warmth, appropriate moisture, strong light, and good seed selection, scale directly into longer-term growing. If you want to go deeper on speed techniques beyond Day 5, or explore what's possible when you're not on a tight timeline, there's a lot more to learn about optimizing conditions for specific plants and growing methods. If you want a simple, repeatable approach to grow plants easily, focus on fast-germinating seeds and consistent care from day one. If you want broader guidance on how to grow plants naturally, focus on choosing the right seeds, balancing light and moisture, and using simple, low-input methods speed techniques beyond Day 5. But the foundation is exactly what you just built.
FAQ
Can I grow a full-sized plant in 5 days if I use better soil or fertilizer?
No, even with the best soil and added nutrients, 5 days is enough only for germination and early emergence. To get a harvestable plant you need weeks, because true leaves, root mass, and establishment take longer than the Day-5 window allows.
What’s the best “proof of success” to look for on Day 5?
Aim for a sprout that breaks the surface (soil) or visible white root tails plus emerging cotyledons (water or paper towel). If you only see swelling seeds but no root or shoot by Day 5, treat it as a setup problem or low seed viability and restart with a new batch.
How warm is too warm for a 5-day sprouting schedule?
Warmer is usually faster, but going above about 78°F at the medium level can dry things out and stress seedlings. If you use a heat mat, check with a thermometer placed near the tray, not just the room temperature.
Should I keep the medium covered with a dome or plastic for the full 5 days?
Keep coverage during the germination stage to retain humidity, but remove or vent as soon as sprouts emerge. Continuing to trap moisture increases mold and damping-off risk, especially if airflow is low.
Why are my seeds sprouting but the shoots won’t come up?
Common causes are seeds buried too deep (especially microgreens), a crust forming on top that blocks emergence, or an overly compact medium. For fixes, mist lightly to soften the surface and reseed shallowly on the next attempt.
Is it okay to mist every 12 hours even if I’m seeing condensation?
If condensation is pooling or droplets are running down, you’re likely oversaturating. Reduce misting frequency, improve airflow, and switch to lighter, more frequent misting only when the surface starts to dry.
How do I avoid drowning jar sprouts during rinsing?
Drain completely after every rinse, use a consistent rinse schedule (every 8 to 12 hours), and tilt the jar so residual water drains instead of staying pooled. Pooled water is the main driver of rot and foul smells.
Can I use tap water for jar sprouting and hydroponics?
Usually yes, but let water sit briefly if it’s very chlorinated, and avoid water that has contacted soil or contaminated plant material. For hydroponics, keep pH in the target band because nutrient uptake can fail even if water quality looks fine.
Do seeds need light during the first 3 days?
Typically no during germination, warmth and moisture are the priorities. The moment you see emergence, switch to light immediately to prevent etiolation and weak, leaning seedlings.
What should I do if my seedlings become leggy by Day 5?
Increase light strength and reduce distance between the light and the canopy (about 3 to 4 inches). Then keep lights on a long daily schedule. You can bury a bit more stem during later transplanting, but the real fix is earlier, stronger light.
Should I fertilize for the first 5 days in soil?
Don’t, most seeds have stored energy for germination and early cotyledons. Fertilizing too early can harm fragile roots. If you’re doing hydroponics, you can start nutrients from Day 1, but keep them diluted and avoid high EC.
How low can the temperature go before my 5-day plan breaks?
Below about 65°F germination often slows dramatically, turning a 3 to 5 day sprout goal into a 10-day timeline. If your home is cool, use a heat mat and verify the temperature at the tray level.
How can I tell damping-off from normal thinning or seedling stress?
Damping-off typically shows a mushy tan stem at the soil line and fast collapse once it appears. If seedlings suddenly slump with a wet base, remove affected plants immediately and let the surface dry slightly while improving airflow.
What’s the safest way to transplant a Day-5 sprout without breaking roots?
Move the sprout during moist conditions so roots stay flexible, handle by the seedling leaves or very top portion, and minimize time exposed to dry air. If roots are very delicate, transplant later rather than immediately, since the goal of Day 5 is early life, not full establishment.
Can I start a second batch immediately to keep growth going after Day 5?
Yes, stagger sowing every few days with the same fast plant type so you always have sprouts at different stages. This prevents the common “one-time success” problem where your Day-5 sprout is cute but you run out of time to keep a steady routine.