Pictures are genuinely the fastest way to understand what your plant is doing and why. A photo of a leggy, pale seedling tells you instantly it needs more light. A shot of yellowing lower leaves points to nitrogen. A close-up of slimy brown roots in a hydroponic setup means you have a root rot problem. Once you know what to look for, you can run through a quick visual check, match it to a known pattern, and fix the issue the same day. This guide walks you through exactly that: the growth stages you should be seeing, what healthy looks like vs. If you want to follow the timeline in more detail, also see how does a plant grow step by step for the same stages in plain language the growth stages you should be seeing. not, how to diagnose problems by the pictures you take, and how to set up a simple photo-tracking system that works whether you're growing in soil, water, hydroponics, or a terrarium.
How Plants Grow Pictures: Step-by-Step Growth Stages and Fixes

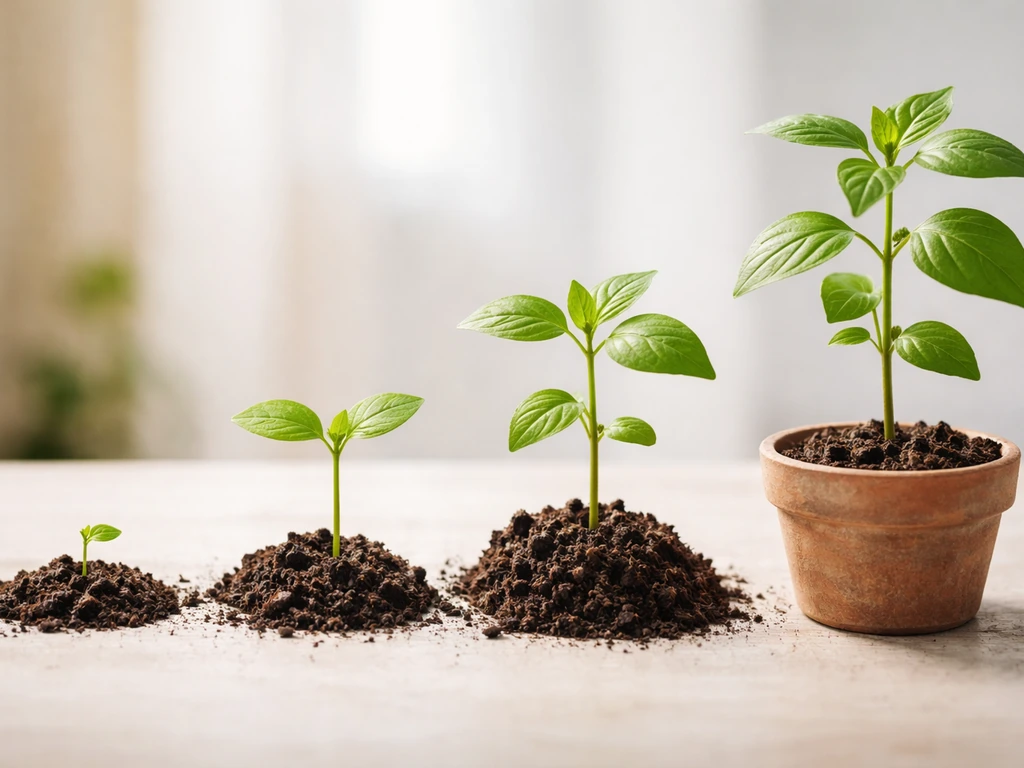
The growth stages you should be able to recognize in photos
Every plant goes through the same basic sequence, and each stage has a distinct visual signature. If you want to understand how plants grow step by step, these are the milestones to watch for. For a broader overview, you can also check how do plants grow on Wikipedia.
Stage 1: Germination (days 1 to 7)
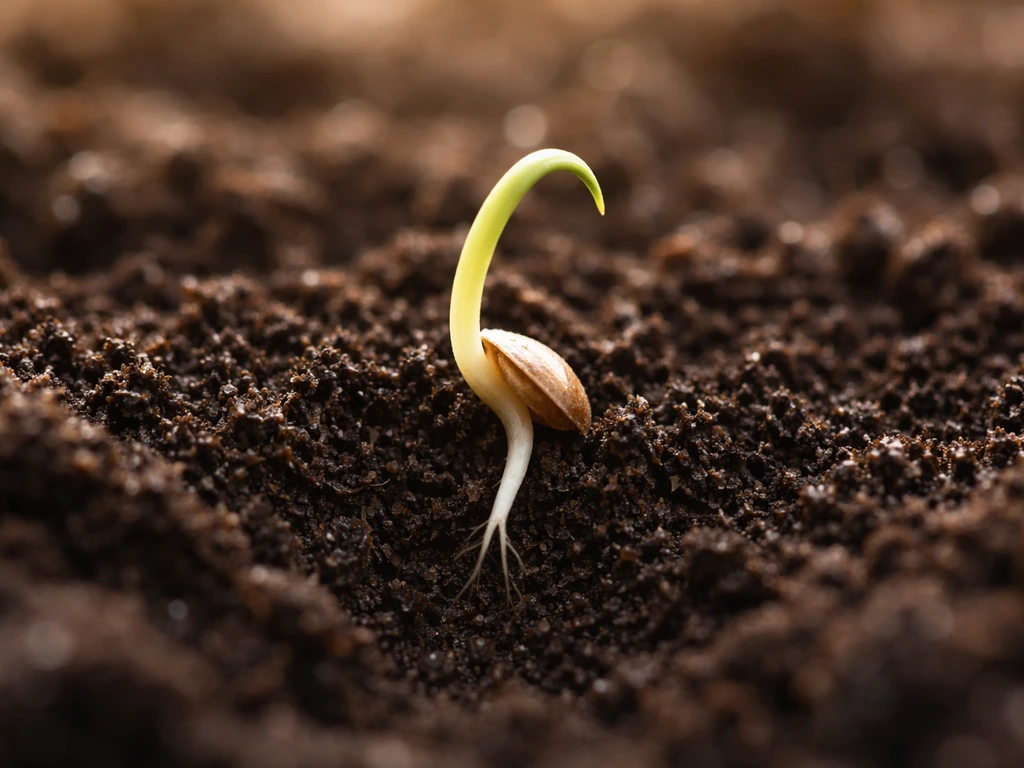
This is the seed cracking open and the radicle (first root) pushing down while the shoot pushes up. In photos, you'll see a tiny curved sprout emerging from the soil or growing medium, usually pale white to light green. The seed coat may still be attached to the first leaves like a little hat. Germination speed varies by species and temperature, but most common vegetables and herbs show visible sprouts within 3 to 7 days at 65 to 75°F. If nothing is visible after two weeks and conditions seem right, the seed is likely not viable.
Stage 2: Seedling development (days 7 to 21)
Once the first true leaves appear (those look like the plant's actual leaves, not the rounded seed leaves that came first), you're officially in the seedling stage. This is the most fragile window and the most visually informative. A healthy seedling is compact, deep green, and stands upright. If your seedling photo shows a tall, floppy stem with leaves spaced far apart, that's etiolation: the plant is stretching toward light it isn't getting enough of. The stem elongates rapidly, leaves are smaller and spaced farther apart, and the whole plant looks pale or yellowish. That's not a minor issue. An etiolated seedling is structurally weak and will struggle later. Move it closer to your light source immediately.
Stage 3: Vegetative growth (weeks 3 to 8+)
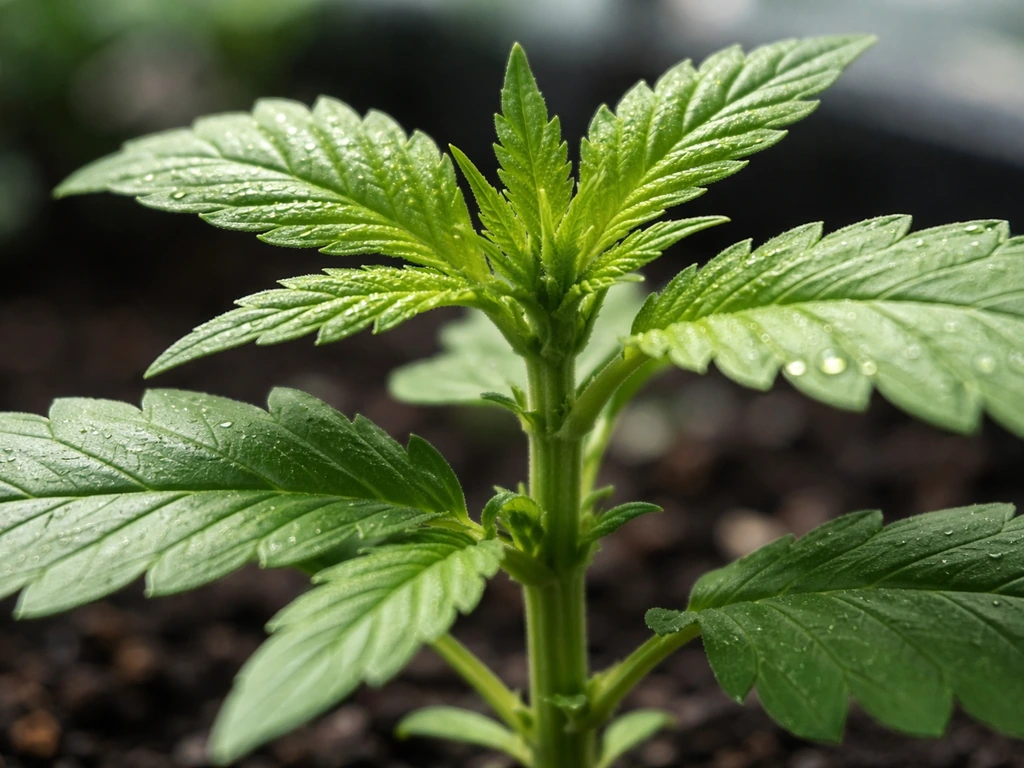
This is where the plant is building its body: stems thickening, new leaves unfurling, and the root system expanding. In photos, you want to see consistent new growth at the top (the growing tip), healthy dark green foliage, and no significant changes in older leaves. Those top changes happen at the growing tip, so it's also helpful to know how do plants grow at their tips and what that looks like in photos. The roots, if visible, should be white to cream-colored and firm. Any deviations from that baseline (yellowing, spotting, wilting at certain times of day) are your cues to investigate further.
Stage 4: Flowering and fruiting
Flower buds show up as small swellings at the nodes or stem tips. Photos at this stage should show tight, green buds opening into full flowers, and eventually fruit setting where the flower was. If a plant drops its flowers before fruit sets, check temperature swings, humidity, and whether pollinators or manual pollination is needed indoors. A dropped flower looks like a limp, browned blossom with nothing forming behind it.
The roots: the stage you mostly can't see (but still can document)
Roots are invisible in soil, but in water propagation, hydroponics, and clear-container terrariums you can actually photograph them. Healthy roots are white, bright, and slightly fuzzy from fine root hairs. Brown, slimy, or foul-smelling roots mean rot. Photographing roots through clear containers or when repotting gives you some of the most useful diagnostic data you'll ever have, so don't skip it.
What your plant's needs actually look like
Light, water, and nutrients each leave very specific visual fingerprints. Learning to read these is the core skill that turns a photo from 'my plant looks bad' into 'my plant needs X.' Here's what each one looks like in practice.
Light: too little vs. just right
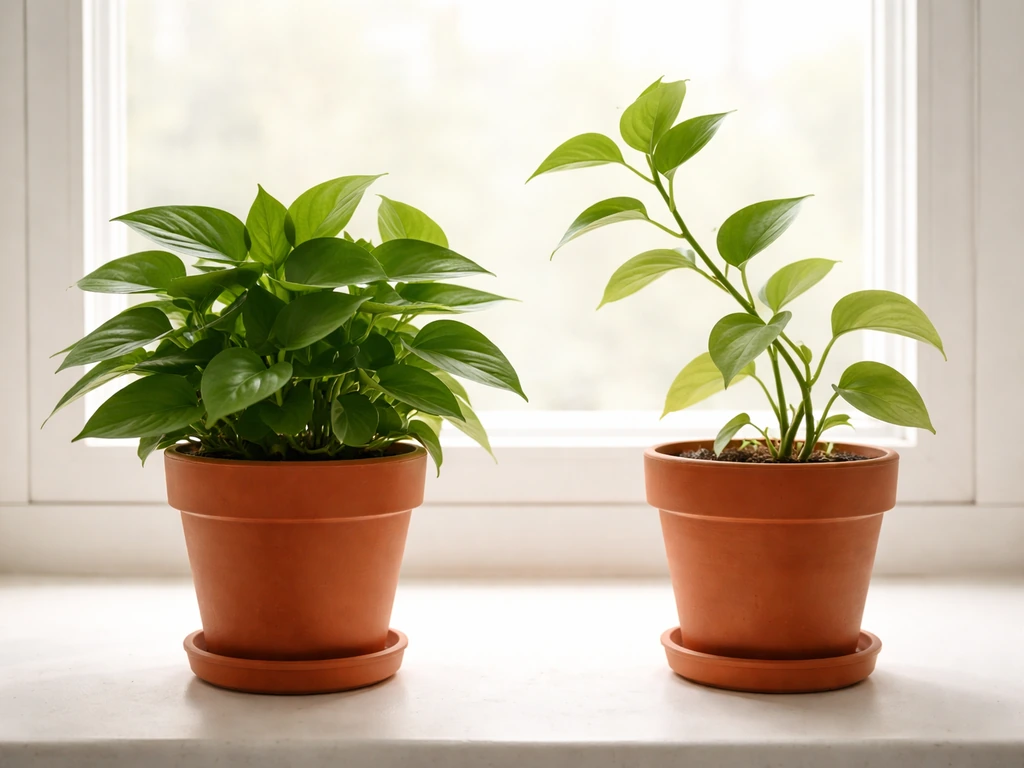
Adequate light produces compact, upright growth with deep green leaves and short internodes (the gaps between leaf nodes on the stem). Too little light, as mentioned above, triggers etiolation: long weak stems, small pale leaves, and a plant that's essentially sprinting toward a light source it can't reach. In photos, a well-lit plant looks stocky and full. An under-lit plant looks stretched and sparse. If your seedling photo matches the second description, your light source is too far away or too dim. A grow light 2 to 4 inches above seedlings is usually the right ballpark.
Water: overwatering and underwatering look different
Underwatering shows as wilting with dry, crispy edges and possibly curling leaves. The soil is bone dry and pulls away from the container edges. Overwatering is trickier because wilting can happen here too, except the soil is wet. The plant wilts not from thirst but because waterlogged roots can't absorb oxygen. Over time, overwatered plants develop yellowing lower leaves, and you may notice a condition called edema: small blister-like swellings on leaf surfaces, often on the undersides or margins of older leaves. These blisters form when roots absorb more water than leaves can release through transpiration. The fix is straightforward: let the soil dry out more between waterings, improve drainage, and if the air is warm while the growing environment is cool, that temperature mismatch makes edema worse.
Nutrients: what deficiency looks like by element
Nutrient problems almost always show up on leaves first, and the pattern of which leaves are affected tells you a lot. Mobile nutrients like nitrogen and potassium move from older leaves to new growth when supplies run low, so deficiency symptoms appear on older, lower leaves first. Immobile nutrients like calcium and iron stay where they are, so those deficiencies show up on new growth first. Use that rule of thumb every time you take a diagnostic photo: look at where the problem is showing up on the plant, not just what it looks like.
| Nutrient | Visual pattern | Where it starts | Quick fix |
|---|---|---|---|
| Nitrogen (N) | Uniform yellowing of whole leaves | Older/lower leaves first | Balanced liquid fertilizer or diluted fish emulsion |
| Magnesium (Mg) | Interveinal chlorosis: yellow between veins, green midrib stays | Older leaves, can progress to reddish-purple blotches and edge necrosis | Epsom salt solution (1 tsp per gallon of water) |
| Potassium (K) | Brown scorching and curling at leaf tips and margins | Older/lower leaves first | Potassium-rich fertilizer, correct pH so K is available |
| Calcium (Ca) | Distorted or dead new growth, blossom end rot in tomatoes | Newest leaves first | Calcium supplement, consistent watering to aid uptake |
| Iron (Fe) | Interveinal chlorosis but on new leaves | Newest leaves first | Chelated iron supplement, check pH is not too high |
Using photos to diagnose common problems fast
This is where having a photo library of your plants becomes genuinely powerful. When something looks wrong, a clear photo taken close-up in natural light gives you something concrete to match against known symptoms. Here are the most common problems and exactly what they look like.
Damping-off in seedlings
Damping-off is a fungal problem that hits seedlings hard and fast. It looks like the blank" rel="noopener noreferrer">seedling is healthy one day and then suddenly collapsed the next, with a pinched, water-soaked or mushy tan area at the base of the stem right at soil level. The stem essentially rots through. Once you see it in one seedling in a tray, neighboring seedlings are at high risk because the fungus spreads in the wet conditions that caused the original outbreak. The fix is to stop overwatering immediately, improve airflow, and remove affected seedlings. MSU Extension advises avoiding overwatering and limiting frequent, light waterings to help reduce damping-off risk avoid overwatering and limit frequent, light waterings. There's no reversing damping-off once it hits, so prevention (not keeping seedlings soaking wet) is everything.
Fungus gnats and root damage
If you see tiny flies hovering around your soil and your plants seem to be stalling or stunted for no obvious reason, fungus gnats are likely the culprit. The adults are mostly harmless, but the larvae, which are pale and worm-like and live just below the soil surface, chew through roots in their early stages. Seedlings and young plants are especially vulnerable. A photo of the soil surface won't show you the larvae unless you dig a bit, but the clue is the combination of slow growth, gnats flying up when you water, and moist, organically rich soil. Let the top inch or two of soil dry out completely between waterings to break the cycle.
Hydroponic root rot
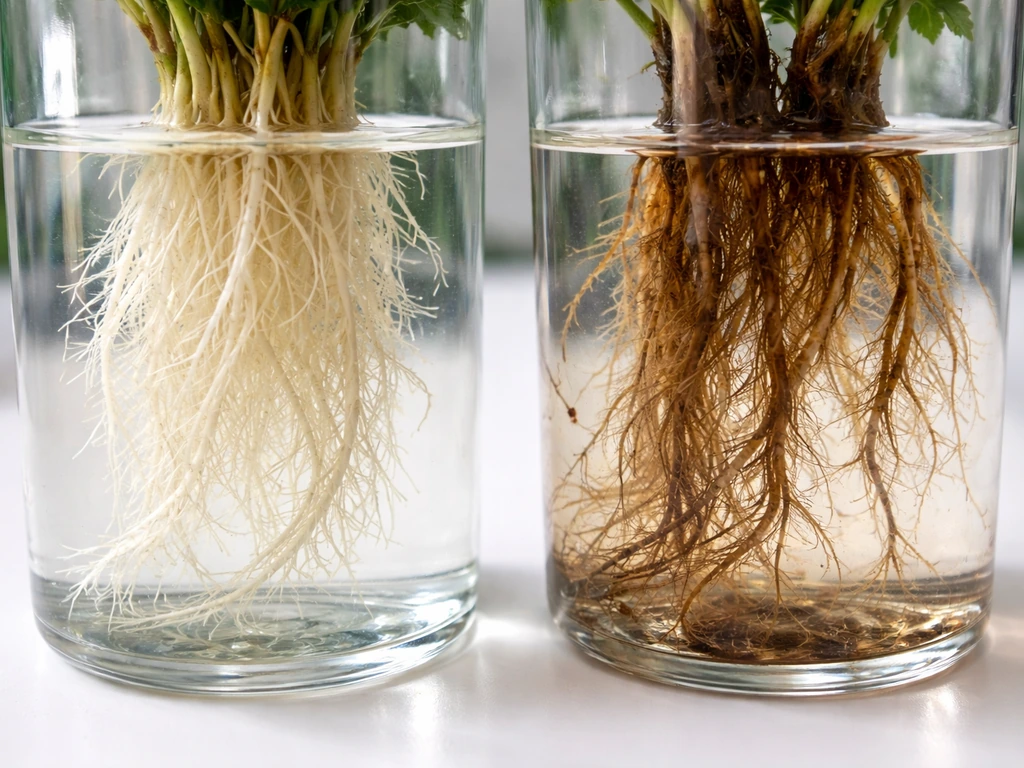
In hydroponics, healthy roots look like white, slightly fuzzy threads. Root rot shows up as brown, slimy roots with a distinctly foul smell. In early stages, you might notice just the tips going brown while leaves above still look okay. By the time the whole root mass is brown and clumped together and the plant is wilting, you're in advanced rot territory. The cause is almost always low dissolved oxygen around the roots, sometimes compounded by algae blooms that consume oxygen as they grow and decompose. Fix it by adding an air stone and pump if you don't have one, reducing light exposure to the nutrient reservoir to stop algae growth, and replacing the nutrient solution with fresh, oxygenated water.
Terrarium mold and condensation problems
Terrariums create their own microclimate, and when that tips out of balance, you'll see it quickly. White fuzzy mold on soil or plant surfaces means humidity is too high and airflow is too low. Constant heavy condensation on the glass (so thick you can't see the plants) is the same signal. The fix is to crack the lid or remove it for a few hours until the condensation clears, then replace it. If mold keeps coming back, leave the lid cracked slightly as a permanent adjustment. Remove any decaying plant matter immediately, since it's feeding the mold. Algae (green film on glass or soil) is also a sign of too much light hitting the moisture layer. Wipe it off and reduce direct sun exposure.
Setting up simple grow trials in four environments
One of the best things you can do as a grower is run a side-by-side comparison of the same plant across different growing setups. It teaches you more in four weeks than you'd learn from reading for months, and the photos you take become your own personalized reference guide. Here's how to set up a basic trial in each environment.
Soil trial
Start with a fast-germinating seed like basil, radish, or bean in a small pot with good-quality potting mix. Plant two or three pots: one near a bright window, one in a dimmer spot, and one under a grow light. Water when the top inch of soil feels dry. This gives you a live comparison of how light changes growth rate and appearance, which is one of the most educational things you can photograph. Label each pot with date planted and light condition so your photos are organized.
Water/cuttings trial
Take cuttings from a pothos, coleus, or mint plant (about 4 inches long with a few leaves) and place them in clear glasses of plain water. Change the water every few days to keep oxygen levels up. You'll see roots emerge within one to two weeks, and a clear glass lets you photograph root development as it happens. Healthy water roots look slightly translucent and delicate compared with soil roots, and they can be surprisingly beautiful in photos. This is also the simplest possible way to watch a plant grow from almost nothing.
Hydroponics trial
A simple Kratky setup (a passive hydroponic method using a jar, net pot, and nutrient solution with no pump required) is the lowest-barrier way to try hydroponics. Use a dark or opaque container to block light from the reservoir, which prevents algae. Lettuce, spinach, or herbs work well. You'll want to photograph the roots every week when you top off the nutrient solution. The contrast between white healthy roots and the brown slimy version is extremely obvious and makes for the most useful diagnostic photos you'll ever take.
Terrarium trial
A small glass jar or fish tank with a lid works as a closed terrarium. Add a drainage layer (gravel or leca), a thin activated charcoal layer, and then potting mix. Plant small humidity-loving plants like ferns, moss, or peperomia. Close the lid and watch the water cycle: condensation on glass in the morning, clearing by afternoon, and back again. Photograph it daily for the first week. That cycle is the visual proof that the terrarium is self-sustaining. If condensation never appears, the system is too dry. If it never clears, it's too wet.
How to track growth week by week with a photo plan
A consistent photo routine turns your growing setup into a real data set. You don't need fancy equipment: your phone camera is completely sufficient. What you do need is consistency in how you take the shots.
- Pick two fixed angles for every plant: one front-facing shot showing the whole plant, and one top-down shot showing the newest growth and overall leaf spread.
- Place a ruler, coin, or index card next to the plant in every photo so you have an automatic scale reference to compare sizes week over week.
- Shoot at the same time of day, ideally in consistent natural light or under your grow light, to keep color rendering comparable across photos.
- Note the date, day since planting, watering schedule, and any fertilizer applied directly in your photo filename or a companion note. A photo without context loses half its value.
- Do a weekly close-up of at least one older leaf and one new leaf to catch early nutrient or pest symptoms before they spread.
- If you have clear containers (hydroponics, water cuttings, terrariums), include a root or reservoir shot every session.
After four weeks of doing this, flip through your photos chronologically. Growth patterns that were invisible day-to-day become obvious. You'll be able to see exactly when a problem started (the first photo where a leaf looked slightly off), what happened in the days before it (did you water more? change the light?), and how quickly the fix worked. That feedback loop is exactly how experienced growers develop intuition. You're just speeding up the process by making it visible.
Your quick visual checklist for each photo session
- Are the newest leaves a healthy dark green, or pale and yellow? (Pale new growth can point to iron or calcium deficiency, or simply low light.)
- Are lower leaves yellowing uniformly? (Check nitrogen and overall watering habits.)
- Are leaf edges or tips brown and crispy or scorched? (Check potassium and salt buildup from over-fertilizing.)
- Is there any interveinal chlorosis (yellow between veins, green veins)? (Points to magnesium on older leaves, iron on new leaves.)
- Are stems compact with short gaps between leaves, or stretched and floppy? (Light check.)
- Any blistering or swelling on leaf surfaces? (Edema from overwatering.)
- Any mushy or tan areas at the base of seedling stems? (Damping-off.)
- Are roots (if visible) white and firm, or brown, slimy, and smelly? (Root rot.)
- Any white fuzzy patches or green film on soil or glass? (Mold or algae in terrarium or overwatered soil.)
- Tiny flies hovering over soil and slow unexplained growth? (Fungus gnats.)
Growing plants is fundamentally a visual skill. The more you look, the faster you get at reading what you see. Keep your photos, build your personal reference library, and treat every problem as a data point rather than a failure. The growers who get really good at this aren't the ones who never kill plants. They're the ones who know exactly what went wrong and how to spot it earlier next time.
FAQ
How can I take how plants grow pictures that are actually comparable from week to week?
Use the same distance and angle each time, and include one “scale” reference (like the pot rim or a ruler edge). Also shoot one photo in natural light and one in the same grow-light setting if you use one, because color temperature shifts can make healthy green look yellowish.
What photo angles should I capture when I’m diagnosing problems with my plant?
Don’t rely on one single symptom photo. Take a wide shot (whole plant), a mid shot (leaf and stem area), and a close-up (affected tissue) so you can compare the pattern across leaves and whether the change is at new growth or older leaves.
What if my plant looks “off” in photos, but I’m not sure it’s an actual problem?
If the leaves look different colors but the plant is firm and growing steadily, it may be a normal variety change or lighting effect. Confirm by checking the growth location pattern (new growth vs older leaves) and whether new leaves match the old ones over the next 1 to 2 weeks.
How do I tell etiolation from a nutrient deficiency using pictures?
Etiolation can look similar to nutrient stress in photos (pale, small leaves), but the tell is structure. Etiolated plants usually have long gaps between nodes and a noticeably stretched stem, while nutrient issues typically show leaf discoloration patterns that start in older or newer leaves depending on which nutrient is lacking.
My plant looks wilted in photos, how do I know whether it’s under- or overwatering?
Start with the watering state before changing anything. If wilting happens with wet soil, treat it as overwatering and check drainage, root oxygen, and container mix first. If wilting happens with bone-dry soil, water thoroughly, then wait for new turgor to confirm the fix.
How can I confirm edema (water imbalance) rather than just leaf damage from something else?
For edema, look for blister-like swelling on older leaves and check whether the environment has warm air and cooler root-zone conditions. Take a close-up that includes the underside of leaves, since the bumps are often easier to spot there.
What should I photograph to be confident fungus gnats are the issue?
Fungus gnats can be caused by the same “too wet” conditions, but photos can mislead if you only photograph the plant. Capture the soil surface in addition to one top-down shot and note whether adults appear when you water, then check whether the top inch dries between waterings.
Is it safe to eat or use plants if the photos suggest root rot or damping-off?
Edible plants deserve extra caution. If you suspect rot, especially in hydroponics, stop using any visibly contaminated nutrient solution and do not taste or salvage compromised leaves. Replace the solution, improve aeration, and consider starting a clean cutting if the damage is advanced.
When leaves yellow, how do I decide whether it’s light, water, or nitrogen?
If only older leaves yellow, check nutrient mobility first, then rule out light and watering timing. If yellowing spreads while new growth stays green, it often points to nitrogen deficiency, but if the whole plant is pale and stretching, prioritize light and watering cadence before adding fertilizer.
My terrarium has recurring mold, what adjustments help most according to pictures?
If you see mold in a terrarium but it keeps returning after short ventilation, reduce inputs. Remove decaying plant matter, wipe surfaces, and slightly reduce the light intensity or duration. Persistent growth often means the system is too humid or too warm for the species you chose.
Can my phone camera settings affect how plants grow pictures and lead to misdiagnosis?
A lot of camera “help” can distort diagnosis. Avoid applying filters, HDR, or heavy sharpening, and keep exposure settings consistent. If you use auto mode, set a consistent focus area and try to prevent the camera from changing white balance between shots.
Should I track one plant with the same framing, or vary angles to get more detail?
Take one photo in the same spot each time (for example, “front view facing the window”) and one photo of the problem area. Over time, you will know your baseline, so the key comparison is before versus after, not which day the photo was taken.
What should I do if my germination photos show no sprout after a long time?
If nothing is visible after two weeks, check viability cues without guessing. Verify the seed was kept warm enough and not waterlogged, then do a quick germination test by moving a small batch to the best temperature range for that species and comparing photos daily.