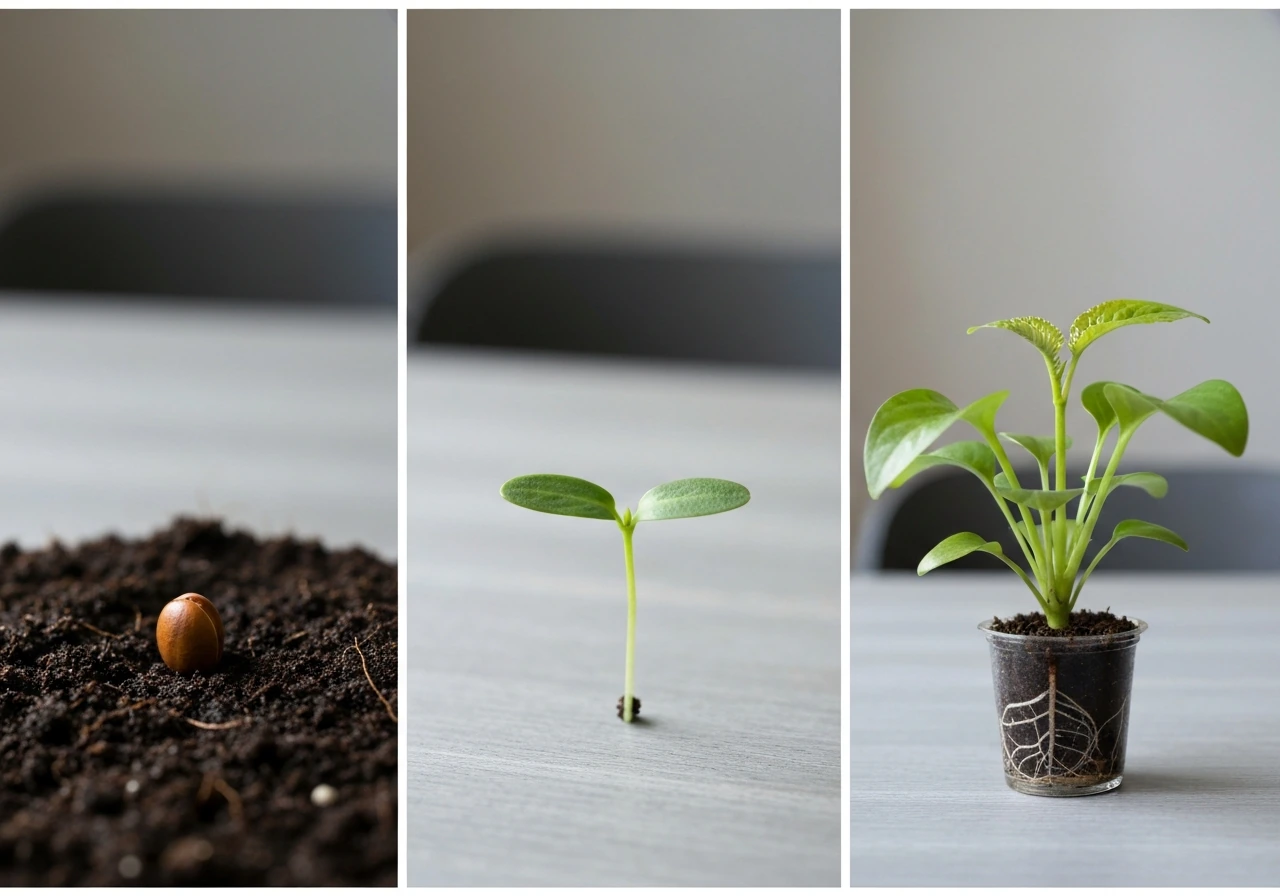
A plant grows by moving through a sequence of predictable stages: the seed absorbs water and cracks open, a root pushes down, a shoot pushes up, leaves unfurl and start capturing light, and the whole system kicks into a self-fueling loop of photosynthesis and growth. That's the short answer. The longer answer, including exactly what you need to do at each stage, is what the rest of this guide covers.
How Does a Plant Grow Step by Step: Beginner Guide

Marcus Holloway
6 Apr 2026
Plant growth basics in plain language
Plants are essentially self-building machines. They take in water, carbon dioxide from the air, light energy, and a handful of minerals from the growing medium, and they use those inputs to manufacture their own structure. Every leaf, stem, and root your plant grows was built from raw materials the plant collected itself. That's actually remarkable when you think about it.
The engine driving all of this is photosynthesis: light hits the leaves, the plant uses that energy to combine CO2 and water into sugars, and those sugars become the fuel and building blocks for new cells. This is why light is non-negotiable. Without enough of it, the plant literally cannot build itself. If you want a deeper look at the underlying biology before diving into the practical steps, how do plants grow breaks down the science in more detail.
Growth happens at very specific locations, not evenly across the plant. Roots extend from their tips, and stems lengthen from theirs. Understanding how do plants grow at their tips helps explain why you can pinch a stem to encourage bushiness, or why a root circling the bottom of a pot eventually strangles itself. The growing tips (called meristems) are where cell division happens, and everything behind them is essentially finished.
Step-by-step: from seed to growing plant
Here's what actually happens inside and outside the seed from day one. Each step builds directly on the last, so skipping conditions at an early stage usually creates problems you won't see until weeks later.
Step 1: Imbibition (the seed drinks)
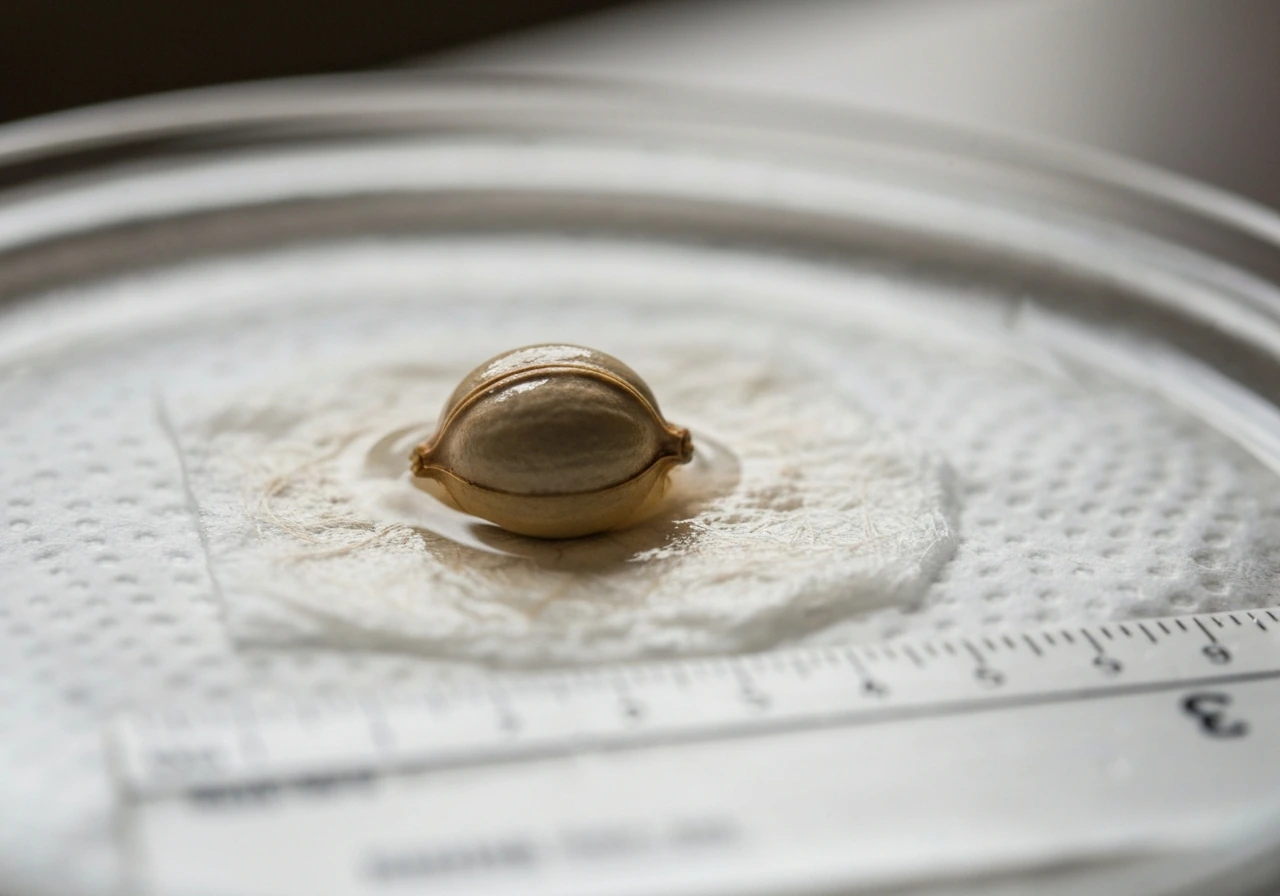
The moment a dry seed contacts moisture, it starts absorbing water through its coat in a process called imbibition. The seed swells visibly. This rehydration is what flips the metabolic switch back on after dormancy. Enzymes that were suspended reactivate, respiration rates climb, and the seed starts converting stored starch into usable energy. You don't need to do anything special here except keep the seed consistently moist, not soaking wet, just persistently damp. A soggy seed rots before it can germinate.
Step 2: Radicle emergence (the root appears first)
Once internal cell division and enlargement build up enough pressure, the seed coat ruptures and the radicle, the embryonic root, pushes out first. This isn't random. The root always comes before the shoot because the plant needs to anchor itself and start pulling in water and minerals before it can afford to invest in stem and leaf development. At this stage, temperature matters a lot. Most common vegetables and houseplants germinate best between 65 and 75°F. Cool-season crops like lettuce and spinach prefer 55 to 70°F, and soil temperatures above 80°F can actually suppress germination and push seeds toward dormancy. Expect germination to take anywhere from 3 to 15 days depending on the species and your conditions.
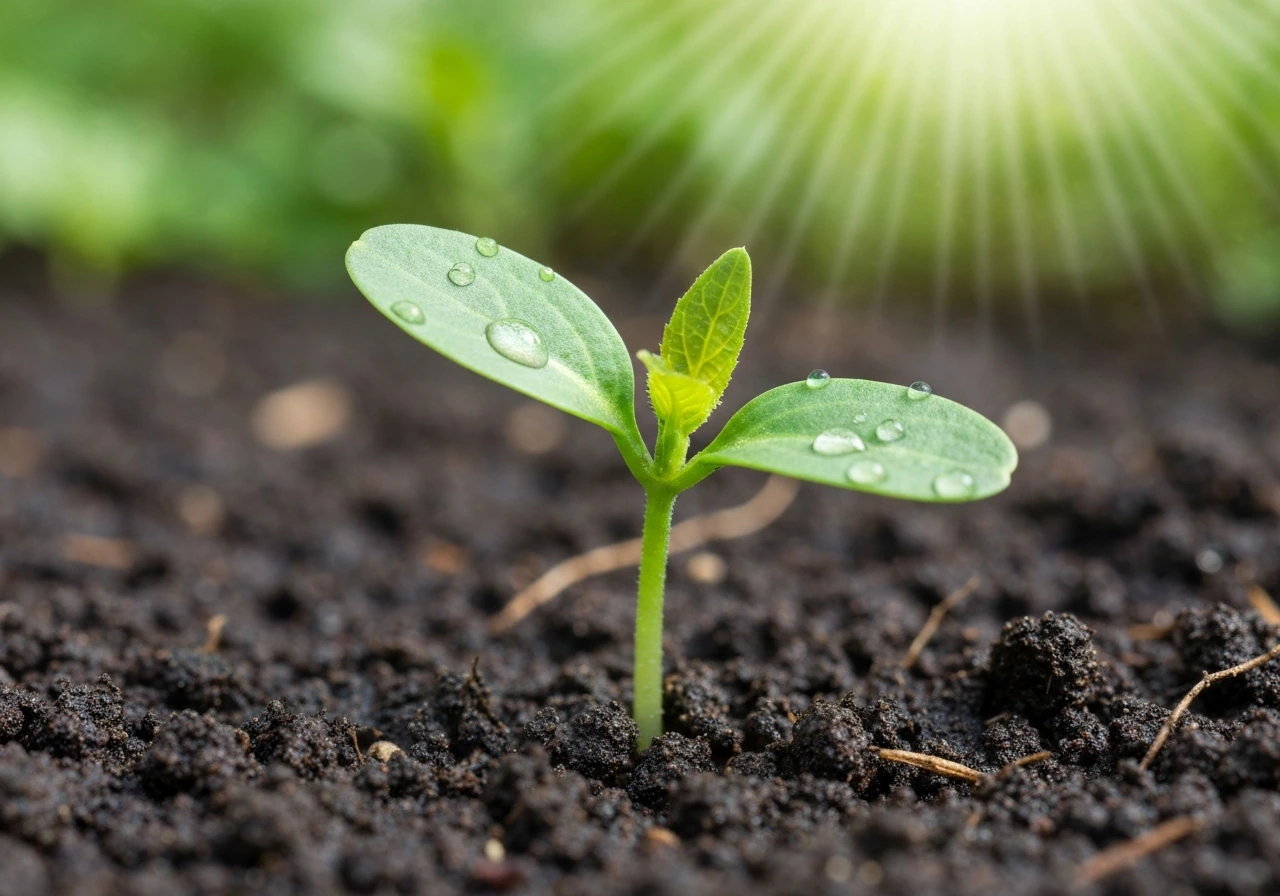
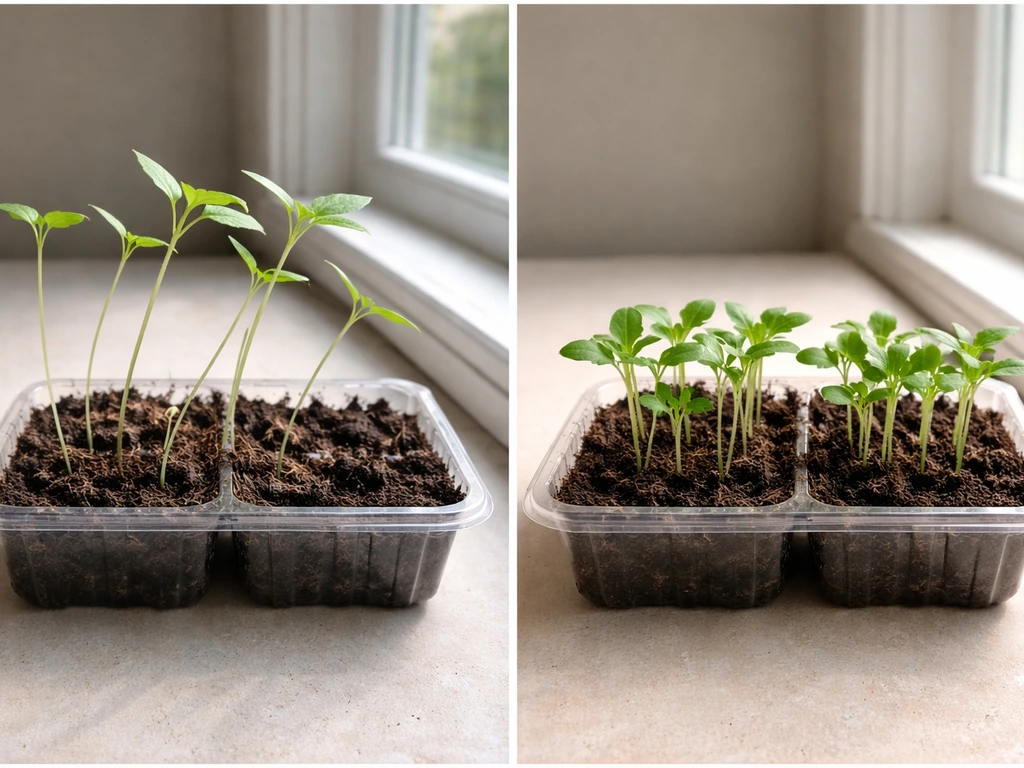
Step 3: Shoot emergence and the seedling stage
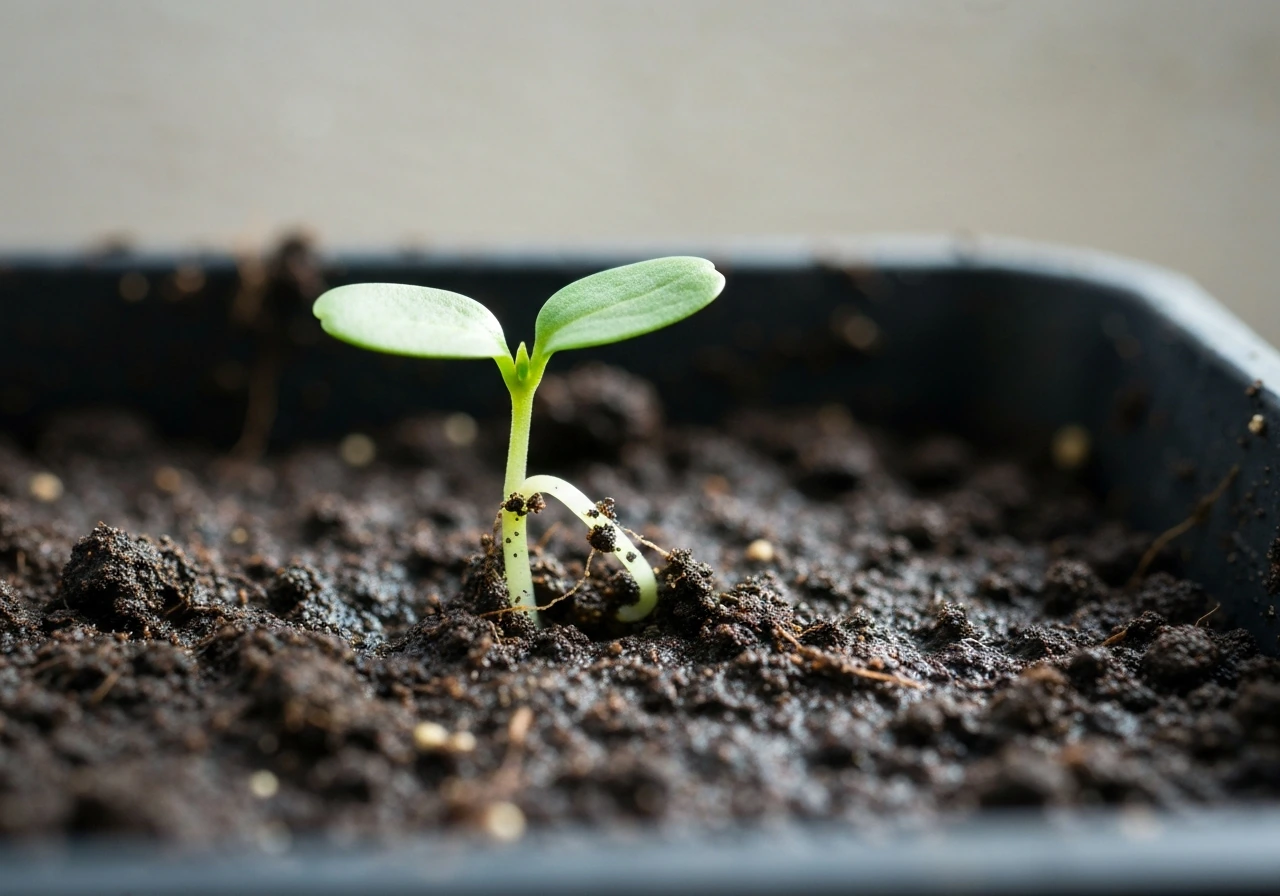
After the radicle establishes a foothold, the plumule (the shoot) pushes upward. In seed germination, the plumule develops into the shoot that produces leaves and stems above ground (Khan Academy) the plumule (the shoot) pushes upward.
The first leaves you see are called cotyledons, and they're pre-formed in the seed. They're not true leaves; they're energy reserves that feed the seedling until real leaves can photosynthesize. True leaves come next, and this is when the plant shifts from running on stored reserves to producing its own food. At this point, move your seedling to a light source.
If it doesn't get enough light immediately, it will stretch tall and thin in a desperate search for it, a problem called etiolation, and that early lankiness is hard to recover from.
Step 4: Root system establishment
While you're watching the shoot grow upward, the roots are quietly building an extensive network downward and outward. Healthy root development is the foundation for everything that comes after. A plant with a weak root system will struggle with drought stress, nutrient uptake, and structural stability. Don't rush to upsize your pot at this stage. Keeping a seedling in a slightly snug container encourages root density before you give it more space to fill.
Step 5: Vegetative growth (leaves, stems, branching)
This is the stage most people picture when they think of "growing a plant." The plant produces new leaves on a regular schedule, stems elongate, and the plant builds out its photosynthetic surface area. Understanding how do plants grow leaves helps you recognize what's normal (alternating leaves, progressive sizing) versus what's a symptom of stress (misshapen leaves, very small leaves, long gaps between nodes).
Step 6: Flowering and fruiting (when relevant)
Not every plant you grow will flower, but for those that do, the trigger is usually day length (photoperiod), temperature, or plant maturity. Day length, or photoperiod, is the number of hours of light per 24-hour period, and UMN Extension notes common seedling targets of about 16, 18 hours per day under grow lights day length (photoperiod). Some plants flower when days get shorter (short-day plants), others when days lengthen (long-day plants), and others don't care about day length at all. After pollination, fertilization occurs and fruit or seed development begins, completing the cycle. If you're growing vegetables, this is the payoff stage, and it often requires slightly different care than the vegetative stage, sometimes less nitrogen and more phosphorus.
If you're a visual learner and want to see the progression mapped out, looking at how plants grow pictures can make each stage click in a way that text descriptions sometimes don't.
What plants need: light, water, air, nutrients, and temperature
Every growth problem traces back to one of these five inputs being off. Nail these, and you'll grow healthy plants. Mess one up consistently, and no amount of extra care will compensate.
Light
Intensity and duration both matter. Most vegetable seedlings need 14 to 16 hours of light per day under grow lights, or a south-facing window with several hours of direct sun. Houseplants vary widely, from low-light tolerant pothos that survive in a dim corner, to succulents that need 6 or more hours of direct sun. The most common beginner mistake is overestimating how much light an indoor spot actually provides. A room that feels bright to your eyes might be delivering only a fraction of what a plant needs. If your plant is stretching toward the light or producing very small leaves, move it closer to the source before trying anything else.
Water
The goal is consistent moisture, not constant wetness. Stick your finger an inch into the soil. If it's still damp, wait. If it's dry, water thoroughly until it drains from the bottom. The schedule will change with the seasons, pot size, plant size, and your home environment. Seedlings need more frequent checking because their shallow roots dry out faster. Established plants in larger pots can often go longer between waterings. The number one killer of houseplants is overwatering, not underwatering. An underwatered plant usually bounces back. An overwatered one rots at the roots before you even notice.
Air and gas exchange
Plants breathe CO2 in through tiny pores in their leaves called stomata, and they release oxygen and water vapor. If the air around your plant is completely stagnant, gas exchange slows. A gentle fan on a low setting improves air circulation, reduces fungal problems, and actually strengthens stems (a little wind resistance encourages thicker stems). For indoor grows and grow tents, air circulation is not optional. Also, the roots need oxygen. Compacted, waterlogged soil cuts off root oxygen supply, which is why well-draining soil matters as much as watering correctly.
Nutrients
The three main nutrients you'll see on any fertilizer label are nitrogen (N), phosphorus (P), and potassium (K). Nitrogen drives leafy, green vegetative growth. Phosphorus supports root development and flowering. Potassium helps overall plant health and disease resistance. For most beginners, a balanced liquid fertilizer (something like 10-10-10) applied every two to four weeks during active growth is all you need. Fresh potting mix usually contains enough nutrients for the first few weeks, so don't fertilize seedlings immediately after potting or you risk burning delicate roots.
Temperature and humidity
Most common plants thrive in the same temperature range comfortable for humans: 60 to 80°F during the day, with a slight drop at night. Humidity matters too, especially for tropical houseplants that prefer 50 to 70% relative humidity. Most homes run drier than that, particularly in winter with heating systems running. A small humidifier near your plant shelf, or grouping plants together, raises local humidity noticeably.
Growing in different mediums: soil, water, hydroponics, and terrariums
The steps above apply regardless of where you grow, but each medium has its own setup and maintenance rhythm. Here's how to approach each one practically.
Growing in soil
- Choose a well-draining potting mix, not garden soil, which compacts too much in containers. Add perlite (about 20% by volume) if drainage feels slow.
- Fill your pot to about an inch below the rim. Make a small hole, place your seed or seedling, and firm the soil gently around it.
- Water thoroughly until water drains from the bottom holes. This settles the soil and ensures even moisture.
- Place in appropriate light immediately. Don't let a seedling sit in the dark for even a day while you figure out placement.
- Check soil moisture every 1 to 2 days for seedlings, every 3 to 5 days for established plants. Adjust based on what you feel.
- Start fertilizing 3 to 4 weeks after potting, once the plant is actively growing and the initial nutrients in the mix are depleted.
Water propagation and water growing
- Select a healthy cutting with at least one node (the bump on the stem where roots will emerge). Pothos, philodendron, and coleus root easily this way.
- Remove any leaves that would sit below the waterline to prevent rot.
- Place the cutting in a clear glass or jar of room-temperature water, with the node submerged and leaves above the water.
- Position in bright, indirect light. Direct sun heats the water and promotes algae growth.
- Change the water every 5 to 7 days to keep oxygen levels up and prevent bacterial buildup.
- Roots typically appear within 1 to 3 weeks. Once roots are 1 to 2 inches long, the cutting can be moved to soil or kept in water long-term with liquid fertilizer added at quarter strength.
Hydroponics
Hydroponics replaces soil with a nutrient-rich water solution delivered directly to the roots. The plant grows faster than in soil because it doesn't have to expend energy searching for nutrients. A basic setup for beginners involves net pots filled with an inert growing medium (like clay pebbles or rockwool), a reservoir of nutrient solution below, and either passive wicking or a small pump to deliver that solution to the roots.
- Mix a hydroponic nutrient solution following the manufacturer's directions. Target an EC (electrical conductivity) of 1.2 to 2.0 mS/cm for most vegetables, starting on the lower end for seedlings.
- Check and adjust pH to 5.5 to 6.5, the range where nutrients are most available to roots. A basic pH meter and pH up/down solutions are inexpensive and essential.
- Keep the reservoir topped up and change the full solution every 1 to 2 weeks to prevent nutrient imbalances.
- Monitor roots visually. Healthy hydroponic roots are white or cream-colored. Brown, slimy roots indicate root rot, usually caused by light leaks warming the water or oxygen deprivation.
- Provide 16 to 18 hours of light for most leafy crops. Hydroponic plants are often grown under LED grow lights with no natural light at all.
Terrariums
A terrarium is a contained or semi-contained glass environment, either sealed (for moisture-loving plants like mosses and ferns) or open-top (for succulents and cacti). The sealed version creates its own internal water cycle: moisture evaporates, condenses on the glass, and drips back down. It's almost self-watering once established.
- Layer the bottom of the container with drainage material: an inch of gravel or sand, then a thin layer of horticultural charcoal to keep the environment from turning sour.
- Add a layer of appropriate growing medium: moisture-retaining peat or sphagnum moss for sealed setups, gritty cactus mix for open setups.
- Plant small, slow-growing species appropriate for your container size. Overcrowding is the most common terrarium mistake.
- For sealed terrariums, add water until you see slight condensation on the glass during the day, then seal it. If condensation covers more than half the glass, crack the lid for a day to release some moisture.
- Place in bright, indirect light. Direct sun through glass creates intense heat that will cook the plants.
- Open terrariums need watering like any other pot. Sealed terrariums may need no watering for months once balanced correctly.
Do this today: your setup checklist
Whether you're starting from a seed or a cutting, this is the practical sequence to follow right now. Don't wait until you've gathered every possible piece of equipment. Start with what you have and fill in gaps as you go.
- Pick your method: soil pot, water glass, hydroponic starter kit, or terrarium. Choose the one that matches what you already have on hand.
- Get your growing medium ready: fresh potting mix for soil, clean tap water left out overnight (to off-gas chlorine) for water or hydroponics, layered drainage setup for terrariums.
- Choose your plant: for beginners, pothos, basil, lettuce, or a fast-germinating radish are all forgiving and quick to show results.
- Identify your light situation before you plant. Measure the spot with your hand shadow: sharp shadow means enough direct light, soft shadow means indirect light, no shadow means too dim for most plants.
- If natural light is insufficient, set up a basic LED grow light on a timer: 14 to 16 hours on, 8 to 10 hours off.
- Plant your seed or cutting now. Label it with the date so you can track germination timing.
- Set a phone reminder to check moisture in 24 hours. Build the habit of daily observation from day one.
- Note down your room temperature. If it's below 60°F or above 80°F, address that before expecting good germination results.
When things go wrong: fixing problems as they grow
Plants communicate through their appearance. Once you know what to look for, diagnosis gets fast. Here are the most common beginner problems and exactly what to do about them. And if you want a broader scientific reference to cross-check symptoms against what's happening biologically, the foundational overview in how do plants grow wikipedia is a useful complement to hands-on observation.
| Symptom | Most Likely Cause | What to Do |
|---|---|---|
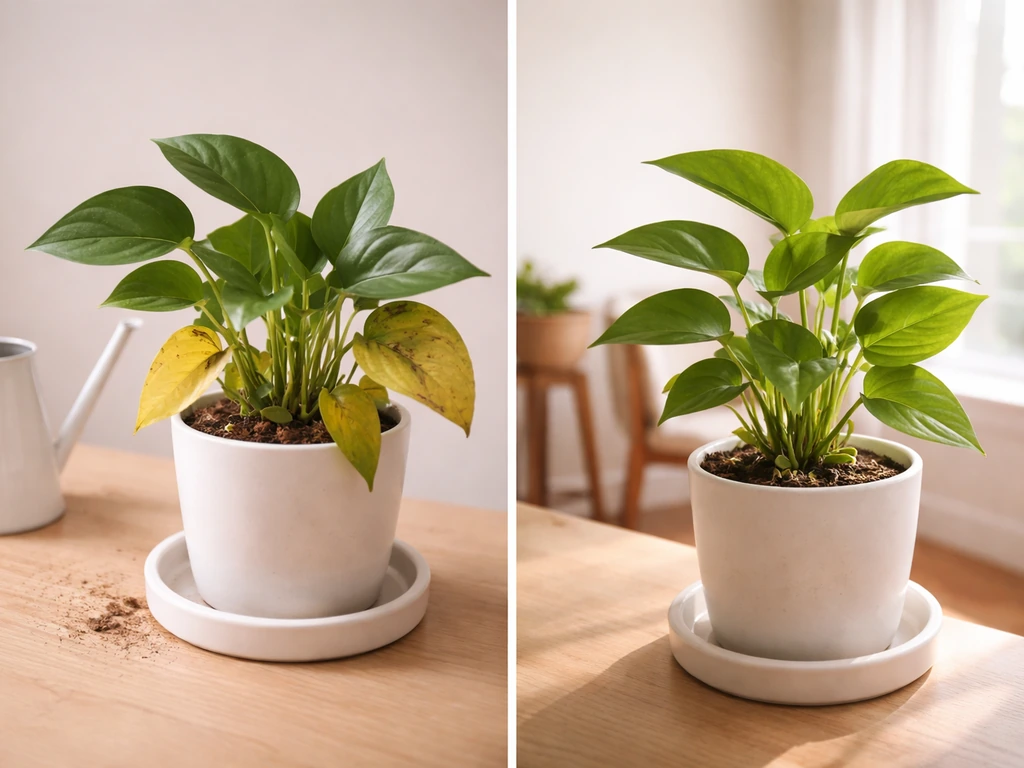
| Yellowing lower leaves | Overwatering or nitrogen deficiency | Check soil moisture before watering again; if soggy, let dry out fully. If dry, add balanced liquid fertilizer. |
| Tall, thin, stretched stems (etiolation) | Insufficient light | Move plant 6 to 12 inches closer to the light source, or add a grow light immediately. |
| Wilting despite moist soil | Root rot from overwatering | Remove from pot, trim any black or mushy roots, repot in fresh dry mix, reduce watering frequency. |
| Crispy brown leaf edges | Low humidity or underwatering | Increase watering frequency, mist leaves, or add a humidifier nearby. |
| Very small new leaves | Nutrient deficiency or root-bound container | Fertilize if you haven't recently; check if roots are circling the pot and repot one size up if so. |
| Slow or no germination after 2 weeks | Temperature too low, seeds too deep, or old seed stock | Check soil temperature (target 65 to 75°F), confirm seeds are planted at correct depth (usually 2x the seed diameter), and test viability with a new seed packet. |
| Pale green or yellow new growth (not old leaves) | Iron or magnesium deficiency, or pH problem in hydroponics | In soil, add a micronutrient fertilizer. In hydroponics, check and correct pH to 5.5 to 6.5. |
| Dropping leaves suddenly | Temperature shock or draft | Move plant away from air vents, cold windows, or heaters and keep temperature stable. |
One honest truth about troubleshooting: most beginner plant problems are caused by watering and light, in that order. Before you buy any product or try any intervention, rule those two out first. Check the light with your hand shadow test, check the soil moisture with your finger, and only then start looking at other variables. You'll solve the problem faster and spend less money doing it.
Growing plants is a skill you build by paying attention. Every dead seedling teaches you something about your specific environment, your watering habits, or the conditions in your space. The biology is consistent and predictable once you understand it, and the more you observe your plants, the faster you'll catch small problems before they become big ones. Start today, watch closely, and adjust as you go.
FAQ
How long should I expect germination to take, and what should I do if it is stalled?
If your seed is still firm and shows no root after the typical window for its type, first verify temperature and moisture level in the soil. Warm up cool soil to the recommended range, keep the growing medium consistently damp (not waterlogged), and be careful not to “check” too often because drying and rewetting can reset germination. If it is past the upper end of the range, discard the batch and start fresh rather than letting old seeds rot.
My plant is getting tall and thin indoors, how do I know if it is too little light versus something else?
Don’t judge the seedling’s “height” as a light problem until you compare it to its stem thickness and leaf size. Etiolation usually comes with thin, pale stems and small or widely spaced leaves. If growth is spindly, move the plant closer to the light, increase daily light duration, and keep the light source at a consistent distance so you do not create repeated stretching cycles.
When should I move a seedling to a larger pot if it is doing well?
A snug container is helpful only for a short window. Once roots circle densely, you will see slowed growth despite adequate light, and you may notice water running straight through without wetting the root ball. At that point, upsize one pot size (not several sizes at once) and switch to a watering rhythm that matches the new root volume, usually less frequent than with very small pots but more total water per session.
What is the best way to water step by step so I do not overwater?
Stick with “moist, then drain” rather than a strict schedule. A simple rule is to water thoroughly, let excess drain, then recheck after the top inch dries. Seedlings with shallow roots need more frequent checks, but established plants in larger pots can handle longer gaps. Overwatering risk goes up when the pot stays wet for days, especially in low light or cool temperatures.
Should I fertilize immediately after potting, or can it wait?
Yes, but only at the right stage. Fresh potting mix often includes nutrients for the first few weeks, and seedlings have delicate roots that can burn with fertilizer. Wait until the plant has true leaves and is actively growing, then use a diluted, balanced fertilizer and reduce concentration if growth is slow or leaves show dark tips or curling.
How much air circulation do I actually need indoors, and can too much be harmful?
Air movement helps with both disease prevention and stem strength, but it should not be a strong blast. Use a gentle fan or mild circulation so leaves are not constantly flapping and the plant is not drying out too quickly. If you see crispy edges or soil drying faster than usual, lower the fan intensity or increase humidity while keeping air exchange.
Why is my plant not flowering yet even though it seems healthy?
Most of the time, poor flowering is due to the plant not meeting its specific trigger, such as day length or temperature. Second, it may be in the wrong growth phase, flowering requires maturity, and some plants need a rest period. If you fertilize heavily with nitrogen, vegetative growth can dominate. Check the plant’s flowering requirements and adjust light timing and temperature before changing fertilizers.
If I grow hydroponically instead of soil, what is the step-by-step difference that beginners miss?
Hydroponics changes the “how” but not the “what”: roots still need oxygen and the plant still needs correct nutrient balance. Use the recommended nutrient concentration and pH range for your crop, and do not let the reservoir run warm or stale for long periods. If growth stalls or roots look brown or slimy, clean the system and refresh solution rather than adding more fertilizer.
How does the growth process differ when starting from a cutting instead of a seed?
Cuttings can root without a seed, but you still need the same core inputs, moisture control, adequate light, and oxygen for the stem base or developing roots. Keep the cutting consistently damp, avoid soaking the stem, and give bright, indirect light or gentle direct light depending on the species. For some plants, rooting hormones improve success, but the biggest factor is preventing rot at the base.
My plant looks unhealthy, how do I troubleshoot without guessing?
Watch for the specific pattern before changing everything. Yellowing can mean overwatering, nutrient deficiency, or older leaves naturally aging, and leaf spots can come from watering on foliage or low airflow. Use your first two checks, light adequacy and soil moisture, then change one variable at a time for a week so you can tell what helped.