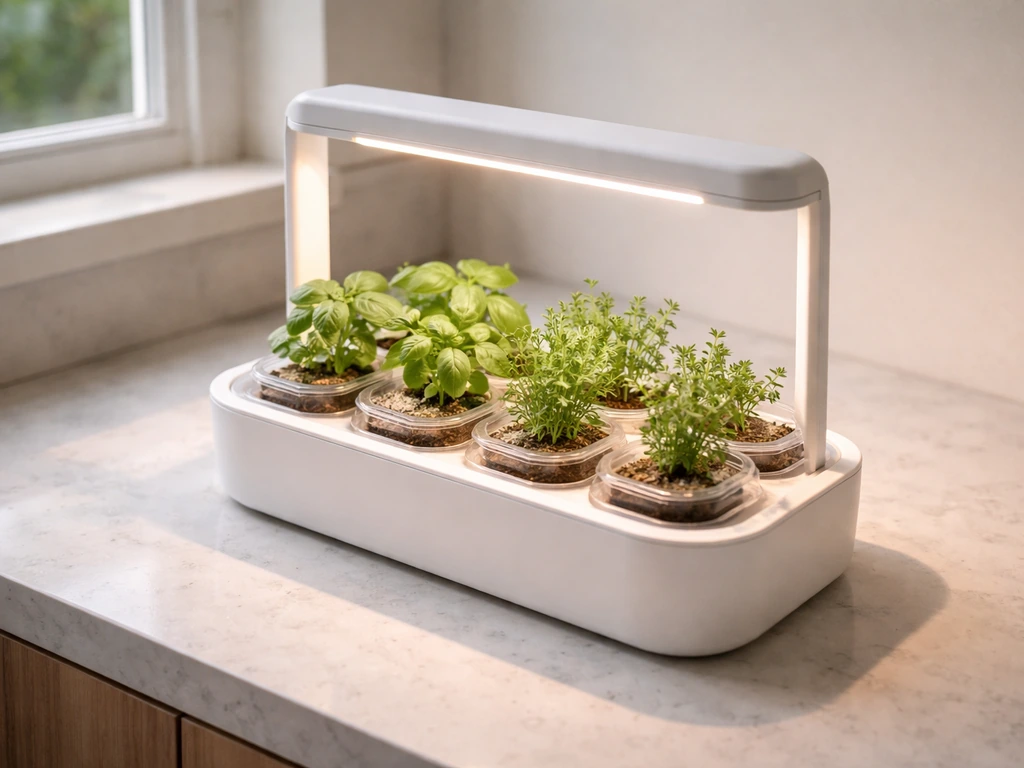
To plant a Click & Grow pod, drop it into the plastic cup, tapered end down, snap it into the garden, fill the reservoir until the float aligns with the lid surface, cover each pod with its transparent dome, and plug in. That is the whole planting step. The system handles watering automatically from there, and the built-in LED lamp runs on a 16-hour-on, 8-hour-off timer so you do not need to think about light either. Most herbs and greens sprout within one to three weeks.
How to Plant Click and Grow: Step-by-Step Indoor Herbs

Marcus Holloway
3 May 2026
What Click & Grow is and what you need to start
Click & Grow is a self-contained indoor growing system built around three things: a water reservoir, a wicking system that pulls water up into the soil pods, and an LED grow light on an automatic timer. You do not add liquid nutrients or measure pH. Each plant pod comes pre-loaded with a specially formulated growing medium that already contains the nutrients the plant needs. Your job is to keep water in the tank and let the system do its thing.
The most popular models are the Smart Garden 3 (three pods, 1.5-liter tank), the Smart Garden 9 (nine pods, 4-liter tank), and the larger Click & Grow 25 (twenty-five pods, 8-liter tank with two 16W LED lamps). Click & Grow lists the Smart Garden 3 water tank capacity as 1.2 L (0.32 US gal) 1.5-liter tank. There is also the HydroVase, a semi-transparent vase format with a magnetic light connection, and the Smart Flowerbed for outdoor-adjacent setups. If you are just starting out, the Smart Garden 3 or 9 are the easiest entry points.
Here is what you need before you begin:
- A Click & Grow device (Smart Garden 3, 9, Click & Grow 25, or another model)
- Compatible Click & Grow plant pods (sold separately or included in bundles)
- Tap water at room temperature
- A flat surface within reach of a power outlet
- Optionally, the Click & Grow app on your phone for plant-specific tracking tips
One thing worth knowing upfront: pods perform best within one year of purchase. If your pods have been sitting in a drawer for a while, check the date printed on the packaging. Old pods can still germinate, but your success rate drops noticeably after the one-year mark.
Unboxing and setting up your device
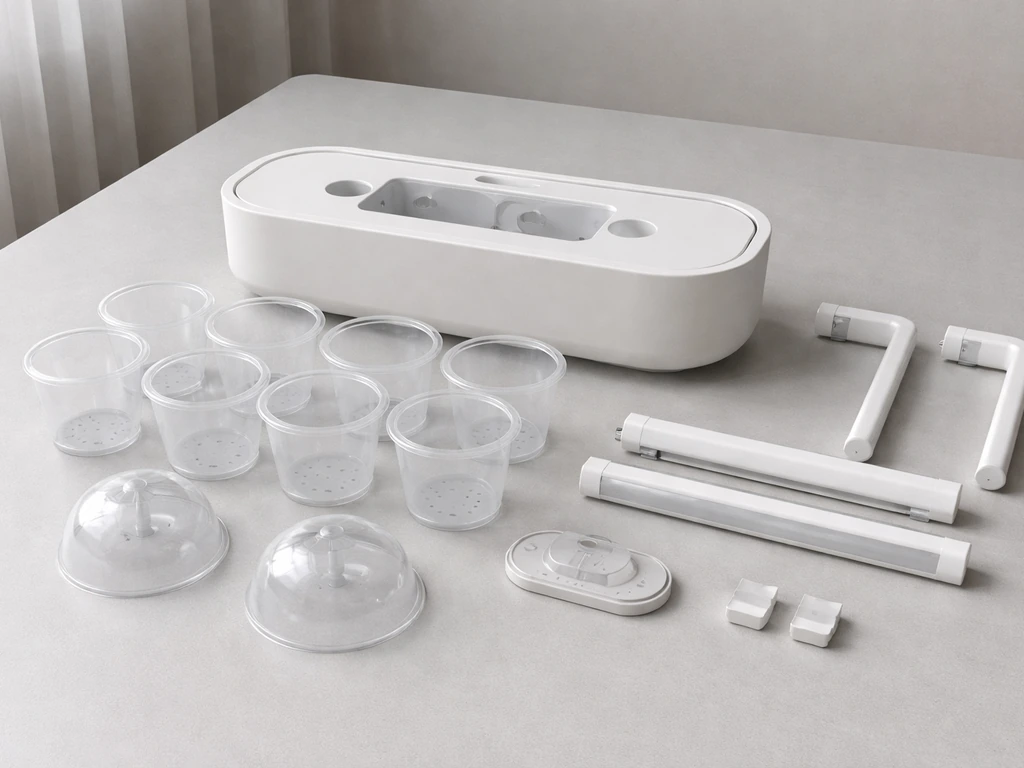
Setup is quicker than most people expect. Pull everything out of the box and identify the main components: the garden body (which contains the water tank), the plastic cups that sit in each pod slot, the lamp arm and LED unit, the U-shaped lids, the transparent germination domes, and the power cord.
Placement and light positioning
Put the garden on a flat, stable surface near an outlet. The built-in lamp provides everything the plants need, so you do not need a sunny windowsill, but you do want to avoid placing the garden right next to a south-facing window in summer because excessive external heat can stress plants. The ideal room temperature is 18 to 24°C (64 to 75°F); the Click & Grow 25 specifies a slightly narrower sweet spot of 20 to 24°C (68 to 75°F).
Attach the lamp arm according to your model's instructions. For the Smart Garden 9, the arm clips into the garden body. For the Click & Grow 25, the setup involves more assembly and there is a downloadable PDF manual worth printing before you start. Once the lamp is positioned, it runs automatically, so you will not need to adjust it daily.
First water fill
Before inserting pods, fill the reservoir. The Smart Garden 3 takes about 1.3 liters (44 oz) and the Smart Garden 9 takes about 4 liters (135 oz). Pour water in through the refill opening after removing the green sticker that covers it (this sticker is a shipping seal, not a feature). Fill until the water level float rises to align with the garden's lid surface. Do not overfill. If the float sits higher than the lid surface, you have added too much water, which can cause root rot and kill seedlings before they have a chance to establish.
Planting the pods: the exact Click & Grow workflow
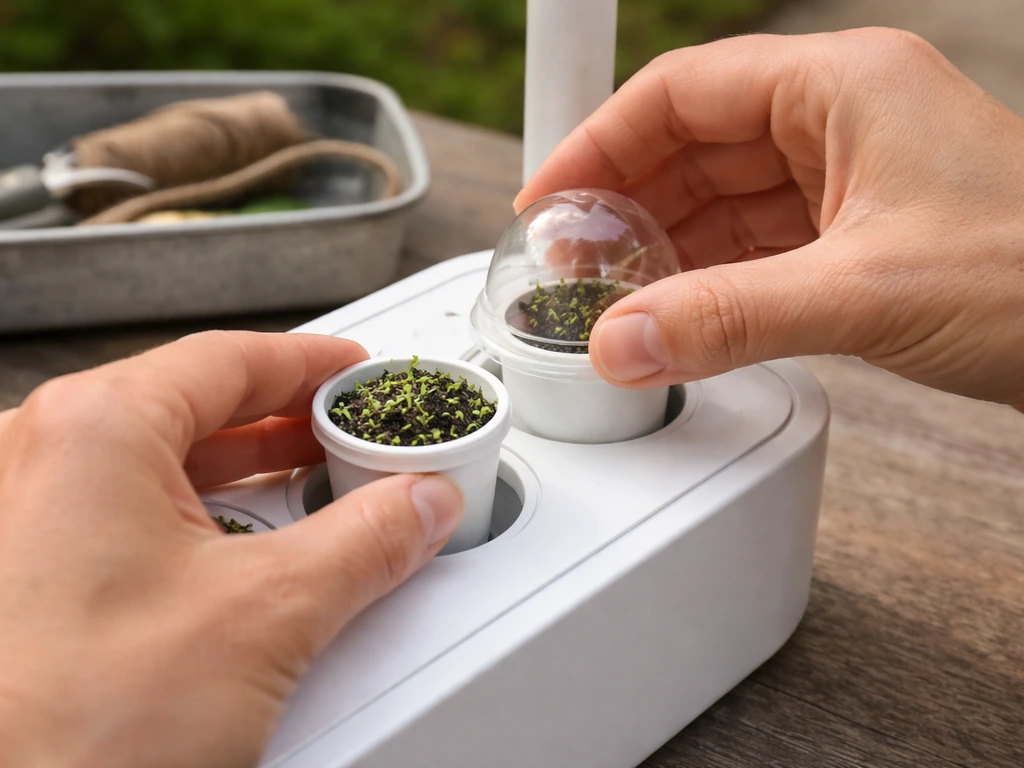
This is where most beginners pause and overthink it. The good news is there is no measuring soil depth, no spacing decisions, and no seed-counting. Each pod is a self-contained unit. Here is the full sequence:
- Take a plastic cup from the garden slot and set it on a flat surface.
- Open your plant pod packaging and remove the pod. Note the shape: one end is tapered (narrower) and one end is wider. The tapered end always goes down.
- Match the pod shape to the plastic cup and press it in gently. It should sit snugly. If it feels upside down or does not seat properly, flip it.
- Place the filled plastic cup back into the garden slot.
- Place the transparent germination dome on top of the pod. The dome traps humidity and warmth, which dramatically improves germination speed.
- Repeat for each pod slot you are filling. You can leave slots empty if you are not using all positions, but cover unused slots with the U-shaped lids to reduce light exposure inside the tank.
- Plug in the device, ideally in the morning. The lamp will immediately begin its 16-hour-on cycle and then switch off automatically after 16 hours, staying off for 8 hours before cycling on again.
- Optionally, open the Click & Grow app and add the plant types you just planted to start tracking their progress and receive care reminders.
That is it. There is no additional watering from above, no fertilizer to mix, and no light timer to program. The wick system pulls water from the reservoir into the pod's growing medium as the plant needs it.
What to expect in the first week
Most plants will not show visible sprouts within the first few days, and that is completely normal. Seeds germinate underground, and you are essentially just waiting for the seedling to push through the pod surface. Here is a realistic timeline by category:
| Plant type | Typical sprout time | Beginner friendliness |
|---|---|---|
| Basil | 5–10 days | Excellent starter plant |
| Green lettuce | 3–7 days | One of the fastest germinators |
| Mini tomato | 7–14 days | Reliable but slower |
| Chili pepper | 10–21 days | Needs patience, keep dome on longer |
| Flowers (e.g., petunia) | 7–14 days | Good for variety, less edible |
Keep the domes on until the seedling physically touches the top of the dome. In Click & Grow’s Ask a Gardener community, a moderator-like response recommends removing the transparent dome once seedlings reach the top, since the dome mainly serves as a mini greenhouse to build humidity early on. Removing them early drops the humidity around young seedlings and slows growth. Once a sprout is tall enough to push against the dome, pop the dome off and set it aside because you will reuse it with future pod cycles.
During week one, resist the urge to add more water or move the pods. Check that the float is still visible and not sitting at the bottom of the tank. If it has already dropped, top up the water now. Otherwise, leave everything alone and let the system work.
Ongoing care: light, temperature, water, and maintenance
Once seedlings are established, the care routine becomes very low-effort. The biggest ongoing task is watching the water level.
Water refills
A full tank lasts roughly two weeks on average, though this varies by how many pods you have, how large the plants are, and the ambient humidity in your home. Refill when the float drops to the bottom of the tank; do not wait for plants to show stress before topping up. Consistent moisture in the wick system keeps the wicks in better condition long-term. When you refill, use room-temperature water. Ice-cold tap water can stress roots.
Light and temperature
The lamp uses white and red spectrum LEDs, with the red spectrum specifically boosting photosynthesis efficiency. Power draw is modest, around 8 watts for the tabletop Smart Garden units, which works out to roughly 6.2 kWh per month, less than leaving a small lamp on. You do not need to adjust the lamp height for most herbs and greens, but if you notice plants stretching dramatically toward or away from the light, check that the lamp arm is at the correct height for your model. Keep the garden away from heating vents, air conditioners, and drafty windows. The 18 to 24°C sweet spot is easy to hit in most homes but harder near exterior walls in winter.
U-shaped lids and pod maintenance
Leave the U-shaped lids on at all times around occupied pod slots. They minimize the gap between the lid and the growing medium, which reduces light exposure inside the tank and significantly cuts down on mold and algae growth. This is one of those small things that makes a real difference over a multi-week growing cycle.
Cleaning the tank

Between growing cycles, the water tank, tank lid, and plastic cups for the Smart Garden 3 and 9 are all dishwasher-safe up to 50°C (120°F). If you see limescale (white mineral deposits) building up on the tank interior, fill it with a mild citric acid solution or diluted food-grade vinegar, let it sit for a few hours, then rinse thoroughly before replanting.
Troubleshooting common problems
Seeds not sprouting after two weeks
Run through this checklist before assuming the pod is dead. Is the dome still on? Is the water float visible and not sitting at the bottom? Is the room temperature close to 24°C (76°F)? Are the lights actually turning on (check during daytime hours when the cycle should be active)? If everything checks out and there is still no sprout by week three, the pod itself may have been too old or damaged. Try a fresh pod.
Yellow or pale leaves
Yellowing after germination is usually a light or water issue. If the lamp is too far from the plant or the cycle has been interrupted, leaves go pale and leggy (tall and weak-stemmed). Confirm the lamp arm is positioned correctly. If the water level has been consistently low, the pod may have partially dried out; top up and monitor for two to three days before assuming the plant is lost. Yellowing on older, lower leaves as the plant matures is normal and not a problem.
Leggy, stretched seedlings
If seedlings are growing tall and thin with long gaps between leaf pairs, they are stretching toward the light. This usually means the lamp arm is positioned too high. Lower it to the recommended height for your model. Leggy seedlings can recover once light distance is corrected, though very stretched stems may need a gentle support prop made from a toothpick.
Mold or algae on the pod surface
Surface mold on a pod is almost always caused by too much moisture sitting at the top of the growing medium combined with light exposure. First, make sure the U-shaped lids are fully seated. If the pod surface still feels waterlogged, click the pod out of the garden for a few days to let it dry before reinserting. If you see green algae forming inside the tank (visible through transparent parts of the garden), the tank is getting too much light. Reposition the garden or use the lids more diligently.
Dry pods even when the tank is full
If the float shows the tank is full but the pod surface feels completely dry, the wick connecting the reservoir to the pod is not transferring water. This can happen if the tank was allowed to run completely dry for an extended period, which can cause wicks to air-dry and lose their capillary ability. Refill the tank, press the pod firmly into the cup to ensure good contact, and give it 24 to 48 hours. Consistent refills before the tank empties completely prevent this problem from occurring in the first place.
Pests
The most common indoor garden pests in Click & Grow setups are fungus gnats, aphids, thrips, and whiteflies. Click & Grow sells sticky traps called Invisible Bug Traps, which are pesticide-free and designed to hang near the garden. Replace them every six to eight weeks or once they are covered. If a pest infestation gets severe, remove all pods, clean the entire unit (dishwasher for plastic parts, wipe-down for the lamp arm), and wait at least three weeks before replanting to break the pest lifecycle.
Click & Grow 25 not responding
If the Click & Grow 25 shows an error or the light behaves unexpectedly, the first step is a reset: unplug the unit, wait two full hours, then plug back in. Check that the green indicator light is stable before doing anything else. If problems persist, refer to the downloadable PDF manual for your specific assembly configuration.
Harvesting, replanting, and picking the right pods
Harvesting
For herbs like basil, start harvesting by cutting stems just above a leaf node (the point where two leaves branch out) once the plant is at least 10 to 15 cm tall. This encourages the plant to branch and produce more leaves rather than going straight to flower. For lettuce, cut outer leaves from the base and let the center keep growing. Mini tomatoes are ready to pick when fully colored and slightly soft to the touch.
Keep in mind that Click & Grow plants have a finite life cycle. Because each pod contains a set amount of growing medium and nutrients, plants cannot grow indefinitely like they would in a large container with regular fertilizing. Basil typically gives a good harvest window of six to ten weeks. Lettuce is faster and can go bitter after eight to twelve weeks. When a plant looks spent, woody, or stops producing new growth, it is time to replace the pod.
Replanting and reusing the device
When a cycle ends, remove the used pod from the plastic cup, compost the growing medium, and clean the cup. The plastic cups, U-shaped lids, and germination domes are all reusable. Clean the tank between cycles to prevent any residual mold or mineral buildup from carrying over. Then simply insert new pods and start the process again. The device itself has no built-in limit on growing cycles.
Choosing the right pods for beginners
If you are new to Click & Grow, start with pods that are forgiving and fast-rewarding. Green lettuce is one of the quickest germinators and hardest to kill. Basil is satisfying because you can harvest within four to six weeks and use it immediately in cooking. Mini tomatoes are slower but very motivating once they fruit. Avoid starting with chili peppers or slow-flowering plants on your first run because the wait can be discouraging if you are not sure the system is working.
Click & Grow offers pod subscriptions that send three-packs or nine-packs on a regular schedule, which is a practical option once you know which plants you enjoy growing most. The Smart Garden 9 bundle, for example, often comes with three basil, three green lettuce, and three mini tomato pods to get you started with variety. Using the app to log which pods you have planted and when is genuinely useful for tracking harvest timing and knowing when to reorder.
If you enjoy the simplicity of the pod format and want to explore other low-effort growing methods, there are similar grow-and-forget approaches worth looking into, like throw-and-grow seed scattering techniques for outdoor spaces, or species-specific guides for plants that thrive with minimal intervention. For indoor systems like Click & Grow, you still start by inserting the pod, keeping the dome on until the seedling reaches the top, and letting the wick and LED timer do the work throw-and-grow seed scattering techniques. To learn the best approach for Plant Species Z specifically, follow a species-focused grow guide with the right light, watering, and timing targets species-specific guides. If you want to move beyond generic tips, use a specific guide for how to grow plant species x so you can match the setup to that plant's needs. If you want plant species-specific guidance, look up how to grow plant species x without irrigation for the best low-water approach minimal intervention. The core skill you are building with Click & Grow, understanding how moisture, light cycles, and seed timing interact, translates directly to those methods too. If you want more tailored guidance for how to grow plant species y, use a species-specific guide that matches its light and moisture needs.
FAQ
What should I check if my Click and Grow pods show no sprouts after the expected time?
If a pod does not sprout, first verify that the dome is still seated, the water float is visible and not sunk, and the unit is actively powering the lamp cycle (check during the hours when the light should be on). If those are all correct, the next most likely cause is that the pod is beyond its best-by freshness window, so replacing with a newer pod is the quickest way to confirm.
How do I fix overfilling or the float being higher than the lid surface?
Do not top off by guessing beyond what the float indicates. Overfilling keeps the wicks and medium too wet at the top, which can trigger root stress or early mold. If you accidentally overfilled, empty and refill to restore the float alignment with the lid surface before reinserting pods.
Is it okay to refill with cold tap water?
Use room-temperature water when refilling, especially in cold seasons. Ice-cold water can shock roots and slow early growth, leading to pale seedlings that take longer to catch up. If your tap runs cold, let it sit until it matches room temperature before adding it to the tank.
When should I remove the transparent dome during germination?
Keep the germination dome on until the seedling physically reaches the dome top, then remove it once it can push against it. Taking the dome off early reduces humidity around the seedling and often delays steady growth, even when everything else (water and light) is correct.
What if my reservoir float looks full, but one pod still feels dry?
If the tank appears full but a pod surface is dry, the wick may have air-dried after a long dry period. Refill the tank, press the pod firmly into the cup to ensure good contact, then wait 24 to 48 hours for the capillary system to rehydrate. If you repeatedly let the tank run empty, this problem becomes much more likely.
How much should I harvest at once, especially for basil?
Trim and harvest in a way that preserves growth points. For basil, cut stems just above a leaf node once the plant is at least 10 to 15 cm tall, and avoid removing more than about one-third of the plant at a time early on. Cutting too aggressively can reduce branching and slow the next flush.
Why are my seedlings turning yellow and pale after they start growing?
Yellowing that appears after germination is usually linked to light distance or inconsistent moisture rather than a need for fertilizer (since pods contain preloaded nutrients). Confirm the lamp arm is at the recommended position and that the float level is not repeatedly dropping low, then watch for improvement over 2 to 3 days.
My seedlings are getting tall and thin, what is the fastest fix?
Leggy growth (tall, thin plants with long gaps between leaf pairs) is typically a light-height issue. Lower the lamp arm to the recommended height for your model, and avoid moving the garden around during early growth unless necessary, since sudden changes can interrupt the stable light environment.
Can I reuse components between cycles, and what is the safest cleaning routine?
Yes, but clean it in a controlled way. When starting a new cycle, remove used pods, compost the medium, rinse and clean the tank between cycles, then reassemble. For plastic components, the dishwasher-safe approach is fine up to 50°C (120°F), but keep the lamp arm clean by wiping, and allow everything to dry fully before replanting.
What are practical first steps if I notice fungus gnats or other pests?
A strong pest sign is usually activity near the garden plus visible specks or small insects on leaves. For prevention, hang the Invisible Bug Traps near the unit and replace them on schedule. If you get a severe outbreak, removing all pods and cleaning the entire unit, then waiting at least three weeks before replanting, helps break the lifecycle.
What should I do if the light timer seems to stop or act erratically?
If the lamp behaves unexpectedly, do a reset first by unplugging, waiting two hours, then plugging back in, and confirm the indicator light is stable. After that, recheck that the lamp arm is assembled correctly for your model, because an incorrect lamp connection is a common reason timing or behavior seems off.
What is the most common beginner mistake that slows everything down?
In general, the biggest “mistake” is changing too many variables at once. During the first week, leave pods where they are, keep the dome on, refill only when needed based on the float, and avoid moving the unit near heaters or drafty windows. Stable room conditions (about 18 to 24°C, 64 to 75°F) make the biggest difference early.
How do I harvest lettuce without reducing future growth or getting bitterness?
It is usually normal for outer leaves of lettuce to be the first ones to show harvestable growth, and that is why you cut them from the base instead of waiting for full heads. Cutting outer leaves supports continued central growth, and replacing the pod when production slows avoids bitterness and “spent” plants.