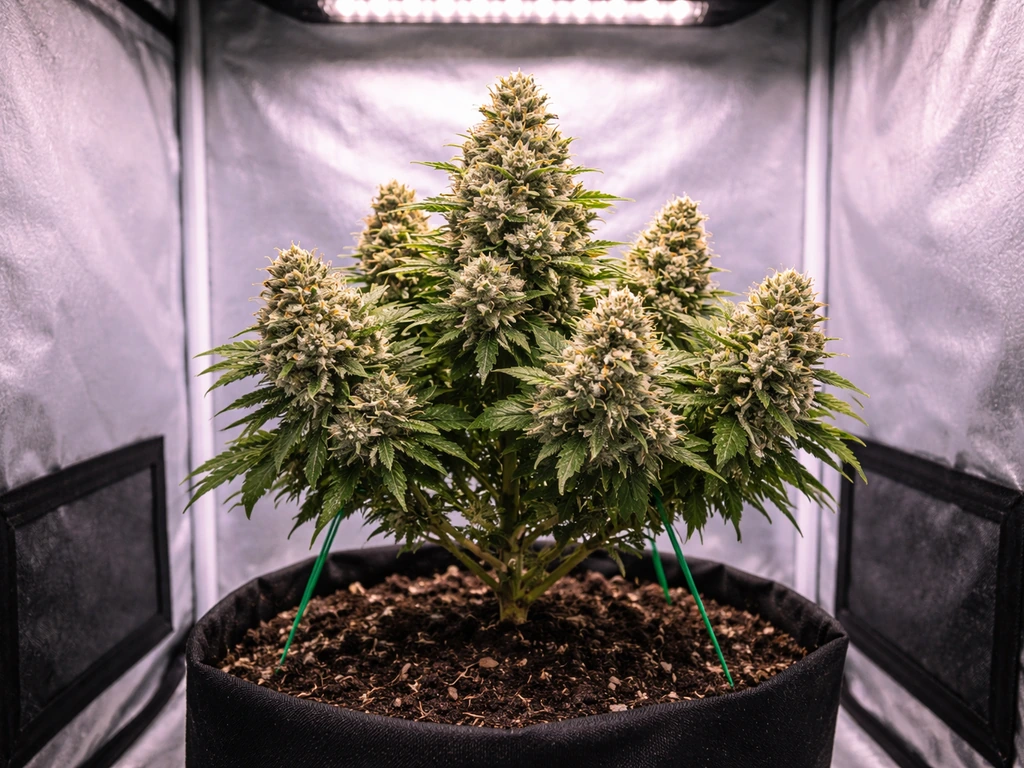
You can absolutely grow small plants with big, dense buds, the key is stacking the right decisions early: pick a compact variety bred for heavy flowering, dial in your light intensity for the flowering stage, use a fast-draining medium, and train your plant to spread its canopy instead of shooting straight up. None of these steps are complicated, but skipping even one of them is usually why people end up with tall, airy plants and disappointing harvests. This guide walks you through every lever, from seed selection to the jar on your shelf.
How to Grow Small Plants With Big Buds: Step-by-Step

Marcus Holloway
27 Apr 2026
Pick the right variety first, everything else builds on this
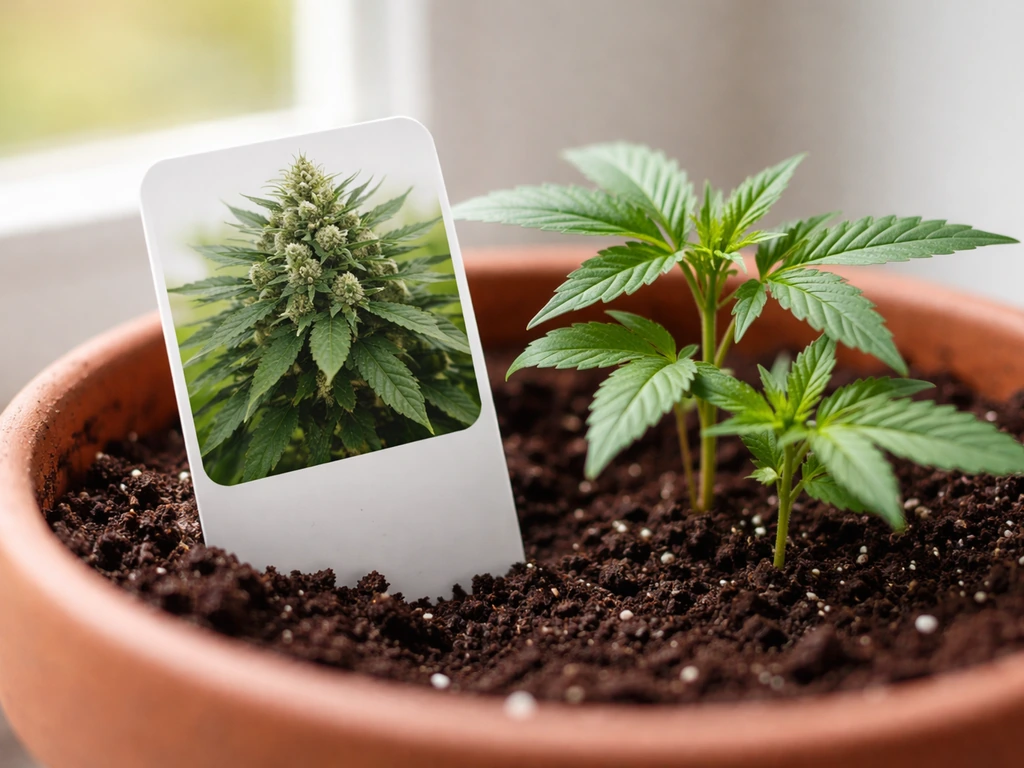
Variety selection is the single biggest predictor of whether your plant stays compact and flowers heavily. You can train and feed a rangy, tall-growing strain all you want and still end up fighting its genetics. Start with something that's already inclined toward short, dense growth.
For limited spaces, autoflowering varieties are usually your best starting point. They're inherently compact by nature, they flower based on age rather than a light-cycle change, and most finish in 70–90 days from seed. Because they don't need a 12/12 light flip the way photoperiod plants do, you can run them at 18/6 or even 20/4 light/dark throughout the entire grow, which means more photosynthesis time and faster development without managing two separate rooms or tents.
Photoperiod varieties give you more control over exactly when flowering starts, you trigger the switch to 12/12 yourself. This is useful when you want to spend more time building a wide, bushy canopy before flipping to flower. If you're growing in a 2x2 or 2x4 tent, a photoperiod indica-dominant strain kept in veg for 4–6 weeks tends to stay manageable and reward you with dense bud structure. Sativa-dominant strains can stretch 2–3x their veg height after flipping, which is a surprise most small-space growers learn the hard way once.
A few things to look for on seed descriptions when shopping for small-footprint, heavy-yielding plants: advertised height under 80–100 cm indoors, 'indica-dominant' or 'auto' genetics, and flowering times under 65 days. Breeder yield claims are usually optimistic, but strains consistently described as 'dense' or 'resinous' tend to back that up more reliably than pure yield numbers.
Lighting and space planning that actually drives bud size
Light is the engine behind bud development. The bigger and denser the buds you want, the more photons your plant needs to hit its canopy during flowering. The metric that matters here is PPFD (micromoles of light per square meter per second). During vegetative growth, a target of 300–600 µmol/m²/s is a reasonable range. Once your plant is in full flower, you want to push that to 600–900 µmol/m²/s at canopy level, that's where you get real bud mass. More light intensity during veg also builds more nodes (the sites where flowers actually form), so don't undershoot early.
For small tents or grow spaces, a quality quantum board LED sized properly for your footprint is the most practical choice in 2026. A 200–240W board covers a 2x4 comfortably in flower; a 100–120W board handles a 2x2. Cheap blurple LEDs or single-bar fixtures often fail to deliver the intensity numbers you need at canopy level, which is why buds grown under them tend to be small and loose. If you're not sure your light is performing, a basic PPFD meter (or a free phone app as a rough proxy) will tell you whether you're actually hitting your targets.
Space planning matters just as much as raw wattage. A compact plant crammed into a corner where light can only hit the top is going to develop one big main cola and a lot of secondary buds that never amount to much. Spread the canopy horizontally so that light reaches as much of the plant as possible, the training section below covers exactly how to do that. As a baseline, figure that each plant needs at least 1–2 square feet of dedicated canopy space to flower properly without competing with itself or a neighbor.
Soil, soilless, or hydro: which medium gives you the best results in a small space

Your growing medium affects how fast your plant grows, how easily you can control nutrients, and how forgiving the setup is when you make mistakes. There's no single best option, it depends on your experience level and how hands-on you want to be.
| Medium | Best For | Pros | Cons | pH Target |
|---|---|---|---|---|
| Quality amended soil | Beginners, low-maintenance grows | Buffers nutrient mistakes well, familiar, inexpensive | Slower growth, harder to dial in mid-grow | 6.0–7.0 |
| Coco coir | Intermediate growers wanting speed | Fast growth, reusable, excellent drainage | Requires frequent watering, needs CaMag supplementation | 5.8–6.2 |
| DWC / hydroponics | Experienced growers chasing max yield | Fastest growth and bud development, precise control | Unforgiving to mistakes, root health is critical | 5.5–6.5 |
| Rockwool / soilless mix | Intermediate, commercial-style setups | Good aeration, clean and sterile | Needs close pH/EC monitoring, can dry out fast | 5.5–6.5 |
For most people growing small plants in a tent or spare room, coco coir hits the sweet spot between performance and accessibility. It drains fast (which matters a lot in small pots), it's inert so you control exactly what goes in, and it grows plants noticeably faster than standard potting mix. The one catch: coco naturally binds calcium and magnesium, so you'll need to supplement with a CaMag product from the start. Skipping this is one of the most common reasons coco grows stall out mid-flower with yellowing leaves and underdeveloped buds.
If you're just starting out or you tend to forget to water on a strict schedule, a good amended soil like a premium cannabis-specific mix gives you more margin for error. The microbiome in quality soil buffers pH swings and holds onto some nutrients between waterings. The trade-off is slower vegetative growth and less ability to course-correct if you notice a deficiency, by the time an amendment-heavy soil medium absorbs a pH change or a new nutrient addition, a week or two can pass.
DWC and recirculating hydro systems genuinely do produce the biggest buds fastest when run correctly. But 'when run correctly' is doing a lot of work in that sentence. Salt buildup in the reservoir, root pathogens, and EC/pH swings all hit plants hard and fast in hydro, with little of the buffering you get in soil. If you want to try it, start with a single-bucket DWC setup, keep the reservoir clean, and monitor your EC (electrical conductivity) closely, if your runoff or reservoir EC is climbing well above your input EC, you've got salt accumulation and need to flush.
Training and pruning to multiply your bud sites
Training is where small-space growing gets really exciting, because the right techniques can take one compact plant and turn it into what's effectively a flat, wide flowering table covered in bud sites. The goal is always the same: break the plant's apical dominance (its tendency to grow one tall main stem) and redirect energy outward and downward so light hits more of the plant.
Low-stress training (LST)
LST is the best place to start, especially if you're new. You're not cutting anything, just bending stems and tying them down to keep the canopy flat and encourage lateral branching. Use soft plant ties or pipe cleaners, and start when the plant has 4–6 nodes. Bend the main stem gently at about a 90-degree angle and secure it to the pot rim or a trellis. As new growth reaches up, bend and tie those branches down too. After a couple of weeks of this, you'll have a wide, even canopy instead of a Christmas tree shape, and every branch tip that's now at the same height as its neighbors will develop into a substantial bud site.
Topping and FIM
Topping means cutting the main stem just above a node, which removes the apical tip and forces the plant to develop two main colas instead of one. Do it after the plant has 4–6 nodes and has been growing vigorously for a couple of weeks. It's a bit stressful for the plant (expect 3–5 days of slower growth while it recovers), but the result is a more symmetrical, bushy structure that's far easier to light evenly. If you're growing photoperiod plants, wait at least 7–14 days after topping before flipping to 12/12 to make sure the plant has fully recovered.
FIM (short for a colorful phrase meaning 'I missed') is a partial top where you pinch or cut the very tip of new growth without fully removing it. Done right, it stimulates 3–4 new growth points instead of 2. It's slightly less reliable than a clean top, but it's less stressful and works well on autoflowers where recovery time is limited. The honest truth: most beginners will get better results from a clean top than attempting FIM, at least until you've done it a few times and can feel the difference.
SCROG (screen of green)
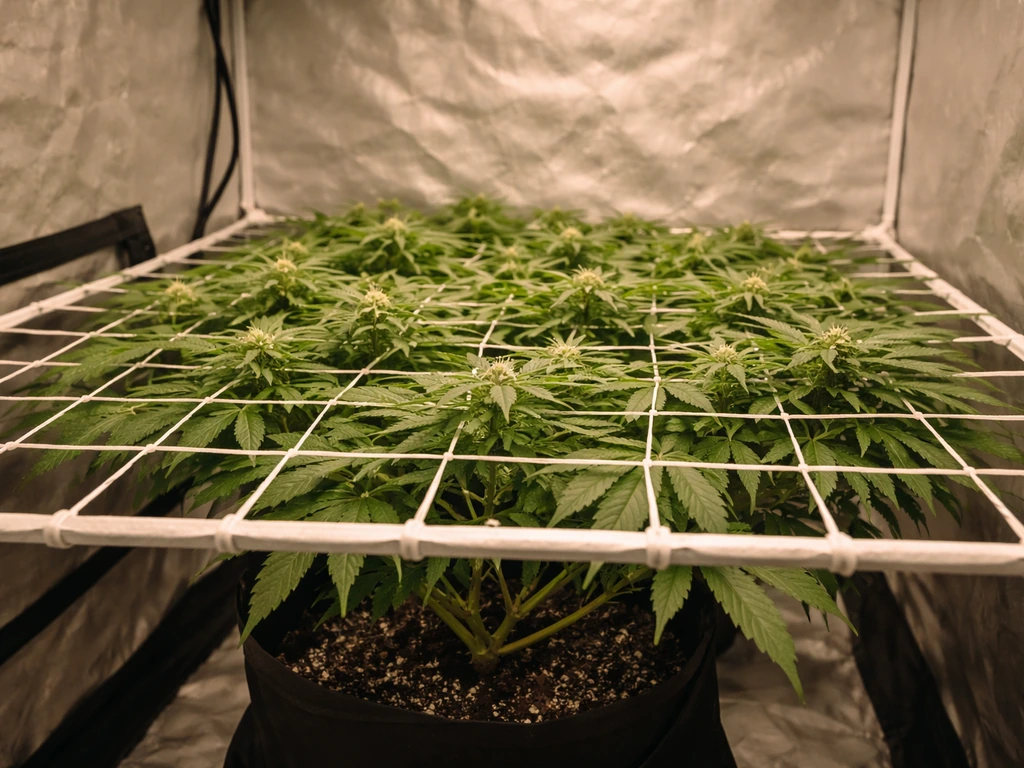
SCROG uses a horizontal screen or net to guide the plant's canopy into a flat, even surface. Set the screen about 12 inches (30 cm) above the base of the plant and weave branches through it as they grow. Once 70–80% of the screen is filled, flip to flower (for photoperiod plants) or just let autoflowers do their thing. The screen holds everything at a uniform height, so every bud site sits at the same distance from your light, which means even, consistent bud development across the whole plant. SCROG works especially well in 2x2 and 2x4 tents with a single plant or a couple of plants.
A word on defoliation
Removing fan leaves that block light from reaching lower bud sites can improve yields, but timing matters a lot. Avoid heavy defoliation in the first 20–25 days of the flowering stage, that's when the plant is stretching and building its bud structure, and stripping leaves at that point stresses it at exactly the wrong moment. A light defoliation session at the flip (removing the largest light-blocking fans) and another around day 25–30 of flower tends to hit the sweet spot. With autoflowers, be even more conservative: remove 1–2 leaves per session rather than big handfuls, since autos don't have time to recover from heavy defoliation the way photoperiods do.
Feeding your plant for maximum bud mass
Nutrients don't grow big buds on their own, they support the process that light and genetics drive. But a deficiency or toxicity at the wrong time absolutely will stall bud development. The core framework to understand is N-P-K (nitrogen, phosphorus, potassium) and how your plant's needs shift across stages.
Vegetative stage feeding
During veg, nitrogen is king. It builds leaves, stems, and the branching structure that your flowering sites will eventually grow from. Use a balanced or nitrogen-forward nutrient formula and keep your EC (feeding strength) moderate, start low and build up as the plant grows. A common beginner mistake is overfeeding from the start, which leads to salt buildup and nutrient lockout. Watch the leaf tips: if the very tips start curling or showing brown burn, you're feeding too strong.
Transition to flower
As flowering starts, begin dialing back nitrogen and increasing phosphorus and potassium. Phosphorus supports root development and bud formation; potassium drives overall plant metabolism and terpene/resin production. Most commercial nutrient lines have a 'bloom' formula designed for this shift, use the manufacturer's schedule as your baseline, but start at 50–75% of the recommended dose and adjust based on how your plant responds.
Calcium, magnesium, and pH
Calcium and magnesium deficiencies are probably the most common mid-grow problem, especially in coco or when using filtered/RO water. Cal-Mag deficiency shows up as yellowing between leaf veins (magnesium) or brown spotting and edge burn (calcium). Add a dedicated CaMag supplement at 2–5 mL per gallon throughout the grow, and don't skip it during flower, buds are heavy feeders for these elements. Keep your root-zone pH in the 5.8–6.2 range for coco and hydro, or 6.0–7.0 for soil. pH out of range is the most common reason nutrients are present in the solution but unavailable to the plant, it's not always a feeding problem, it's often a pH problem.
Monitor runoff EC as a simple health check. Water in at a known EC and measure what drains out. If your runoff EC is climbing significantly above your input EC over successive waterings, salts are accumulating in the medium and can start locking out nutrients. A plain-water flush (or a targeted flush product) resets the root zone. Conversely, if runoff EC is consistently much lower than input, the plant is hungry and you can gradually increase feeding strength.
Water, airflow, temperature, and humidity: the environmental basics that make or break your yield
Even a perfectly fed, well-trained plant in great soil will underperform if the environment is working against it. The good news is that most small-tent setups can be dialed in fairly easily once you know what to aim for.
Watering
The most common watering mistake is watering on a schedule rather than based on the medium's moisture level. In a small pot, daily watering might be right; in a large fabric pot of amended soil, every 2–3 days might be correct. The lift test works well: lift the pot when it's dry (right before watering) and when it's saturated. You'll quickly learn the weight difference and can use it as your trigger. In coco, more frequent watering (often daily or even twice daily in late flower) is normal and beneficial, the medium dries out fast and the plants love the oxygen/water cycling.
Airflow and CO2
Good airflow does two things: it replenishes CO2 at the leaf surface (which drives photosynthesis) and it strengthens stems through gentle mechanical movement. A small oscillating fan on low keeps air moving without blasting your plants directly. In a sealed tent, you also need an exhaust fan pulling air through a carbon filter, this controls smell, replaces stale air, and maintains temperature. Stagnant air is one of the fastest routes to mold and mildew, especially once dense buds start forming in the last few weeks of flower.
Temperature and humidity
During veg, aim for 70–80°F (21–27°C) with 50–70% relative humidity. Once flowering starts, drop humidity progressively as buds develop, target 40–50% RH through mid-flower and push toward 35–45% in the final 2–3 weeks. Dense buds with high humidity are an open invitation for bud rot, which can wipe out weeks of work in a matter of days. A cheap digital hygrometer/thermometer inside the tent is a must-have, not optional equipment.
VPD (vapor pressure deficit) is a more precise way to think about the relationship between temperature and humidity at the leaf level, and it matters most during flowering. High VPD in a hot, dry tent stresses the plant and reduces resin quality; low VPD in a cool, humid environment invites mold. Most small-tent growers who keep temps in the 75–80°F range and humidity at 45–55% in early flower are naturally hitting a reasonable VPD window without ever looking at a VPD chart, but if you're chasing maximum quality, it's worth learning the basics of VPD for your flowering stage.
Harvest timing and curing: don't undercut your hard work at the finish line
You can grow the densest, most resinous buds imaginable and still ruin them by harvesting too early or skipping the cure. This final step is where the bud quality you worked for actually gets locked in.
Reading trichomes to time your harvest
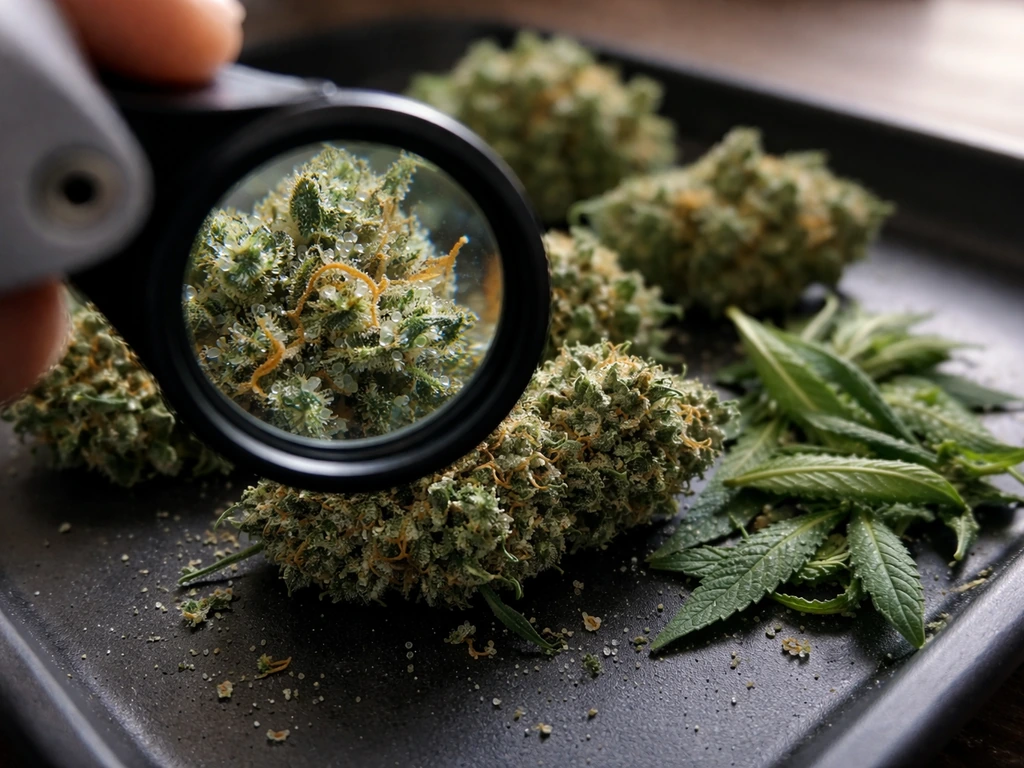
The most reliable way to know when to harvest is to look at the trichomes (the tiny crystal-like structures on the buds and sugar leaves) under a jeweler's loupe or digital microscope. Trichomes go through a visible progression: clear means immature and underdeveloped, harvest now and you lose both potency and yield. Cloudy/milky means the plant is at or near peak. Amber means degradation of THC into CBN has begun, which shifts the effect profile. Most growers target a mix of mostly cloudy with a small percentage of amber (around 10–20%). The key detail: trichomes can change noticeably from one day to the next in the final week, so check daily once you see the first amber appearing.
You can also watch the pistils (the tiny hair-like structures on the buds) as a secondary cue. When 70–90% have darkened from white to orange or red, you're usually in the harvest window. Pistil color alone isn't as precise as trichome inspection, but it's a quick naked-eye check when you're looking in on your plants daily.
Drying and curing basics
After harvest, dry your buds slowly in a dark space at around 60–70°F (15–21°C) with 50–60% humidity and gentle airflow that circulates around the buds without blowing directly on them. This typically takes 7–14 days. You're aiming for stems that snap rather than bend, and buds that feel dry to the touch but aren't crumbling. Drying too fast (under 5 days, especially with high heat) locks in a harsh grassy smell and degrades quality; drying too slow with high humidity invites mold.
Once dry, move buds into glass jars, wide-mouth mason jars work perfectly. For the first 1–2 weeks, open the lids once or twice a day for 10–15 minutes to release moisture and exchange gases (this is called 'burping'). You're targeting 58–62% relative humidity inside the jars; small humidity packs (Boveda 62% is the most popular) make this easy to maintain. A minimum cure of 2 weeks will noticeably improve smoothness and aroma, and 4–6 weeks will take buds from good to genuinely great. Properly cured and stored buds in sealed jars at 55–62% RH will hold quality for 6 months or longer.
Putting it all together
Growing small plants with big buds is less about any one trick and more about not having a weak link in the chain. Pick a compact variety that's built for this, give it enough light intensity during flower, use a medium that drains well and doesn't hold you back on nutrients, train the canopy wide instead of tall, and keep the environment stable. Every section of this guide is a lever, you don't have to be perfect at all of them, but the more you nail, the better your harvest. If you're also working on keeping plants healthy indoors in general, a lot of the same principles around light, water, and airflow apply across indoor and houseplant growing too, so the skills compound quickly. By understanding the basics of plant life cycles and indoor conditions, you can make your indoor plants grow faster and healthier from seed to harvest how to indoor plants live and grow. If you're also working on keeping plants healthy indoors in general, a lot of the same principles around light, water, and airflow apply, which is why this guide on how to grow healthy plants indoors is a great next read. If you want to grow something for better indoor air too, check out how to grow air purifying plants and choose varieties that suit your space and lighting. If you're specifically learning how to grow houseplants, you'll want to apply the same fundamentals with more focus on indoor light, watering consistency, and airflow houseplant growing. If you want to help houseplants grow faster, prioritize bright indirect light, a consistent watering rhythm, and good airflow.
FAQ
My plants are staying compact, but the buds are still airy. What’s the most likely cause?
If your plant is staying small but the buds still look loose, it’s usually light or canopy coverage, not a nutrient “boost.” First confirm you’re measuring PPFD at canopy height in flower, then check training and spacing so more than one side of the plant gets direct light. If you see adequate canopy coverage and PPFD but still get low density, reassess flowering timing and whether nitrogen was kept too high late in flower, which can delay bud packing.
How quickly should I adjust light or nutrients if I’m not getting big buds?
Start slow with changes. If you raise light intensity, do it in steps over 5 to 10 days, and watch leaf color and clawing. If you increase nutrients or EC too fast, salts can build quickly in small containers, which then causes lockout and less bud mass. A good rule, only change one major lever at a time (light, feed strength, or irrigation frequency) so you know what corrected the problem.
Can I water small plants on a fixed schedule to keep growth tight?
A basic “schedule” can work only when your medium and pot size stay consistent, but in small grows it often breaks down. Instead of calendar watering, use the lift-weight test (dry vs saturated) and water to a small amount of runoff so the root zone stays evenly hydrated. In coco and late flower, you may need daily or even twice daily watering, even in tiny pots.
What pruning mistake most often reduces bud density?
For a compact, wide canopy, avoid anything that blocks airflow and light behind the dense middle. If you prune, keep it light and targeted (remove a leaf that clearly blocks a bud site or keeps the interior from breathing). The article already notes limiting defoliation early in flower, the extra caution is to avoid stripping so much foliage that you reduce photosynthesis during the stretch and early bud formation window.
How do I know whether my “feeding problem” is actually salt buildup?
Use a runoff check rather than guessing. Measure input EC and runoff EC the same day, then look at the trend. If runoff EC climbs progressively above input, salts are accumulating and you’ll need a reset flush or a change in irrigation pattern. If runoff EC is always far below input, you may be underfeeding or watering so lightly that the medium isn’t fully distributing nutrients.
My leaves are yellow, does that mean I should increase nutrients?
Not necessarily. Many “yellowing” issues come from pH or calcium and magnesium availability rather than total nutrient strength. If yellowing appears between leaf veins (often magnesium) or with edge spotting (often calcium), add CaMag and verify your root-zone pH is in range for your medium. Also check whether runoff pH is drifting out of the target zone, because correct nutrients can still become unavailable.
Can I top or heavily prune autoflowers to keep them small and bud-dense?
Autos are less forgiving of heavy stress, so the safest training is gentle LST rather than topping. If you do topping or major pruning on an autoflower, do it only early and expect reduced vigor and delayed recovery. The practical takeaway is: start LST at 4 to 6 nodes, keep sessions small, and avoid repeating large cut-based interventions.
My humidity averages 45 to 50%, but I still worry about mold. Is that still risky?
It depends on how close the humidity is to the bud zone and whether airflow is strong. Dense buds at high RH in mid to late flower increase the chance of bud rot, even if the tent’s average RH looks acceptable. If your RH spikes during lights-off or you see condensation inside the canopy, raise airflow and reduce peak humidity rather than only watching the daytime reading.
Why do my harvest timing cues disagree (pistils vs trichomes)?
Don’t rely on pistil color alone, because it can mislead by variety and lighting. Trichomes are the better indicator, especially once amber starts showing. The extra detail, check trichomes daily in the final week because individual buds can ripen at slightly different rates, so you might need to harvest based on the densest, most advanced sites.
What’s the most common mistake in drying and curing small-bud harvests?
A common cure issue is over-drying during the first phase, which leads to harsh aroma and slower flavor development in jars. Use the “snap” feel for stems and keep drying conditions stable, around 60 to 70°F with moderate humidity and gentle airflow, then burp jars early and aim for about 58 to 62% RH. If jar RH sits high, burp more often and check airflow during drying.