Indoor plants live and grow the same way plants do everywhere: they need light to make food, water to move nutrients and stay firm, roots that can breathe, and temperatures that don't stress them out. The difference indoors is that you control every one of those variables, which is actually great news. Once you understand what your plant is asking for, you can dial it in and watch it thrive. This guide walks through the biology, the setup, the troubleshooting, and the day-to-day routine, so you leave with a real plan, not just general tips.
How to Indoor Plants Live and Grow: A Practical Guide

Marcus Holloway
12 Apr 2026
How indoor plants survive: the life-support basics

Every indoor plant is running on six core inputs: light, water, nutrients, oxygen (at the roots), temperature, and space for roots to grow. Pull any one of those away entirely and the plant declines. Give them in the wrong balance and you get the slow fade most people mistake for 'just how the plant is.' It's not.
Temperature is the easiest to get right. Most houseplants prosper in the 65°F to 75°F range that most homes already sit at, according to OSU Extension. What trips people up is humidity. Average home air is often drier than many tropical houseplants prefer, especially in winter when heating systems run constantly. You don't always need a humidifier; grouping plants together, setting pots on a pebble tray with water, or misting leaves daily can help some plants push through low-humidity stress.
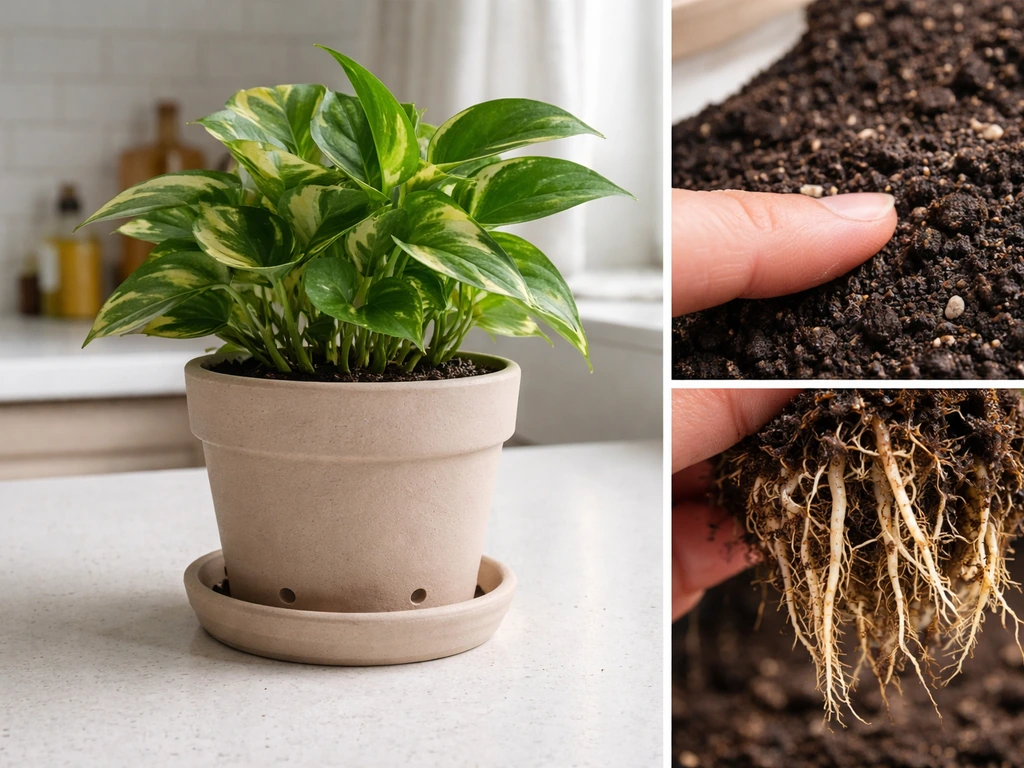
Root space matters more than most beginners realize. A pot that's too large holds more potting mix than the plant's roots can dry out between waterings, which means the medium stays wet far too long and root rot follows. Go up in pot size gradually, no more than one or two inches in diameter at a time, and always use a container with drainage holes. Without drainage, waterlogged soil is almost guaranteed, and that's one of the most common reasons houseplants die.
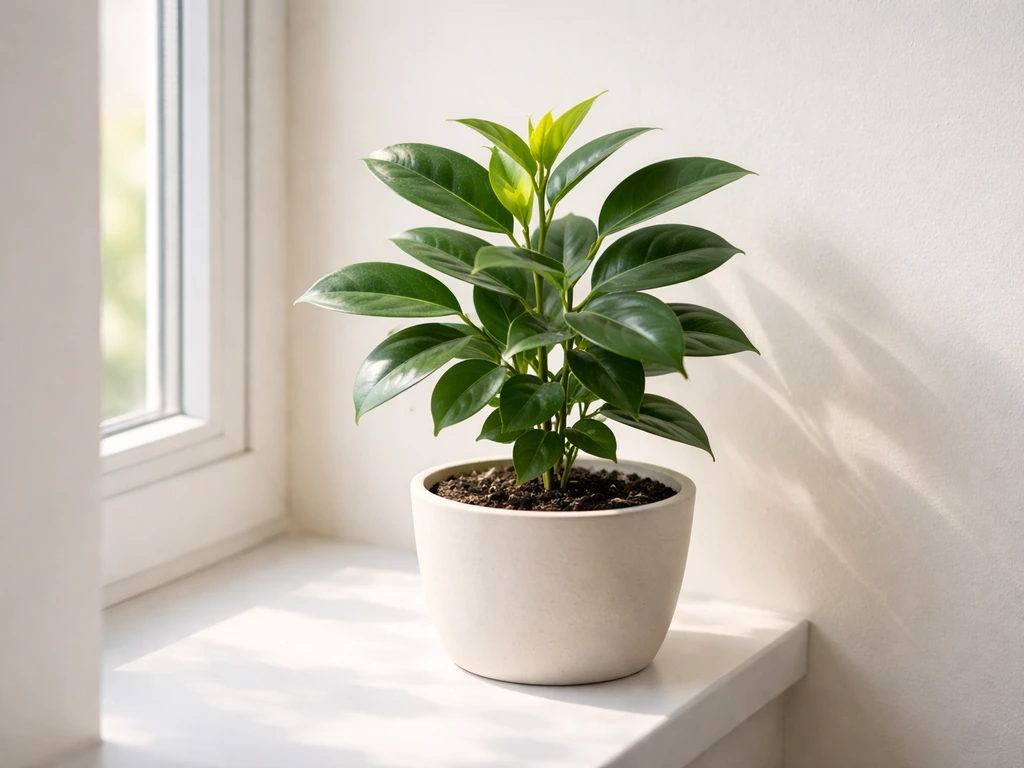
Light indoors: choosing placement, intensity, and schedules
Light is where most indoor plant failures start. Missouri Extension ranks improper light intensity right alongside improper watering as the top causes of houseplant failure, and that tracks with what I see all the time: plants pushed into dark corners or burned by direct summer sun through south-facing glass.
Here's the honest truth about labels like 'low light' and 'bright indirect': they're generalizations, not scientific measurements. UF/IFAS points out that window direction, the season, nearby trees or buildings, and even weather all affect how much light actually reaches your plant. A north-facing window in January in Minnesota delivers very different light than one in Florida in June. Use a free light meter app to get a rough lux reading if you want to stop guessing.
In general, Illinois Extension organizes houseplants into low, moderate, and bright light categories, and notes that many plants perform best in bright light even when they can tolerate lower levels. That distinction matters: 'tolerate' means surviving, not thriving. If you want actual new leaf growth, push your plants toward the brightest spot that doesn't scorch them.
- South-facing windows: brightest, best for succulents, cacti, and most flowering plants
- East or west-facing windows: moderate light, ideal for the majority of common houseplants like pothos, philodendrons, and peace lilies
- North-facing windows: lowest light indoors, best reserved for ferns, snake plants, or ZZ plants
- Grow lights: use a full-spectrum LED 6 to 12 inches above foliage for 12 to 16 hours per day to supplement or replace natural light
Rotate your pots a quarter turn every week or two so all sides of the plant get equal exposure. Plants lean toward light sources, and rotating keeps growth even and prevents lopsided sprawl.
Water and roots: watering, drainage, and avoiding common root problems
Overwatering kills more houseplants than underwatering. The confusion is that the symptoms look identical: drooping, yellowing, wilting. The way to tell the difference is to check the soil. Push your finger about an inch into the potting mix. If it's still moist, wait. If it's dry, water thoroughly until it drains freely from the bottom of the pot. Then wait again. That's the rhythm.
Drainage is non-negotiable. Houseplants grown in pots without drainage holes have a significantly higher risk of root rot and other disorders from waterlogged soil. If you love a decorative pot without holes, use it as a cachepot: drop a plastic nursery pot with drainage inside it, and empty any water that collects in the bottom after watering.
Stagnant water in the root zone cuts off soil oxygen, and roots need oxygen just as much as they need water. MU Extension notes that stagnation and low soil oxygen directly lead to root-rotting diseases and a weak root system overall. Wisconsin Extension explains why perlite is such a common ingredient in potting mixes: it preserves open pore space in the medium so air can reach roots even after watering. Think of it as tiny air pockets your roots breathe through.
A good potting mix for most houseplants, per Illinois Extension, is roughly one-third potting soil, one-third peat moss (or coco coir as a sustainable alternative), and one-third perlite or vermiculite. That ratio keeps moisture available without suffocating roots. Mixes with more perlite drain faster, which means you'll water more frequently and need to fertilize more often to replace nutrients that wash out. If you want to dig deeper into growing healthy plants indoors, the medium you start with is one of the most important decisions you'll make.
Nutrients and feeding: soil fertility vs water/hydroponic growing
Fresh potting mix comes loaded with nutrients, typically enough to feed a plant for six to eight weeks. After that, the plant is pulling from an increasingly depleted bank and growth will slow noticeably. That's when fertilizing becomes part of the routine.
For most soil-grown houseplants, a balanced fertilizer with a nutrient profile around 3-1-2 (nitrogen-phosphorus-potassium) works well for general maintenance, as noted by UConn Extension. You can feed on a weekly, biweekly, or monthly schedule depending on the fertilizer concentration and label directions. OSU Extension emphasizes following the label closely for pot size and dose: more is not better indoors, where nutrients accumulate in limited soil volume and can burn roots.
In water-based and hydroponic setups, nutrients are delivered directly in the water solution, which means you skip the question of soil fertility entirely but take on the responsibility of maintaining the right nutrient concentration (measured in EC, or electrical conductivity) and pH, usually between 5.5 and 6.5 for most plants. In hydroponics, nutrients are available immediately and plants often grow faster because of this, but the margin for error is smaller. An imbalance shows up in days, not weeks.
Terrariums are the exception: closed or semi-closed systems recycle nutrients through decomposition and generally need little or no added fertilizer. Over-fertilizing a terrarium can throw off the whole ecosystem quickly.
How indoor growth actually happens: photosynthesis, transpiration, and new growth signals
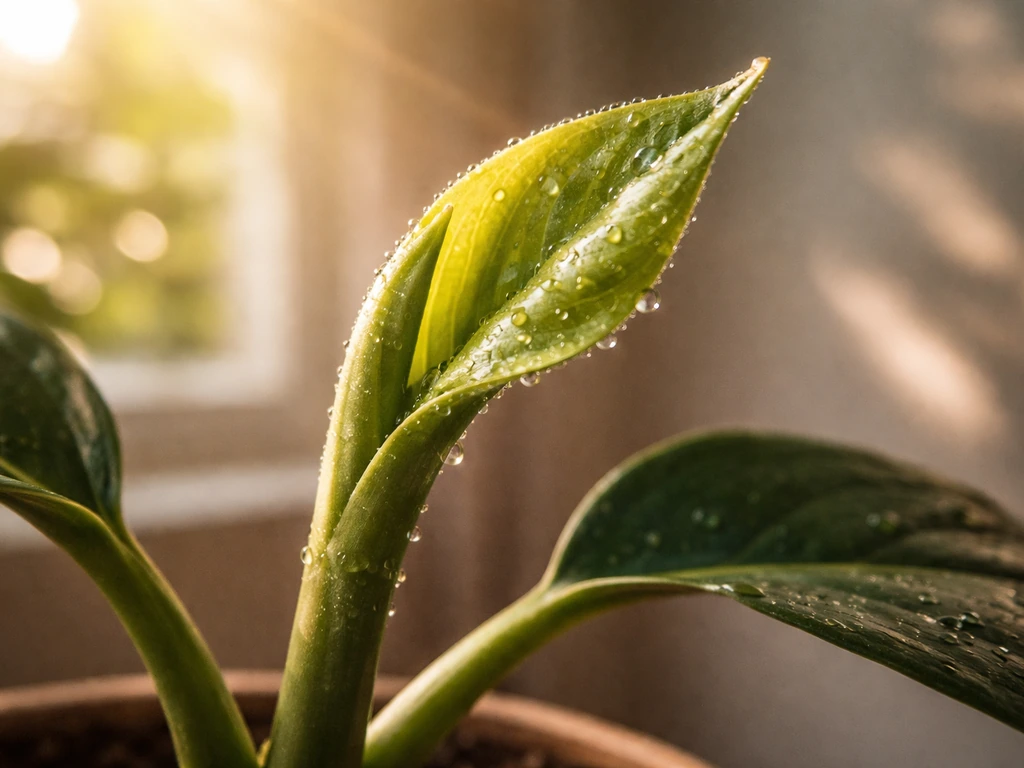
Photosynthesis is how your plant makes its food. Leaves capture light and use it to convert carbon dioxide from the air and water from the roots into glucose, which powers every process in the plant. More usable light generally equals more food production and faster growth, within the plant's natural limits. When light is too low, the plant can't make enough food to grow new leaves, maintain old ones, and run its other systems. Something gets cut, and it's usually the older leaves, which yellow and drop.
Transpiration is the process where water moves up from roots through the stem and out through tiny pores in the leaves called stomata. This isn't waste: transpiration drives nutrient movement through the plant, cools leaves, and keeps cells firm. When a plant wilts, it's because transpiration is outpacing water delivery, either because the soil is dry or because roots are damaged and can't absorb enough. High temperatures and low humidity accelerate transpiration and can stress plants that aren't adapted to those conditions.
Knowing how to spot real new growth helps you confirm the plant is doing well. Look for fresh unfurling leaves (often lighter green or reddish-pink depending on species), new stem extension, or visible root tips poking out of drainage holes. These are the signals that photosynthesis is running well and conditions are right. If you've had a plant sitting completely static for months, it's not growing, and something in its environment needs adjusting.
Step-by-step setup plan for beginners
If you're starting fresh or resetting after a struggling plant, here's a practical sequence to follow. The goal for the first two to four weeks isn't dramatic growth; it's stabilizing the plant and removing stressors so roots and leaves can recover.
- Choose your plant: Start with forgiving species like pothos, snake plants, spider plants, or ZZ plants. These tolerate a range of light and watering inconsistencies while you build your routine.
- Pick the right pot: Use a container with drainage holes that's only slightly larger than the root ball, one to two inches more in diameter. Avoid oversized pots.
- Mix your medium: Combine one-third potting soil, one-third peat moss or coco coir, and one-third perlite. Use a fresh, disease-free potting mix, not garden soil.
- Choose your spot: Place the plant in the brightest appropriate spot in your home. Most common houseplants do well in east or west-facing windows. If light is limited, set up a grow light on a 14-hour timer.
- Water correctly on day one: Water thoroughly until water drains from the bottom. Don't water again until the top inch of soil is dry. Set a reminder to check every two to three days.
- Week one: Let the plant settle. No fertilizer yet. Watch for drooping (normal adjustment) versus yellowing (a signal something is off). Keep temperatures between 65°F and 75°F.
- Week two: If the plant has stabilized and is in fresh mix, hold off on fertilizer. If it's in old, depleted soil, begin a light dose of balanced fertilizer at half the label's recommended strength.
- Weeks three and four: Look for new growth. A new leaf unfurling or visible root extension means the setup is working. Adjust light or watering slightly if leaves are still yellowing or soil stays wet too long.
If you want a broader foundation, how to grow houseplants covers additional species-specific guidance that pairs well with this setup process.
Common problems and quick fixes
Yellow leaves
Yellow leaves are the most common complaint and have the most causes: overwatering, underwatering, too little light, nutrient deficiency, or natural aging of lower leaves. Start by ruling out overwatering (soggy soil, roots smell musty), then check light levels, then consider whether the plant has been in the same soil for over a year without fertilizing. One or two yellow leaves at the base is usually normal aging. A cascade of yellowing from the top down or all over at once signals a systemic problem.
Drooping or wilting
Drooping usually means one of two things: too dry or too wet. Check the soil first. If it's bone dry, water thoroughly and the plant should recover within a few hours. If it's wet, ease off watering and improve drainage. Persistent wilting in moist soil often points to root rot, where damaged roots can't move water even when it's available. In that case, unpot the plant, trim any dark, mushy roots, and repot into fresh mix.
Slow or no growth
Plants go dormant or near-dormant in low light and during winter. If your plant has shown zero new growth for two or more months during active seasons (spring and summer), look at light first, then nutrients, then root space. A root-bound plant in old soil with low light will sit completely still. Repotting, moving closer to a window, and starting a fertilizer schedule often breaks the stall within a few weeks. For more ideas on helping houseplants grow, a combination of adjustments usually works faster than changing just one variable.
Pests
The most common indoor plant pests are fungus gnats, spider mites, and mealybugs. Fungus gnats are attracted to moist soil surfaces; letting the top inch of soil dry out between waterings reduces them significantly. For larvae already in the soil, Bacillus thuringiensis israelensis (Bti) applied as a soil drench kills larvae without harming the plant, per Mississippi State Extension. Yellow sticky traps catch adult fungus gnats and whiteflies and are a simple, non-toxic first step recommended by Colorado State Extension.
Spider mites thrive in dry conditions. Increasing humidity and washing the plant with water can help, and for more serious infestations, insecticidal soap or neem oil are effective, lower-toxicity options. University of Minnesota Extension notes that neem oil works against mealybugs and spider mites but advises keeping treated plants out of direct sun until the product fully dries to avoid leaf burn. Colorado State Extension also recommends insecticidal soap and horticultural oils as least-toxic controls for most small indoor pests. Always match the product to the pest and follow the label.
Growing in different mediums: soil vs water vs hydroponics vs terrariums
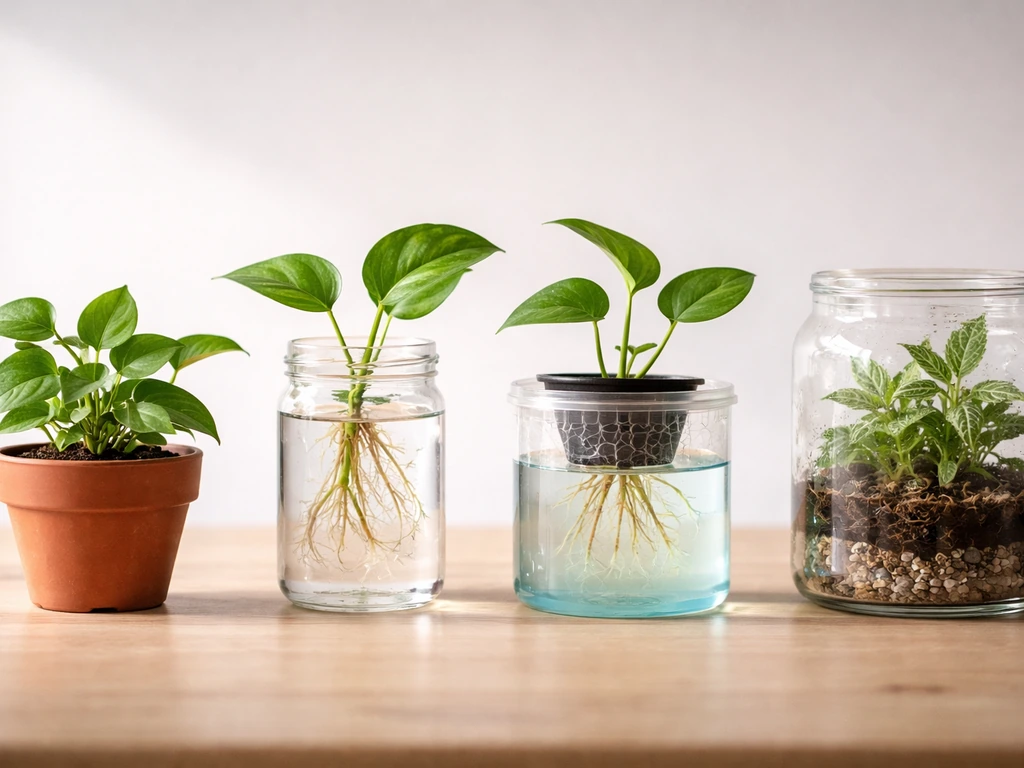
The fundamentals of plant growth don't change across mediums, but how you deliver those fundamentals does. Here's how the four main indoor growing environments compare:
| Medium | Nutrient delivery | Watering routine | Root health risks | Best for |
|---|---|---|---|---|
| Soil | From potting mix, then added fertilizer | Check soil moisture; water when top inch is dry | Root rot from overwatering or poor drainage | Beginners, most common houseplants |
| Water (propagation/semi-hydro) | Nutrients dissolved in water, changed weekly | Top off as needed; refresh fully every 1–2 weeks | Algae, root suffocation if stagnant | Easy propagation, pothos, philodendrons |
| Hydroponics | Measured nutrient solution, monitored by EC and pH | Continuous or timed delivery via pump/reservoir | Root rot if oxygen is limited; nutrient burn if concentration is too high | Faster growth, herbs, leafy greens, advanced growers |
| Terrarium | Decomposition cycle within the system | Minimal; closed systems self-regulate moisture | Mold and rot if humidity or drainage is off | Ferns, mosses, slow-growing tropicals |
Soil is still the easiest starting point for most people because the medium itself buffers mistakes. You have more time between problems and solutions. If you're curious about how to grow plants in your house across different setups, soil is where nearly everyone should begin before experimenting with water or hydroponic systems.
Water propagation is a low-commitment middle step. Many plants root and even grow long-term in water as long as you change it regularly to prevent stagnation and algae buildup. It's a great way to understand root development visually before committing to soil or hydroponics.
Hydroponics accelerates growth by making nutrients immediately available and giving roots direct oxygen access. If you're interested in growing compact plants with dense, vigorous output, hydroponic systems are often the method growers turn to because of that faster production cycle. The trade-off is closer monitoring and a higher upfront investment in equipment.
Terrariums are a unique case because they're partially self-regulating. A well-built closed terrarium recycles water and nutrients through decomposition. The main management challenges are airflow (too little and mold develops) and light (terrariums placed in direct sun cook the plants inside because the glass traps heat). A semi-open terrarium with a vent or loose lid handles airflow better for tropical plants.
One more reason to care: what plants do for your space
Beyond the satisfaction of keeping something alive and growing, indoor plants actively contribute to the air quality and feel of your space. If you want to build your collection with purpose, learning how to grow air purifying plants gives you a practical framework for choosing species that also work for your home environment, not just any plant that looks nice at the nursery.
The bottom line is this: indoor plants live and grow when you give them enough light to make food, enough water to stay firm and transport nutrients, roots that can breathe, and a temperature they're comfortable in. Get those four things mostly right and plants are more resilient than people give them credit for. You don't need to be perfect, you just need to be paying attention. Check the soil before you water. Move a struggling plant closer to the window. Add perlite to a dense mix. These small adjustments compound, and within a few weeks you'll see exactly what a plant looks like when it's actually thriving.
FAQ
How can I tell the difference between a plant that is just surviving and one that is actually growing?
Look for growth rate, not just survival. If a plant is staying firm with steady leaf color and producing at least one new leaf or new shoot over several weeks to a couple of months (species-dependent), it is likely meeting its needs. If it is only holding steady but no new growth appears for an extended stretch, the most common causes are insufficient light, overly dense or waterlogged soil limiting root oxygen, or an exhausted potting mix with no added nutrients after the initial fresh-mix window.
What’s the best way to move a plant to a brighter window without shocking it?
Yes, most indoor plants can be severely shocked by sudden light changes. Move the plant gradually, for example increase exposure by about 15 to 30 minutes of additional bright light every few days, or step it closer to the window over 1 to 2 weeks. Watch for leaf scorch (bleached, crispy patches) or drooping that worsens after moving, those are signs to back off and acclimate more slowly.
How do I set up “bright indirect” light when window labels don’t match my home?
In many homes the limiting factor for “bright indirect” placement is light reaching the leaves, not the window direction alone. A practical method is to keep the plant where it can still cast a mild shadow in the room during daylight, or use a phone light meter reading as a trend while you adjust distance. If growth stalls or leaves yellow from the bottom upward, try moving closer, then rotate to keep growth even.
Is it better to water indoor plants on a schedule or when the soil dries?
Most plants prefer watering based on the drying pattern of the potting mix, not a calendar. A useful rule is to water thoroughly only when the top portion has dried and the pot feels significantly lighter than right after watering. For quick triage, use the finger test plus the weight test, if the mix is dry 1 inch down but the plant is still droopy, check for root issues like rot or poor drainage.
What should I do if I think my plant is suffering from root rot rather than simple overwatering?
If you suspect root rot, act faster than you would for typical wilting. Remove the plant from its pot, smell the roots (musty or sour is a warning), trim dark mushy roots, and repot into fresh mix in a container with drainage. After repotting, water lightly enough to settle the mix, then wait longer between waterings because the damaged root system needs less water while it recovers.
How do I recover a plant if the soil became too dry and water won’t soak in properly?
Underwatering can mimic overwatering symptoms, but it usually improves after a thorough watering and the plant perks up within hours (sometimes by the next day). If the pot is bone dry and water runs straight through or the soil repels water, the mix may have become hydrophobic. Rehydrate slowly by watering in smaller doses until it absorbs evenly, then resume normal watering once it is evenly moist.
How can I tell whether my drainage is truly working and not just “not visible”?
For a diagnostic check, inspect how often you see standing water and whether water drains freely. If water pools in the outer decorative cachepot or sits under the nursery pot, empty it after watering. Also confirm the soil looks and feels unevenly wet, if you have a soggy surface with dry pockets or wet-heavy clumps, repotting into a more aerating mix is often the fix rather than watering less.
When should I fertilize, and when is fertilizing likely to make things worse?
Be cautious with fertilizing if the plant is weak, recently repotted, or growing in low light. In low light, the plant cannot use nutrients efficiently, so salts can build up and burn roots. A safe approach is to start feeding only when you see active growth (new leaves or consistent shoot extension), and use half strength for the first couple of cycles when you are unsure about the plant’s current condition.
What are signs of fertilizer salt buildup, and how do I fix it?
Common signs of nutrient salt buildup include browning leaf tips, white crust on soil surface, slow growth despite adequate light, and a potting mix that stays salty-smelling or stiff. To address it, do a periodic thorough flush by running water through the soil until it drains freely, then let it dry normally again. If the buildup is severe or the plant is stressed, repotting into fresh mix is usually more reliable than repeated flushing.
Does misting actually increase humidity enough to help indoor plants?
Misting is not a reliable long-term humidity solution for most homes because droplets evaporate quickly, and it can even leave mineral residue on leaves. It is most useful for short-term stress relief during very dry spells, but pairing a pebble tray or grouping plants is usually more effective for sustained humidity. If your plant is consistently dropping leaves or browning edges in winter, a humidifier near the plants can help most.
What’s the quickest, most effective way to stop pests before they spread to my other plants?
For pests, isolate the plant first, then treat based on the pest you identify. For fungus gnats, drying the top inch of soil and using sticky traps helps, then you may need a soil-targeted treatment for larvae. For spider mites and mealybugs, regular rinsing and wiping can reduce numbers quickly, and targeted soaps or oils work best when you cover undersides of leaves. Repeat applications may be required, because eggs or hidden life stages can survive initial treatment.
What changes should I expect when caring for plants in a terrarium compared to normal pots?
Terrariums need different care than open pots. If you see persistent fogging, mildew, or trapped standing condensation, you likely have too much moisture and not enough airflow. If plants are tall and stretched, light is too low. If plants are stressed or scorched, they may be getting excessive direct sun that heats the sealed environment.
How much does “space” matter indoors, and what does it mean in practice?
Space includes both pot size for roots and overall airflow around the plant. Even if the pot has drainage, a very tight cluster of plants or no airflow can increase pest pressure and slow drying of the soil surface. Aim for enough clearance that leaves are not constantly pressed against neighboring plants, and ensure vents or HVAC drafts are not blasting one plant directly.