You can grow your own plants at home successfully by matching three things from the start: the light you actually have, the space you can realistically use, and the time you're willing to spend on care. If you want to grow a plant in your home, start by choosing the right light level for the space you actually have how to grow plant in home. Pick a plant that fits those conditions, set it up in the right growing medium (soil, water, or a terrarium), and follow a simple watering and feeding routine. Hanging plants like pothos or spider plants can also thrive indoors when you match their light and watering routine to your space. That's genuinely the whole framework. Everything else is just detail layered on top of that.
How to Grow Your Own Plants at Home: A Beginner Guide

Marcus Holloway
23 Apr 2026
Start with your conditions: light, space, temperature, and time
Before you buy a single plant or bag of soil, spend five minutes assessing your space. Light is the single biggest variable that determines what you can grow. A south-facing window gets the most direct sun and supports the widest range of plants, especially in winter when light levels drop everywhere. North-facing windows are dim year-round. East and west windows fall in the middle. Be honest about what you have.
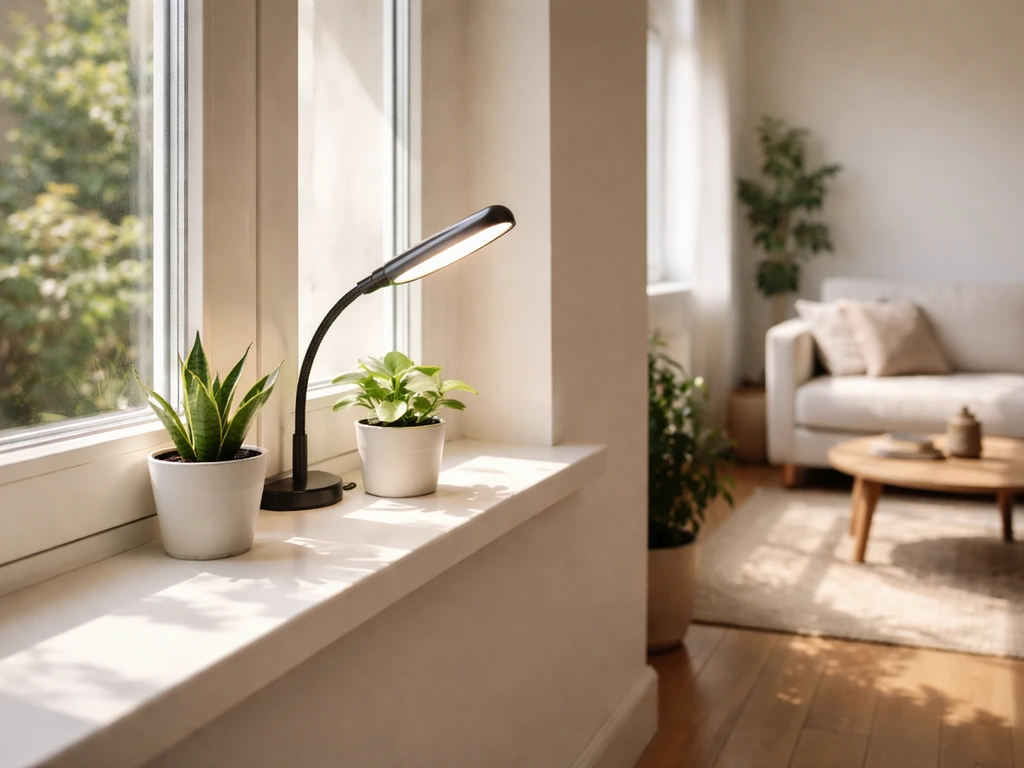
If your windows are weak, you can supplement with grow lights. The key insight from horticultural research is that plants care about their total daily light dose, not just how bright the light is at any one moment. A less intense grow light run for 16 to 18 hours a day can deliver the same total light energy as a shorter burst of stronger light. Use a timer set to run your grow light during the same window as your natural light so the plant gets a consistent schedule. Pairing artificial light with whatever window light you have is more effective than relying on either alone.
Temperature matters too, though most home growers don't need to obsess over it. Most houseplants and common edibles do fine between 60 and 75 degrees Fahrenheit, which is normal indoor temperature. Avoid placing plants directly above heating vents or next to drafty single-pane windows in winter. Those two spots kill more houseplants than bad watering habits do.
Finally, be realistic about your time. A hydroponic setup needs you to check nutrient solution levels every few days. A drought-tolerant succulent on a windowsill might need water once every two weeks. If you travel frequently or simply forget plants for stretches, build your growing plan around lower-maintenance options from the start rather than trying to become a different person.
Choose easy plants to grow at home
The fastest way to get discouraged is to start with a plant that's fighting your conditions from day one. Match the plant to your light level first, then consider your skill level. If you want a simple way to start, use the light, water, and plant-matching steps above as your baseline for how to grow green plants. Plants with dark green leaves are generally better adapted to low-light environments because they have more chlorophyll to capture whatever light is available. Variegated or pale-leafed plants almost always need more light.
| Plant | Light Needed | Difficulty | Good For |
|---|---|---|---|
| Pothos | Low to medium | Very easy | Beginners, small apartments, shelves |
| Snake plant | Low to bright indirect | Very easy | Low-light rooms, infrequent waterers |
| ZZ plant | Low to medium | Very easy | Beginners who travel or forget plants |
| Spider plant | Medium indirect | Easy | Hanging baskets, fast growers |
| Peace lily | Low to medium indirect | Easy | Low-light rooms, visible wilting signal |
| Basil (herb) | Bright direct or grow light | Easy | Sunny windowsill, edible plants |
| Lettuce/salad greens | Medium to bright | Easy | Containers, hydroponic trays |
| Heartleaf philodendron | Low to medium indirect | Easy | Trailing or climbing, forgiving |
| Succulents (e.g., echeveria) | Bright direct | Easy in right light | South windows, dry environments |
If you're in a small apartment with limited light, pothos, snake plants, and ZZ plants are your most reliable starting points. If you have a bright south or west window, herbs like basil and fast-growing greens like lettuce are satisfying because you can actually eat what you grow. For those interested in growing visually striking or show-worthy specimens, more specialized techniques apply, but getting the basics right with a forgiving plant first builds the confidence and observation skills you'll use forever. If you want show-worthy results, start by choosing a plant variety that fits your light and then use consistent care to encourage dense, healthy growth show-worthy plants.
Step-by-step setup for soil and container growing
Container growing in potting mix is the most forgiving method for beginners, and getting the setup right from the start prevents the majority of problems you'll face later.
Pick the right container
Always use a pot with drainage holes. If you fall in love with a decorative pot that has no holes, use it as an outer sleeve and keep the plant in a plain nursery pot inside. When sizing up, go no more than about 2 inches larger in diameter than the current pot. Jumping to a much bigger pot is a common mistake: the excess soil stays wet for too long, which creates root rot conditions before the roots even reach it. If you need to improve drainage in a container, you can drill holes along the sides near the bottom and add a half-inch layer of coarse gravel at the base.
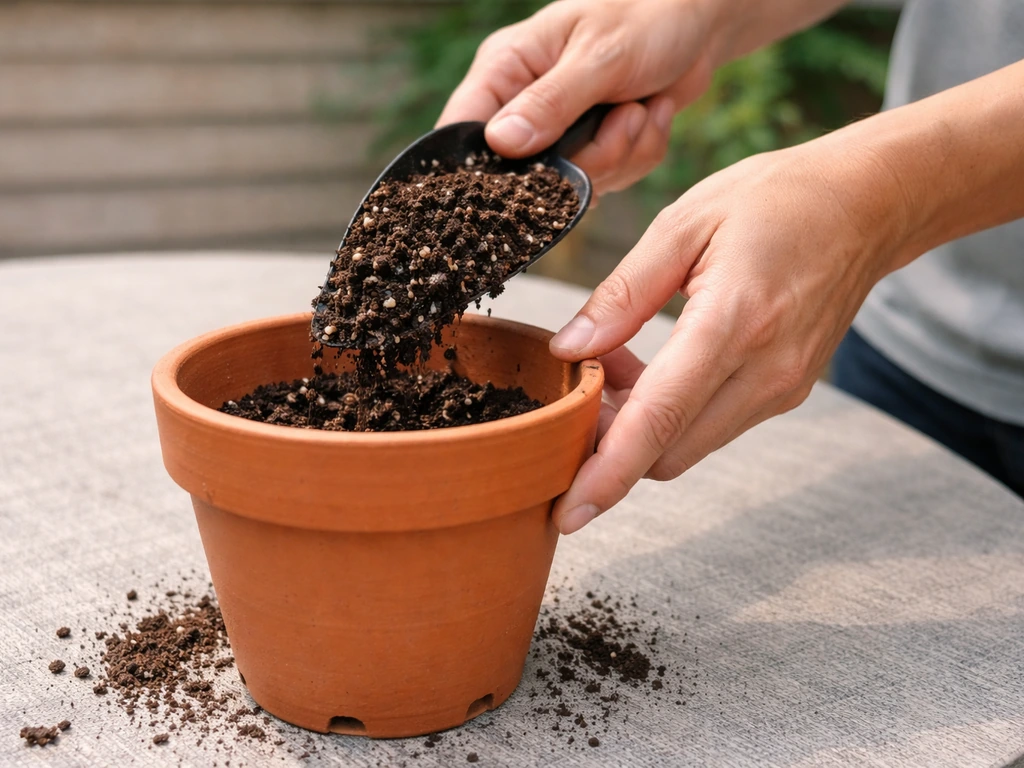
Use actual potting mix, not garden soil
Garden soil compacts heavily in containers, cutting off drainage and air to the roots. Always use a bagged potting mix formulated for containers. For succulents and cacti, use a cactus-specific mix or add perlite to a standard mix to improve drainage. When repotting, center the root ball in fresh soil and water it in gently to settle the mix around the roots without packing it down hard.
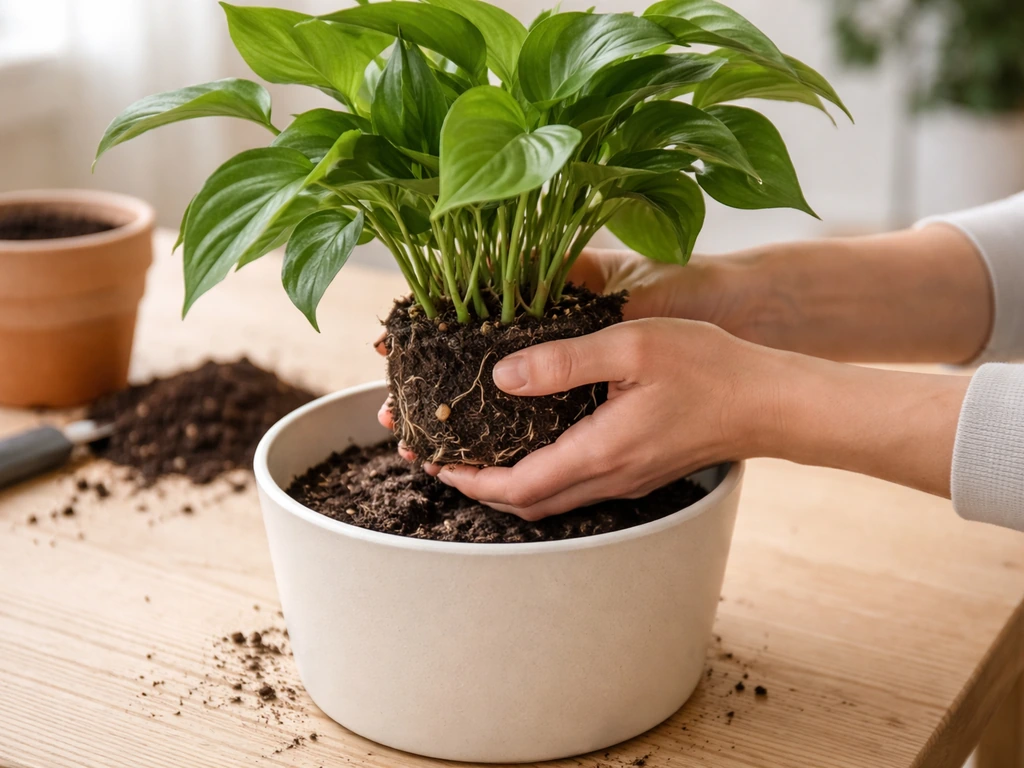
The repotting process, step by step
- Water your plant the day before repotting so the root ball holds together.
- Choose a new pot that is no more than 2 inches wider in diameter than the old one.
- Add a layer of fresh potting mix to the bottom of the new pot.
- Gently tip the plant out of its old pot and loosen any circling roots with your fingers.
- Center the root ball in the new pot and fill in around the sides with fresh potting mix.
- Water thoroughly until it drains from the bottom, then let it drain completely before placing it back in its spot.
Water growing and simple hydroponic setups
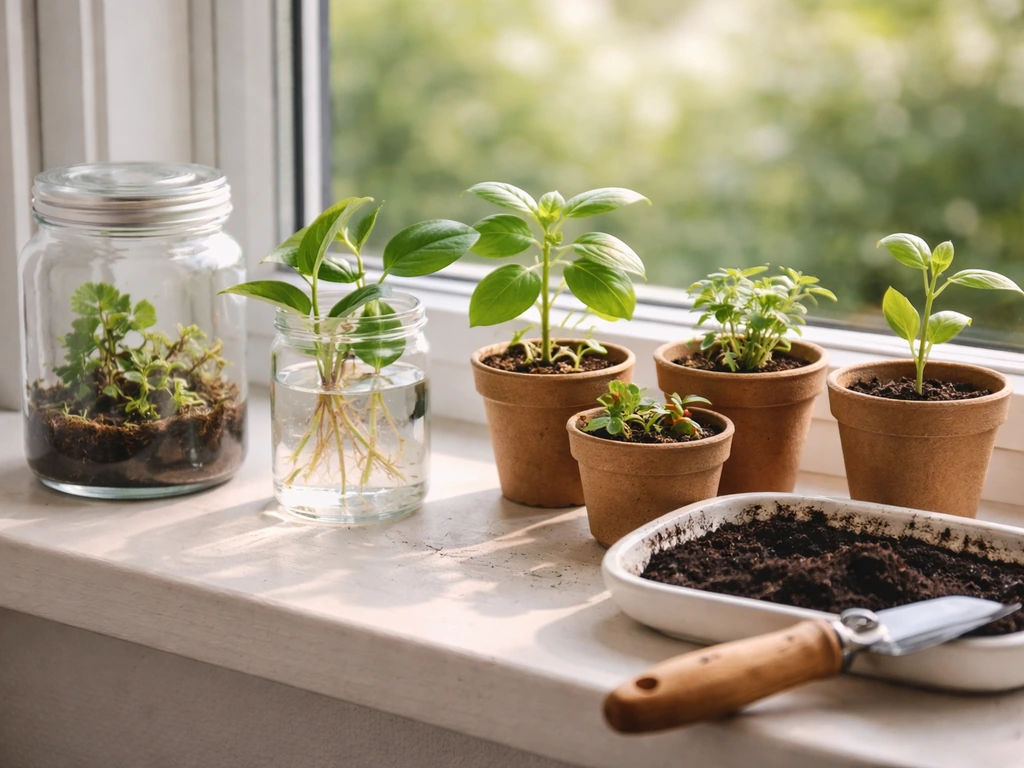
Growing plants in water is one of the easiest entry points into soil-free growing, and it scales all the way from a single cutting in a glass jar to a full beginner hydroponic setup. Both approaches work well at home.
Propagating in water (no equipment needed)
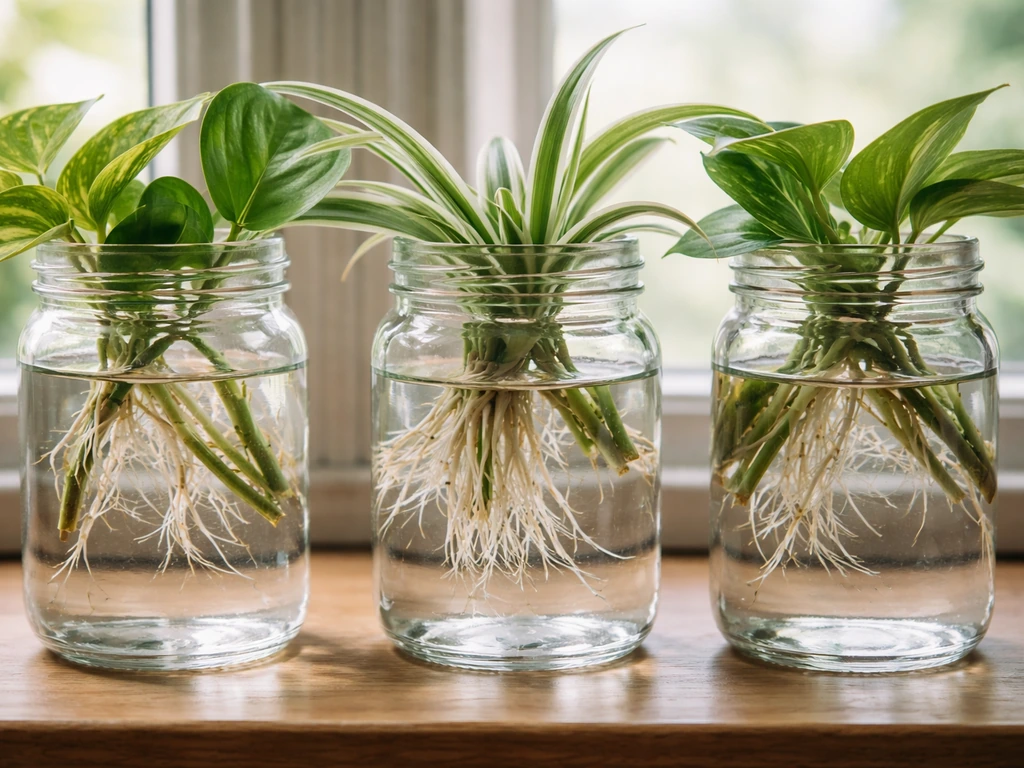
Many popular houseplants root easily in water. Pothos, philodendron, and spider plant cuttings will develop roots in a glass of water placed near a bright window within one to three weeks. Cut just below a node (the bump where a leaf meets the stem), remove the lower leaves so they're not submerged, and change the water every week to keep oxygen levels up. Once roots are an inch or two long, you can transplant to soil or keep growing in water with a diluted liquid fertilizer added to the water every few weeks.
Simple hydroponic setups for beginners
Hydroponics at home is simpler than it sounds. The core idea is this: instead of soil delivering nutrients, you deliver them directly through a nutrient solution in water. The plant's roots need two things from that water: nutrients and oxygen. Getting oxygen to the roots is why you can't just plunk a plant in still water and walk away. The most beginner-friendly hydroponic system is a wick system: a plant sits in a porous growing medium (like perlite or coco coir) with a fabric wick running down into a reservoir of nutrient solution below. The wick draws solution up passively, no pumps or electricity needed.
Another easy option is a simple Kratky-style passive setup, where you place a plant in a net cup in the lid of a reservoir filled with nutrient solution, leaving an air gap between the water surface and the roots so roots get both solution and air as the water level drops. Lettuce, herbs, and greens do especially well in these setups. You'll need a premixed hydroponic nutrient solution (available at any garden store) and you'll need to top off the reservoir every few days and fully replace the solution every one to two weeks.
Terrariums and closed micro-environment growing
A terrarium is essentially a self-contained mini-ecosystem inside a glass container. Done right, a closed terrarium can go four to six months without any watering at all because moisture cycles through the system: plants transpire water, it condenses on the glass, and drips back down to the soil. That makes terrariums genuinely one of the lowest-maintenance setups available once they're established.
Setting one up correctly
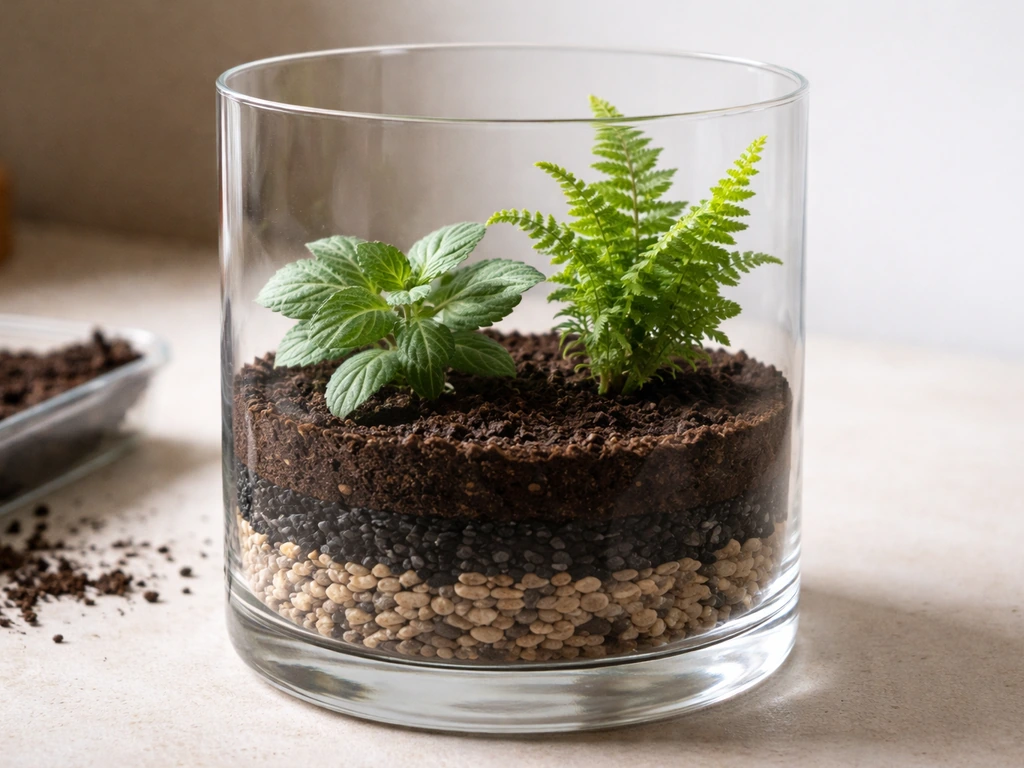
Start with a clean glass container. Wash it thoroughly before use so you're not introducing bacteria or fungi from the start. The layering matters: add activated charcoal above your drainage layer to help prevent odors and microbial buildup, then your potting mix, then your plants. One important warning: skip the thick layer of decorative stones at the very bottom. A thick gravel layer creates a perched water table where water pools just above it in the soil, keeping roots waterlogged even when the surface looks dry. If you want drainage material, keep it minimal.
Choose plants sized for the container and keep foliage from pressing against the glass walls. Leaves or stems touching the interior glass trap moisture and can cause rot or disease spots. Good terrarium plant choices include mosses, ferns, nerve plant (Fittonia), and small peperomias. Avoid succulents and cacti in closed terrariums as they need dry conditions and will rot in the trapped humidity.
Watching for terrarium problems
A healthy closed terrarium should show light condensation on the glass in the morning that clears during the day. If condensation is so heavy it never clears, crack the lid for a few hours to let excess moisture out. Algae growth on the glass is usually a sign of too much direct sunlight: move the terrarium to bright indirect light. A closed terrarium placed in direct sun will overheat and cook everything inside.
Watering, feeding, and basic care routines
Most plant deaths at home come down to one of two things: too much water or not enough light. Overwatering is far more common than underwatering, and it causes a slow invisible rot that looks like a sick plant even though the soil feels moist.
How to water correctly
Use the finger test before every watering. Push your finger about 1 to 2 inches into the soil. If it feels cool and moist, wait. If it feels dry at that depth, water thoroughly until it flows from the drainage holes, then let it drain completely. Never leave a pot sitting in a saucer of water for more than 30 minutes. Roots need air as much as water, and saturated soil suffocates them. Bottom leaves yellowing and dropping is one of the clearest signs you're overwatering. If the outer leaf tips yellow and then dry out, the plant usually needs more water.
Fertilizing without overdoing it
Houseplants grow slower than outdoor plants, so they need less fertilizer than you might think. A general all-purpose liquid fertilizer mixed at half or quarter strength is a safer starting point than full strength. During the growing season (roughly March through September), feeding once every one to three months is enough for most houseplants. In winter, when days are short and most plants slow down or rest, many need no fertilizer at all. Over-fertilizing shows up as brown crusty buildup on the soil surface or leaf tip burn, and it's harder to fix than under-fertilizing.
Feeding hydroponic plants
In a hydroponic system, the nutrient solution is the only source of food for your plants. There's no soil to fall back on. Follow the mixing ratios on your chosen hydroponic nutrient product, check the solution every two to three days, and replace the whole reservoir every one to two weeks to prevent salt and nutrient imbalances from building up.
Troubleshooting: what's going wrong and how to fix it
Most plant problems have a visible pattern once you know what to look for. Here's how to read the signs and respond.
Leggy, stretched-out growth
If your plant is growing long and spindly with large gaps between leaves, it's reaching for light. Move it closer to your window or add a grow light. This is one of the most common issues for indoor growers and it's entirely preventable by matching your plant choice to your actual light level from the beginning.
Yellow leaves
Yellowing from the bottom of the plant upward is the classic overwatering symptom. Check the soil moisture and let it dry out more between waterings. If the yellowing is in newer top leaves and the soil is dry, the plant may be nutrient-deficient, especially nitrogen. If you haven't fertilized in months, try a diluted feed. Yellow leaves with green veins (called interveinal chlorosis) can indicate a micronutrient issue like iron or magnesium deficiency, often triggered by a soil pH problem or overwatering damaging the roots' ability to absorb nutrients.
Root rot and overwatering damage
If your plant looks wilted even though the soil is wet, suspect root rot. If you notice stunting, yellowing, wilting, and brown or black roots, it can be a sign of root rot such as Pythium root rot. Gently tip the plant out of its pot and inspect the roots. Healthy roots are white or light tan and firm. Rotten roots are brown or black, mushy, and may smell. Remove all the affected roots with clean scissors, let the remaining roots air out for an hour, then repot in fresh dry potting mix in a clean pot. Water very sparingly for the first two weeks while the plant recovers. If more than two-thirds of the roots are gone, the plant may not recover, but it's worth trying.
Common pests
Spider mites are tiny and often invisible until you see fine webbing between leaves or a dusty stippled texture on leaf surfaces. They thrive in hot, dry conditions. Increase humidity, move the plant away from heat vents, and treat with insecticidal soap or neem oil applied to all leaf surfaces including the undersides. Fungus gnats show up as small flies hovering around moist soil. They lay eggs in wet topsoil, so letting the top inch or two of soil dry out between waterings breaks their lifecycle. Overwatering is the root cause of most fungus gnat problems, so fixing your watering habits solves the pest problem too.
Nutrient problems in soil and hydroponic systems
In soil, nutrient deficiencies are less common than nutrient excess (from over-fertilizing) or nutrient lockout from root damage. If you've been fertilizing regularly and still see deficiency signs, check whether your watering and root health are sound first. In a hydroponic system, nutrient problems are more common because you're the entire supply chain. If plants look pale or growth stalls, check that your nutrient solution is mixed correctly and at the right pH (most hydroponic crops do best between 5.5 and 6.5). A pH that's too high or too low locks out specific nutrients even when they're present in the water.
Do this today: your starter plan and ongoing checklists
Here's a concrete starting plan you can actually do today, not someday.
Your first day action plan
- Walk to your brightest window and stand there for 30 seconds. Is it bright enough to read comfortably? That's medium indirect light. Does it get direct sun patches on the floor? That's bright light. If it's dim all day, that's low light.
- Based on your light level, pick one plant from the table earlier in this article. One plant. Start simple.
- If you're going soil: buy a small bag of potting mix and a pot with drainage holes that fits your space. Avoid the urge to go big.
- If you want to try water growing: take a cutting from a pothos, philodendron, or spider plant (or buy a small start), put it in a glass of water, and place it near your brightest window.
- If you want a terrarium: grab a clean glass jar or tank, pick up a small bag of potting mix and activated charcoal, and choose two or three small ferns or mosses.
- Set a recurring phone reminder for once a week labeled 'check plants' so the habit has a trigger.
Weekly care checklist
- Do the finger test on every soil-grown plant before watering anything
- Check hydroponic reservoir levels and top off with plain water if needed
- Look at the undersides of a few leaves for early pest signs
- Rotate pots a quarter turn so all sides get equal light exposure
- Remove any dead or yellowing leaves to keep air flowing around the plant
Monthly and seasonal checklist
- Fertilize with diluted all-purpose fertilizer (March through September only for most houseplants)
- Fully replace hydroponic nutrient solution
- Check if any plants are root-bound by looking for roots circling out of drainage holes
- Clean dust off large leaves with a damp cloth so they can absorb light efficiently
- Reassess light: as seasons change, your window's intensity and angle changes too
- Note any growth changes in a small notebook or phone note so you can spot patterns over time
The real secret to growing your own plants at home isn't a green thumb, it's just attention and iteration. You notice something looks off, you adjust one variable, and you see what happens. For more detailed guidance on growing different plant types, use these tips to <a data-article-id="E9DFE89E-BD0F-4441-99AA-07380D670755">grow green plants at home</a> and adjust one variable at a time based on what you observe. After you get a baseline, use these tips to grow plants at home as you notice changes and iterate on one variable at a time. Every plant that doesn't make it teaches you something specific. The growers who end up with thriving plants everywhere didn't start out knowing everything. They started with one plant, paid attention, and kept going.
FAQ
I rent and cannot drill holes or change windows, how can I still grow plants at home?
Yes. Start with a “low-stakes” plant that can handle your exact light and watering pattern, and keep it in a nursery pot with drainage. For the first month, avoid fertilizing and focus on nailing light and moisture consistency, then adjust only one variable (light or watering) if leaves start changing.
How do I choose the right plant if I do not know my home’s actual light level?
Do a quick light check, not just where the window faces. Place your plants where you can comfortably read a book at midday, then watch for signs after 2 to 3 weeks (spindly growth means too little light, scorched or bleaching leaves means too much). If you cannot move plants later, choose plants known for your dimmest spot.
If I use grow lights, how do I set the schedule without accidentally stressing the plant? (Hours, distance, rotation)
Aim for consistent scheduling. If your window is weak and you add a grow light, run it on a timer for the same daily block of time each day, and keep the light at a workable distance so you do not overheat or scorch. Once per week, rotate the plant 90 degrees so growth stays even.
What is the best way to know when to water so I do not overwater, especially in small pots?
For soil in containers, watering is about how deep you wet and how well it drains. Use the finger test you already know, then water thoroughly until runoff happens and the pot fully drains. For sandy mixes or very small pots, you may need more frequent checks, but still use the same depth-based method so you are not guessing.
Can tap water cause issues, and what should I do if my plants struggle even when I follow the routine?
Tap water can be a problem for sensitive plants if it is heavily treated or very hard, especially for long-term hydroponics. If you notice chronic nutrient deficiency symptoms plus consistently wet roots, try letting water sit 24 hours to reduce chlorine, or test and adjust with an appropriate approach for your situation.
What mistake causes “mysterious root problems” after repotting, and how can I prevent it?
Watch your soil, not just the schedule. If the soil stays wet for many days or you see persistent yellowing from the bottom, you likely upsized too far or the mix is too dense. Move up gradually (small pot size increases), and consider a chunkier mix with better airflow if drainage is slow.
Are wick or Kratky passive hydroponic systems easy to maintain if I sometimes forget to check them?
If it is potted and indoors, a wick or Kratky setup can still go wrong if the reservoir level is inconsistent or if the wick dries out. Add a top-off reminder, keep the system out of hot sun, and do a quick check every two to three days so roots never sit in nutrient-starved or fully dry conditions.
When should I prune or pinch back my plants, and how aggressive can I be as a beginner?
When you prune, use a clean blade and cut just above a node or leaf junction so new growth can form. For beginners, pruning is most successful during active growth (spring through early fall for most houseplants), and you should only prune one section at a time to avoid shocking the plant.
What should I do if my closed terrarium is always foggy, or plants start rotting?
Closed terrariums are not only about watering, they are also about plant selection and airflow. If condensation is heavy and never clears, crack the lid briefly and move to brighter indirect light. Also avoid plants that outgrow the container, because crowded foliage increases rot risk.
How do I fertilize differently for soil versus hydroponics, and what mistakes are most common?
Match the fertilizer to the system and frequency. For hydroponics, you must use the correct premixed nutrient solution and you cannot rely on “half a scoop” intuition. For soil, the safest approach is dilute liquid fertilizer and feed sparingly, then stop entirely during winter for many houseplants.
My plant looks unhealthy. What is a simple decision process to troubleshoot without making it worse?
A good rule is to confirm the diagnosis before changing everything. If leaves are yellow and the soil is wet, that points to overwatering. If growth is pale or stalled, check light first, then verify nutrient mixing and pH in hydroponics. If roots smell bad or roots turn mushy, switch to the root-fix-and-repot approach rather than just watering less.
What plant should I start with if I want the highest chance of success and quick learning?
Yes, for most people the first plant should be something forgiving and easy to observe, like pothos, snake plant, ZZ, basil, or lettuce, depending on your light. If you choose a plant with strict moisture needs (like many fussy ferns or flowering plants), you will spend more time correcting conditions than learning the basics.