Most houseplants stall for one of a handful of reasons: not enough light, inconsistent watering, compacted or soggy soil, roots running out of room, or a nutrient tank that's been empty for months. Fix the biggest offender first and you'll usually see new growth within a few weeks. This guide walks you through every variable, starting with a quick plant check so you can pinpoint the real problem before changing anything.
How to Help Houseplants Grow: A Beginner Guide

Marcus Holloway
27 Apr 2026
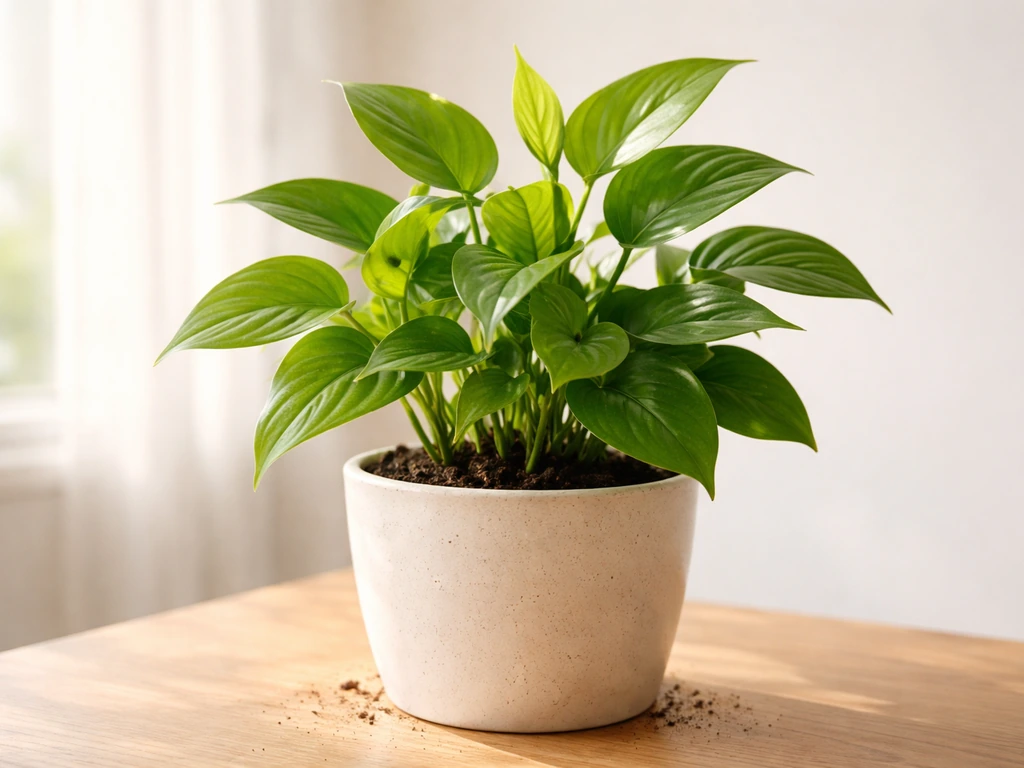
Quick plant check: why is your houseplant growing so slowly?
Before you adjust anything, spend five minutes actually looking at the plant. Slow growth has a lot of possible causes and the wrong fix can make things worse. For example, adding fertilizer to a plant with root rot won't help and will probably hurt. Start here.
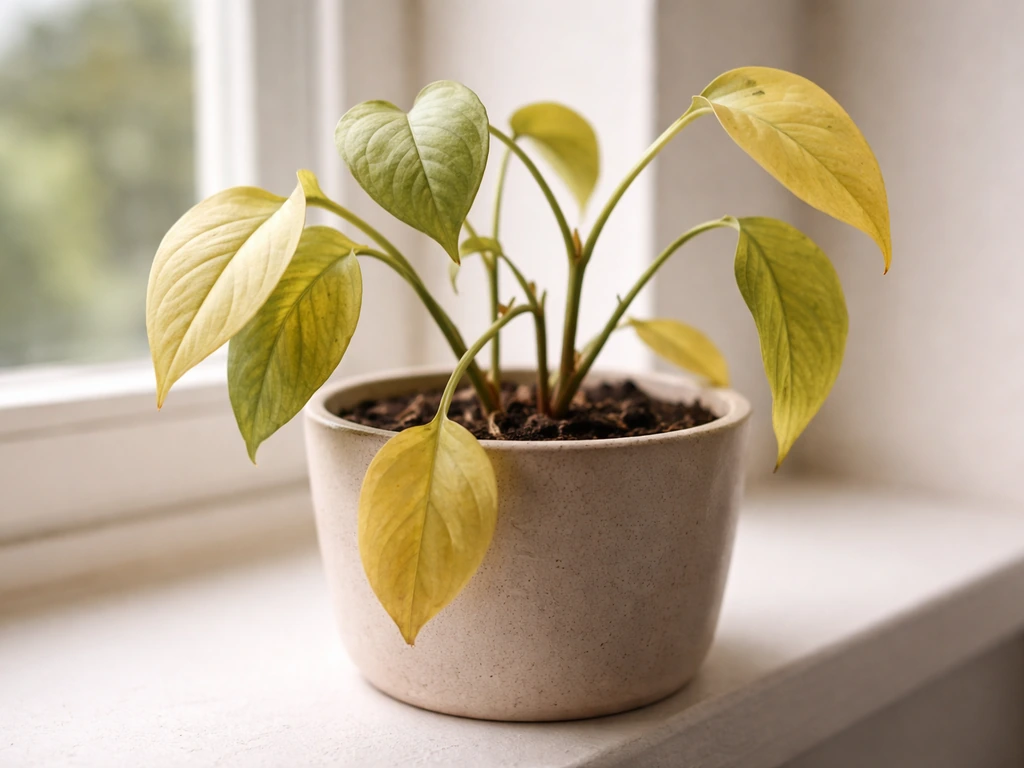
Check the leaves first. Light green or yellowing leaves often point to nitrogen deficiency, too much or too little light, root rot, or sap-sucking insects. Brown crispy tips usually mean low humidity, salt buildup from over-fertilizing, or underwatering. Soft, mushy yellow leaves lean toward overwatering. Leggy, stretched stems with wide spacing between leaves almost always mean not enough light.
Now flip a few leaves over and look at the undersides, the soil surface, and where the stem meets the soil. You're checking for pests (webbing, sticky residue, tiny moving specks), fungal issues (white powdery coating, black spots, fuzzy growth), and the soil condition (bone dry, soggy, or pulling away from the pot edges). Finally, lift the pot. If roots are poking out of drainage holes or circling the inside of the pot visibly, the plant is rootbound.
- Yellowing leaves, slow growth: possible light issue, nutrient deficiency, root rot, or pests
- Leggy stretching toward the window: definitely not enough light
- Soft mushy base or stems: likely overwatering or root rot
- Crispy brown tips: low humidity, salt burn from fertilizer, or inconsistent watering
- Visible webbing or sticky residue on leaves: pest problem, treat before doing anything else
- Roots circling the pot or escaping drainage holes: time to repot
- Soil pulling away from pot edges: severely underwatered or hydrophobic soil
This initial check tells you where to focus. A healthy plant in poor light needs more light, not more fertilizer. A pest-stressed plant needs treatment first. Once you know what you're dealing with, the rest of this guide gives you the exact fix.
Light: the single biggest lever for growth
Light powers photosynthesis, which powers everything else. If the light is wrong, better watering and fertilizing will only go so far. Most people underestimate how fast light drops off as you move away from a window. Light intensity can fall by roughly 75% or more just one meter back from the glass. That sunny-looking corner across the room may actually be quite dim.
How to actually measure the light in your space
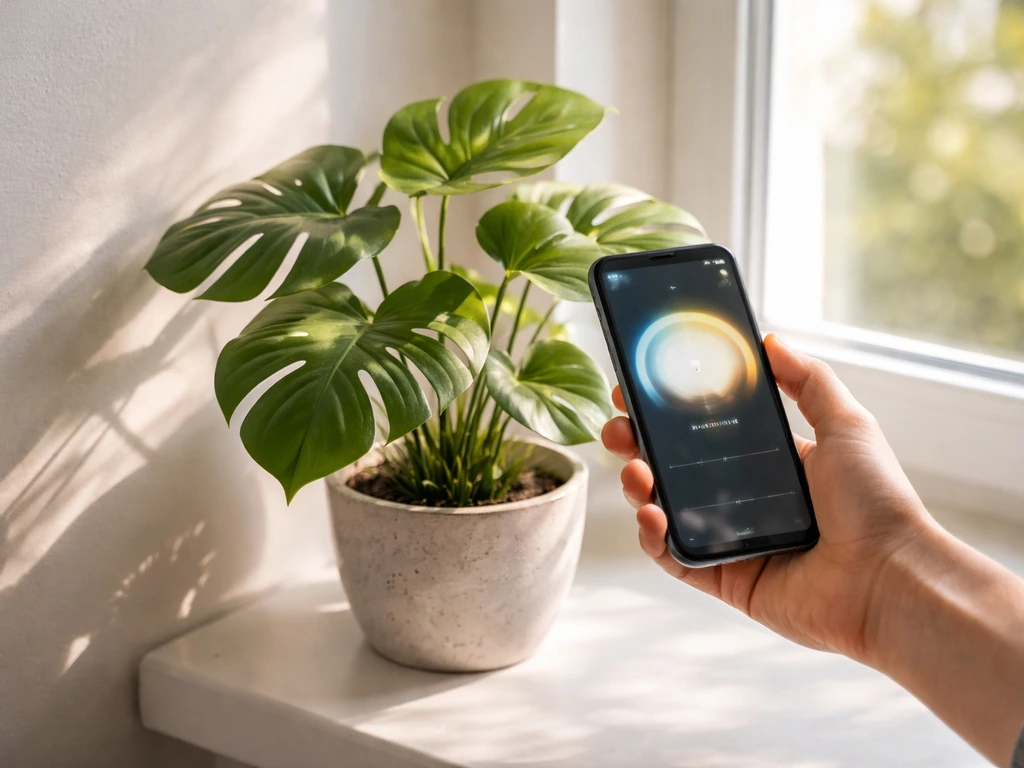
Instead of guessing, use a free lux meter app on your phone. Hold it at plant height and take a reading midday on a clear day. This gives you a real number to work with. For reference, north-facing windows typically deliver around 100 to 300 footcandles, which is fine for very low-light plants but not enough for most tropical foliage plants to grow actively. Vegetative growth generally needs around 100 to 500 PPFD, while flowering or fruiting plants often want 400 to 1,200 PPFD. African violets can get by on 50 to 150 PPFD, philodendrons manage on 50 to 250 PPFD, and succulents need 100 to 200 PPFD minimum.
Window placement and grow lights
Move the plant as close to the window as possible without exposing it to harsh direct afternoon sun (which can scorch many tropical plants). South and west-facing windows provide the most light in the northern hemisphere; north-facing windows are the weakest. If your best window still doesn't cut it, a basic LED grow light set 6 to 12 inches above the plant for 12 to 16 hours per day will fill the gap reliably. Grow lights have gotten cheap enough that this is genuinely one of the highest-return investments you can make for indoor plants.
One sign the fix is working: new leaves will be a normal size and color, and the stem internodes (the gaps between leaves) will be shorter and more compact. If new growth stays small and pale, the light is still too low. For budier results on smaller plants, focus on dialing in light intensity and consistent watering so the plant has the energy to form and swell dense buds how to grow small plants with big buds.
Watering, drainage, and getting the soil cadence right
Overwatering is probably the most common way people accidentally stop their plants from growing. It's not just about frequency though: it's about whether the roots can actually breathe between waterings. Consistently wet soil suffocates roots and creates the perfect environment for rot. The fix is watering based on what the plant and conditions actually need, not on a rigid schedule.
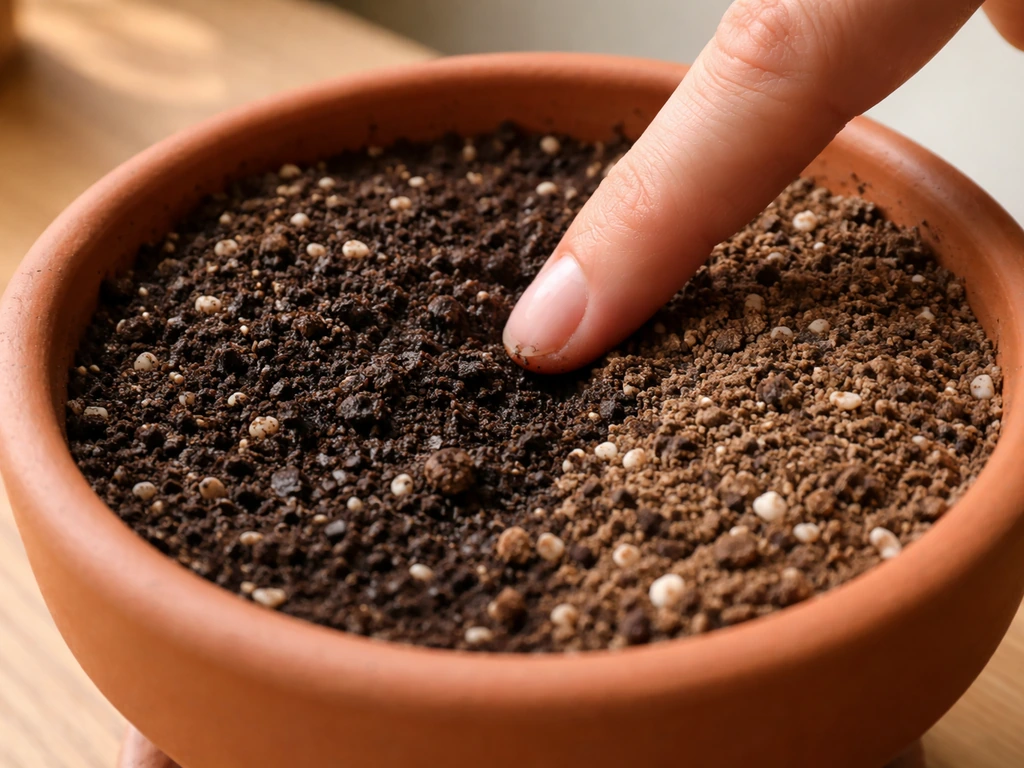
How to know when to water
The two most reliable methods are the finger test and the weight test. For the finger test, push your finger about an inch into the soil. If it still feels damp, wait. If it's dry at that depth, water thoroughly. For the weight test, lift the pot right after watering so you know what fully saturated feels like, then lift it again before the next watering. A noticeably lighter pot means the soil has dried out and it's time to water. This weight intuition builds quickly and becomes second nature.
How to water properly
When you do water, do it thoroughly. The goal is to wet the entire root ball, not just the top inch. Water slowly until it runs out of the drainage holes, then let the pot drain completely before putting it back. A good alternative is bottom watering: set the pot in a tray of water for 20 to 30 minutes so the soil wicks up moisture from below, then drain fully. This method encourages roots to grow downward and helps avoid surface-soil issues.
Drainage is non-negotiable
Pots without drainage holes trap water at the bottom even when the top layer of soil feels dry. That trapped water is a root rot factory. If you love a decorative pot that has no holes, use a plastic nursery pot with drainage inside it and just set it inside the decorative one. Empty the saucer after watering so the roots aren't sitting in standing water. If you suspect overwatering has already caused root rot, check the roots: healthy roots are white or light tan and firm; rotted roots are brown, mushy, and may smell. Trim away the damaged roots, let them air dry briefly, repot in fresh dry soil, and hold off on watering for a few days.
Choosing the right soil
Standard potting mix works for most houseplants, but it can compact over time and retain too much moisture for plants that prefer to dry out between waterings. Mixing in perlite (about 20 to 30% by volume) dramatically improves drainage and aeration. For succulents and cacti, use a dedicated cactus mix or go even heavier on the perlite. For moisture-loving tropical plants, a peat-based or coco coir mix retains more water while still draining well. Old, compacted soil is worth replacing at repotting time even if the plant isn't rootbound.
Fertilizing: feeding without overdoing it
Plants need nutrients to build new leaves, stems, and roots, and potting mix runs out of available nutrients faster than most people expect, often within a few months. If you haven't fertilized in over six months and your plant is in the same soil, a lack of nutrients is almost certainly part of why growth is slow.
What to use and how often
A balanced liquid fertilizer (something like 10-10-10 or 20-20-20 NPK) works well for most foliage houseplants during the growing season, roughly spring through early fall. Feed every two to four weeks during active growth, following the package dilution rate. Don't be tempted to double the dose thinking it'll help faster: too much fertilizer causes salt buildup that burns roots and shows up as crispy brown leaf margins and tips. If you see that kind of damage and you've been fertilizing heavily, flush the soil thoroughly with plain water to leach out the excess salts.
Seasonal adjustments
Cut back or stop fertilizing in late fall and winter when most houseplants slow down naturally due to lower light levels. Feeding a plant that's barely growing won't push new growth and just contributes to salt accumulation. Resume feeding in spring when you start seeing new growth emerge. If you're growing plants under strong artificial lighting year-round, you can maintain a lighter feeding schedule through winter since the plants are still actively photosynthesizing.
Reading deficiency signs
Nitrogen deficiency shows up as overall pale green to yellow leaves starting with older growth. Iron or manganese deficiency (common in high-pH soils) causes yellowing between leaf veins while the veins stay green. If you're watering with very hard tap water or your soil is alkaline, nutrient availability can drop even if you're fertilizing regularly because roots struggle to absorb certain minerals at high pH. Switching to filtered water or occasionally using a slightly acidic fertilizer can help.
Temperature, humidity, and airflow
Most common houseplants are tropical in origin, which means they prefer conditions that feel comfortable to us but with a bit more humidity than the average heated or air-conditioned home provides. Getting these conditions right doesn't require a greenhouse setup, but a few adjustments make a real difference.
Temperature
A daytime range of 65°F to 75°F (18°C to 24°C) is ideal for most houseplants. The bigger problems are sudden cold drafts, heat from vents, and cold windowsills in winter. Keep plants away from air conditioning vents, heating ducts, and drafty windows. Cold stress can cause leaf drop and halt growth even when everything else seems fine. If you're placing a plant near a window in winter, check that the leaves aren't actually touching cold glass overnight.
Humidity
Most homes run well below the humidity that tropical plants prefer. Common foliage houseplants do best around 40 to 60% relative humidity, while more humidity-loving tropicals want 50 to 70% RH. Low humidity shows up as brown crispy leaf tips and edges, slow growth, and leaves that curl or look stressed even when watering seems fine. A small humidifier near your plant shelf is the most effective and consistent fix. Grouping plants together also raises local humidity slightly as they transpire. Misting is often recommended but evaporates too quickly to make a meaningful difference, and can encourage fungal issues if leaves stay wet.
Airflow
Good airflow strengthens stems (plants actually build stronger cell walls in response to gentle movement) and prevents the stagnant air that encourages fungal disease and pests. A gentle oscillating fan on low, running a few hours a day, is plenty. Don't blast plants with strong direct airflow, which can dry them out too fast, but some air movement is genuinely beneficial.
Repotting, root health, and avoiding the most common growth blockers
Roots need space, oxygen, and healthy soil to absorb water and nutrients. When those conditions aren't met, the plant can't grow no matter how good the light is or how carefully you water. This is one of the most underestimated parts of houseplant care.
Signs it's time to repot

- Roots poking out of drainage holes or circling the surface of the soil
- The plant dries out extremely fast (within a day or two of watering)
- Growth has completely stalled despite good light, watering, and feeding
- The plant seems to be pushing itself out of the pot
- Soil is old, compacted, and drains poorly
How to repot correctly
The best time to repot is late winter to early spring, right before the growing season kicks in. Repotting in fall, when growth slows, gives roots less ability to push into new soil quickly. Choose a pot that's about 2 inches wider and deeper than the current one. Going too large is a real mistake: a huge pot holds far more moisture than the roots can use, which dramatically increases root rot risk.
When you remove the root ball, if the roots are tightly circling or matted on the outside, gently loosen them or slice through the outer layer to encourage new root growth outward. Set the plant in fresh potting mix, water it in, and place it back in its spot.
Salt buildup and soil quality
Over time, fertilizer salts and minerals from tap water accumulate in the soil and can damage roots even when you're not over-fertilizing. You might notice white crusty deposits on the soil surface or pot edges. Every few months, flush the soil thoroughly with plain water, letting it run through completely several times. This leaches out salt buildup and gives roots a reset. Repotting with fresh soil every one to two years also helps avoid this problem.
Alternative growing setups worth knowing
If you find yourself repeatedly dealing with soil-related problems like overwatering or compaction, it's worth knowing that some plants thrive in semi-hydro setups (using an inorganic medium like leca clay balls) or even water propagation for certain species. These approaches eliminate a lot of the guesswork around soil moisture. They're not necessary for most houseplant growers, but they're a useful option if traditional soil keeps giving you trouble.
Pruning, training, and propagation to kick growth into gear
Pruning often feels counterintuitive when a plant is already struggling to grow, but it's actually one of the best ways to redirect the plant's energy toward healthy new growth. Removing dead, damaged, or leggy growth tells the plant to put resources into fresh stems and leaves rather than trying to maintain struggling material.
How and when to prune
Prune in spring or early summer when the plant is entering its most active growing period. Use clean, sharp scissors or pruning shears. Cut just above a leaf node (the point where a leaf meets the stem), which signals the plant to send out new growth from that point. For leggy plants, cutting back to a point where the stem is still healthy and compact encourages a bushier, fuller shape. Remove any yellow or dead leaves at the base regularly since they're not contributing to photosynthesis and can become disease entry points.
Training for better shape and light exposure
Vining plants like pothos, philodendrons, and monsteras can be trained up a moss pole or trellis, which encourages larger leaves and more vigorous growth. Rotating the pot a quarter turn every week or two ensures all sides of the plant get equal light and prevents lopsided growth toward the window.
Propagation as a growth strategy
If a plant is very leggy or sparse, taking stem cuttings and propagating them in water or fresh soil can give you multiple healthier plants. Water propagation is simple and lets you watch root development in real time, which is genuinely useful for learning. Once roots are a couple of inches long, pot the cutting into soil or a suitable growing medium. Pruning the parent plant for cuttings also stimulates new branching at the cut point, so both the parent and the cutting benefit.
Leaf problems and pests that are quietly blocking growth
Pests and diseases don't just look bad, they actively drain the plant's resources and stress it enough to halt growth entirely. Sap-sucking insects remove the plant's food supply from the inside; fungal issues clog leaf tissue. Catching these early makes treatment much easier.
Most common pests and how to identify them
| Pest | What to look for | Quick fix |
|---|---|---|
| Spider mites | Fine webbing under leaves, yellow stippling on leaf surface, tiny moving specks on a white sheet when leaf is shaken over it | Isolate plant, wipe leaves with damp cloth, spray thoroughly under leaves with neem oil or insecticidal soap; mites thrive in hot dry conditions so improving humidity helps prevent reinfestation |
| Mealybugs | White cottony clusters in leaf joints and along stems, sticky residue | Dab individual clusters with rubbing alcohol on a cotton swab, then spray whole plant with insecticidal soap; repeat weekly for 3 to 4 weeks |
| Scale | Brown or tan bumps on stems and leaf undersides that don't move; sticky honeydew below | Scrape off manually, treat with neem oil or horticultural oil; consistent repeat treatments needed |
| Fungus gnats | Tiny flies around the soil surface, larvae in moist topsoil damaging young roots | Let soil dry more between waterings; use yellow sticky traps to catch adults; bottom watering reduces surface moisture that attracts them |
| Whiteflies | Clouds of tiny white insects fly up when plant is disturbed; sticky leaves | Yellow sticky traps, insecticidal soap spray; treat in the morning when flies are less active |
Disease problems to watch for
Powdery mildew shows up as white to gray powdery patches on leaf surfaces, usually triggered by poor airflow and inconsistent humidity. Improve airflow immediately and treat with a diluted neem oil spray. Root rot (from overwatering) shows as mushy brown roots, yellow soft leaves, and a general wilting despite moist soil. The fix is to unpot, trim dead roots, let them air out, and repot in fresh well-draining mix. Always diagnose correctly before treating: the same yellowing leaf can mean pests, overwatering, underwatering, or nutrient deficiency, and each has a different solution.
What to do today if you spot a problem
- Isolate the affected plant from others immediately to prevent spread
- Identify the pest or disease before applying any treatment
- Remove heavily infested or diseased leaves and dispose of them (not in compost)
- Treat with the appropriate method: insecticidal soap, neem oil, rubbing alcohol, or improved drainage depending on the problem
- Repeat treatment every 7 to 10 days for at least three to four rounds since most pest treatments don't kill eggs
- Reassess care conditions (humidity, airflow, watering) to remove the underlying stressor that made the plant vulnerable
Putting it all together: what to change first
The best approach is to fix one or two variables at a time so you can actually see what's working. Start with light and watering since those have the biggest impact on growth and the most room for error. If the light is clearly inadequate, move the plant or add a grow light. A good indoor plant also needs balanced temperature, humidity, and airflow, not just light, water, and fertilizer.
If the soil is staying wet for too long, adjust your watering habits and consider adding perlite at the next repot. Once those basics are solid, layer in a consistent fertilizing schedule during the growing season. If the plant still isn't responding, that's when to look more carefully at root health, pot size, pests, and environmental conditions like humidity. Most houseplants will reward you with visible new growth within two to four weeks of meaningful improvements.
If you want a simple, step-by-step checklist for how to grow plants in your house, start by confirming your light, watering, and soil conditions match what your specific plant needs. Understanding what indoor plants need day to day makes it much easier to keep them thriving and growing how to indoor plants live and grow.
If you're also curious about building healthy plants from scratch or exploring different growing methods, learning how to grow houseplants in different mediums or environments adds a lot of useful context to everything covered here. For a practical way to combine faster growth with indoor air quality goals, use this guide on how to grow air purifying plants.
FAQ
My plant is “green” but not growing, should I fertilize?
If your plant is producing new leaves but they stay small or pale, the most likely cause is still light or inconsistent moisture, not fertilizer. Check that the plant is getting enough intensity at plant height, then make sure the soil dries and re-wets reliably (not chronically wet and not bone dry). Fertilizing a plant that is not getting enough light usually just increases salt buildup without fixing growth.
How often should I rotate my houseplant to help it grow evenly?
Yes. For most tropical foliage plants under normal indoor light, 10 to 20% of the light per day change can matter, so rotating too rarely can create uneven growth. Turn the pot about a quarter turn every 1 to 2 weeks, then stop rotating the moment you see new growth if it seems to be stabilizing, so the plant does not keep re-adjusting.
Can I just water on a set schedule to help plants grow?
Not necessarily. “Weekly watering” often fails because evaporation, pot size, soil mix, and season change the soil moisture cycle. If the soil is still damp at 1 inch deep, skip that watering. The target is a consistent wet-to-dry rhythm appropriate for the plant, typically drying down between waterings for many popular tropicals.
What should I do about watering after I trim rotted roots?
If you suspect root rot, avoid watering again “just to be safe.” After trimming mushy roots and repotting into fresh dry, well-draining mix, wait several days before watering (until you can feel dryness at least in the top portion of the new mix). The key is that damaged roots need time to heal and you need airflow in the soil.
My plant dries too fast or stays wet too long, how do I fix the watering problem?
Start with pot drainage and mix aeration. If water runs straight through without slowing and the plant wilts, you likely need a soil mix that holds some moisture (more peat or coco coir depending on the plant) rather than more frequency. If water sits too long, increase aeration with perlite and check that the pot has drainage holes and proper saucer use.
How do I know if growth issues are from fertilizer buildup, not low light or watering?
Look for signs that are consistent across multiple days. Fertilizer salts show up as white crusts, and they also increase leaf tip browning even if you water “enough.” If you see salts and the plant is struggling, flush until water runs clear from the drainage holes, then resume with a reduced dose for the season rather than returning immediately to full strength.
Why did my plant stop growing after I brought it home?
A newly purchased plant may appear to “stall” because it is stressed by moving, lower light in your home, and adjusting to a different watering cycle. Give it 2 to 4 weeks with stable conditions, ideally bright light near a window or under a grow light, and check that the soil is not staying soggy. Only repot early if the pot is missing drainage or the mix is clearly unusable or compacted.
Can I use a grow light to speed up growth all year, and what’s the catch?
Yes, but it’s plant- and setup-dependent. For plants under grow lights, keep daily light exposure consistent (for example, 12 to 16 hours) and maintain the correct distance so intensity stays in range. If you see stretching or pale new growth, raise time slightly or reduce distance, then wait 2 to 3 weeks before making another big change.
My plant has brown tips, is it always under-watering or low humidity?
Humidity issues can mimic watering problems. If tips brown while soil moisture is correct (drying as expected), consider raising relative humidity or using a humidifier rather than adding fertilizer or watering more. Also ensure airflow, because very humid, still air can increase fungal problems even if the plant likes the moisture.
When should I restart fertilizing in spring to help growth?
Spring feeding is a common trigger, but don’t start a full schedule until growth is actually active. Resume fertilizing when you see new leaves or clear new shoot growth, and keep the same dilution guidance. If you restart fertilizing before light improves, the plant may not use the nutrients and salts can accumulate.
Why is my plant still not growing in winter even though I’m watering carefully?
Yes, especially with humidity-loving plants in winter. Cold windowsills can chill leaves and slow root function even if the room air temperature feels fine. Move the plant slightly away from the glass and verify that leaves are not touching cold panes overnight, then reassess growth after a couple of weeks.