You can grow a healthy plant today, even if you've killed every plant you've ever owned. The process is simpler than most people think once you match the right plant to your actual conditions, set up a basic routine, and know what warning signs to watch for.
How to Grow a Plant: Wikihow-Style Step by Step Guide

Marcus Holloway
20 Apr 2026
This guide walks you through every step, from picking the plant all the way to adjusting your care as it grows, including how things change if you're growing in soil, water, or a terrarium. For a BBC-style walkthrough, look for practical, step-by-step guidance on where to place your plant and how to adjust watering as it grows how to grow a plant bbc.
For a BBC-style walkthrough, also see how to grow your plant for a clear step-by-step care routine as it grows how to grow a plant bbc.
Choosing the Right Plant for Your Space
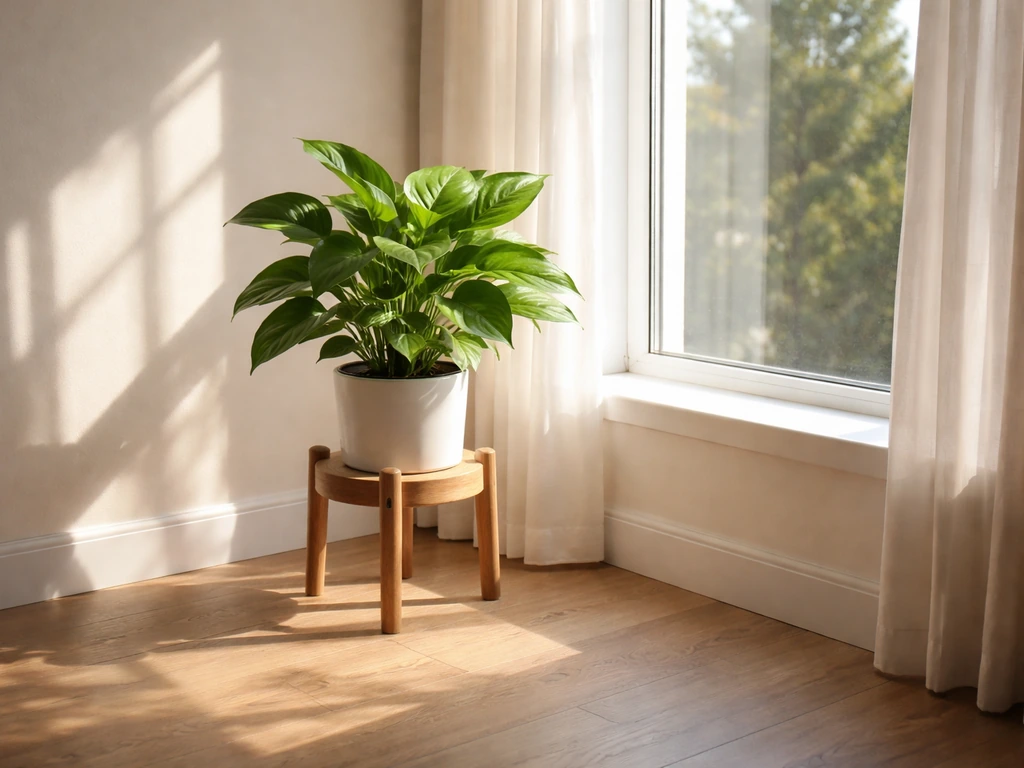
Before you buy anything, look at your light. Stand in the room where you want to grow and look at where the sun actually hits, not where you wish it hit. A south-facing window gets 6 or more hours of direct sun daily and can handle almost any plant. East or west-facing windows give you moderate indirect light, which is ideal for most common houseplants. North-facing rooms get low, diffuse light, and only a specific set of plants will thrive there without a grow light.
Match the plant to the light you have, not the light you'd like to have. Here's a reliable starting point based on experience level and space:
| Light Condition | Best Beginner Plants | Why They Work |
|---|---|---|
| Bright direct sun (south window) | Basil, succulents, tomatoes, peppers | Love heat and high light, dry out quickly which prevents overwatering |
| Moderate indirect light (east/west window) | Pothos, spider plant, peace lily, herbs | Tolerant of fluctuating light, forgiving of occasional missed watering |
| Low light (north window or interior room) | ZZ plant, snake plant, cast iron plant | Adapted to shade, very slow metabolism so overwatering is the main risk |
| Grow light setup (any room) | Lettuce, seedlings, tropical plants | Consistent spectrum lets you grow almost anything regardless of window access |
If you've killed plants before, start with a pothos or a snake plant. Both survive neglect, bounce back from underwatering, and tell you clearly when something is wrong. Once you've kept one alive for three months, you'll have a much better instinct for what plants actually need.
Gathering Supplies and Setting Up the Growing Environment
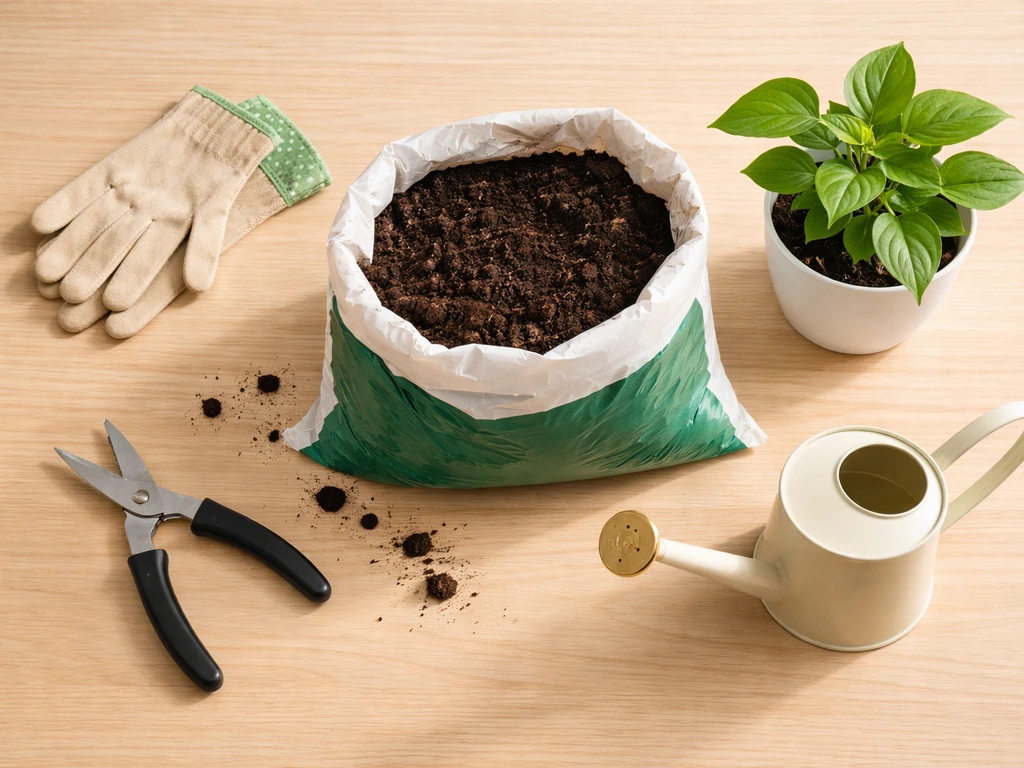
You don't need to spend a lot to start. A basic setup for a single container plant costs under $20, and most of it is reusable. Here's what to pull together before you bring a plant home:
- A pot with drainage holes (6-inch diameter works for most beginner plants)
- A saucer or tray to catch water
- Potting mix appropriate for your plant type (general-purpose, cactus mix, or seed-starting mix)
- A small watering can with a narrow spout for control
- A spray bottle if you're growing anything that likes humidity
- A grow light if your space gets less than 4 hours of usable light
Drainage holes are non-negotiable for soil growing. Without them, water pools at the bottom of the pot and rots roots, which is the single most common reason beginner plants die. If you fall in love with a pot that has no hole, use it as a decorative cachepot and set a smaller nursery pot inside it. Lift the inner pot out to water, let it drain, then set it back in.
For your growing environment, temperature matters more than most beginners realize. Most common houseplants want temperatures between 60°F and 80°F (15°C to 27°C). Keep plants away from heating vents, air conditioning drafts, and cold window glass in winter. Humidity between 40% and 60% suits most tropical houseplants. If your home runs dry in winter, a small humidifier or a pebble tray filled with water placed under the pot helps without overwatering the roots.
Planting and Initial Care
When you first bring a plant home, resist the urge to immediately repot it. Give it one to two weeks to adjust to your home's light and humidity before moving it to a new container. Plants get stressed by changes, and doing too many things at once, new home plus new pot plus new soil, makes it harder to figure out what's causing any problems that show up.
Potting Your Plant
- Add a layer of potting mix to the bottom of the pot, enough so the plant's root ball sits about 1 inch below the rim.
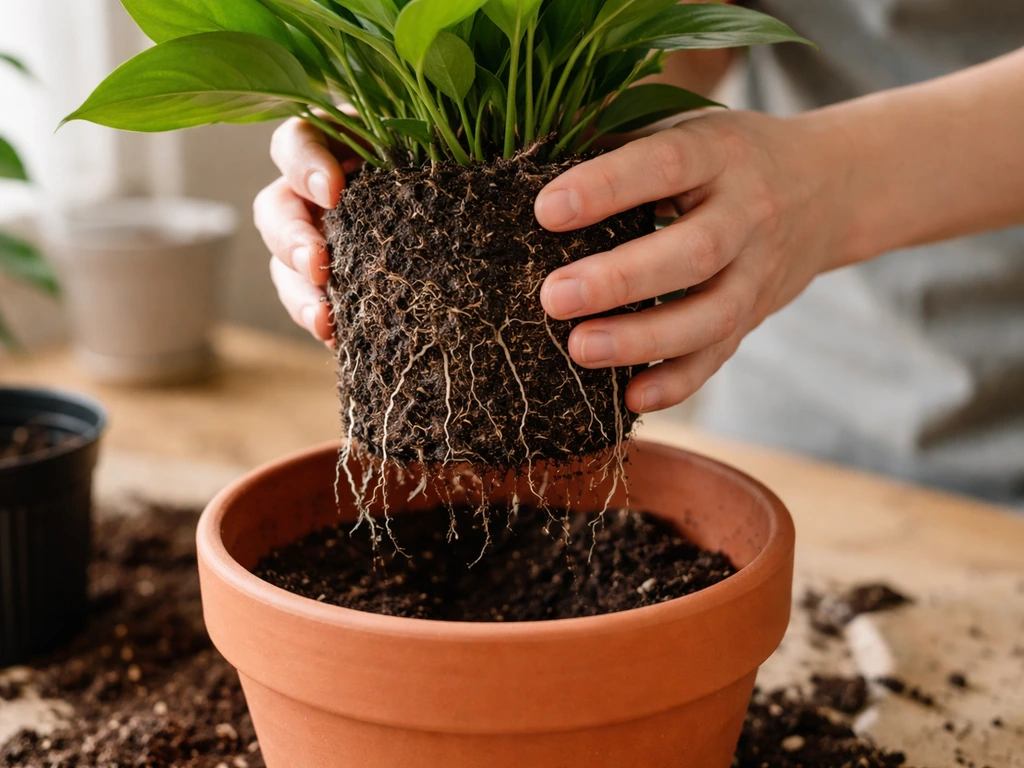
- Remove the plant from its nursery pot and gently loosen any tightly wound roots at the base.
- Set the plant in the center, then fill in around the sides with fresh potting mix.
- Firm the soil gently with your fingers, but don't pack it tightly. Roots need air.
- Water thoroughly until water flows out of the drainage holes, then let it drain completely before placing it on a saucer.
Watering
The most reliable watering method for beginners is the finger test: push your finger about an inch into the soil. If it feels dry at that depth, water thoroughly. If it still feels moist, wait another day or two and check again. Most houseplants in 6-inch pots need watering every 7 to 10 days in average indoor conditions, but that number changes with pot size, soil type, temperature, and season. When in doubt, underwater rather than overwater. Most plants recover from drought faster than they recover from root rot.
Light
Place your plant as close to your light source as it can tolerate. Even a few feet away from a window cuts light intensity significantly. A plant sitting 3 feet from a window receives roughly 75% less light than one sitting 6 inches away. If you notice your plant leaning heavily toward the light source, rotating the pot a quarter turn every week keeps growth even. Leggy, stretched stems are a clear signal the plant is not getting enough light and is reaching for more.
Soil
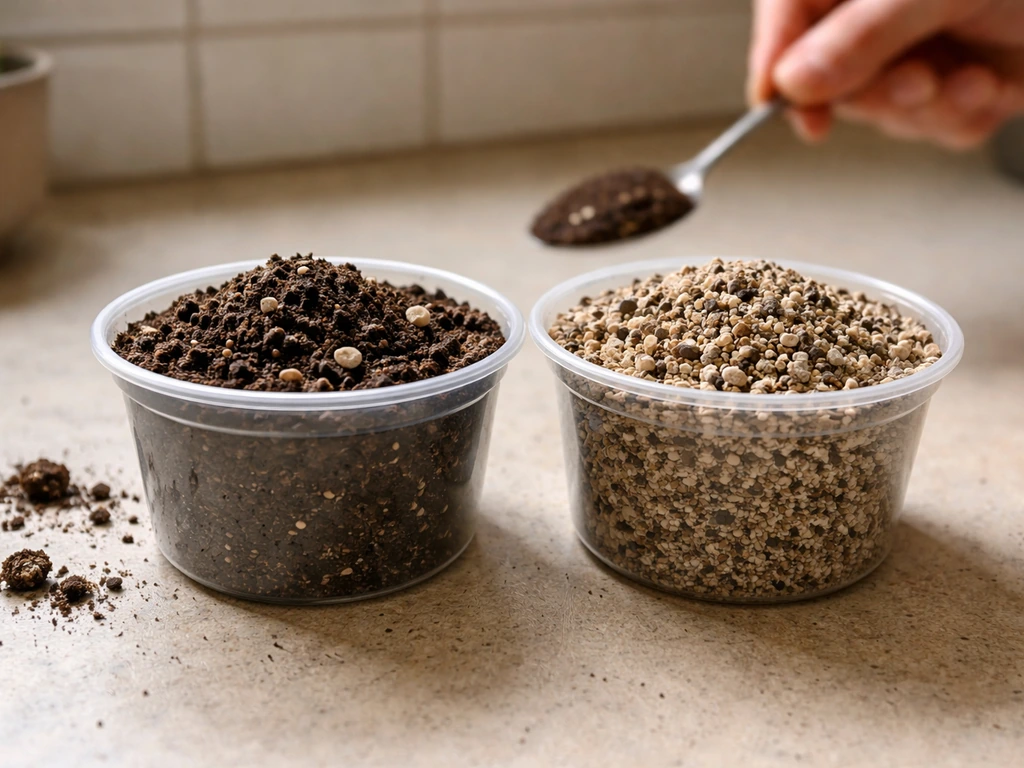
General-purpose potting mix works fine for most tropical houseplants, herbs, and vegetables. For succulents and cacti, use a cactus or succulent mix, or blend regular potting mix with coarse perlite at a 50:50 ratio. Perlite is the small white particles you often see in commercial mixes. It improves drainage and aeration, reducing the risk of waterlogged roots. For seedlings, use a seed-starting mix, which is finer and lower in nutrients than regular potting soil. Regular potting soil can compact too much and inhibit delicate new roots.
Ongoing Maintenance: Feeding, Pruning, and Repotting
Feeding
Potting mix nutrients deplete after about 6 to 8 weeks, so regular feeding keeps your plant from stalling. A balanced liquid fertilizer with an NPK ratio close to 10-10-10 or 20-20-20 diluted to half strength works well for most foliage plants during the growing season (spring through early fall). Feed once every two to four weeks while the plant is actively growing. In fall and winter, most houseplants slow down and should be fed once a month or not at all. Overfeeding during dormancy leads to salt buildup in the soil, which you'll see as a white crust on the soil surface.
Pruning
Pruning isn't just for aesthetics, it actively encourages bushier, healthier growth. When you cut just above a leaf node (the point where a leaf meets the stem), the plant pushes out two new branches from that spot instead of one. For fast-growing plants like pothos or basil, trim back leggy stems by one third in spring to keep the plant compact. Always remove dead, yellowing, or damaged leaves promptly. Leaving them on the plant wastes energy and can invite fungal problems.
Repotting
Repot when you see roots growing out of the drainage holes, the plant dries out much faster than it used to between waterings, or growth has visibly stalled despite good light and feeding. Move up one pot size at a time (typically 2 inches larger in diameter). Going from a 4-inch pot to a 10-inch pot all at once leaves too much soil around the roots, which stays wet too long and encourages rot. Spring is the best time to repot because the plant is entering its active growth phase and recovers quickly.
Growing in Different Mediums: Soil, Water, Hydroponics, and Terrariums
Soil is the default for most people, but it's not the only way to grow plants. Each medium changes how you handle watering, nutrients, and light, so here's what to expect from each one.
Soil (Container Gardening)
Container soil growing is the most forgiving medium for beginners because soil buffers moisture and nutrients. The main risks are overwatering and poor drainage. Use the finger test to gauge moisture, feed regularly during the growing season, and make sure your pot drains well. Most of the guidance in earlier sections applies directly here.
Water Propagation and Semi-Hydroponic Growing
Water propagation means rooting cuttings (or growing certain plants entirely) in a vessel of water. Plants like pothos, coleus, mint, and many others root quickly this way. Fill a clean glass or jar with room-temperature water, submerge only the stem (keep leaves out of the water), and place it in bright indirect light. Change the water every 5 to 7 days to prevent stagnation and algae buildup. Once roots are 1 to 2 inches long, you can transfer to soil or keep the plant growing in water long term by adding a few drops of liquid fertilizer every two weeks. Water-grown plants need more frequent nutrient top-ups because there's no soil to act as a buffer.
Hydroponics
Hydroponics replaces soil with a nutrient solution delivered directly to the roots, usually through a growing medium like clay pebbles, rockwool, or perlite. Plants grown hydroponically often grow 30 to 50% faster than soil-grown plants because their roots have constant access to oxygen, water, and nutrients at the same time. The tradeoff is that the system requires more attention: pH of the nutrient solution should stay between 5.
To help prevent pH problems, UMN Extension recommends testing the pH periodically rather than assuming it will stay correct forever test the pH periodically. Nutrient solutions for soilless hydroponic culture should generally be kept in the pH range of 5 to 6, usually around 5.
5, while the root-zone pH is maintained between 6 and 6. 5 pH of the nutrient solution should stay between 5.
5 and 6. 5, and you'll need to top up or change the solution every 1 to 2 weeks. A basic passive hydroponic setup (kratky method) is the easiest entry point. You suspend the plant's roots in a nutrient solution in a sealed reservoir and let the roots absorb liquid as it drops, leaving an air gap for oxygen.
No pumps or electricity required.
Terrariums
A terrarium is a glass container, open or closed, that creates a mini ecosystem for plants. Closed terrariums recycle moisture through condensation, meaning you may only need to water once every few weeks or even months. They work best with moisture-loving plants like ferns, mosses, and small tropical species. Open terrariums dry out faster and suit succulents, cacti, and air plants.
The key challenge with closed terrariums is ventilation: too little airflow leads to mold and fungal issues. If you see consistent fog on the glass or white fuzzy mold on the soil surface, crack the lid open for a few hours a day until conditions balance. Use a layer of activated charcoal just above the drainage layer (usually pebbles) to help filter water and reduce bacterial buildup.
| Medium | Watering Frequency | Nutrient Needs | Best For | Main Risk |
|---|---|---|---|---|
| Soil (container) | Every 7-14 days | Fertilize every 2-4 weeks in growing season | Most houseplants, herbs, vegetables | Overwatering and root rot |
| Water/semi-hydro | Top up every 5-7 days | Add liquid fertilizer every 1-2 weeks | Pothos, mint, coleus, cuttings | Algae, stagnation, root rot without air gap |
| Hydroponics | Check reservoir every 1-2 days | Full nutrient solution every 1-2 weeks | Fast-growing herbs, lettuces, tomatoes | pH drift, solution imbalance |
| Closed terrarium | Every few weeks to months | Rarely needed, very low nutrient demand | Ferns, mosses, small tropicals | Mold, fungal growth, overwatering |
| Open terrarium | Every 1-2 weeks | Light feeding a few times per year | Succulents, cacti, air plants | Underwatering, poor drainage |
Troubleshooting Common Problems
Most plant problems come down to a handful of root causes: too much water, too little light, pest pressure, or a soil/nutrient issue. Here's how to diagnose and fix the most common ones.
Yellowing Leaves
Yellow leaves are one of the most common symptoms beginners see, and unfortunately they have multiple possible causes. Start by checking the soil moisture. If the soil is wet or soggy, overwatering is the likely culprit, and you'll often see yellowing starting from the lower leaves with soft, mushy stems. Let the soil dry out completely before watering again.
If the soil is bone dry and the leaves are also crispy at the tips, underwatering is the issue: water thoroughly and the plant should perk up within a day or two. If moisture looks fine, check light levels and consider whether the plant has been fertilized recently. Nutrient deficiency (especially nitrogen) causes yellowing that starts at the oldest lower leaves and moves upward. A diluted balanced fertilizer feeding usually resolves this within a couple of weeks.
Wilting
Wilting almost always means the plant isn't getting enough water to its leaves, but the reason can be either underwatering or, counterintuitively, overwatering. Touch the soil first. Dry soil plus wilting means the plant is thirsty: water immediately. Wet soil plus wilting is more serious and suggests root rot, where the roots have been damaged by sitting in water and can no longer absorb anything. If you suspect root rot, unpot the plant, trim away any black or mushy roots with clean scissors, let the roots air dry for a few hours, and repot into fresh dry potting mix.
Leggy, Stretched Growth
Long, weak stems with wide gaps between leaves (called etiolation) happen when a plant isn't getting enough light. The plant is literally stretching toward the nearest light source. Move the plant closer to a window, or add a grow light positioned 6 to 12 inches above the foliage for 12 to 16 hours per day. Prune back the leggy stems to just above a leaf node to encourage bushier growth as the improved light kicks in.
Pests
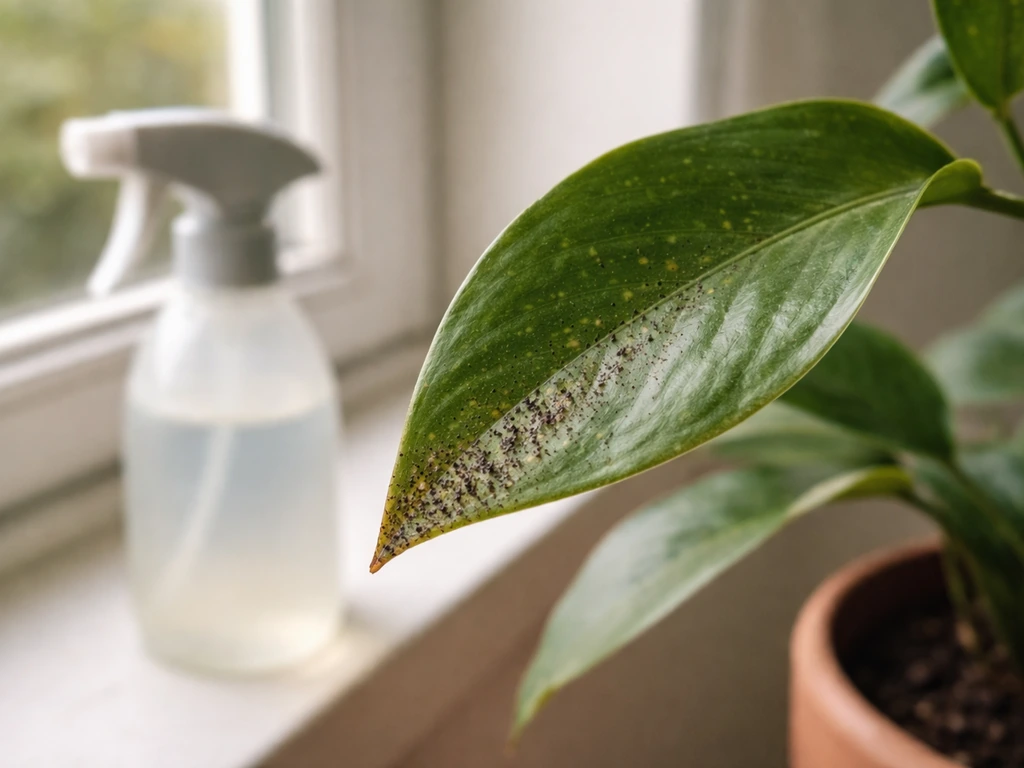
The most common indoor plant pests are fungus gnats, spider mites, and mealybugs. Fungus gnats (tiny flies around the soil surface) thrive in consistently moist soil. Let the top 2 inches of soil dry out between waterings to break their lifecycle. A layer of coarse sand on the soil surface also deters egg-laying.
Spider mites look like fine webbing on the underside of leaves and thrive in hot, dry conditions. Increase humidity and spray the plant down with water, then follow up with an insecticidal soap spray every 5 to 7 days for three treatments. Mealybugs appear as white cottony clusters in leaf axils and joints. Dab individual bugs with a cotton swab dipped in 70% isopropyl alcohol, then follow up with insecticidal soap spray.
Mold and Fungal Issues (Especially in Closed Systems)
White fuzzy mold on soil is usually saprophytic fungus feeding on organic matter and is not directly harmful to the plant, but it's a sign of too much moisture and poor airflow. In open containers, reduce watering frequency and improve air circulation. In closed terrariums, crack the lid daily until the mold clears. In any system, remove the affected soil or any decaying organic matter physically, then dust the area lightly with cinnamon, which has natural antifungal properties. If the mold persists or moves to the plant's stems or leaves, a diluted neem oil solution (1 teaspoon per quart of water) applied to the affected areas works well.
Your Next Steps: Simple Schedules and Growth Goals
The difference between a plant that survives and a plant that thrives usually comes down to consistency. A simple weekly check-in is more effective than reacting to obvious problems after they've gotten bad. Here's a practical routine to build around: If you want a step-by-step plan, start with a clear approach to how to grow your plant and adjust based on what you observe each week.
If you are comparing mediums, start with these beginner basics, and then use how to grow your plant for a clear, step-by-step plan you can follow as your plant grows. If you want to personalize your routine for a specific goal, like figuring out how to grow plants Conan-style, follow the same step-by-step approach and adjust based on what your plant shows you.
| Frequency | Task | What to Look For |
|---|---|---|
| Every 2-3 days | Check soil moisture with the finger test | Dryness at 1-inch depth means it's time to water |
| Weekly | Inspect leaves (top and underside) for pests or discoloration | Spots, webbing, stickiness, yellowing edges |
| Weekly | Rotate pot a quarter turn | Even growth on all sides |
| Every 2-4 weeks (growing season) | Feed with diluted fertilizer | Steady new leaf production, rich green color |
| Monthly | Check roots at drainage holes | Roots poking out signal it's time to size up the pot |
| Seasonally | Adjust watering and feeding schedule | Reduce both in fall and winter as light and growth slow |
As you get comfortable with one plant, you'll naturally start to read it more easily. You'll notice what a well-watered leaf looks like versus a slightly thirsty one. You'll spot a new unfurling leaf before it fully opens. These small observations are what actually make someone a good grower, not any specific technique. Keep a notes app or a small journal with the plant name, date you got it, and what you did and when. Three months of notes will tell you more about that plant's needs than any guide can.
Once you've mastered basic container growing, the next logical steps are experimenting with growing mediums (water propagation is a great low-cost experiment), trying plants from seed, or setting up a small terrarium ecosystem. If you want to keep improving beyond basic container growing, focus on practical steps in how to grow your plant in each medium and adjust care as conditions change. Each of those paths builds on the core skills you develop here. The goal isn't perfection.
Plants die sometimes even for experienced growers. The goal is to get better at reading what your plant needs before a small problem becomes a big one, and to enjoy the process of watching something grow because of the environment you built for it.
FAQ
I’m busy and travel a lot. How do I choose a plant if I can’t follow a strict watering routine?
Look for a plant that naturally fits your window exposure and your watering habits. If you only get bright light for part of the day, choose plants that tolerate medium light, and plan to water based on soil depth (finger test) rather than a fixed schedule, since light and temperature swings change how fast the soil dries.
Should I fertilize right after I bring home a new plant or after I repot it?
Don’t fertilize a plant immediately after purchase or after repotting. Wait about 4 to 6 weeks so the plant can recover from transport and any root disturbance, then start with half-strength feed during the growing season and only when you see active growth.
My plant droops even after I watered. What should I check next?
If the potting mix feels dry at an inch but the plant looks droopy, the issue may be root stress rather than simple thirst. Check drainage first, then confirm that water is actually soaking through (run water until it drains and empty the saucer). Persistent droop with wet soil usually means root rot risk, not “more water.”
What does white crust on the soil mean, and what do I do about it?
When you see white crust on soil, it often comes from fertilizer salt buildup or hard water. Stop feeding for several weeks, flush the pot by running water through until it drains out, and then switch to a diluted schedule. If the crust keeps returning quickly, consider using filtered water.
How should I water a plant after repotting so it doesn’t get root rot?
In general, move up gradually, one pot size at a time, and keep the new mix slightly drier at first. After repotting, water lightly only if the mix is dry, then resume your normal routine once you see steady new growth. Overwatering right after repotting is a common reason beginners trigger rot.
Can I grow multiple plants in the same pot or terrarium together?
Yes, but it can be tricky to get right. Use a chunky mix with extra drainage, water less frequently, and make sure the container has drainage holes. If you try to combine plants with very different light or water needs, you’ll often end up compromising one of them.
How often should I water a closed terrarium?
For closed terrariums, don’t follow a “weekly” watering rule. Instead, watch condensation patterns, if the glass clears for long periods, add a small amount, if it’s constantly dripping and staying foggy, ventilation or less water is needed. A single plant’s needs can vary, so adjust based on the tank’s moisture cycle.
What are the biggest mistakes people make when propagating or growing plants in water?
If you’re growing in water, keep leaves dry and submerge only the stem. Change water on schedule, and if you see cloudiness or strong algae buildup, scrub the container and start with fresh room-temperature water. For long-term water growing, add small fertilizer top-ups instead of heavy feeding.
How do I tell root rot from simple underwatering, and what’s the safest first fix?
If you suspect root rot, act quickly. Unpot, remove black or mushy roots, let the remaining roots air dry for a few hours, then repot into fresh dry mix with drainage. After repotting, wait until the top layer dries before watering again, and improve airflow so excess moisture doesn’t linger.
How can I prevent pests like fungus gnats and spider mites before they become a problem?
Most pest outbreaks are easier to prevent than cure. Use consistent watering habits (avoid staying constantly wet), inspect the underside of leaves during your weekly check, and isolate any new plant for a couple of weeks to avoid introducing mites or mealybugs into your setup.
Can etiolation happen for reasons besides not enough light?
Yes. Etiolation can also be caused by temperature and airflow issues, but light is usually the main driver. Confirm by checking how the plant responds after you move it closer to light or add a grow light, if the new growth shortens and gets denser over a few weeks, the cause was insufficient light.
When is the best time to prune, and how much can I cut without stressing the plant?
For pruning, always cut above a leaf node and remove dead or damaged tissue as soon as you notice it. For best regrowth, prune during active growth (spring through early fall) and avoid major trimming right when conditions are changing, like immediately after repotting or during winter dormancy.
How do I use a grow light without burning or stressing my plant?
A grow light can replace a window, but placement and duration matter. Keep the light about 6 to 12 inches above foliage, run it roughly 12 to 16 hours per day, then watch for response. If leaves bleach or look scorched, raise the light or shorten the photoperiod.