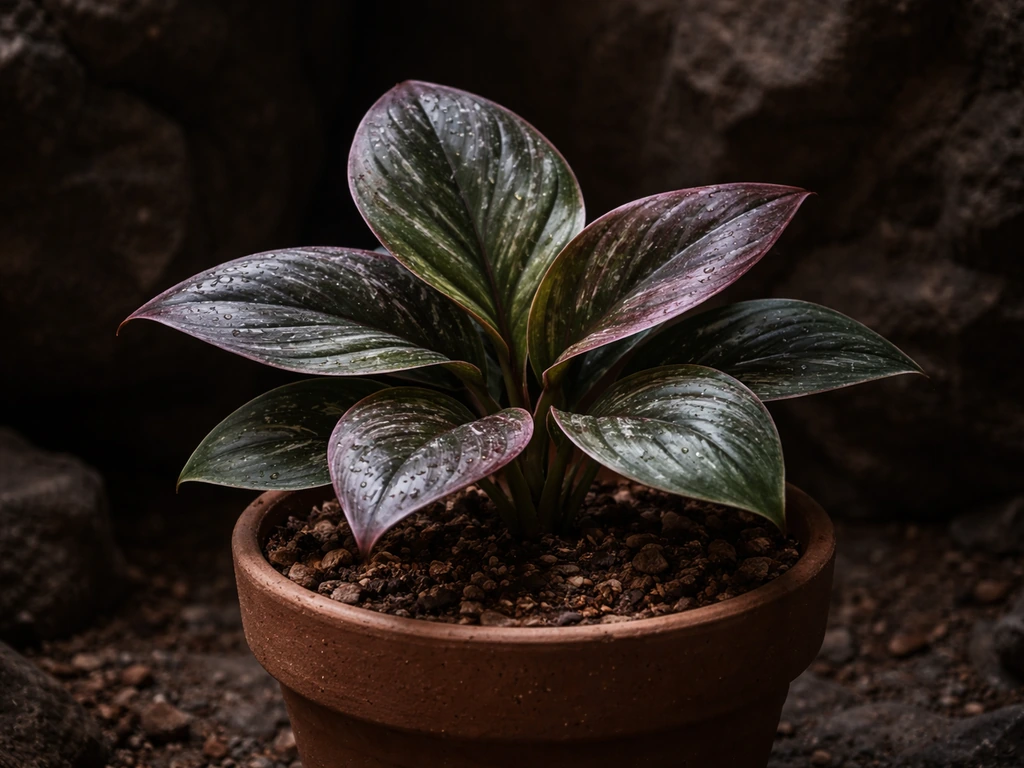
Plant Species Z is a bioluminescent, cave-adapted plant from the Aberration map in ARK: Survival Evolved. It is grown inside the game by placing Plant Species Z Seeds into a Large Crop Plot, and once mature it produces Plant Species Z Fruits that act as flash-bang grenades.
How to Grow Plant Species Z: Step-by-Step Care Guide

Marcus Holloway
12 May 2026
If you landed here looking for a real-world houseplant or garden species, this guide still walks you through every growing principle you need, treating Plant Species Z as a model for any unfamiliar, low-light, high-humidity plant you are trying to cultivate. If you want the real-world equivalent, use these same low-light, high-humidity growing principles to guide how to grow plant species Y in your home.
The logic of light, substrate, watering, and propagation is universal, so you will leave with a full framework you can apply immediately.
Identify plant species Z and confirm your starting material
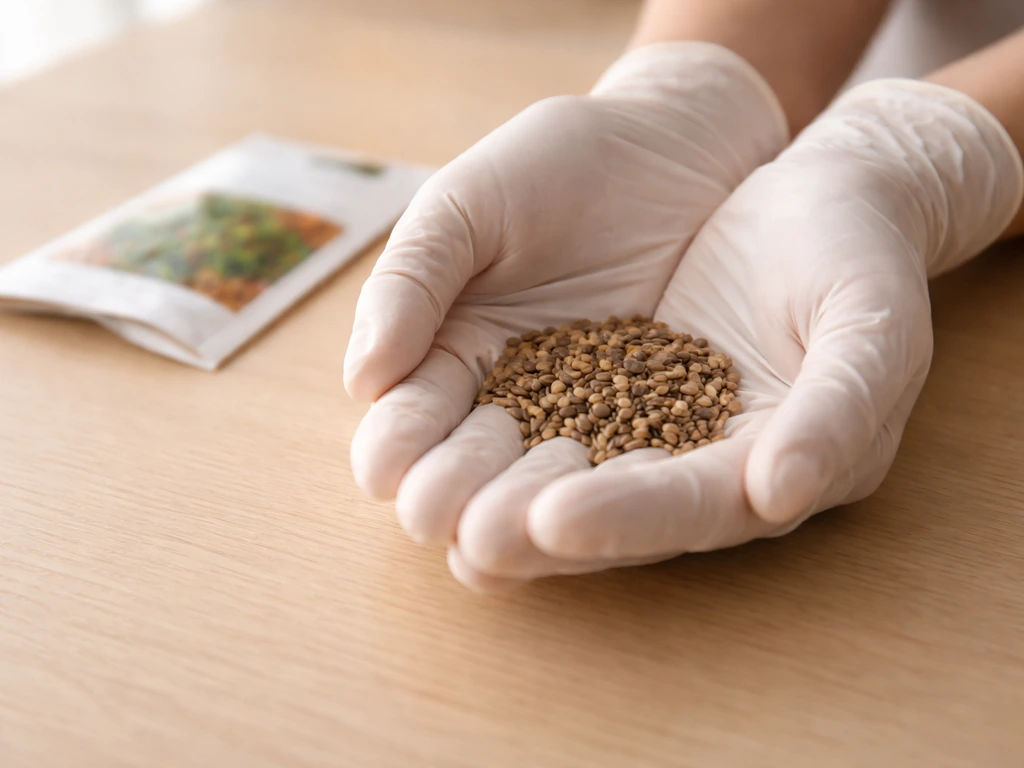
Before you put anything in soil, you need to be completely sure about what you are growing and what form your starting material is in. Plant Species Z in ARK starts as a seed (the in-game GFI code is seed_plantspeciesz), and that distinction matters: seeds, cuttings, bulbs, and offsets all have different early-care needs. For any plant you are treating as a "species Z" equivalent, check the label or source documentation carefully. Is it a seed packet, a rooted cutting, a bare-root division, or a bulb? Each one has a different success rate for beginners and a different setup routine.
If you are working from seeds, look for information on whether they need stratification (a cold period to simulate winter) or scarification (light scratching of a hard seed coat) before they will germinate. If you received a cutting, check whether it has visible roots or nodes. If it is a bulb or offset, confirm it is firm and not rotting at the base. Skipping this identification step is the single biggest reason beginners fail in the first two weeks, so spend five minutes on it before you touch any potting mix.
- Confirm the species name and whether it is a seed, cutting, bulb, or offset.
- Check if seeds need pre-treatment (stratification or scarification) before sowing.
- Inspect cuttings for at least one healthy node and no soft or discolored rot.
- Verify bulbs and offsets are firm, not mushy, and free of mold.
- Note the origin climate of the plant: cave/low-light, tropical, arid, or temperate. This tells you everything about what it wants.
Light, temperature, humidity, and watering rules
Plant Species Z in ARK is a cave plant, which tells you its real-world analog craves indirect or low-intensity light rather than direct sun. Think of it like a fern or a peace lily: bright indirect light for a few hours is productive, while harsh midday sun will scorch the foliage. If you are growing indoors, a north or east-facing window is usually ideal. If natural light is genuinely limited, a grow light set to a 12-to-14-hour cycle at around 2,000 to 4,000 lux works well for most low-to-medium light species.
Temperature is the next lever. Most cave-adapted and tropical plants thrive between 65°F and 80°F (18°C to 27°C). Keep the plant away from heating vents and cold drafts near windows in winter. A swing of more than 15°F in a single day stresses most plants and slows growth noticeably.
Humidity matters more than most beginners expect. Cave and tropical species often want relative humidity above 50%, sometimes closer to 60 to 70%. If your home runs dry (especially in winter with forced-air heating), a small humidifier near the plant or a pebble tray with water underneath the pot can make a real difference. Misting leaves is often recommended but less effective than raising ambient humidity because the moisture evaporates within minutes.
For watering, the rule is simple: water thoroughly, then let the top inch or two of the substrate dry out before watering again. In a related r/houseplants discussion, keepers interpret the “water when the top inch is dry” rule as a practical compromise between letting the topsoil dry and avoiding soggy conditions deeper in the pot blank" rel="noopener noreferrer">Can anybody put “water when top inch is dry” in layman’s terms?. Overwatering kills far more plants than underwatering. Stick your finger an inch into the soil. If it feels moist, wait another day or two. If it feels dry, water slowly until water drains freely from the bottom. Empty the saucer after 30 minutes so roots are never sitting in standing water.
| Condition | Ideal Range | Warning Signs If Off |
|---|---|---|
| Light | Bright indirect, 2,000-4,000 lux, 12-14 hrs/day | Leggy growth (too little), scorched leaf tips (too much) |
| Temperature | 65°F to 80°F (18°C to 27°C) | Wilting or dropped leaves from cold drafts or heat stress |
| Humidity | 50% to 70% relative humidity | Crispy leaf edges, curling, or spider mites in dry air |
| Watering frequency | When top 1-2 inches of substrate are dry | Yellow leaves and soft stems (overwatered), crispy/wilted (underwatered) |
Soil, pot choice, and your fertilizer plan
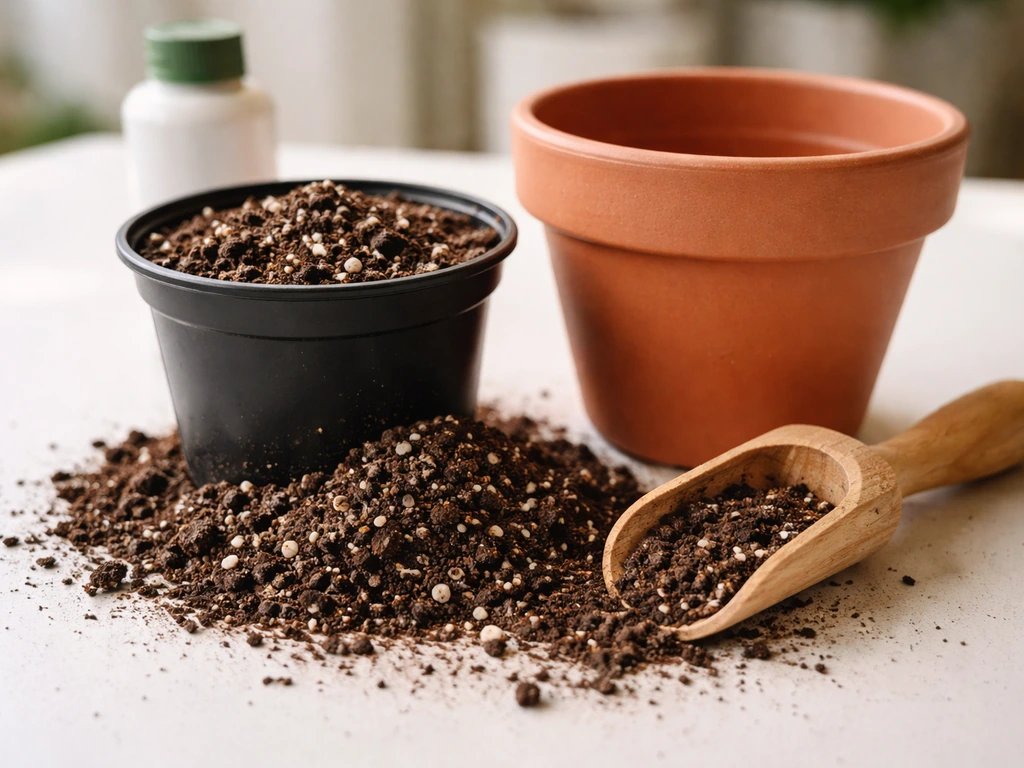
In ARK, Plant Species Z requires a Large Crop Plot, which is basically the game saying this plant needs generous root space and well-structured growing medium. In real-world terms, that translates to a pot with good drainage and a substrate that holds some moisture without staying waterlogged. For most low-light or cave-adapted plants, a mix of standard potting soil cut with 20 to 30% perlite works well. The perlite creates air pockets so roots can breathe and excess water drains quickly.
Pot size matters more than people think. Going too large encourages the substrate to stay wet for too long because the roots are not using all that moisture. As a starting point, choose a pot that is 1 to 2 inches wider in diameter than the plant's root ball. Plastic and glazed ceramic pots retain moisture longer (good for moisture-loving plants), while terracotta pots dry out faster (good for plants that hate wet feet). Make sure any pot has at least one drainage hole. No exceptions.
For fertilizer, most houseplants and garden specimens do well with a balanced liquid fertilizer (something like a 10-10-10 or 20-20-20 NPK ratio) applied at half strength every two to four weeks during the active growing season (roughly spring through early fall). Cut back to monthly or stop entirely in winter when most plants are resting. If your plant is showing pale new leaves, it often wants more nitrogen. Yellowing between the veins (while veins stay green) usually points to a magnesium or iron deficiency, which a balanced fertilizer or a dose of Epsom salt can address. Yellowing between the veins is interveinal yellowing, which RHS notes is usually indicative of manganese, iron, or magnesium deficiency interveinal (between-veins) yellowing.
Propagation and getting your setup right from day one
The setup phase is where most beginner mistakes happen, so slow down here. If you are starting from seed, fill a small tray or cell pack with a fine seed-starting mix (not regular potting soil, which is too dense for tiny seedlings). Sow seeds at the depth recommended on the packet, usually no deeper than twice the seed's diameter. Mist the surface gently, cover the tray with a clear plastic dome or plastic wrap to hold humidity, and place it somewhere warm, around 70°F to 75°F. Check daily and mist when the surface looks dry. Once seedlings show their second set of true leaves, they are ready to transplant into individual pots.
If you are starting from a cutting, let any fresh cut callous over for an hour before inserting it into moist propagation mix or placing it in water. Stem cuttings root faster in water when you change the water every three to five days and keep the cutting in bright indirect light. Once roots are at least an inch long, pot the cutting into your prepared substrate mix and water it gently. Expect a brief adjustment period of a week or two where growth seems stalled. That is normal transplant stress.
For bulbs and offsets, plant the bulb with its pointed end facing up and cover it to about twice its depth. Offsets can be carefully separated from the mother plant, allowed to dry for a day (especially for succulents), and then planted in fresh mix. In all cases, hold off on fertilizing for the first four to six weeks. The plant needs to establish roots first, and pushing it with fertilizer before that can burn young root tissue.
Ongoing care schedule: pruning, repotting, and seasonal changes
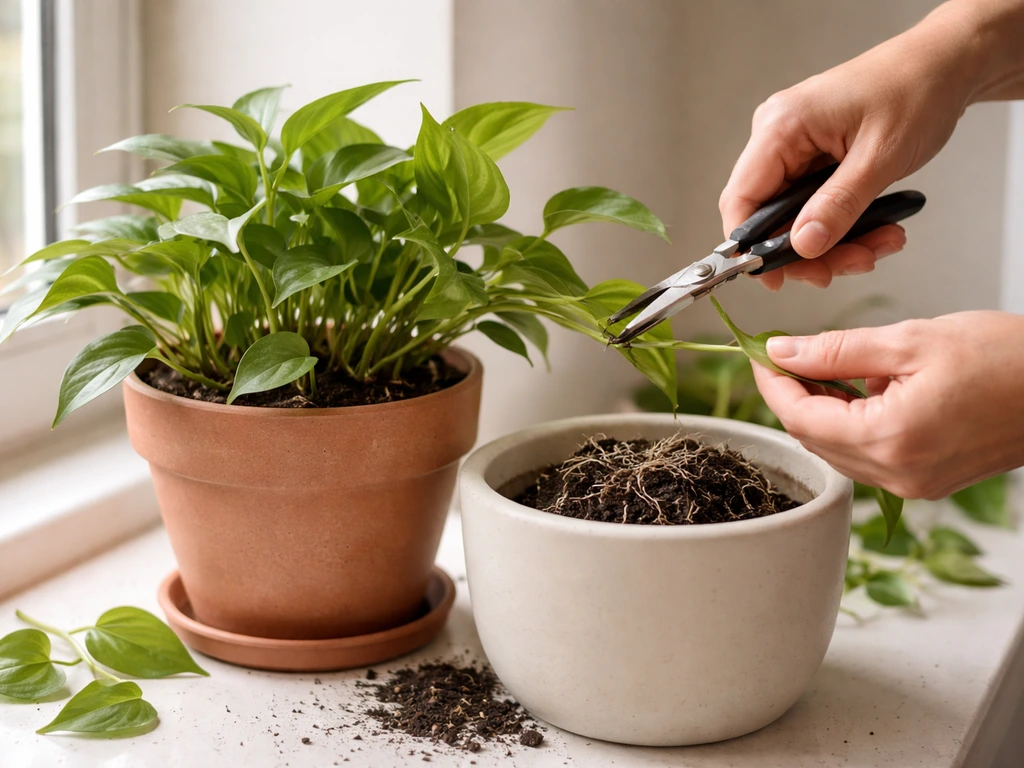
Once your plant is established, the work becomes more rhythmic than intensive. Think of it in seasonal blocks. Spring and summer are the growing season: water more frequently, fertilize every two to four weeks, and give the plant the most light you can. This is also the right time to prune any leggy stems or dead growth. Prune just above a leaf node (the bump where a leaf meets the stem) to encourage branching rather than leaving a bare stub.
Repot when you see roots circling the bottom of the pot or poking out of drainage holes, or when the plant dries out much faster than it used to. Spring is the best time to repot because the plant has the energy to recover quickly. Move up by one pot size, refresh the substrate, and avoid disturbing the roots more than necessary. Water thoroughly after repotting and hold off on fertilizer for about a month.
In fall and winter, most plants slow down significantly. Reduce watering frequency and stop fertilizing. If you are in a Northern Hemisphere home with short winter days, supplement with a grow light to maintain at least 10 hours of light. Avoid moving plants around during this period since stability matters more when a plant is not actively growing.
- Spring: Begin fertilizing, increase watering, prune leggy growth, and check if repotting is needed.
- Summer: Maintain consistent watering, watch for pests during warm humid weather, and rotate the pot every two weeks for even growth.
- Fall: Taper fertilizing to monthly, reduce watering slightly as growth slows, and move the plant away from drafty windows.
- Winter: Stop fertilizing, water only when the substrate is quite dry, supplement light if days are short, and keep the plant away from heating vents.
Common problems and fast troubleshooting
Yellow leaves are the most common alarm bell and unfortunately also the most ambiguous. Overwatering is the leading cause: the leaves turn uniformly yellow, the stem near the soil may feel soft, and the soil smells slightly sour. Let the substrate dry out more between waterings and check that drainage is working properly. If the lower leaves are yellowing while upper leaves look fine, that is often just the natural aging of older foliage and not something to panic about. If new growth is yellow and the older growth looks fine, suspect a nutrient deficiency and introduce a balanced fertilizer.
Leggy, stretched growth almost always means insufficient light. The plant is reaching toward the nearest light source and thinning its stems in the process. Move it closer to a window or add a grow light. You can prune leggy stems back to a healthy node to encourage bushier growth once the light situation is fixed.
Pests are frustrating but manageable. The most common ones are fungus gnats (tiny flies hovering around the soil, whose larvae live in the top inch of moist substrate), spider mites (fine webbing on leaf undersides, usually in dry conditions), and mealybugs (white cottony clusters at leaf joints). For fungus gnats, let the top two inches of soil dry out completely between waterings and add a layer of sand on top. For spider mites, raise humidity and wipe leaves with a damp cloth or spray with diluted neem oil. For mealybugs, dab them with a cotton swab dipped in rubbing alcohol.
| Symptom | Likely Cause | Quick Fix |
|---|---|---|
| Uniform yellow leaves, soft stem | Overwatering or root rot | Let soil dry out, check drainage, trim rotted roots |
| Lower leaves yellowing only | Normal aging | Remove leaves, no action needed |
| New growth is pale yellow | Nutrient deficiency | Apply balanced fertilizer at half strength |
| Leggy, thin stems reaching toward light | Insufficient light | Move closer to window or add grow light, prune back |
| Crispy brown leaf tips | Low humidity or underwatering | Raise humidity, check watering schedule |
| Fine webbing on leaf undersides | Spider mites | Wipe with damp cloth, apply neem oil spray |
| White cottony clusters at leaf joints | Mealybugs | Dab with alcohol-soaked cotton swab |
| Tiny flies hovering near soil | Fungus gnats | Dry out top 2 inches of soil, add sand layer on top |
Choosing a grow method: soil vs water vs hydroponics vs terrarium
Most people default to soil, and for good reason. It is forgiving, widely available, and buffers against both overwatering and underwatering better than any other medium. For a cave-adapted or humidity-loving plant like a Species Z equivalent, a well-amended potting mix with extra perlite is usually the best starting point if you are a beginner.
Water propagation is not the same as growing in water long-term, but some plants (pothos, tradescantia, certain aroids) can thrive indefinitely in water if you add a diluted liquid fertilizer to the water every two weeks and change it regularly. The roots that develop in water are physiologically different from soil roots, so transplanting a water-rooted plant into soil involves another adjustment period.
Hydroponics suits growers who want faster growth and more control over nutrients, but it has a steeper learning curve and higher upfront cost. In a basic hydroponic setup like Kratky or deep water culture, the plant sits in net pots over a nutrient solution. This method works especially well for plants that tolerate consistently moist roots. If the Species Z equivalent you are growing is moisture-loving, hydroponics can be a rewarding upgrade once you have nailed the basics.
Terrariums are the best choice if your plant wants very high humidity and you are growing it in a small, contained way. A closed terrarium creates a self-watering micro-climate as moisture cycles between the soil and glass walls. This is ideal for ferns, mosses, and other cave-adapted species. The tradeoff is that terrariums do not suit plants that need air circulation or that are prone to fungal disease in stagnant air.
| Method | Best For | Main Advantage | Main Drawback |
|---|---|---|---|
| Soil | Beginners, most species | Forgiving, widely available, buffers mistakes | Can stay too wet if drainage is poor |
| Water (propagation/long-term) | Cuttings, aroid-type plants | Easy to monitor roots, no substrate needed | Requires frequent water changes and fertilizer |
| Hydroponics | Growers wanting faster growth and control | Faster growth, precise nutrient delivery | Higher cost and learning curve upfront |
| Terrarium | High-humidity, cave-adapted, small species | Self-watering, stable humidity, visually striking | Poor airflow, not suited to all plants |
If you are completely new to this, start with soil in a well-draining pot. Once you understand how your specific plant behaves, meaning how fast it dries out, how it responds to fertilizer, and what pests it attracts, you can experiment with hydroponics or a terrarium setup from a position of knowledge rather than guesswork. Many growers find that exploring different growing methods, whether propagating in water, moving into hydroponics, or setting up a terrarium, is one of the most satisfying parts of the hobby. The core skills transfer across every method.
Start your setup today: a quick action checklist
You do not need to have everything perfect before you start. Here is what to do today so you can get your plant growing without overthinking it. If you want the exact click-and-grow-style setup, focus on getting the lighting, humidity, and watering schedule aligned before you transplant or upgrade your setup how to plant click and grow.
If you follow this checklist along with basic planting steps, you will have a clear path for how to plant and grow successfully get your plant growing. If you want species-by-species guidance, follow this guide on how to grow plant species x for a more tailored setup.
If you are specifically aiming to grow Plant Species X without irrigation, focus on drought-tolerant soil, high humidity where needed, and careful watering only when the top layer dries out without overthinking it.
- Confirm your starting material: seed, cutting, bulb, or offset. Check for any rot, damage, or pre-treatment needed.
- Choose your pot: one with drainage holes, 1 to 2 inches wider than the root ball.
- Mix your substrate: standard potting soil plus 20 to 30% perlite for most species.
- Pick your spot: the brightest indirect light you have, away from cold drafts and heating vents.
- Water once at planting, then wait until the top inch of substrate is dry before watering again.
- Hold fertilizer for the first four to six weeks, then start at half the recommended dose.
- Check your plant every two to three days in the first month: look at the leaves, check the soil moisture, and look under leaves for early pest signs.
- Adjust light first if growth looks leggy, adjust watering first if leaves look yellow or soft.
FAQ
Can I use regular potting soil or yard soil for a Species Z-type plant?
Yes, but don’t use garden soil straight from the yard. For a Species Z-like low-light, humidity-loving plant, use a potting mix that drains well and then add extra perlite (about 20 to 30%) so the “holds moisture” benefit doesn’t turn into chronic sogginess.
How often should I water Plant Species Z equivalents?
Use the “dry-down” method rather than a calendar. Wait until the top 1 to 2 inches are dry, then water slowly until it drains freely, and empty the saucer after about 30 minutes. If you water on a fixed schedule, overwatering becomes much more likely.
What’s the fastest way to tell nutrient deficiency from watering problems?
Chlorophyll breakdown usually shows up first as slower growth and paler new leaves, not just yellowing. If new growth is light and older leaves stay green, try adjusting nitrogen with a balanced fertilizer at half strength, then reassess after 2 to 3 weeks rather than repeatedly changing products.
Is misting the leaves enough to keep humidity high?
Most beginners mist when they should humidify. Raise ambient humidity with a humidifier or a pebble tray that doesn’t let the pot sit in water, and keep leaves dry if you are seeing fungus or persistent spots. Misting alone often evaporates too quickly to matter.
My plant looks humid-friendly but I get moldy soil, what should I change?
Watch for mold or a stale, sour smell in the soil. If that happens, improve airflow, reduce watering frequency, and consider switching to a lighter mix with more perlite. Keep the plant stable, avoid frequent moving during low-light months, and make sure the pot drains.
Can big day-night temperature swings stunt growth?
Yes, temperature swings can be more damaging than slightly lower average warmth. Try to keep it within the 65°F to 80°F range, and avoid placing the pot where it gets cold drafts at night or blasts of hot air from vents.
Why do my stem cuttings wilt or fail to root even when humidity seems high?
If the cutting is fresh, let the cut end callous briefly (around 1 hour) before sticking it, use a moist but not waterlogged propagation mix, and place it in bright indirect light. Also keep the humidity high, since low humidity makes many cuttings wilt before they root.
When should I start fertilizing after transplanting or repotting?
After repotting, resume fertilizing only when you see active new growth and the root system has re-established (about a month is a good baseline). Fertilizing too early can burn tender new roots, especially in fresh, slightly wet mix.
How do I choose the right pot size, and what if my plant dries out too quickly?
If the plant dries out too fast, the pot is often too large or the mix is too airy. Move only one pot size up and keep the pot width about 1 to 2 inches larger than the root ball. A pot that is “too big” stays wet longer, which can also harm roots.
My leaves are yellowing, how can I narrow down the cause quickly?
Use a simple observation rule: if yellowing is uniform and the soil stays wet or smells sour, it’s usually overwatering or drainage failure. If only older leaves yellow while the plant keeps making greener new growth, it can be normal aging. If new growth is yellow, check nutrients and recent changes (light reduction, missed feedings, etc.).
What’s the most effective first step for each common pest I might see?
For fungus gnats, letting the top 2 inches dry out between waterings is key, and larvae live where moisture stays. For spider mites, increase humidity and treat leaf undersides, wipe first to remove webbing, then reapply treatment if needed. For mealybugs, rubbing alcohol works best when you physically remove the cottony clusters.
When should I avoid using a closed terrarium for a Species Z-like plant?
A terrarium is best when the plant needs stable humidity and you can tolerate limited airflow. Avoid it for plants that like drying periods or for anyone already dealing with recurring fungal problems, since closed setups can trap moisture and worsen stagnant-air issues.
My plant is stretching, how do I increase light without shocking it?
For low-light plants, “more light” isn’t always “better.” Leggy growth suggests insufficient light, but sudden intense light can scorch foliage. Increase light gradually, for example by moving closer to the window in small steps or stepping up grow-light intensity before changing the schedule.
Should I keep it in water forever, or transplant into soil?
It’s often safer to keep it in soil long-term if you want fewer transitions. Water-rooted plants can grow fine in water only for species that tolerate it, and switching from water to soil typically causes a temporary stall, so plan for a week or two of adjustment.
What’s the easiest long-term method after I get the basics right?
If your goal is a uniform, low-risk routine, soil in a well-draining pot is usually the best “default,” then you can upgrade later. Move to hydroponics once you can reliably manage light, temperature, and watering, because hydroponics depends on nutrient solution stability rather than “soil drying” as a natural buffer.