Growing a plant successfully comes down to three things: matching the right plant to your actual conditions, setting it up in a growing system that fits your space, and staying consistent with a handful of basic care habits. That's it. If you've killed plants before, it almost certainly wasn't bad luck. It was a mismatch somewhere in that chain, and the good news is every one of those mismatches is fixable.
How Do You Grow a Plant: Step-by-Step for Beginners

Marcus Holloway
3 Apr 2026
Start with the right plant for your space and light
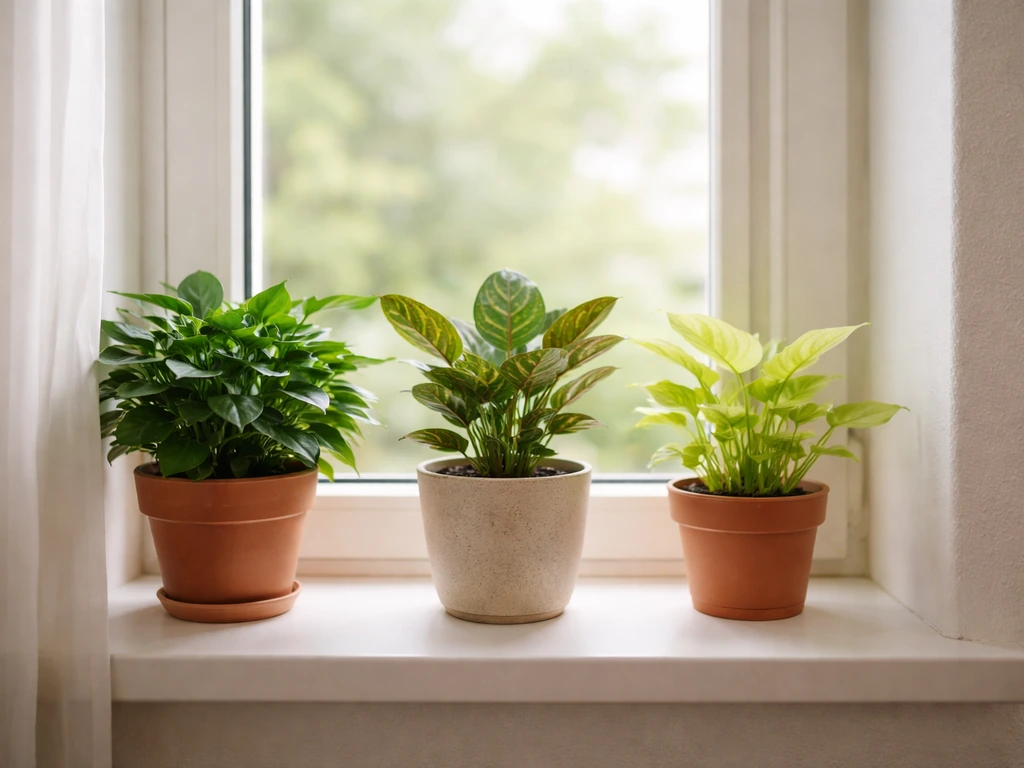
Before you buy a single seed or cutting, look at your windows. Light is the most common limiting factor for indoor growing, and no amount of good soil or careful watering can compensate for a plant sitting in the wrong brightness. East- and west-facing windows work well for most low-to-moderate light plants. South-facing windows deliver strong direct sun that can scorch plants not built for it. North-facing windows are dim and suit only the most shade-tolerant species.
A reliable beginner shortcut: plants with darker green leaves are generally more adapted to lower light levels. If your apartment only gets a few hours of indirect light, lean toward pothos, snake plants, ZZ plants, or ferns rather than succulents and herbs, which crave brightness. For anyone wondering how we can grow a plant in genuinely dim conditions, the honest answer is to choose species that evolved on shady forest floors rather than trying to force sun-lovers to survive in low light.
Match your temperature and humidity too. Most common houseplants are comfortable between 60°F and 80°F (15°C to 27°C), which is typical home range. Humidity is trickier. Indoor air, especially in winter, often drops well below what many plants prefer. A good target range to keep in mind is 30% to 60% relative humidity, which is also what ASHRAE recommends for healthy indoor environments. A $10 hygrometer tells you where you stand. If your home runs dry, a small humidifier or a pebble tray with water under the pot can lift humidity meaningfully around the plant.
Soil, soilless, or hydroponics: picking your growing system
Most beginners default to potting mix in a container, which is perfectly valid. But understanding your options means you can choose the system that actually fits your setup instead of just copying whatever the garden center sells.
Soil in containers
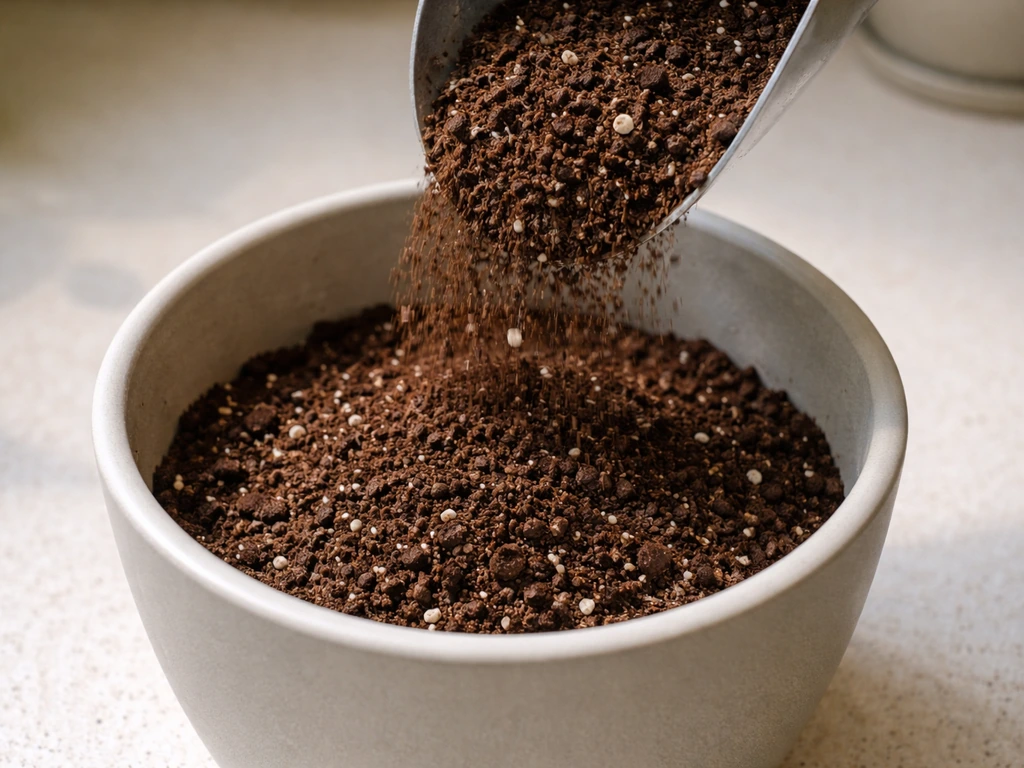
A good quality potting mix (not garden soil, which compacts badly in pots) gives roots physical support, moisture retention, and a buffer of nutrients. For most houseplants and kitchen herbs, this is the lowest-effort, most forgiving system. The main failure point is waterlogging, so always use pots with drainage holes and a well-draining mix amended with perlite if needed.
Soilless and propagation media
Soilless growing media include peat, perlite, vermiculite, coco coir, and sand, often used in combination. These materials are popular for starting cuttings and seedlings because they're sterile and drain well. A 1:1 mix of peat and perlite, for example, is a widely recommended sterile rooting medium because it holds just enough moisture while letting excess water escape quickly, reducing rot risk. These media contain little to no nutrition on their own, so you'll need to feed with liquid fertilizer once plants are established.
Hydroponics basics
Hydroponics grows plants in a nutrient-rich water solution rather than soil. The two most important variables to manage are pH and dissolved oxygen. The root-zone pH should stay roughly in the 5.0 to 6.0 range (around 5.5 is a common target for most crops). Dissolved oxygen in the solution should stay above 6 ppm for healthy root function. Both pH and electrical conductivity (EC, which measures nutrient concentration) drift over time as plants drink water and absorb nutrients, so you'll need to check and adjust them regularly. Hydroponics produces fast growth and uses less water overall, but it demands more attention to chemistry than soil growing.
| System | Best for | Skill level | Main risk | Nutrition source |
|---|---|---|---|---|
| Potting mix in container | Houseplants, herbs, most beginners | Beginner | Overwatering / root rot | Slow-release fertilizer or liquid feed |
| Soilless media (perlite/peat) | Propagation, seedlings, cuttings | Beginner to intermediate | Drying out too fast or staying too wet | Liquid fertilizer only |
| Hydroponics | Fast-growing herbs, leafy greens, advanced setups | Intermediate | pH/EC drift, pump failure | Balanced nutrient solution |
| Terrarium | Humidity-loving plants, small tropical species | Beginner to intermediate | Overwatering, fungal buildup | Minimal, slow-release amendments |
For most people reading this today, start with a container and quality potting mix. Move into hydroponics or soilless systems once you're comfortable reading your plant's signals.
From seed, seedling, or cutting: the step-by-step process
Starting from seed
Check the seed packet for any special requirements before you do anything else. Some seeds need cold stratification (a period of cold, moist storage that mimics winter) before they'll germinate. This requirement can add 1 to 3 months to your timeline, so plan ahead. Skip this step for species that need it and your seeds just won't sprout, no matter how good your setup is.
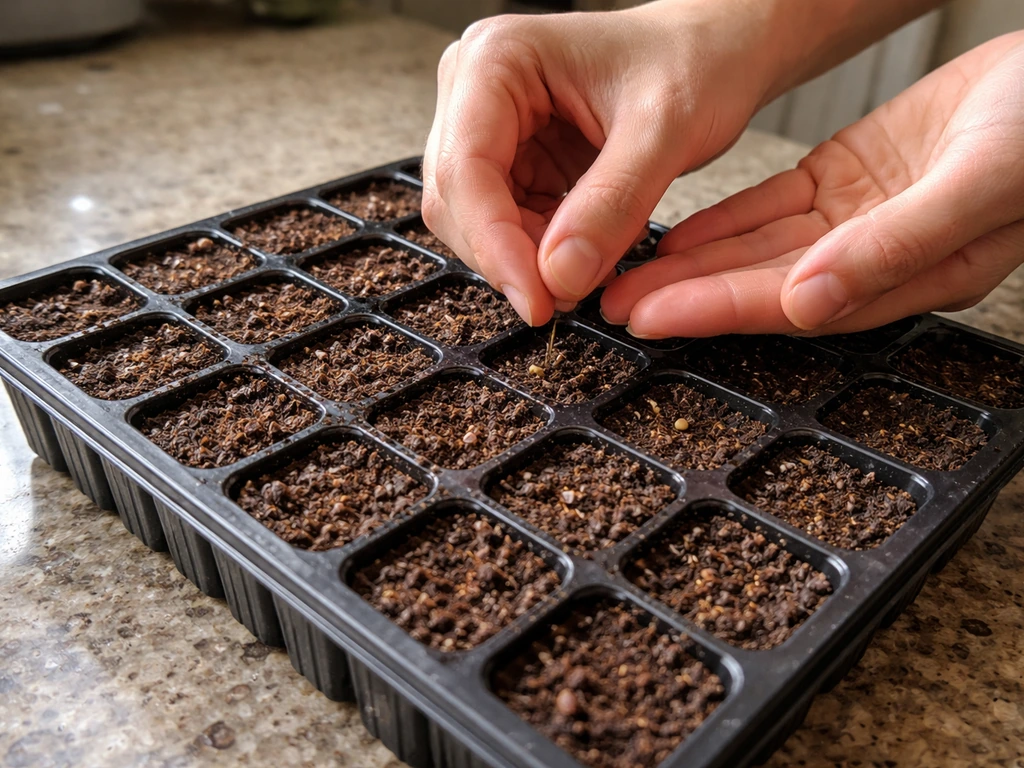
- Fill a small cell tray or pot with moistened seed-starting mix (fine-textured and sterile).
- Sow seeds at the depth specified on the packet. A general rule: plant at a depth equal to roughly twice the seed's diameter.
- Cover the tray with a humidity dome or loose plastic wrap to retain moisture during germination.
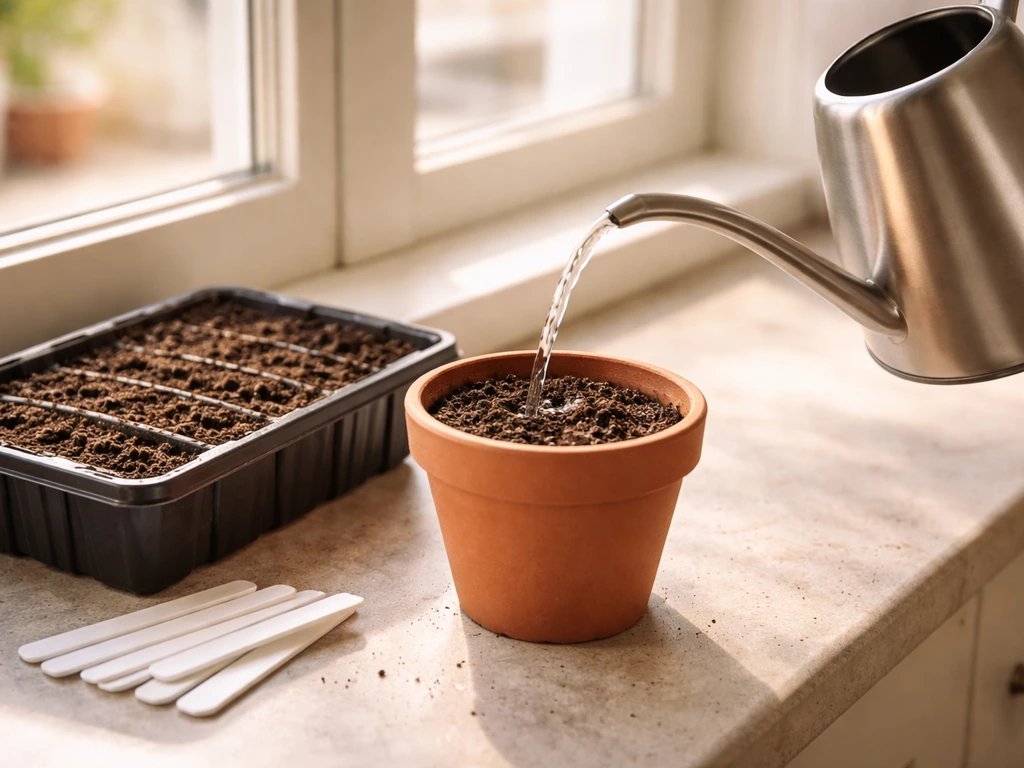
- Keep the medium consistently moist, NOT soggy. Overwatering at this stage is the leading cause of damping-off, a fungal disease that kills seedlings at the soil line. Bottom-watering (setting the tray in a shallow dish of water and letting it absorb from below) reduces the splash that spreads damping-off spores.
- Place in a warm location (65°F to 75°F is ideal for most seeds) with bright indirect light or under grow lights once sprouts appear.
- Remove the dome once the first true leaves appear and begin feeding with a diluted liquid fertilizer.
Starting from a cutting
Cuttings are faster than seeds and let you clone a plant you already know and like. Take a 3- to 5-inch stem cutting just below a leaf node, remove the lower leaves, and dip the cut end in rooting hormone powder (optional but helpful). Insert the cutting into a sterile rooting medium like a 1:1 peat and perlite mix, or coarse vermiculite, then cover with a clear bag or humidity dome to keep moisture high around the leaves. Roots typically form in 2 to 6 weeks depending on species. Keep the medium just barely moist, not wet. Once you feel resistance when gently tugging the cutting, roots have formed and you can transplant it into regular potting mix. If you want to explore other propagation approaches, learning how to grow a new plant from an existing one opens up a wide range of techniques beyond simple cuttings.
Starting from a nursery seedling or transplant
Buying a small plant from a nursery is the most beginner-friendly starting point. The plant has already made it past the most vulnerable germination stage. Water it thoroughly before you repot or move it anywhere, and give it a few days in its new spot before making any other changes. Plants need time to adjust to new light levels, temperatures, and humidity.
Light, temperature, water, and feeding: your ongoing care schedule
Light
If you're relying on natural window light, place sun-loving plants (succulents, herbs, most fruiting plants) within 1 to 2 feet of a south or west window. Low-light plants can sit several feet back from a window or in a north-facing room. Supplement with a full-spectrum LED grow light if your space doesn't have enough natural light. Most seedlings and herbs do well with 14 to 16 hours of grow-light coverage per day.
Temperature and humidity
Keep plants away from air conditioning vents, drafty windows, and heating registers. Sudden temperature swings stress plants even if the average temperature is fine. For tropical plants especially, cold drafts near windows in winter are a silent stressor. Aim for that 30% to 60% humidity window. Group plants together to create a slightly more humid microclimate, or set pots on a tray filled with pebbles and a shallow layer of water (the evaporation helps without waterlogging the roots).
Watering
Improper watering (both too much and too little) is the single most common cause of houseplant decline and death. The classic advice is to stick your finger an inch into the soil: if it feels dry, water thoroughly until it drains from the bottom; if it still feels moist, wait. Keeping soil perpetually wet invites root rot and other diseases, while letting it dry out completely repeatedly stresses the plant and damages fine feeder roots.
A few practical rules that hold for most plants: water less in winter when growth slows, water more in summer or under grow lights, and always empty saucers after watering so roots don't sit in standing water. If you have a wick-watering or self-watering setup, understanding how to repot a wick and grow plant correctly will help you avoid the waterlogging problem that self-watering systems can sometimes cause if not set up right.
Fertilizing
Potting mix comes with some nutrients, but they deplete over weeks to months. A balanced liquid fertilizer (something like a 10-10-10 or 20-20-20 NPK ratio diluted to half-strength) applied every 2 to 4 weeks during the growing season (spring through early fall) covers most houseplants and herbs. Reduce or stop feeding in winter. Signs you're overfeeding: brown leaf tips, salt crust on the soil surface, or stunted growth. Signs you're underfeeding: pale leaves, slow growth, and older leaves yellowing and dropping. Adjust by cutting concentration in half and observing for two weeks before deciding on a change.
When things go wrong: common problems and quick fixes
Plant problems almost always trace back to environment, watering, or pests. Knowing which one you're dealing with saves a lot of guesswork.
Yellowing leaves
Yellow leaves on lower, older growth are normal. If yellowing spreads to newer growth, check watering first (overwatering is more likely than underwatering indoors). Pull the plant from its pot and look at the roots: brown, mushy roots mean root rot from too much moisture. Healthy roots are white or light tan and firm. If you see rot, trim the affected roots, let them dry briefly, and repot into fresh, well-draining mix. If the roots look fine, the problem is likely nutrient deficiency, usually nitrogen or iron, which you can address with a balanced fertilizer.
Wilting
Wilting despite moist soil almost always means root problems, either root rot or compacted roots that can't take up water efficiently. Wilting in dry soil means the plant simply needs water, but if it doesn't bounce back within a few hours of watering, root damage may already be present. Don't make the mistake of watering a wilting plant more if the soil is already wet. That makes root rot worse.
Leggy, stretched growth
Long, spindly stems with wide gaps between leaves mean the plant is stretching toward a light source it can't reach. Move it closer to a window or add supplemental lighting. Pinching back the stretched stems encourages bushier growth once the light issue is resolved.
Pests
The most common indoor plant pests are fungus gnats, spider mites, and mealybugs. Fungus gnats are tiny flying insects hovering around soil and are usually a sign the top inch of soil is staying too wet. Let the soil dry out more between waterings and the population will drop significantly. Spider mites show up as fine webbing on leaf undersides with small yellow stippling on leaves. Treat with insecticidal soap spray, which targets insects on contact without leaving harmful residue. Apply it to all leaf surfaces, including the undersides, and repeat every 5 to 7 days for three applications. Mealybugs look like small white cottony clusters, especially at stem joints. Dab them with a cotton swab soaked in rubbing alcohol, then follow up with insecticidal soap. For any pest problem, isolate the affected plant first to prevent spread to your other plants.
Damping-off in seedlings
If seedlings suddenly collapse at the soil line, that's damping-off, a fungal disease that spreads through overly wet conditions and can even be carried by fungus gnats. There's no cure once it hits a seedling, but prevention is reliable: use sterile seed-starting mix, bottom-water instead of overhead watering, and provide good airflow around seedlings. If damping-off appears, remove affected seedlings immediately and cut back watering for the rest of the tray.
Transplanting, pruning, and encouraging new growth
Plants eventually outgrow their containers, and a root-bound plant (one where roots have filled the pot and are circling or escaping through drainage holes) will stall in growth and stress quickly between waterings. Repot into a container only 1 to 2 inches larger in diameter. Going too large means excess soggy soil around the roots, which invites rot.
Before you transplant, water the plant thoroughly. This reduces root disturbance by keeping the root ball intact. After transplanting, give the plant a few days in a stable environment before moving it to a brighter spot or changing its care routine. Gradually acclimating plants (what growers call hardening off) before a significant environmental change dramatically reduces transplant shock. The key principle is the same whether you're moving a seedling outdoors or shifting a houseplant to a sunnier window: make changes gradually over a week rather than all at once.
Pruning serves two purposes: controlling size and encouraging branching. Cutting just above a leaf node (the point where a leaf meets the stem) triggers the plant to produce new growth below the cut. For most houseplants and herbs, you can safely remove up to one third of the plant at a time without causing serious stress. Regular light pruning keeps plants compact and full rather than leggy and top-heavy.
Growing in small spaces and controlled environments
Terrariums
A terrarium is essentially a miniature greenhouse. Closed terrariums create high humidity from the water cycle inside the glass, making them ideal for mosses, ferns, and tropical plants that would struggle in dry indoor air. The typical setup uses roughly one quarter of the terrarium's total volume for the growing medium and drainage layer combined. Start with a drainage layer of gravel or LECA at the bottom, add a thin layer of horticultural charcoal to prevent stagnant odors, then fill with a peat-based potting mix that provides both aeration and moisture retention. Open terrariums suit succulents and cacti, where lower humidity and faster drying are advantages rather than problems.
Grow tents and indoor grow setups
A grow tent gives you full control over light, temperature, humidity, and airflow in a compact, reflective space. This is the setup of choice for growers in apartments without good natural light, anyone who wants to grow plants year-round regardless of season, or those interested in hydroponics. Set up a full-spectrum LED grow light on a timer (14 to 16 hours on for most plants, 12 hours for flowering plants), pair it with a small fan for airflow, and use a thermometer/hygrometer to keep conditions dialed in. Hydroponics systems work especially well inside grow tents because the controlled environment eliminates many of the variables that make hydro tricky outdoors. There's even a broader philosophical side to creating community around growing, which is worth exploring if you're curious about how concepts like how to grow a church plant apply the same principles of intentional environment-building to human communities.
Practical tips for very limited space
- Vertical space is underused: wall-mounted planters, hanging baskets, and tiered shelving let you grow a lot in a small footprint.
- Self-watering pots help if your schedule is inconsistent, as they maintain a reservoir the roots can draw from.
- Compact varieties exist for almost every plant. Look for dwarf or patio versions of herbs, tomatoes, and fruiting plants if you're working with a balcony or windowsill.
- Grouping plants together increases local humidity and reduces individual watering frequency slightly.
- Reflective surfaces (white walls, foil-backed panels) bounce available light back onto plants and can meaningfully increase effective light levels near windows.
The honest truth about growing plants is that the fundamentals don't change regardless of the method or environment: match the plant to your conditions, set up a system that gives roots the right balance of moisture and oxygen, feed consistently but not excessively, and respond to what the plant is showing you. Mistakes are part of the process. Every grower has killed something. The difference between someone who eventually succeeds and someone who gives up is just keeping at it and asking why it didn't work rather than assuming it's hopeless.
FAQ
How do you grow a plant if you have almost no natural light?
Start by choosing shade-tolerant plants (for example, ZZ plant or snake plant) and verify light with a phone light meter app or by observing growth (staying compact is a good sign). If you only have dim light, plan on using a full-spectrum LED set on a timer, because “bright window” rules don’t apply without supplemental light.
What’s the fastest way to learn how much water a plant needs?
Use a consistent routine and measure, not guesses. Weigh the pot right after watering (or take a photo of the pot’s surface after watering), then re-check in a day or two. After a few cycles you’ll know your environment’s drying rate and can adjust without repeatedly over- or under-watering.
Is it better to water from the top or the bottom?
Either can work, but bottom-watering is especially helpful for preventing fungus issues like damping-off and for keeping seedlings from getting constantly wet at the soil line. For established houseplants, top watering is fine as long as you water thoroughly and empty any saucers after draining.
How do you know if yellow leaves mean too much water or too little light?
Too much water often comes with consistently wet soil, soft stems, or brown mushy roots when you check. Low light usually causes slow growth, paler leaves that keep thinning over time, and stretching rather than immediate root-rot symptoms.
What should you do if your plant is “happy” but not growing?
Check three likely causes: not enough light, fertilizer timing, or root restriction. If the plant has gone a full growing season without improvement, look for root-bound signs, then consider moving it closer to the light source or increasing feeding during spring through early fall (at half strength first).
How do you avoid root rot when you’re trying a self-watering setup?
Follow a strict drainage and monitoring habit. Even if the reservoir looks “manageable,” roots can stay too wet if the wicking system draws water faster than the plant uses it. Watch for sour soil smell, persistently heavy pot weight, and slow wilt that doesn’t correct after letting the reservoir run low.
Do you need to repot immediately when you buy a nursery plant?
Not usually. Let the plant acclimate for several days, then repot only if it’s clearly root-bound, sitting in a dense mix that stays wet too long, or in a pot without drainage. If you repot, choose a container only slightly larger (about 1 to 2 inches in diameter) to reduce the chance of excess soggy soil.
Should you prune right away or wait?
Wait if the plant is newly moved and still adjusting. Once it stabilizes, prune to shape by cutting above a leaf node. If you prune too early, you may reduce the plant’s ability to recover from the initial light and humidity change.
How can you tell whether your soil is draining well enough?
Do a simple drain test. After watering, the pot should drain and not stay soggy for many hours. If the surface stays wet and the pot remains very heavy the next day, you likely need a better-draining mix and confirm the pot has drainage holes.
What’s the right way to start seeds if you’re new?
Read the seed packet for cold stratification, but also pre-plan your timing so you aren’t tempted to “fix it” early. Keep the seed-starting mix lightly moist and use airflow to reduce fungus problems, because overly wet conditions can kill seedlings even when temperature seems fine.
How do you propagate cuttings without them rotting?
Use a sterile, draining rooting medium and keep it just barely moist. The biggest mistake is leaving the cutting too wet under high humidity. If you’re using a humidity dome or bag, ventilate occasionally and avoid letting water pool around the cut end.
When should you use a fertilizer, and how do you avoid salt buildup?
Begin feeding only after the plant is established and actively growing. If you see salt crust on the soil surface, flush the pot with plain water until excess drains out, then resume at lower concentration. Stopping overfeeding is important, because salts can worsen leaf tip burn and stress roots.
What do you do if you bring home pests from the nursery?
Isolate the new plant right away and inspect undersides of leaves and stem joints. Acting within the first week usually prevents widespread damage, and you can treat based on the pest type (webbing for mites, cottony clusters for mealybugs, hovering gnats for fungus gnats).
Why are there tiny bugs in the soil that don’t seem harmful?
Fungus gnat adults usually mean the soil stays too wet near the surface. Let the top inch dry more between waterings and consider yellow sticky traps. If you see larvae in the mix, you’ll need to correct the moisture cycle, not just spray the adults.
How do you harden off a plant before changing its environment?
Make changes gradually over about a week, increasing light exposure and adjusting temperature step by step. For outdoor moves, start with indirect conditions to prevent leaf scorch, then step up to the target light level once the plant shows new, steady growth.
Is a full terrarium always good for beginners?
No, closed terrariums are best for plants that handle consistently high humidity. If you want something beginner-proof and drier, choose an open terrarium for succulents or cacti, because trapped moisture can cause rot in plants adapted to arid conditions.