Growing plants successfully comes down to five things: picking a plant that fits your space, setting up the right growing medium, planting it correctly, dialing in water and light and nutrients, and then keeping a close eye on it as it grows. That's the whole framework. Everything else is just detail work inside those five steps, and even if you've killed every plant you've ever owned, you can follow this process and come out the other side with something alive and thriving. If you follow these five steps, you can give yourself a clear path and avoid the most common mistakes when learning how to grow plants.
5 Steps on How to Grow Plants: Setup, Planting, Care

Marcus Holloway
6 May 2026
This guide walks through each step in a way that works whether you're growing in a pot of soil on a windowsill, starting cuttings in water, setting up a small hydroponic system, or building a terrarium in a glass jar. The fundamentals don't really change across those methods. The details do, and I'll point out exactly where.
Step 1: Pick the Right Plant and Match It to Your Light and Space
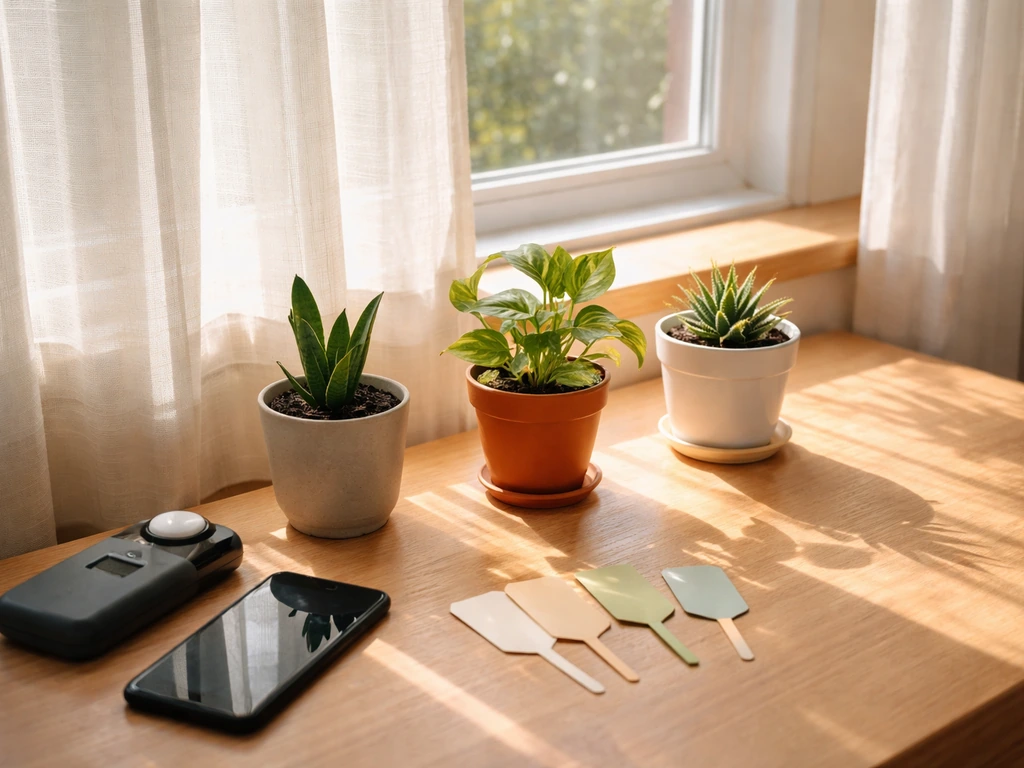
Most plant failures start here, before anyone has even bought a pot. The single most useful thing you can do is figure out what kind of light you actually have before choosing a plant, not after. Walk around your space on a bright afternoon and look at your windows. North-facing windows get very little direct sun and stay dim most of the day. East- and west-facing windows get a few hours of direct sun in the morning or afternoon and are considered medium-to-bright, roughly in the 100 to 500 foot-candle range. South-facing windows in the northern hemisphere get the most light and are genuinely high-light spots.
Something important: 'low light' on a plant tag does not mean 'no light.' Penn State Extension is clear that even low-light plants need several hours of bright indirect light to perform their best. A plant sitting in the corner of a dark room six feet from any window is not getting low light, it's getting almost no light, and it will slowly decline no matter what else you do right. The rule of thumb from University of Nebraska-Lincoln Extension is a useful anchor: plants that need more than four hours of direct or bright indirect sun are not low-light plants, and treating them like they are is a setup for failure.
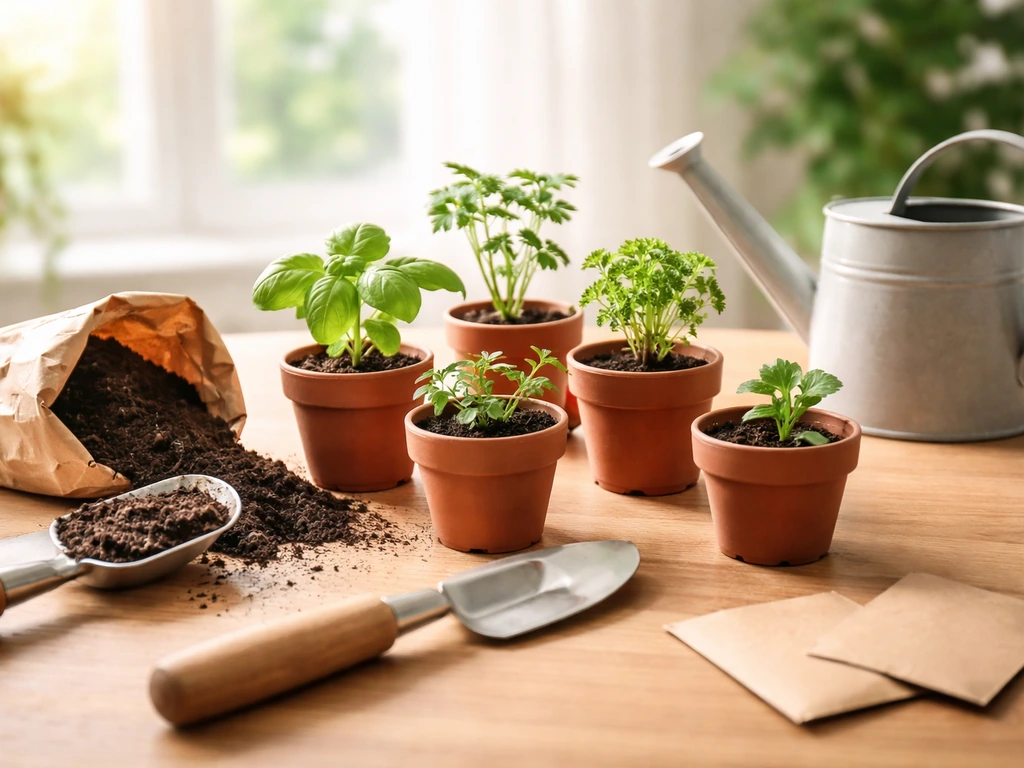
Once you know your light situation, match your plant to it honestly. If you have a dim apartment with one north window, pothos, ZZ plants, snake plants, peace lilies, and cast iron plants are genuinely forgiving. If you have a bright south-facing sill, you can grow herbs, succulents, or even small fruiting plants. Size matters too. A five-foot monstera is not a realistic choice for a studio apartment shelf. Start with something small that fits your actual space and let yourself learn the rhythm of plant care before scaling up.
A quick checklist before you buy
- Which direction do your windows face?
- How many hours of direct sun does that spot get in a typical day?
- How much horizontal and vertical space do you have for the plant at mature size?
- Do you travel often or have an irregular schedule? (If yes, pick a drought-tolerant variety.)
- Is the temperature in your space fairly stable, or does it drop at night near a drafty window?
Step 2: Choose Your Growing Medium and Set Up Containers
Your growing medium is the foundation your plant's roots live in, and the right choice depends on what you're growing and where. The four main options you'll encounter on this site are soil, water-based propagation, hydroponics, and terrariums. Each one has a slightly different setup process, but they all share the same goal: give the roots access to water, oxygen, and nutrients without drowning them.
Soil in containers
For most beginners growing houseplants or herbs indoors, a quality pre-mixed potting soil is the right call. Don't use garden soil from outside in pots; it compacts badly and often brings in pests. Choose a pot with drainage holes, because sitting water at the bottom of a pot with no way to escape is the fastest route to root rot.
A r/plantclinic thread about “before and after” troubleshooting also emphasizes checking for drainage holes and how watering mistakes can drive overwatering and root-rot symptoms Choose a pot with drainage holes. University of Minnesota Extension specifically flags this as one of the most common beginner mistakes: roots that sit in standing water turn yellow, then soft, then dead.
A pot that's slightly too big is also a problem. Oversized pots hold more moisture than young roots can drink, which keeps the soil wet too long. Match pot size to root ball size and move up gradually.
Water-based growing and cuttings
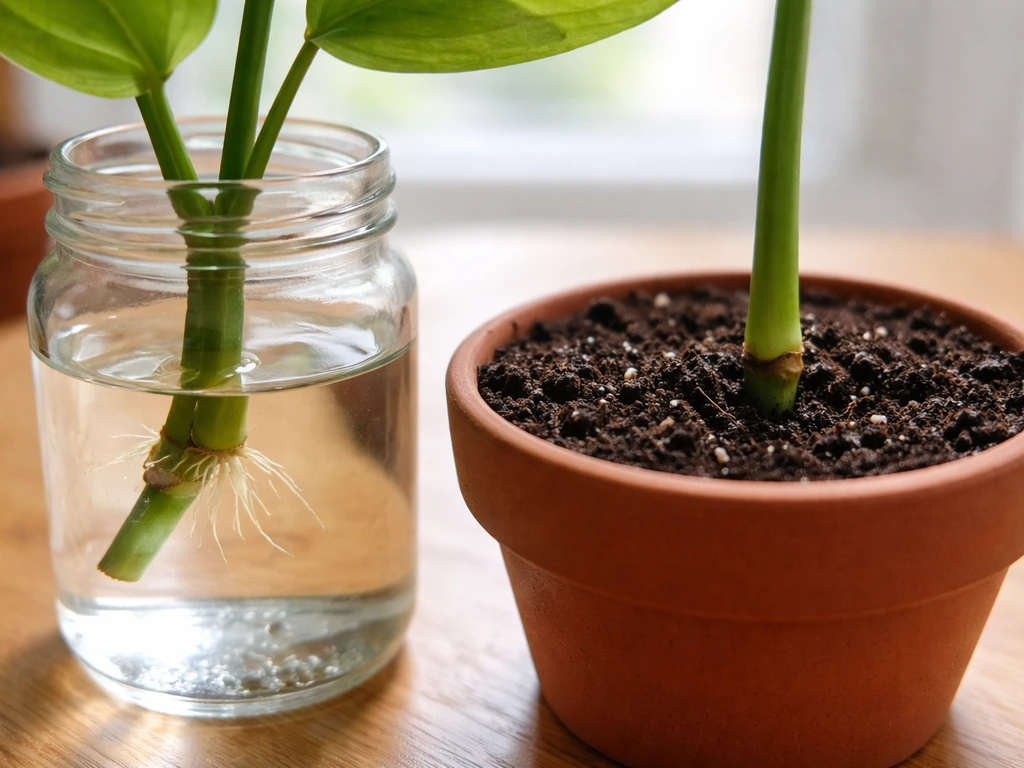
Propagating cuttings in water is one of the easiest entry points to growing plants. You take a cutting with a node (the bump where roots will emerge), strip the lower leaves so they're not submerged, and place it in a clean jar with room-temperature water. Change the water every few days to keep it oxygenated and clear. This works well for pothos, philodendrons, coleus, mint, and many soft-stemmed plants. Once roots are about an inch or two long, you can pot the cutting into soil or continue in a hydroponic system.
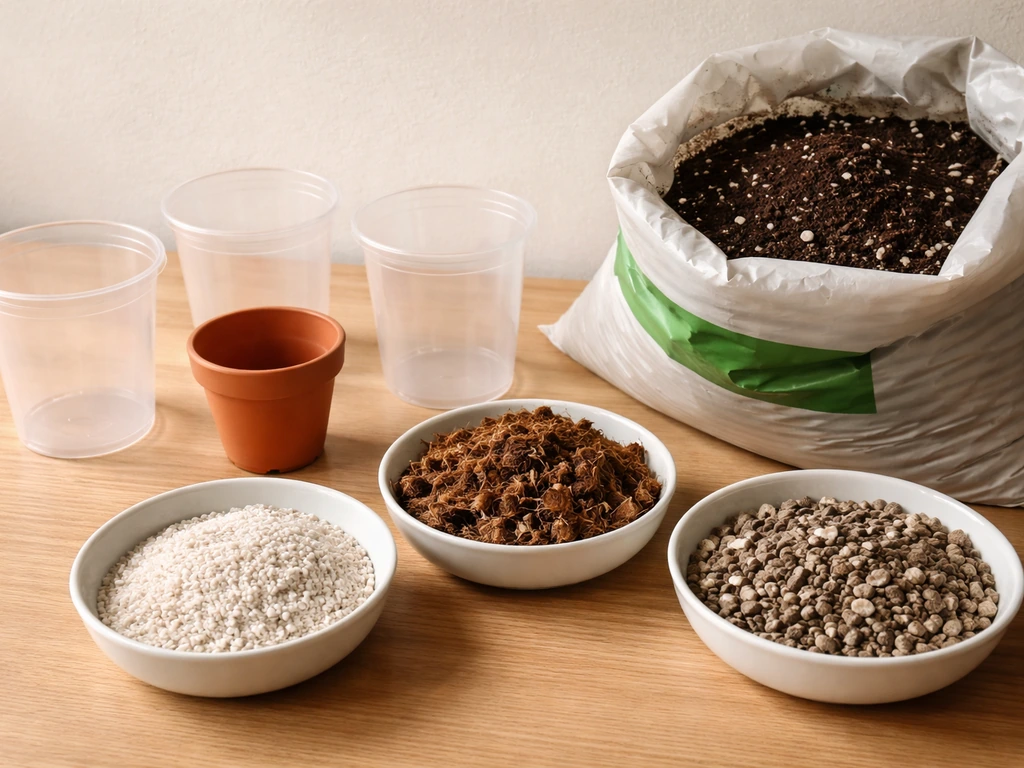
Hydroponics basics
Hydroponics replaces soil with a nutrient-rich water solution that feeds roots directly. It sounds complicated but the home-scale version is simple: a container, a growing medium like perlite or clay pebbles to anchor the plant, and a nutrient solution you mix and monitor. The Purdue guide to home hydroponics for leafy greens makes a strong case for measuring EC (electrical conductivity) rather than just guessing at nutrient strength. EC tells you how concentrated your nutrient solution is.
For leafy greens in vegetative growth, a starting target of around 1. 0 to 1. 2 mS/cm (which converts to roughly 640 to 770 ppm on a TDS meter) is a common beginner-friendly range. You'll also need to check pH; most plants prefer a solution between 5.
5 and 6. 5. A basic EC/pH meter combo runs about $20 to $30 and is worth every cent.
Terrariums
Terrariums are small planted ecosystems inside glass containers. Because most terrarium containers have no drainage holes, the layering system is essential. University of Missouri Extension recommends starting with a layer of pebbles or gravel at the bottom for drainage, followed by about a half-inch layer of activated charcoal to keep the environment fresh, then a shallow layer of potting mix on top.
University of Vermont Extension adds that if your container lacks drainage, this layered approach is not optional; it's what keeps the roots from sitting in accumulated water. One more decision you need to make upfront: open top or closed top? OSU Extension warns that closed terrariums trap humidity and can lead to mold, disease, and algae if you're not careful. Closed setups work well for moisture-loving plants like ferns and moss.
Open setups suit succulents and air plants better.
| Growing Method | Best For | Key Setup Requirement | Biggest Beginner Pitfall |
|---|---|---|---|
| Soil in containers | Houseplants, herbs, most beginners | Drainage holes, right-sized pot, quality potting mix | Overwatering or oversized pot |
| Water/cuttings | Propagating soft-stemmed plants | Clean jar, node submerged, frequent water changes | Letting water go stagnant |
| Hydroponics | Leafy greens, fast-growing crops indoors | EC/pH meter, correct nutrient concentration | Wrong EC or pH, skipping measurements |
| Terrarium | Small ferns, moss, succulents (open) | Drainage layer, charcoal, shallow soil, vent decision | Closed setup for wrong plant type, no drainage layer |
Step 3: Plant or Sow Correctly and Start With a Simple Routine
How you put the plant in the ground (or medium) matters more than most beginners expect. Getting this step right prevents a whole class of early problems.
Transplanting a plant into soil or a container

When moving a plant from a nursery pot into its new home, gently loosen the root ball so the roots aren't tightly circled. Place it at the same depth it was growing before; burying the stem too deep invites rot. Fill in around the roots with fresh potting mix and firm it down lightly to close air pockets, which is the same technique University of Missouri Extension recommends for terrarium planting. Then water thoroughly until it drains from the bottom. Montana State University Extension notes it's normal to see a little yellowing or leaf drop after repotting as the plant adjusts, so don't panic if that happens in the first week.
Sowing seeds
For seeds, the basic rule from Penn State Extension is to sow at a depth of about two to three times the thickness of the seed. A tiny basil seed barely gets covered; a bean seed goes in an inch down. Sow into moist (not soaking wet) seed-starting mix, cover with a humidity dome or plastic wrap to retain moisture until germination, then remove it as soon as sprouts appear.
The biggest early failure with seeds is damping off, which is a fungal rot that kills seedlings at the soil line. Penn State Extension ties it directly to overwatering and cool, wet conditions. Keep the medium moist but not soggy, provide warmth (most seeds germinate best between 65 and 75 degrees Fahrenheit), and make sure there's some airflow once seedlings emerge.
Planting in a terrarium
Terrarium soil is shallower than a standard pot, so you need to be deliberate. University of Vermont Extension specifically advises spreading the roots to accommodate the shallow depth rather than bunching them. Make a small hole in the growing layer, set the plant in, and fill around it, tamping gently to firm the mix around the roots. Work from the back and sides toward the front to avoid crushing plants you've already placed.
Step 4: Water, Light, and Nutrients, What 'Enough' Actually Looks Like
This is where most people overthink it and end up doing too much rather than too little. The goal is not a perfect schedule. The goal is reading what your plant is telling you and responding appropriately.
Watering
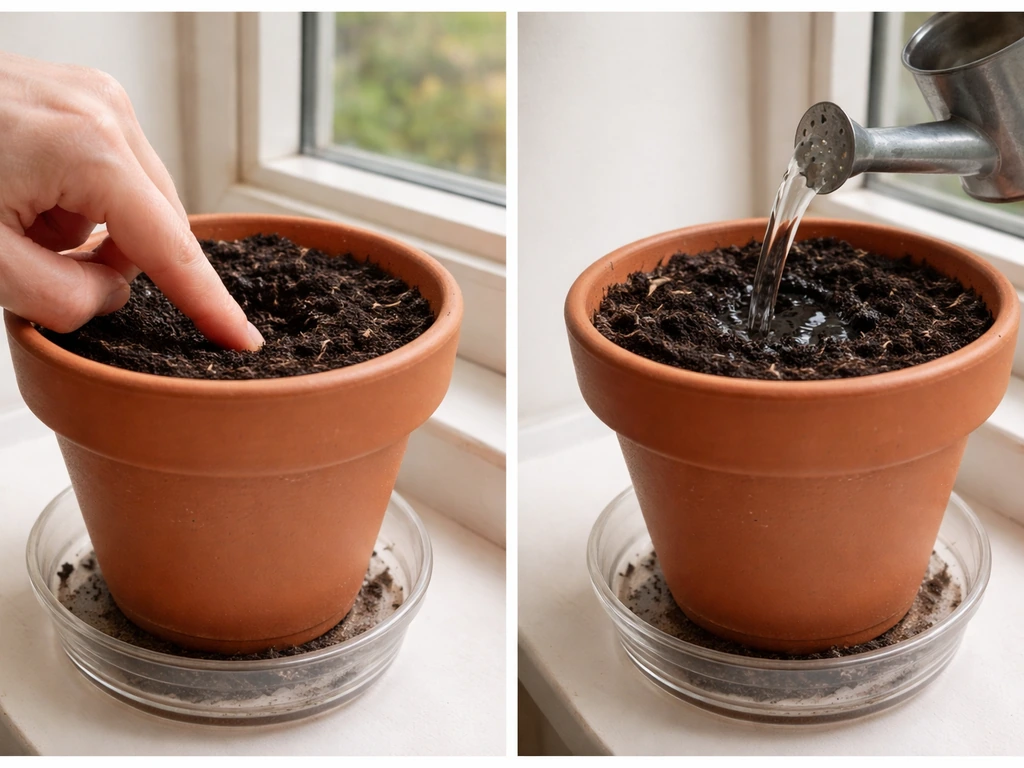
For soil-grown plants, the most reliable method is the finger test: stick your finger about an inch or two into the soil. If it feels dry at that depth, water thoroughly until it drains from the bottom. If it's still damp, wait and check again in a day or two.
University of Minnesota Extension uses this same one-to-two-inch dryness indicator as the benchmark for preventing fungus gnats, and Cornell's IPM program agrees, stating that keeping the top two inches of soil dry discourages gnats from laying eggs. Overwatering shows up as yellowing leaves and wilting even when the soil is wet, which Utah State University Extension identifies as classic signs of standing water around the roots.
If you see both wet soil and a wilting plant at the same time, you have a drainage or overwatering problem, not a thirst problem.
Light
Light isn't something you adjust daily, but it is something you revisit seasonally. University of Minnesota Extension explains that light duration, or photoperiod, refers to the number of hours of light plants need per 24-hour period, and that plants are often categorized into low, medium, and bright light needs.
Illinois Extension points out that window brightness changes significantly between summer and winter, so a plant that does great on an east windowsill in July may struggle there in December. If you notice slow growth, pale or stretched stems, or leaves leaning hard toward the light source, that's the plant telling you it needs more. Move it closer to the window or add a basic grow light.
LED grow lights are inexpensive and effective; a simple clip-on panel running 12 to 14 hours a day can substitute for or supplement a dim window.
Nutrients
For soil-grown houseplants, a balanced liquid fertilizer applied at half the recommended strength every two to three waterings is a practical, low-risk starting routine. University of Minnesota Extension specifically recommends this half-strength approach to prevent salt buildup in the soil, which can scorch roots over time. For hydroponic systems, nutrients are already dissolved in the water, so your job is to maintain that EC target (around 1. 0 to 1.
2 mS/cm for leafy greens) and check pH regularly. Top off with plain water between solution changes because plants drink water faster than nutrients, so the solution gets more concentrated over time. For terrariums, nutrients are largely provided by the starting potting mix and don't need frequent supplementing; over-fertilizing a terrarium is a more common mistake than under-fertilizing.
Step 5: Ongoing Maintenance and What to Do When Things Go Wrong
Once your plant is in and growing, your job shifts to observation and small adjustments. Most problems announce themselves visually before they become serious, which is good news. The trick is knowing what you're looking at.
Regular maintenance tasks
- Check soil moisture every few days with the finger test and water only when the top inch or two is dry.
- Wipe dust off large leaves to keep them absorbing light efficiently.
- Rotate the pot a quarter turn every week or two so all sides get equal light exposure.
- Remove dead or yellowing leaves promptly to reduce disease pressure.
- Flush soil-based containers with plain water every few weeks to prevent fertilizer salt buildup.
- For hydroponic setups, check EC and pH every few days and top off with plain water between full nutrient changes.
- For terrariums, check for condensation buildup; too much moisture on the glass means the system needs more airflow.
Common problems and fast fixes
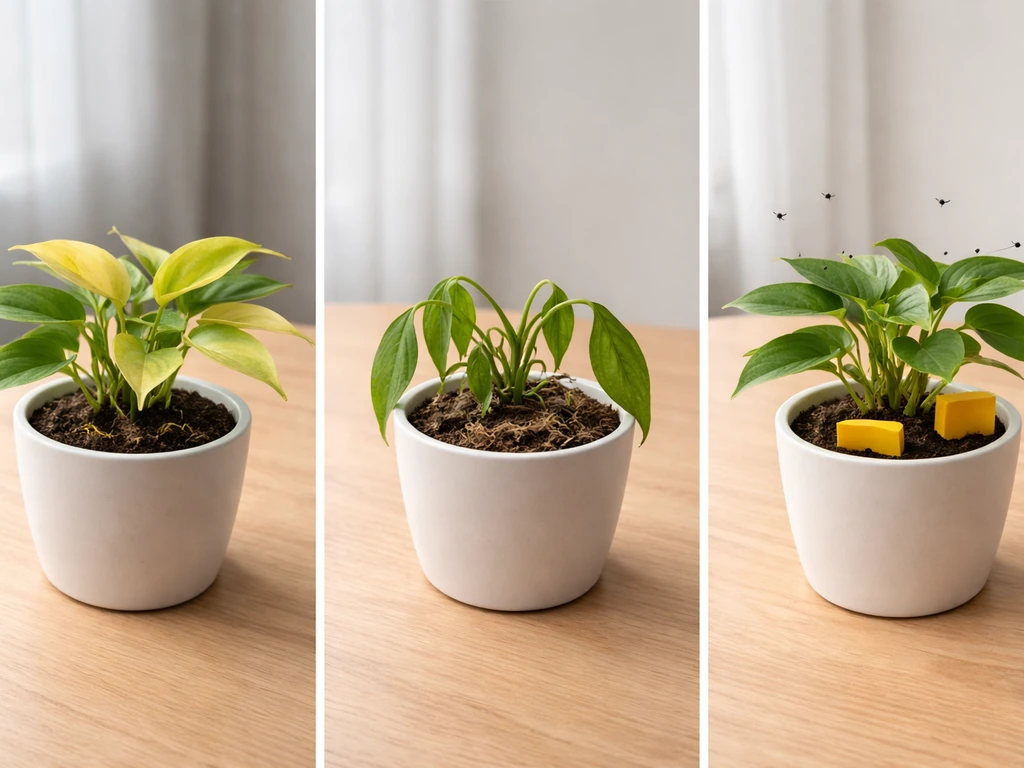
Yellowing leaves are the most common complaint and the most overdiagnosed. They can mean overwatering, underwatering, too little light, or nutrient deficiency, sometimes all at once. Start by checking the soil: if it's wet and the roots smell bad or feel mushy, overwatering is the culprit. Penn State Extension recommends cutting out infected roots with clean scissors, repotting into fresh sterile potting mix in a clean container, and backing off on watering. University of Maryland Extension adds that overwatered plants can show drought-like leaf scorch because the damaged roots can no longer deliver water properly, which is why the symptoms can look so confusing.
Fungus gnats are annoying but manageable. The fix is simple: let the top two inches of soil dry completely between waterings. The gnats need moist soil to lay eggs; take that away and the cycle breaks within a few weeks. Yellow sticky traps catch adults in the meantime.
Leggy, stretched growth means not enough light. Move the plant closer to the window or supplement with a grow light. You can prune the stretched stems back to a node to encourage bushier new growth.
Wilting with dry soil is simple dehydration; water thoroughly and the plant usually recovers within a few hours. Wilting with wet soil is root damage from overwatering or rot, which needs the repotting intervention described above.
For seed-starting failures, if seedlings are falling over at the base with a pinched or rotted stem, that's damping off. There's no saving affected seedlings, but you can restart with fresh sterile mix, reduce watering frequency, add a small fan for airflow, and make sure the environment isn't too cold or too wet during germination.
Knowing when to move to the next stage
Plants tell you when they need more space: roots growing out of drainage holes, very fast soil drying after watering, or slowed growth despite good care are all signs it's time to move up one pot size. Don't jump two or three sizes at once; that just creates the overwatering risk all over again. One size up, fresh potting mix, and your established routine will carry the plant through the transition.
Growing plants is genuinely a skill you build by doing it, making mistakes, and adjusting. These five steps give you the full cycle from selection to ongoing care, but the real learning happens when you notice something off and figure out why. If you want to go deeper on any individual phase, there's a lot more to explore around specific tips for different plant types, how to document your growing process, and dialing in care for flowering plants specifically.
If you want, I can also point you to gardening documentation of how to grow plants so you have a clear record of what worked. If you want a quick overview before you start, this article breaks everything into 4 steps to grow a plant. If you’re aiming for blooms, these tips to grow flowering plants will help you fine-tune light, watering, and nutrients for consistent flower production dialing in care for flowering plants specifically.
For more practical tips on how to grow plants, check the section that covers plant types and common fixes. If you want a deeper, more step-by-step walkthrough of the full process, the steps to grow plants section covers everything from choosing the right plant to ongoing care.
FAQ
How do I tell whether my plant needs more water or more light?
Use the soil and the timing together. If the soil is dry 1 to 2 inches down, water thoroughly and reassess after a day. If the soil is still damp but the plant looks weak (yellowing, leggy stems, leaning toward the window), it is more likely a light or drainage issue than thirst.
What should I do if my plant is in a pot but water never drains properly?
Check for two common causes: drainage holes clogged with soil and a cachepot that traps runoff. Flush the pot with water and verify it drains from the bottom within a reasonable time, then empty any saucer after watering.
Can I reuse potting soil from previous plants?
It is risky for most indoor growing. Old mix can compact, retain too much moisture, and carry pests or fungal spores. If you reuse it, sterilize and refresh with fresh mix, but for seedlings and cuttings, use new sterile seed-starting or potting mix.
How much should I water cuttings after potting them into soil?
After transitioning from water, keep the mix evenly moist for the first 1 to 2 weeks but not soggy. Overwatering during this window is a common reason newly rooted cuttings fail, since damaged or tender roots cannot handle standing moisture.
Do I need to fertilize immediately after repotting?
Usually no. Give plants 2 to 4 weeks to recover and start new growth before applying fertilizer. Starting too soon can overwhelm stressed roots, especially if the fresh potting mix already contains nutrients.
What is the fastest way to prevent fungus gnats when I’m new to indoor plants?
Let the top 2 inches of soil dry between waterings (not just the surface). Also avoid bottom-watering into a constantly wet setup, and remove dead leaves on top of the soil, since gnats breed in consistently moist organic matter.
How do I adjust for seasonal light changes without shocking my plants?
Move the plant gradually, in small increments over 1 to 2 weeks, rather than jumping from a dim spot to a bright one. If you use a grow light, keep the daily duration consistent first, then increase slowly as the plant adapts.
My plant’s leaves look pale or washed out. Is that always a light problem?
Not always. Pale growth can indicate too much light (bleaching) or too little (weak, stretched growth). Look for the pattern: bleaching often shows crispy or bleached patches, while low light usually brings slow growth and stretching toward the light.
Can I grow low-light plants near a window but still fail?
Yes, because “low light” labels still assume several hours of bright indirect light. If your window is far away or your plant sits in dim corner conditions for most of the day, you may need a closer placement or a small grow light even for low-light species.
How should I size a pot if I’m unsure what “one size up” really means?
Target a pot that leaves about 1 to 2 inches of new potting mix space around the root ball, not several inches. If your plant is between sizes, choose the smaller option and plan to repot again once roots fill the container.
What’s the most common terrarium mistake after building the layers?
Using the wrong opening type for the plants. Closed terrariums work best for moisture-loving plants, while succulents and air plants usually need an open setup with more airflow to avoid mold and trapped condensation.
In hydroponics, what should I do if leaves start yellowing?
First confirm water depth and that the roots are getting oxygen (not just sitting submerged in stagnant solution). Then check EC and pH, since nutrient imbalance or wrong concentration is a frequent cause. If the solution has not been replaced on schedule, top-off-only can concentrate nutrients too far.
How do I prevent damping off when starting seeds?
Keep the mix moist but not wet, use sterile seed-starting mix, and add airflow once seedlings emerge. If your room is cool, improve warmth, since cool, consistently wet conditions strongly increase damping off risk.