Growing a plant successfully comes down to doing the right things in the right order. That sounds simple, but most beginner failures happen because someone skips a step or does two things out of sequence, like fertilizing before roots exist or watering on a rigid schedule instead of reading what the plant actually needs. This guide walks you through every step from choosing your plant to keeping it thriving, and it covers all four main growing environments: soil, water culture, hydroponics, and terrariums. If you've killed plants before, that's fine. You're about to understand why, and how to stop doing it.
Steps to Grow Plants: A Beginner Guide From Seed to Care

Marcus Holloway
4 Apr 2026
Start by choosing the right plant and your growing goal
Before you buy a single bag of soil, decide two things: what you want to grow, and why. Those answers determine everything else. Someone who wants fresh herbs on a kitchen counter has completely different requirements than someone trying to grow tomatoes on a balcony or build a self-contained terrarium on a shelf. Your growing goal shapes your container choice, your light setup, your watering schedule, and your fertilizer timing.
For beginners, the most reliable starting plants are ones with a high tolerance for minor mistakes. Lettuce, basil, mint, pothos, and snake plants are forgiving. Succulents are forgiving in a different way: they hate overwatering but can handle neglect. Pick something matched to the light you actually have, not the light you wish you had. A plant that needs full sun will not thrive three feet from a north-facing window, no matter how well you do everything else.
Also decide whether you're starting from seed or from a cutting or starter plant. Seeds are cheaper and give you more variety, but they add 2 to 8 weeks before you have a plant that looks like a plant. Starter plants from a nursery skip germination entirely and are worth the extra cost if you're impatient or working on a deadline. Gardening documentation on how to grow plants can help you map out this planning phase if you want a more formal record of your decisions before you start.
Step-by-step setup: containers, soil or media, and drainage

Your container is not a passive holder. It actively determines whether your roots get too wet, dry out unevenly, or stay at the right moisture level. The single most important feature of any container is drainage. Every container you use for growing plants should have at least one drainage hole at the bottom, and two or three holes are genuinely better than one. A single large hole can actually drain less effectively than several smaller holes spread across the base. If you're using a decorative pot without holes, the workaround is to grow your plant in a plain plastic nursery pot that does drain, then drop that inside the decorative one, and elevate the inner pot so it never sits in pooled water at the bottom.
Container size matters too. A common mistake is starting too big, thinking a large pot will give roots room to grow. In reality, a large pot holds more water than the roots can use, and the wet soil around the edges creates the exact conditions that rot roots. Match pot size to plant size. For vegetables like leaf lettuce grown in containers, a roughly 1-gallon container with 12 to 18 inches of depth is a practical starting point. Scale up only when roots have filled the current container.
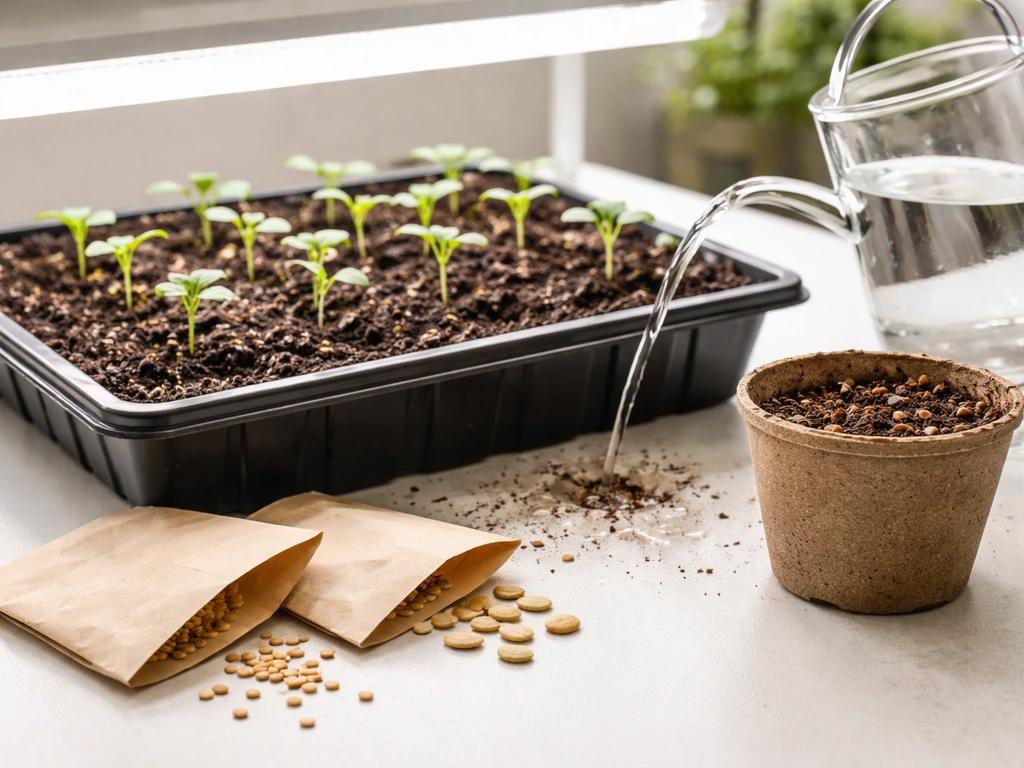
For the growing medium itself, do not use garden soil in containers or seed-starting trays. Garden soil compacts in pots, drains poorly, and often carries pathogens. Use a seed-starting mix for germination: these are soilless blends, typically peat moss or coco coir combined with vermiculite or perlite, designed to stay light and airy while holding just enough moisture. For established plants in containers, a standard potting mix works well. Pre-moisten your seed-starting mix before you fill your containers. If you pour dry mix into a tray and then water from the top, it will clump unevenly and leave dry pockets that you can't see.
Lighting, temperature, and your watering plan
Light is food for plants. It's not a comfort feature. Without enough light, a plant can't photosynthesize effectively, which means it can't build the structures it needs to grow, flower, or fruit. If you're growing indoors under artificial lights, seedlings generally need about 16 to 18 hours of light per day. Hydroponic herbs and lettuce typically do well with 12 to 14 hours. The exact duration also depends on how close your light is to the plants: a grow light mounted higher up delivers less intensity per hour, so you may need to run it longer to hit the same effective light dose.
When using grow lights for seedlings, start with the light positioned close, just a few inches above the soil level, then raise it as the seedlings grow. The goal is to maintain roughly a 2 to 4 inch gap between the light and the top of the plant canopy. A timer is not optional here. Running lights by memory means inconsistency, and inconsistency stresses plants. A basic plug-in outlet timer costs a few dollars and removes that variable entirely.
Temperature affects two things that beginners often treat as separate: germination and ongoing growth. Seeds germinate based on soil temperature, not air temperature. Many vegetable seeds germinate fastest when the soil is between 65 and 75 degrees Fahrenheit. If your seed trays are sitting on a cold floor, germination will be slow and uneven. Moving trays to a warmer surface or using a seedling heat mat makes a real difference. After seedlings emerge, slightly cooler air temperatures are actually fine and can produce sturdier stems.
Watering is where most beginners go wrong, in both directions. The goal is consistently moist media, not wet, not dry. Think of it like a wrung-out sponge: damp all the way through, but not dripping. For seedlings, a spray bottle lets you wet the surface gently without dislodging seeds or washing mix out of cells. As plants get larger, bottom-watering is one of the most reliable methods: set your containers in a tray with about half an inch of water and let them sit for around 20 minutes. The media pulls water up from below, wetting evenly without disturbing the surface or splashing soil onto leaves.
Planting and early care: from germination through establishment
Once your containers are filled with pre-moistened seed-starting mix, you're ready to sow. The seed packet is your first reference: it tells you planting depth, spacing, and days to germination. A general rule is to plant a seed at a depth equal to about twice its diameter. Tiny seeds like lettuce often need light to germinate and should be pressed gently onto the surface rather than buried. Pressing seeds lightly into the mix improves seed-to-soil contact, which supports more uniform and reliable sprouting.
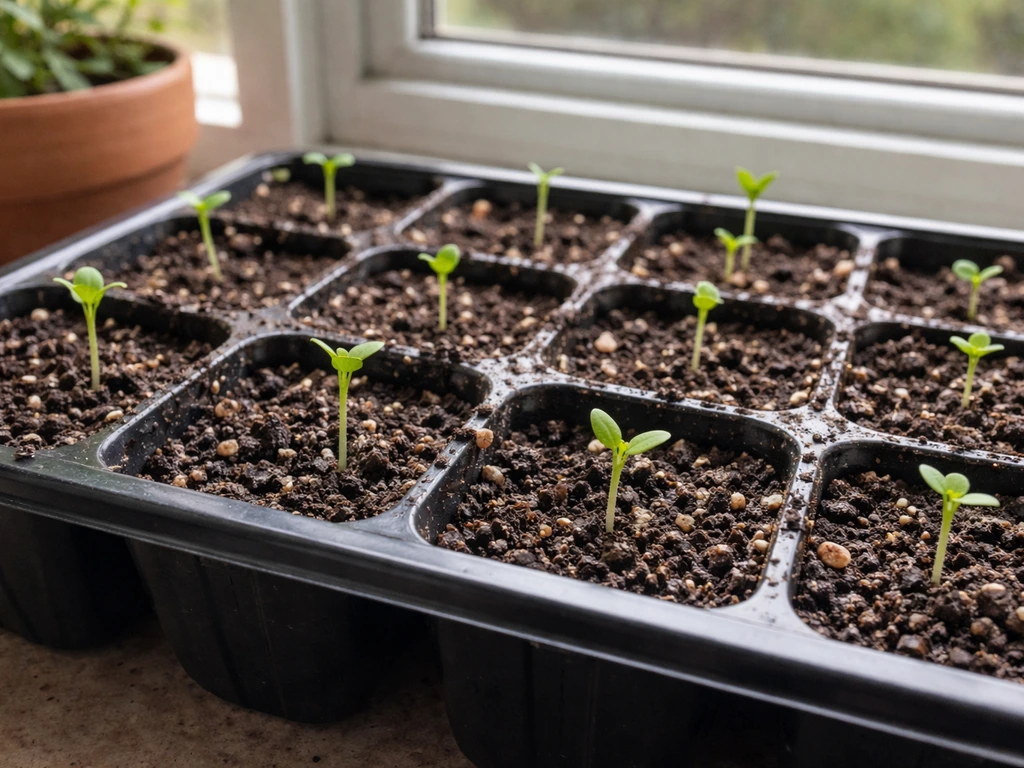
After sowing, keep the medium consistently moist. Don't let the surface dry out, because once a seed starts to crack open and sends out a tiny root hair, that root will die within hours if it dries out. At the same time, don't let the medium get soggy. Overly wet soil and high humidity are the main drivers of damping-off, a fungal problem where seedlings rot at the soil line and collapse. It looks like the stem just dissolves. This is one of the most common and discouraging things that happens to new growers, but it's almost entirely preventable with good drainage, appropriate moisture levels, and airflow. Running a small fan near your seedlings reduces the stagnant humid air that lets damping-off pathogens thrive.
Once seedlings have their first set of true leaves (the second pair to emerge, after the initial seed leaves), they're ready to be thinned. If you planted multiple seeds per cell, cut the weakest ones at soil level with scissors, leaving one plant per cell. Don't pull them out, as that disturbs the roots of the surviving seedling. Transplanting into larger containers comes when roots start to circle the bottom of the cell or poke out of drainage holes. At transplant time, water your seedlings in with a half-strength solution of a balanced, water-soluble fertilizer to reduce stress on the tender root system.
Feeding and routine maintenance
Most seed-starting mixes contain little to no nutrients, which is intentional. Seedlings don't need much at first, and too much fertilizer early can burn delicate roots. Begin feeding once seedlings have two or three sets of true leaves. A light starter fertilizer, around 1.5 tablespoons of a 5-10-5 formula per gallon of water, works as a gentle introduction. As plants mature, switch to a balanced all-purpose fertilizer and follow the product label for frequency. For most container-grown plants, feeding every two weeks during active growth is a reasonable baseline. Cut back or stop feeding when growth slows in winter or during dormancy.
Pruning is not just for aesthetics. Removing dead or yellowing leaves reduces the chance of fungal problems taking hold. Pinching back the growing tips of herbs like basil keeps the plant bushy and delays flowering, which extends the harvest window. For houseplants, removing old or damaged growth redirects the plant's energy toward new, healthy growth.
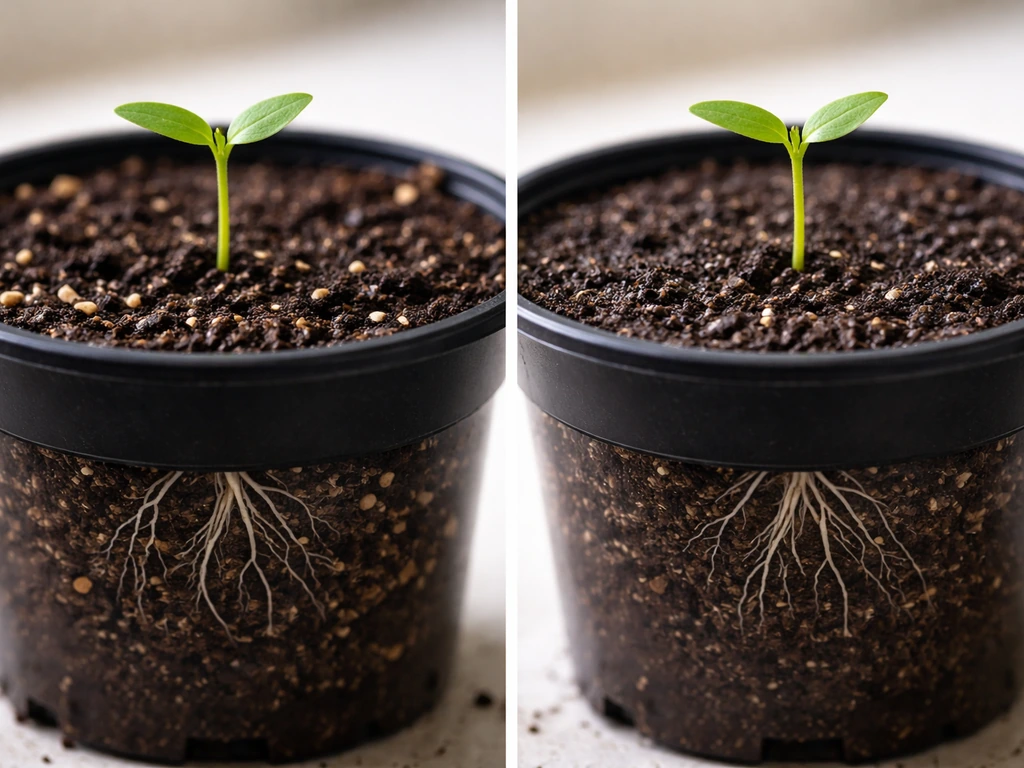
Repotting becomes necessary when a plant is clearly rootbound: roots circling densely in the pot, water rushing straight through without being absorbed, or growth that has stalled despite good light and watering. Go up one container size at a time. Jumping from a 4-inch pot to a 12-inch pot creates the same overwatering risk as starting in too large a container. When repotting, gently loosen the root ball, remove any mushy or dead roots, and place the plant at the same depth it was growing before.
Step-by-step methods by environment
Growing in soil
Soil growing is the most forgiving system for beginners because soil has some buffering capacity: it holds nutrients, moderates moisture swings, and supports beneficial microbes. The basic sequence is: choose your container with proper drainage, fill with pre-moistened potting or seed-starting mix, sow seeds or plant your starter, water consistently, feed after the seedling stage, and repot as needed. If you follow the steps above in order, soil growing is very hard to completely fail at. The most common mistakes are overwatering and insufficient light, both of which are fixable once you can identify them.
Growing in water (water culture)
Some plants, including pothos, lucky bamboo, mint, and many herbs, can root and grow directly in water. The setup is simple: a clean container, enough water to cover the roots or base of a cutting, and indirect light. Change the water every one to two weeks to prevent stagnation and algae buildup. Add a tiny amount of liquid fertilizer to the water every few weeks once the plant is actively growing. Roots grown in water are structurally different from soil roots and won't survive if abruptly transplanted into dry soil, so plan to keep water-grown plants in water long-term or transition them gradually.
Growing hydroponically
Hydroponics replaces soil with an inert growing medium (like rockwool, clay pellets, or net cups) and delivers nutrients directly through the water. For a beginner hydroponic setup, especially for lettuce or herbs, the key numbers to understand are electrical conductivity (EC) and pH. OSU Extension notes that for hydroponics you should use EC and pH targets, including lettuce target ranges, as starting benchmarks for managing the nutrient solution blank" rel="noopener noreferrer">electrical conductivity (EC) and pH. EC measures how much nutrient is in your water. A practical starting target for small-scale lettuce systems is around 1250 µS/cm, which you typically reach by adding hydroponic nutrients at roughly 1 teaspoon per gallon of water. pH should stay between 5.5 and 6.5 for most crops. Light duration for hydroponic lettuce is typically 12 to 14 hours per day, though Florida-adapted lettuce varieties can do well with as little as 10 to 11 hours. In a stable, well-lit setup, you won't need to constantly adjust these numbers. The goal is to create stable conditions and then monitor rather than constantly intervene. Five steps to growing plants hydroponically can serve as a focused companion guide if you want to go deeper on that system specifically.
Growing in a terrarium
A terrarium is a closed or semi-closed growing environment in a glass container. The biology is the same as any other growing setup, but the scale and moisture dynamics are different. Because terrariums trap humidity, they suit moisture-loving plants like ferns, mosses, and tropical species. Drainage is managed differently here: instead of a drainage hole, most terrariums use a layered base of pebbles, activated charcoal, and then soil to allow water to move away from the root zone. Water very sparingly in a closed terrarium. Condensation on the glass walls means the system is cycling moisture on its own. Open the lid occasionally if condensation becomes too heavy.
Comparing the four growing environments
| Environment | Best for | Drainage setup | Watering frequency | Feeding approach | Difficulty |
|---|---|---|---|---|---|
| Soil (containers) | Most plants, beginners | Holes in container base | When top inch of soil is dry | Every 2 weeks with diluted fertilizer | Low |
| Water culture | Cuttings, herbs, pothos | No soil, open water | Top up every 1–2 weeks | Small dose liquid fertilizer every few weeks | Low |
| Hydroponics | Lettuce, herbs, faster growth | Inert media, nutrient solution reservoir | Continuous (reservoir system) | Premixed nutrient solution at ~1 tsp/gallon | Medium |
| Terrarium | Ferns, moss, tropicals | Layered pebble/charcoal base | Very infrequent (closed system) | Minimal to none | Low to medium |
Troubleshooting common problems using the growth-step logic
Most plant problems trace back to one of four things: wrong light, wrong watering, wrong temperature, or wrong nutrients. The trick is to think about which step in the growth sequence you're currently at, because the same symptom can have different causes depending on the stage. Practical tips on how to grow plants includes a useful reference for common symptom patterns if you want a broader diagnostic list.
- Seeds aren't germinating: Check soil temperature first, not air temperature. Cold soil is the most common culprit. Also check that the medium hasn't dried out even once since sowing.
- Seedlings are falling over at the soil line: This is damping-off. It's caused by excessive moisture and poor airflow. Improve drainage, reduce watering, and add a small fan. You likely cannot save affected seedlings, but you can prevent it in the next round.
- Seedlings are tall and spindly (leggy): The light is too far away, too weak, or running for too few hours. Lower your grow light or increase duration. Add a fan to strengthen stems.
- Leaves are yellowing on an established plant: Yellow lower leaves on an otherwise healthy plant often mean the plant needs nitrogen. Yellow leaves with green veins suggest an iron or magnesium deficiency. But check watering first: overwatering causes yellowing too, and adding fertilizer to a waterlogged plant makes things worse.
- Leaves are wilting even though soil is moist: This usually means root rot from overwatering. The roots can't deliver water to the leaves because they're damaged. Let the soil dry out more than usual between waterings and check the roots if you can.
- Plant stopped growing: In soil, this often means the plant is rootbound and needs repotting. In hydroponics, check EC and pH. In all systems, check that light duration and intensity are adequate.
- Hydroponic plants look pale or stunted: Check your EC reading. If it's too low, the plants are nutrient-deficient. If pH is out of range (below 5.5 or above 6.5), nutrient uptake is blocked even if nutrients are present in the water.
Your simple checklist and next-step schedule
Here's how to think about the first 8 weeks of growing from seed. Adjust timing based on the specific plant you chose. If you're working from a starter plant rather than seeds, skip to week 2. For more detailed step-by-step breakdowns tailored to specific scenarios, a complete walkthrough on how to grow plants step by step covers additional context on sequencing these actions for different plant types.
- Before day 1: Choose your plant, decide your environment, get your container with drainage holes, and buy the right growing medium. Pre-moisten your mix the day before sowing.
- Day 1 (sowing): Fill containers with pre-moistened seed-starting mix, sow seeds at the right depth (check your packet), press lightly for good contact, label your containers, and place under lights or in your brightest window.
- Days 1–14 (germination): Keep the medium moist with a spray bottle. Don't let it dry out or get soggy. Run lights 16–18 hours per day for seedlings. Check daily. Resist the urge to water if the surface still feels damp.
- Weeks 2–4 (early seedling): Once true leaves appear, thin to one plant per cell. Begin checking for damping-off risk (reduce watering if stems look pinched at the soil). Keep fan running for airflow.
- Weeks 3–5 (first feeding): Start light fertilizing once you see 2–3 sets of true leaves. Use a diluted starter formula. Don't skip this if your mix has no added nutrients.
- Weeks 4–6 (transplanting): When roots circle the bottom of cells or poke out of drainage holes, move up to the next container size. Water in with half-strength fertilizer after transplanting.
- Weeks 6–8 (establishment): Resume normal watering schedule based on the plant's needs, not a fixed calendar. Feed every two weeks. Monitor light and adjust height of grow lights as needed. Prune any dead or yellowing leaves.
- Ongoing: Check monthly whether the plant needs repotting. Adjust feeding when growth slows. Revisit your troubleshooting list anytime something looks off.
If this is your first time growing from seed, consider starting with just two or three cells of one plant type. Keep it small enough that you can pay close attention to each one. Once you've successfully taken a plant from seed through to establishment once, the whole process makes much more intuitive sense. A focused four-step framework for growing a plant is a good resource to revisit after your first round, when you want to tighten up your process and cut out any unnecessary steps.
For anyone who wants to go beyond basics once they're comfortable, tips specifically for growing flowering plants covers the additional considerations that come into play when you're trying to get a plant to bloom, including light cycles, feeding ratios, and the timing adjustments that make the difference between a plant that just survives and one that actually flowers.
FAQ
When exactly should I start fertilizing, and what if my seedlings look pale?
Most beginners should not start fertilizer until the plants have at least two or three sets of true leaves, because seed-starting mixes usually contain little nutrition and young roots burn easily. If your mix already includes a slow-release nutrient, wait longer (or check the label), and switch to regular feeding only after steady new growth starts.
How can I water correctly if I do not want to follow a strict schedule?
Before watering again, do a quick finger test 1 to 2 inches down (or lift the pot and check weight). If the surface feels dry but the mix underneath is still damp, wait, since seeds and seedlings can die from drying out after germination starts. For hydroponics and water culture, instead of a rigid schedule, check EC and pH and only top off or replace when they drift beyond your target range.
What should I do if I notice damping-off or seedlings collapsing near the soil line?
Use a humid, not wet, approach, keep airflow gentle (a small fan) and avoid frequent misting once damping-off risk starts. If seedlings collapse at the soil line, remove affected seedlings immediately, improve ventilation, and water less from above. Also confirm you are using a light seed-starting mix and that containers drain properly.
My seedlings are getting leggy, what should I change first?
If seedlings stretch tall and thin, increase light intensity or lower the light closer to the canopy while keeping the 2 to 4 inch gap guideline. Also reduce how much nitrogen you feed (or delay feeding) and make sure the room temperature is not excessively warm. Stretched seedlings can often recover if you correct light within a week or two.
Do I really need multiple drainage holes, and how do I handle decorative pots without holes?
A single drainage hole is often enough for small, forgiving plants, but using several holes spaced across the base helps prevent uneven wet zones. For decorative containers without holes, the double-pot method works, but make sure the inner pot is elevated so it never sits in runoff, then empty any water that collects in the outer cachepot.
Can I move a plant that rooted in water into soil later without killing it?
Yes, but only if you are adjusting the transition carefully. Roots grown in water adapt to an always-moist environment and can fail when moved abruptly to dry or fast-draining soil. If you want to switch, transition gradually by keeping the new medium consistently damp at first, then slowly reduce moisture over 1 to 2 weeks, and place the plant in brighter indirect light.
Should I thin seedlings by pulling them out or trimming them, and when?
For seedlings, trim only if you planted multiple seeds in a cell, thinning to one plant by cutting the extras at the soil surface. Do not pull them out, because you will disturb the remaining seedling’s fragile root connections. After thinning, keep the environment stable (light, moisture, temperature) for a few days to reduce stress.
How do I know when to repot, and how big of a pot jump is safe?
Do not move up to a much larger pot until roots visibly fill the current container or start circling and poking out of drainage holes. Jumping sizes too early causes excess wet soil around the edges, which increases rot risk. When repotting, loosen tightly circling roots gently and keep the plant at the same depth as before.
What are common soil-related pests I might get, and how do I prevent fungus gnats?
If you see fungus gnats, allow the top layer to dry slightly between waterings (without letting the seedling medium fully dry out), use bottom watering more often, and check that you are not overfilling trays. Yellow sticky traps help, and removing decaying plant matter reduces breeding sites. For seed starting, avoid topping off with water that spreads organic debris.
How often should I water a terrarium, and what signs mean I am overdoing it?
In a closed or semi-closed terrarium, more water is not better. Water very sparingly, rely on condensation cycling, and open the lid only when condensation becomes excessive. If plants get yellow or mushy, it usually means moisture is too high or airflow is too low, adjust by opening more often and waiting longer between waterings.
If my plant is not thriving, how do I diagnose the real cause without guessing?
Wrong light is the most common non-obvious cause of slow growth, but the stage matters. Early on, poor light mainly causes weak, stretched plants; later it can reduce flowering and overall vigor. When diagnosing, check the last step you completed in the sequence (light hours and distance, moisture level, temperature for germination, and fertilizer timing) rather than treating symptoms without context.