If your plant is just sitting there doing nothing, you are not alone, and there is almost always a fixable reason. Plants stall for a handful of predictable causes: not enough light, a watering or root-health problem, temperature stress, a nutrient issue, or simply the fact that the plant is doing exactly what it should be doing right now. The goal of this guide is to help you figure out which one is happening in the next few minutes, and then do something about it today.
Why Won’t My Plant Grow? Quick Troubleshooting Checklist

Marcus Holloway
8 Apr 2026
Quick troubleshooting checklist for stalled growth
Before diving into each cause, run through this fast checklist. Answer yes or no to each question, and the pattern will point you toward the right section below.
- Is the plant getting direct or bright indirect light for most of the day, or does it sit in a dimly lit corner?
- Are the stems stretched, pale, or leaning hard toward a window?
- Is the soil staying wet for more than 7–10 days, or does it pull away from the pot edges and repel water?
- Do the roots (if you can check) look brown, mushy, or smell bad?
- Is the room temperature consistently outside the 65–75°F comfort range, or near a vent, drafty window, or air conditioner?
- Has the plant been repotted or moved recently?
- Are the leaves yellowing, developing brown tips, or dropping, despite otherwise normal care?
- Have you been fertilizing, and if so, is there a white crusty residue on the soil surface or pot rim?
Most people find their answer by question three or four. Use the sections below to confirm and fix it.
Light problems and how to diagnose them
Low light is the single most common reason houseplants stop growing, and it is also the most underestimated. Indoors, what looks bright to your eyes is often shockingly dim for a plant. University of Missouri Extension identifies improper light intensity as one of the most frequent causes of houseplant failure, and the fix is usually straightforward once you accept how little light most rooms actually provide.
Diagnosing low light indoors
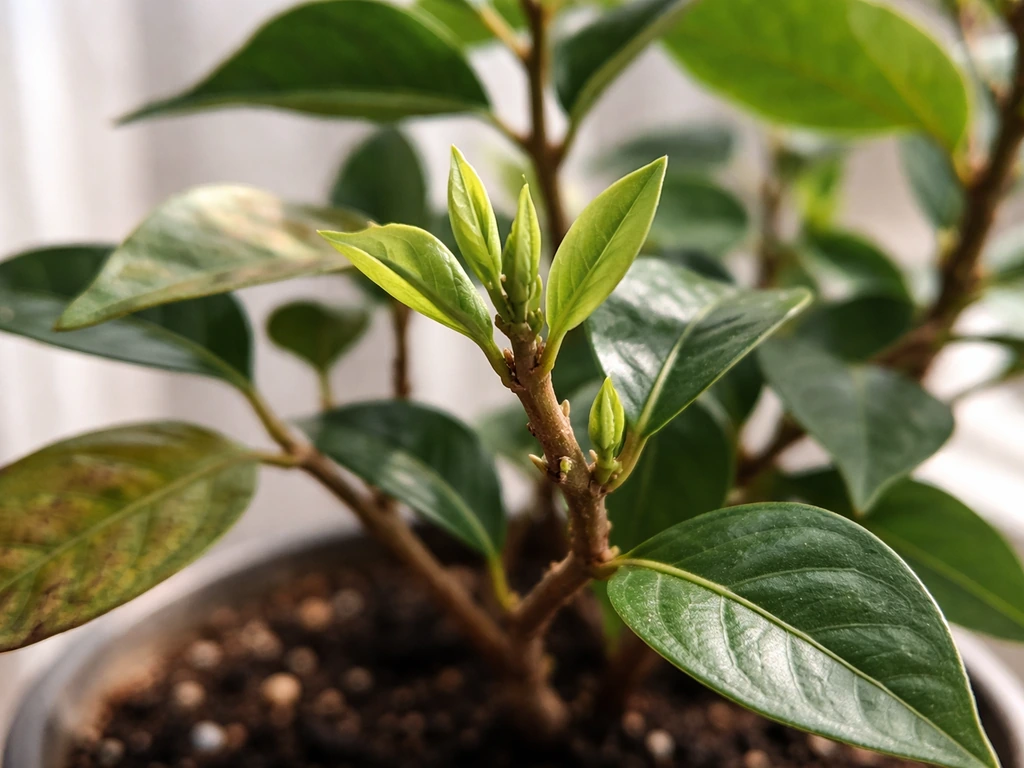
The clearest symptom of insufficient light is etiolation: stems become long, thin, and weak as the plant stretches toward the nearest light source, and the overall color goes pale or yellowish. University of Maine Extension describes this as a loss of vigor and color that follows directly from inadequate light. A plant in very low light may technically stay alive but show zero new growth for months. The Plant Runner puts it well: in that dim-corner range, the plant looks nice but simply does not grow. If yours fits that description, light is your culprit.
Most houseplants need around 12–16 hours of good light per day according to Penn State Extension. That number shocks most people because a north-facing windowsill in winter barely delivers a few hours of usable light. Test your situation with a free lux meter app on your phone: anything below about 1,000–2,000 lux for an extended period is likely keeping your plant in survival mode rather than growth mode. For a more plant-accurate measurement, PPFD (photosynthetic photon flux density) is the number that actually reflects how much usable light the plant is absorbing, and low PPFD directly causes stretching and no new growth.
Diagnosing light issues outdoors
Outdoors, the problem flips. Plants can receive too much direct sun, especially if they have been moved suddenly from a shaded nursery or indoor environment to full outdoor exposure. Mississippi State Extension warns that drastic changes in light intensity can cause yellowing foliage and leaf drop. The fix here is staged acclimation: move the plant to its new brighter spot for just a couple of hours a day, then increase gradually over one to two weeks. Missouri Botanical Garden also specifically recommends this staged approach for any significant light-location change.
The grow light shortcut
If moving the plant closer to a window is not possible, a grow light is the most reliable budget fix. Full-spectrum white LEDs in the 5000K–6500K range work well for most houseplants. Position them close enough to deliver meaningful PPFD at the leaf level (check your specific light's specs), and run them on a timer for 12–16 hours a day. University of Alaska Fairbanks plant care guidance specifically recommends moving a plant to a stronger light source when poor growth is the symptom.
Watering, soil, and root health issues

The second most likely culprit, especially in houseplants, is a root health problem caused by watering habits or soil conditions. Roots are where growth actually starts, and when they are in trouble, the rest of the plant stalls immediately. Understanding how plant roots grow helps here: roots need both moisture and oxygen, and overwatering eliminates the oxygen side of that equation.
Overwatering and root rot
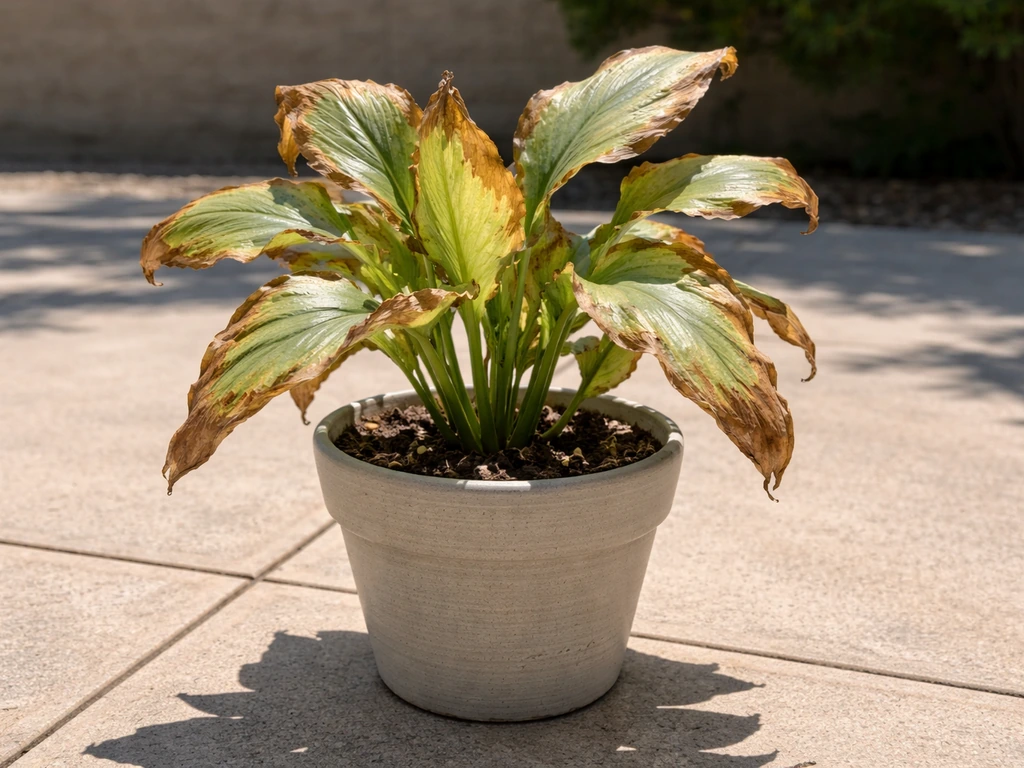
Overwatering is probably the most common plant-killing mistake, and it causes stalled growth well before the plant actually dies. UMass Extension explains that overwatering deprives roots of oxygen, making them vulnerable to root diseases. WSU Extension describes the pattern: soil stays constantly wet at the top, lower leaves curl or wilt, and stems may become mushy or dark at the base. UC ANR adds the signs you see when you unpot the plant: mushy stems, yellowing leaves, brown-black roots, and a foul smell. University of Maryland Extension confirms that brown, discolored, soft roots almost always indicate root rot from overwatering.
Smart Garden Experts lists the key diagnostic trio for root rot: persistent wilting even when the soil is wet (this is the counterintuitive one that fools people), soft or mushy roots when you touch them, and a characteristic rotten smell. If your plant ticks two of those three boxes, root rot is your problem. The fix involves removing the plant from its pot, trimming any black or mushy roots back to healthy white or cream-colored tissue, letting them air dry briefly, and repotting into fresh, well-draining mix. Do not fertilize immediately after, and hold back on watering until the plant shows signs of recovery.
Underwatering and hydrophobic soil

Underwatering stalls growth too, but it usually shows up as dry, crispy leaf edges, very lightweight pots, and soil that pulls away from the pot sides. A related problem is hydrophobic soil: old or peat-heavy mix that has dried out completely and now repels water rather than absorbing it. You can spot this when water pours straight through the pot without slowing down. The fix is bottom watering: set the pot in a tray of water for 20–30 minutes so the soil rehydrates from below. A simple moisture check using container weight, as UMass Extension suggests, works well: lift the pot right after watering and again a few days later. You will quickly learn what dry versus moist feels like for your specific pot and plant.
Root health in non-soil setups
If you are growing in hydroponics or water culture, root health issues look different but matter just as much. In those systems, brown slimy roots usually indicate low dissolved oxygen or light reaching the reservoir. Increase aeration, keep the reservoir temperature cool (ideally under 70°F), and block light from reaching the roots. In a terrarium, compaction and poor drainage are the usual culprits: a drainage layer and well-structured substrate are not optional extras but essential for root function. If you are trying to grow roots on a plant cutting or propagation, these same oxygen and moisture principles apply: roots need humidity and oxygen simultaneously, not just constant wet.
Temperature, humidity, and airflow as growth limiters
Plants are more sensitive to environmental conditions than most people realize. A perfectly watered, well-lit plant will still refuse to grow if it is cold, too dry, or sitting in stagnant air.
Temperature range and drafts
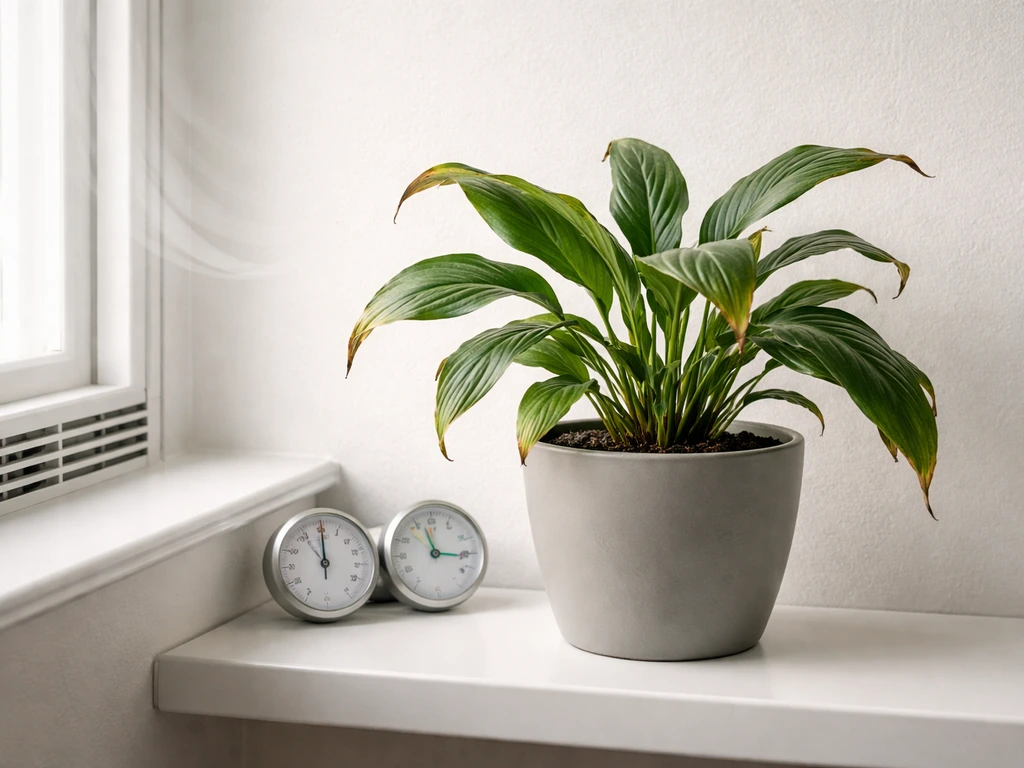
UF/IFAS Extension states that most houseplants grow well between 65–75°F, and UGA Extension backs this up with a framework of roughly 75°F during the day and 65°F at night as a comfortable range. The bigger danger is sudden temperature swings rather than a steady slightly-off temperature. Penn State Extension notes that sudden temperature changes can cause leaf and flower drop. OSU Extension Master Gardener guidance specifically flags cold drafts from windows and exterior walls as a stressor, recommending that plants be moved away from these spots during cold months. Check whether your plant is near an air conditioner vent, a drafty single-pane window, or a heating register blowing dry air directly on it. Any of those will suppress growth noticeably.
Humidity and airflow
Many tropical houseplants evolved in 60–80% humidity environments and find the 30–40% typical of heated or air-conditioned rooms quite stressful. Low humidity does not kill plants quickly, but it consistently slows growth and causes brown leaf tips and margins, which Missouri Botanical Garden describes as a sign of unresolved environmental stress. A cheap hygrometer tells you exactly where you stand. If humidity is below 40% for tropical plants, a small humidifier or a pebble tray with water placed near the plants makes a real difference. On the airflow side, stagnant air slows transpiration (the plant's internal water-moving system) and encourages fungal problems. A gentle fan running on low a few hours a day keeps air moving without stressing the plant.
Nutrients and feeding mistakes
Nutrient problems cause stalled growth in two very different ways: too little and too much. Both look like failure, but the fix for each is the opposite of the fix for the other, so getting this diagnosis right matters.
Deficiency: not enough nutrients
A plant that has been in the same pot of potting mix for more than a year is almost certainly running low on nutrients. Most commercial potting mixes contain fertilizer that is depleted within three to six months. Nitrogen deficiency is the most common result: overall pale or yellowing leaves (starting with the older, lower leaves), slow or no new growth, and small new leaves. The fix is a balanced liquid fertilizer applied at the manufacturer's recommended rate during the active growing season (spring through early autumn for most plants). Avoid fertilizing in winter unless you have strong artificial lighting, because a plant that is not actively growing cannot use fertilizer and the salts just accumulate.
Over-fertilizing and salt buildup
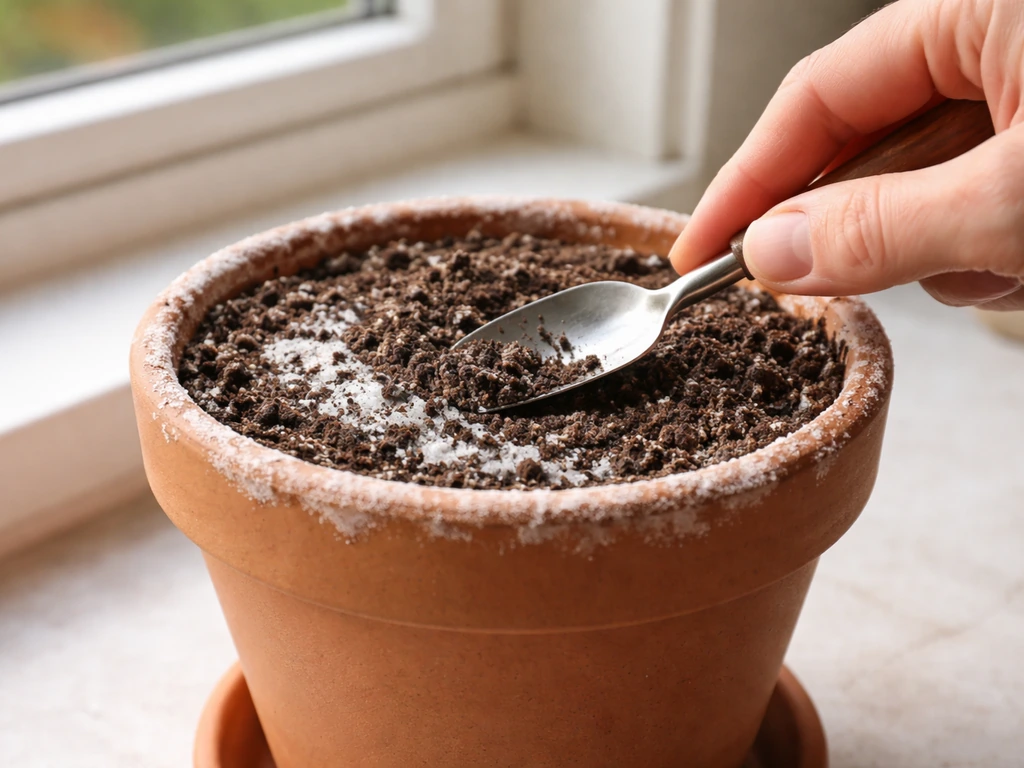
Too much fertilizer causes fertilizer burn and salt buildup, which actually prevents the roots from absorbing water and nutrients even when both are present. Idaho Master Gardener handbook guidance notes that salt accumulation shows up as a white or crusty surface residue on the soil or pot rim. Michigan State University Extension explains that high electrical conductivity (EC) in the growing media reduces crop growth and can cause leaf burn. UMass Amherst CAFE also notes that soluble salts above the normal range for a prolonged period may cause root injury, leaf chlorosis, marginal burn, and sometimes wilting high electrical conductivity (EC) in the growing media reduces crop growth and can cause leaf burn. Mississippi State Extension advises reducing fertilizer applications immediately if overfertilization is suspected. The fix for salt buildup is flushing: run a large volume of water (roughly three to four times the pot volume) through the soil slowly to dissolve and carry away accumulated salts, then hold fertilizer for at least four to six weeks.
| Problem | Symptoms | Fix |
|---|---|---|
| Nutrient deficiency | Overall pale/yellow leaves, older leaves affected first, small new leaves, slow growth | Balanced liquid fertilizer at recommended rate during growing season |
| Over-fertilizing / salt buildup | Brown leaf tips, white crust on soil/pot, wilting despite moist soil, root damage | Flush soil thoroughly, stop fertilizing for 4–6 weeks |
| Feeding too early (post-repot) | New transplant not establishing, roots not absorbing, possible burn on tender roots | Wait 4–6 weeks after repotting before any fertilizer application |
Plant-specific expectations and common 'not a bug' reasons
Sometimes the honest answer is that the plant is not doing anything wrong. Here are the most common situations where stalled growth is actually normal, and you can stop troubleshooting.
Dormancy and seasonal slowdown
Many plants slow down or go completely dormant in winter, even indoors. Deciduous plants lose leaves. Bulbs die back to the soil. Succulents and cacti can sit motionless for months. If you are reading this in late autumn or winter and your plant was growing fine before, seasonal dormancy is a very likely explanation. The fix here is patience and reduced watering, not intervention. Increasing artificial light and keeping temperatures stable can shorten the dormant period for some plants.
Transplant shock and acclimation
A plant that was recently repotted, moved, or purchased may spend weeks doing nothing visible while it rebuilds its root system and adjusts to its new environment. Cornell's transplant-shock guidance emphasizes minimizing root damage and allowing proper acclimation time as the key factors in recovery. Plant Meditation notes that new growth typically appears on a multi-week scale after recovery, and full normalization can take considerably longer. This is not failure; it is establishment. Good Home Garden advises keeping post-repot conditions especially stable, particularly light levels, to reduce the duration of this shock period. The same principle applies when you learn how to grow bare root plants: that initial dormant-looking phase while roots establish is completely normal and should not be confused with a dead plant.
Inherently slow growers and root-bound plants
Some plants are simply slow. Many succulents, cacti, and certain tropicals like cast iron plants can add just a few new leaves per year under ideal conditions. If your expectations are based on a faster-growing species, you might be watching for growth that will not come at that pace regardless of what you do. On the flip side, a severely root-bound plant in a too-small pot can also stall: all available energy goes into maintaining the existing root mass rather than producing new top growth. If roots are visibly circling the bottom of the pot or growing out of drainage holes, it is time to size up. Knowing whether you can grow a plant from just roots (yes, in many cases) also helps you appreciate just how root-forward plant growth really is: what happens underground determines what happens above it.
Step-by-step fix plan and what to monitor next
Here is a direct action plan you can start today. Work through these in order because each step rules out the most statistically likely causes first.
- Check light first. Move the plant to your brightest available spot or set up a grow light (5000K–6500K LED, 12–16 hours a day on a timer). Do this today regardless of what else you discover, because low light is the most common silent killer of plant progress.
- Check soil moisture. Stick your finger two inches into the soil. If it is wet, stop watering and let it dry before the next watering. If it is bone dry and pulling away from the pot, bottom water for 20–30 minutes.
- Inspect the roots. If the soil has been wet for a long time and you see the root-rot signs (wilting despite wet soil, bad smell, mushy stems), unpot the plant, trim the affected roots to healthy tissue, and repot into fresh mix with good drainage.
- Check temperature and placement. Confirm the room is staying between 65–75°F. Move the plant away from cold windows, AC vents, or heating ducts. Add a gentle fan if air is stagnant.
- Assess your fertilizer history. If you have not fed in over a year, start a balanced liquid fertilizer at the recommended rate once the plant is otherwise stable. If you have been feeding heavily and see white crust or brown tips, flush the soil and stop fertilizing for four to six weeks.
- Consider the plant's situation. If it was recently repotted or purchased, or if it is winter, give it time. Mark a calendar date four weeks out and reassess then rather than intervening further.
What to monitor over the next two weeks
After making changes, resist the urge to keep adjusting. Pick one change at a time and give it two full weeks before reassessing. Here is what to watch for as confirmation that the fix is working:
- New growth points: look for new leaf buds, unfurling leaves, or new stems emerging from the soil. Even a tiny bud is a green light.
- Leaf color improving: yellowing that stabilizes and stops spreading is a good sign. You will not reverse yellowed leaves, but you should see new leaves coming in green.
- Root recovery: if you treated root rot, new white root tips emerging from the trimmed ends over two to three weeks confirm the plant is rebuilding. Learning more about how do plant roots grow can help you understand exactly what healthy root development looks like at this stage.
- Soil moisture cycling normally: the soil should be going through a consistent wet-to-dry cycle in seven to ten days for most medium-sized pots. If it is staying wet longer, improve drainage or reduce watering.
- No new symptoms: if you have addressed the main issue, you should not be seeing new yellowing, browning, or wilting appearing on previously healthy leaves.
Plant growth is rarely a dramatic turnaround. Most of the time, recovery looks like one small new leaf, then another, then a plant that is clearly moving again two or three weeks after you made the fix. That slow progress is not failure; it is exactly how plants work. Stay consistent, do not over-correct, and give each change enough time to show results before making the next move. You have got this.
FAQ
How can I tell if my plant is dormant versus actually unhealthy and stalled?
Look for life signs that match dormancy: no new growth paired with firm stems, no blackening, no foul smell from the soil, and leaves that do not continue to decline. Dormant plants may lose leaves or go still, but they usually do not develop progressive rot symptoms or widespread discoloration. If the plant’s base gets soft, leaves keep deteriorating, or roots smell rotten, treat it as a problem to diagnose, not a normal rest period.
Should I fertilize if my plant stopped growing?
Usually no, especially if the plant has low light, winter conditions, or suspected root stress. Fertilizer is most effective when growth is already happening, and salts can worsen issues when roots are weak or damaged. If you recently repotted (with fresh mix) or suspect low light, wait until conditions support active growth, then use a diluted balanced fertilizer during the growing season.
Why do my leaves look worse after I move the plant closer to a window or add a grow light?
That is often light shock or heat stress. Increase light intensity gradually, and keep the light at a distance that does not overheat the leaves. Watch for new symptoms within days, such as leaf scorch, crispy patches, or sudden leaf drop, and then back off the intensity or duration slightly while the plant adjusts.
How do I know whether the real issue is too much water or too little, when the soil feels confusing?
Use a two-step check. First, stick a finger an inch or two into the soil or lift the pot to feel weight (dry and light is usually underwatered). Second, if the soil stays wet for days, smells sour, or the plant wilts even when wet, that points to root rot or oxygen starvation from overwatering. “Wilting while wet” is the most reliable red flag for overwatering-related root trouble.
My plant is in a self-watering pot or cache pot, why might it still not grow?
Stagnant moisture and poor oxygen at the roots are common in these setups if excess water is not fully drained. Ensure the inner pot has drainage, empty any standing water promptly, and verify the outer reservoir is not constantly soaking the roots. If growth stalls and soil stays wet near the base, switch to a freely draining potting mix and confirm runoff exits quickly.
Do I need to flush my soil every time I suspect fertilizer buildup?
Not automatically. Only flush when you see clear salt residue (white crust on rim or soil), persistent symptoms after the plant is in otherwise correct light and watering, or repeated over-fertilization. When you do flush, water slowly and thoroughly until excess drains, then pause fertilizer for several weeks so roots can recover and salts can continue to leach out.
What humidity level should I target for a plant that is not growing?
Match the plant’s origin. Tropical plants usually benefit from about 50 to 60% humidity or more, while many common houseplants tolerate lower levels. If you see brown tips and margins plus stalled growth, measure with a hygrometer and raise humidity gradually, since sudden humidity changes can stress some plants. If humidity is below 40%, a humidifier or nearby pebble tray is more likely to help.
Can stagnant air really stop growth, or is it just a mold problem?
It can reduce growth because low airflow can slow transpiration and keep leaf surfaces drier or wetter than the plant needs, which indirectly affects nutrient uptake and disease risk. The practical fix is a gentle, low fan for part of the day to move air without blasting the plant. Avoid direct strong drafts from the fan, vents, or windows.
How long should I wait after fixing one issue before I change something else?
Give the plant at least two full weeks after a single adjustment, especially for light and watering changes. Expect slow, incremental recovery (often one new leaf at first). If there is no improvement after two weeks and the plant is declining, switch from “wait” to “re-diagnose,” starting with roots and light exposure.
My roots look fine, but the plant still won’t grow. What should I check next?
If roots appear healthy, prioritize light first because it is the most frequent bottleneck indoors. Then confirm temperature stability (avoid cold drafts and hot heating vents). Also check that you are not under- or overwatering by habit, because healthy-looking roots can still be intermittently stressed by inconsistent watering patterns.