Alpine plants are genuinely rewarding to grow, but they do have a reputation for being fussy. Here is the honest truth: they are not hard to keep alive once you understand what they actually want. They come from high-altitude environments where the soil is rocky and lean, drainage is fast, light is intense, and temperatures swing dramatically between seasons. Replicate those conditions at home, and alpines thrive. Ignore them, and you end up with rot, leggy growth, or a plant that sulks and disappears. This guide walks you through everything you need, from choosing the right species to a seasonal care plan you can follow week by week.
How to Grow Alpine Plants: Step-by-Step for Success

Marcus Holloway
17 Apr 2026
What makes alpine plants different from everything else you've grown
Most garden plants are happy in rich, moisture-retaining soil with moderate light. Alpine plants evolved in the exact opposite conditions. Their native habitat is rocky, exposed, and nutrient-poor. The soil (if you can call it that) is mostly broken-up stone with very little organic matter. Rain drains through almost instantly, roots never sit in wet ground for long, and the plants spend winter under a dry snowpack rather than in waterlogged soil.
What this means for you as a grower is a set of non-negotiable requirements. Get these right and the rest is detail.
- Fast drainage above everything else: roots sitting in moisture for even a day or two can cause fatal rot.
- Lean, low-fertility growing medium: rich compost produces soft, disease-prone growth and shortens plant life.
- Maximum light: most alpine species need full sun for the majority of the day.
- Cool temperatures, especially at night and in winter: heat stress weakens them quickly.
- Dry winters: unlike bog plants, alpines in their natural habitat experience a cold but relatively dry dormancy period.
It is also worth knowing what alpines are not. They are not the same as ornamental plants bred for rich borders, and growing them with the same soil and feeding routine will almost certainly kill them. Think of them more like succulents in their need for drainage, but with a preference for cool, bright conditions rather than heat.
Choosing species that will actually work for your climate
Not every alpine will perform well in every garden, and picking the wrong species for your climate is one of the most common reasons beginners get frustrated. The good news is that the range of plants loosely called 'alpines' is enormous, so there is almost always something suitable for where you live.
Cool, temperate climates (zones 4 to 7)
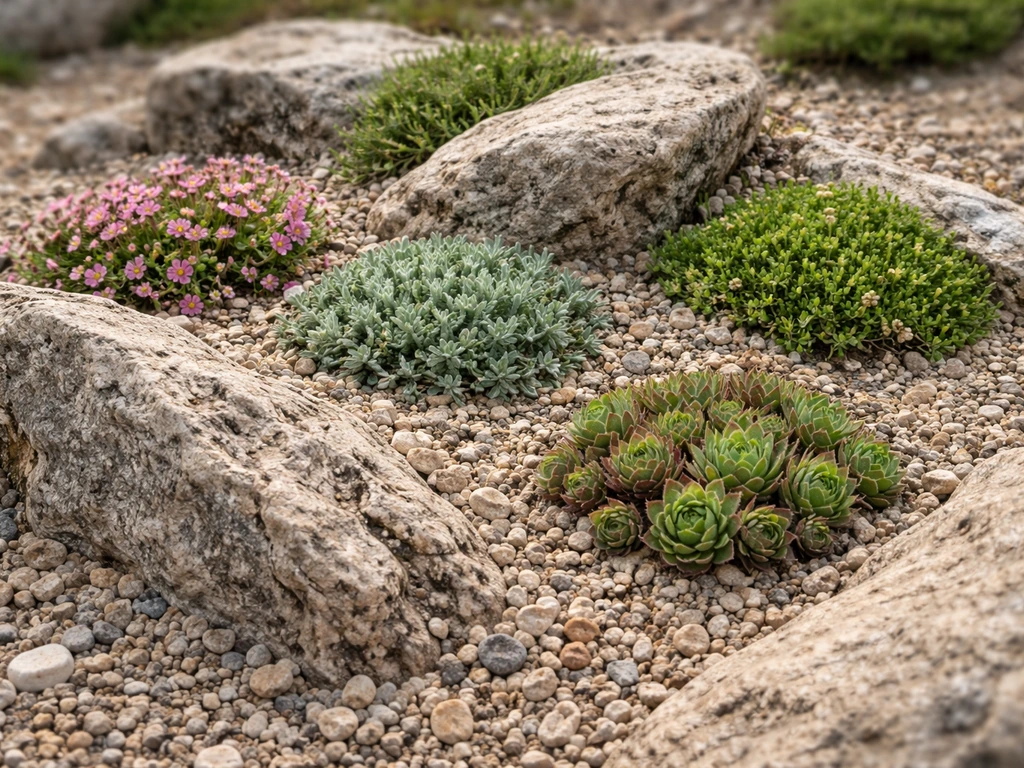
This is the sweet spot for the widest range of alpine species. Saxifrages, primulas, lewisias, sedums, sempervivums, and most gentians will all perform well. Aubrietia, arabis, and alpine phlox are excellent starter plants because they are forgiving, fast-establishing, and very visual. If you want to go deeper, cushion plants like Dionysia and some of the rarer kabschia saxifrages are doable in these zones with the right setup.
Warmer or more humid climates (zones 8 and above)
Heat and humidity are the enemies here. Your best strategy is to focus on heat-tolerant alpines such as ice plants, certain dianthus species, creeping thyme, and sempervivums. Use containers so you can move plants to a cooler, shadier spot during peak summer heat, and prioritize evening air circulation. Avoid species from high alpine zones (4,000 metres and above) as they genuinely struggle when temperatures stay warm at night. If you live somewhere with wet, warm winters, container growing is almost essential because you can control drainage and shelter plants from excess rain.
Matching skill level to species
If this is your first attempt, start with sempervivums, sedums, or aubrietia. They are difficult to kill, visually satisfying, and teach you the fundamentals of alpine drainage and lean soil without punishing every mistake. Once you have those established and understand how they respond to your watering and conditions, move on to more temperamental species. Some growers get so absorbed in rare alpine species that it leads them naturally toward growing rare plants as a broader hobby, but you do not need to go there right away.
Building the right growing setup: soil, containers, and drainage
The single most important investment you can make is getting the growing medium right. Everything else can be adjusted later, but plant an alpine in the wrong soil and it will struggle from day one.
The mix that works
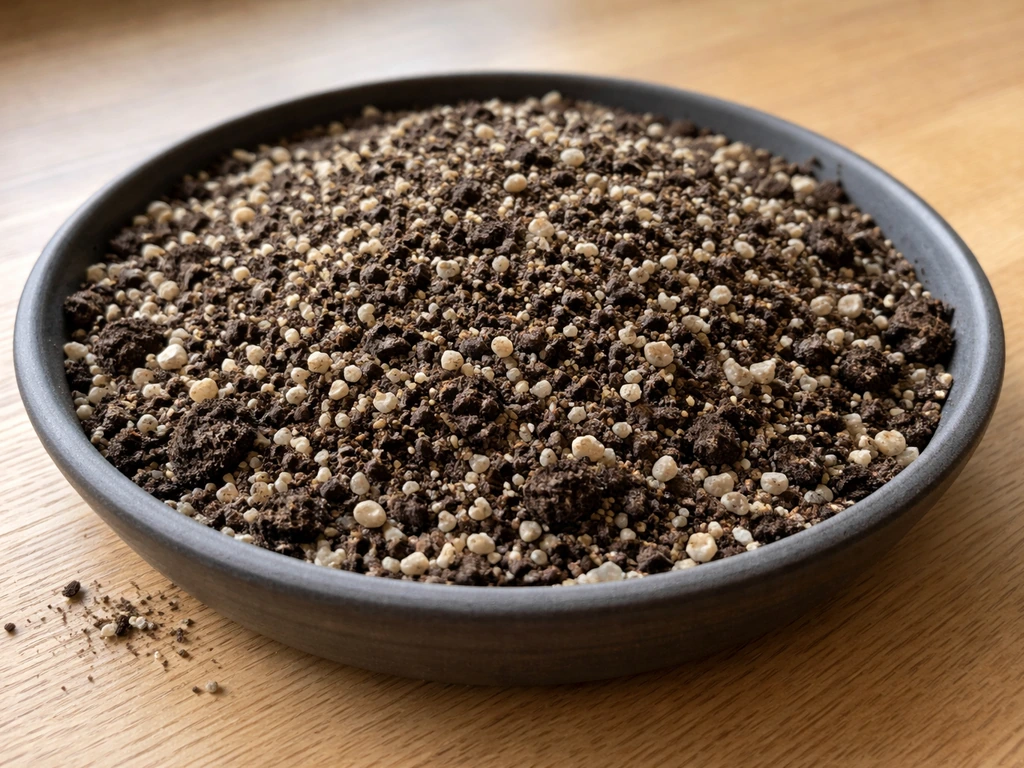
The RHS recommends a 50:50 mix of soil-based, peat-free compost and horticultural grit or sharp sand for container alpines. This is a solid baseline. NARGS (the North American Rock Garden Society) goes a step further, emphasizing that the overall goal is a blank" rel="noopener noreferrer">lean, extremely well-aerated medium, not a nutrient-rich one. NARGS also stresses that drainage is only useful if water has somewhere to go, reinforcing the need for drainage pathways rather than relying on grit alone emphasizing that the overall goal is a lean, extremely well-aerated medium, not a nutrient-rich one. In practice, many experienced alpine growers add up to 50% coarse grit or sand by volume to whatever compost base they are using. The result looks almost more like gravel than potting mix, and that is exactly right.
Avoid standard multi-purpose compost on its own. It holds too much moisture, compacts over time, and contains more nutrients than alpines need. If you are building a raised bed or trough, you want the same lean, gritty approach: mix in substantial quantities of horticultural grit and avoid adding slow-release fertilizers.
Containers versus raised beds versus rock gardens
| Setup | Best for | Drainage control | Main limitation |
|---|---|---|---|
| Containers/troughs | Beginners, small spaces, humid or warm climates | Excellent (can tailor mix completely) | Dries out faster, needs monitoring |
| Raised alpine bed | Larger collections, temperate gardens | Very good (elevation helps) | Requires more initial building work |
| Rock garden | Established gardens, naturalistic look | Good if site is well-chosen | Hard to correct drainage after planting |
| Sand plunge beds | Specialist/pot collections | Outstanding (continuous drainage) | More setup complexity |
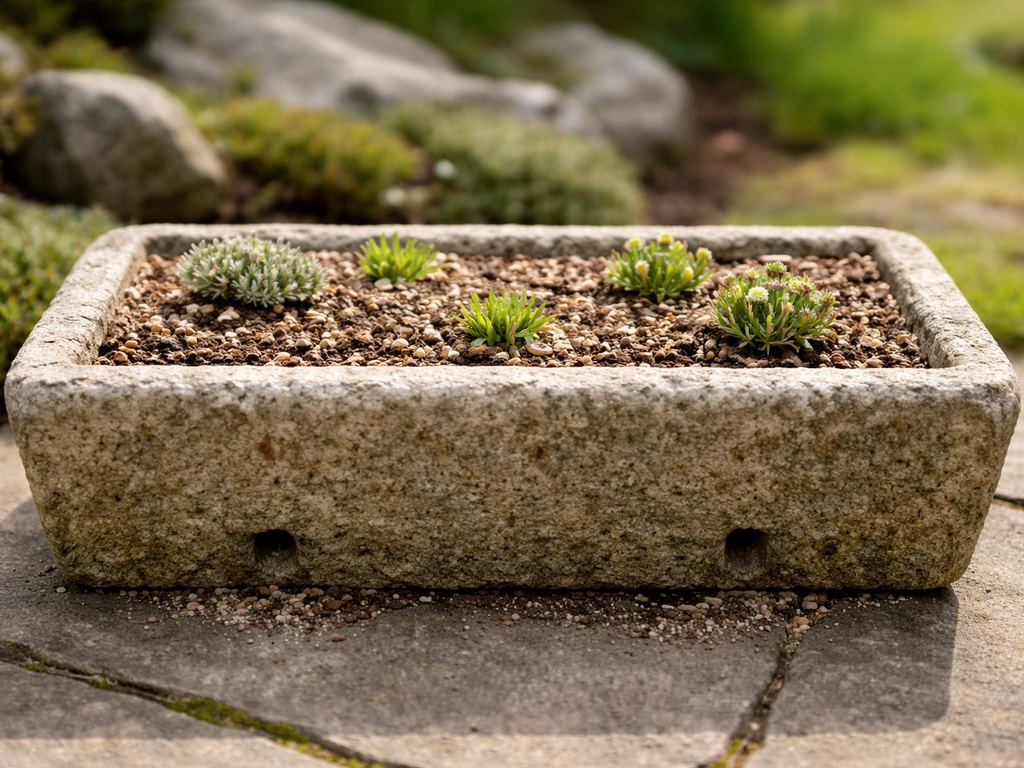
For most beginners, a container or a simple trough is the practical starting point. Hypertufa troughs (made from cement, perlite, and peat substitute) are a classic choice because they are porous, lightweight, and look the part. Any container works as long as it has adequate drainage holes. Wide, shallow containers are better than deep ones because alpines have shallow roots and the extra depth just holds surplus moisture.
Drainage at the base and surface
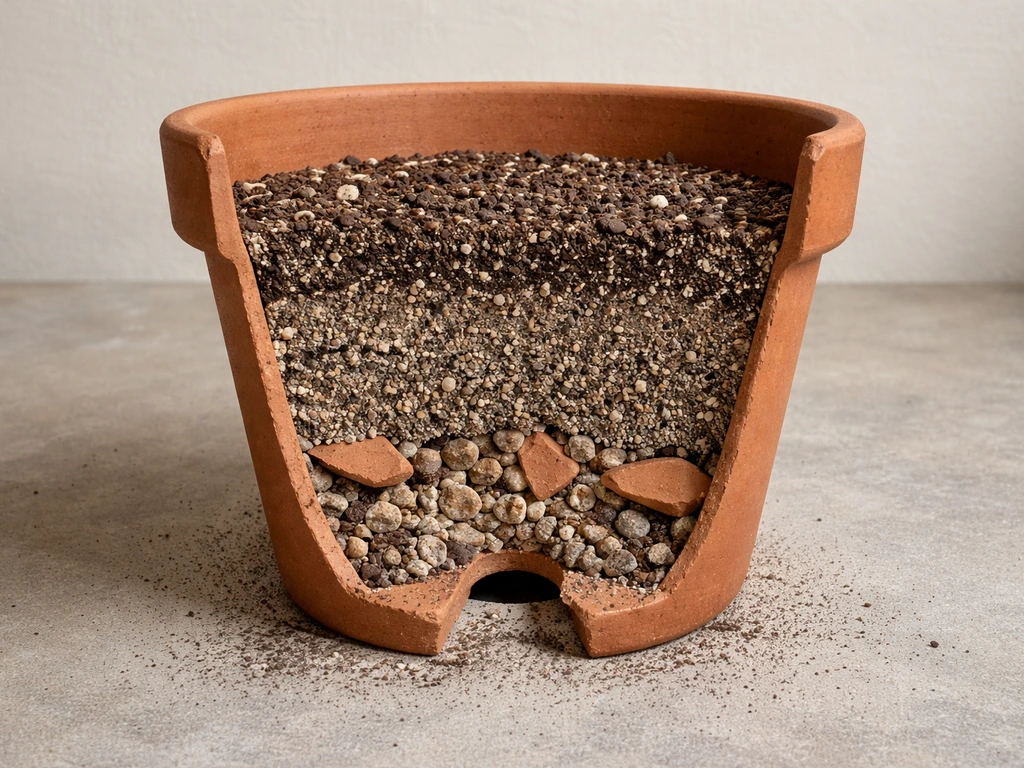
Place a layer of crocks, coarse gravel, or broken-up terracotta at the bottom of any pot before adding your mix. This prevents the drainage holes from becoming blocked with fine compost particles. At the top, add a surface mulch of horticultural grit or fine gravel about 1 to 2 cm deep over the entire surface. This serves two purposes: it keeps the crowns and leaves of low-growing alpines off damp compost, dramatically reducing fungal disease risk, and it helps moisture evaporate from the surface quickly after rain or watering.
The sand plunge technique
If you are growing a collection of alpines in individual pots, a sand plunge bed is worth knowing about. You sink the pots to their rims in a bed of coarse sand. The sand wicks moisture away from the base of the pot continuously, so roots never sit in a puddle, even after heavy rain. RHS Wisley uses this approach specifically to prevent rot during dormancy by keeping the plunge dry over winter. It sounds specialist but it is actually a simple way to manage a group of pots at once.
How to plant, water, and feed alpines correctly
Planting
Spring (March to May) is the best planting time in most climates because plants have the whole growing season ahead to establish before winter. Autumn planting works in mild climates if you give plants at least six weeks before hard frost. When planting, do not bury the crown. The point where the plant meets its roots should sit at or just above the soil surface. Once planted, firm the mix gently, water in well, then apply your surface grit layer immediately. If you are moving plants from pots to an outdoor bed, water the plant an hour before you transplant it so the root ball is moist and holds together.
Watering
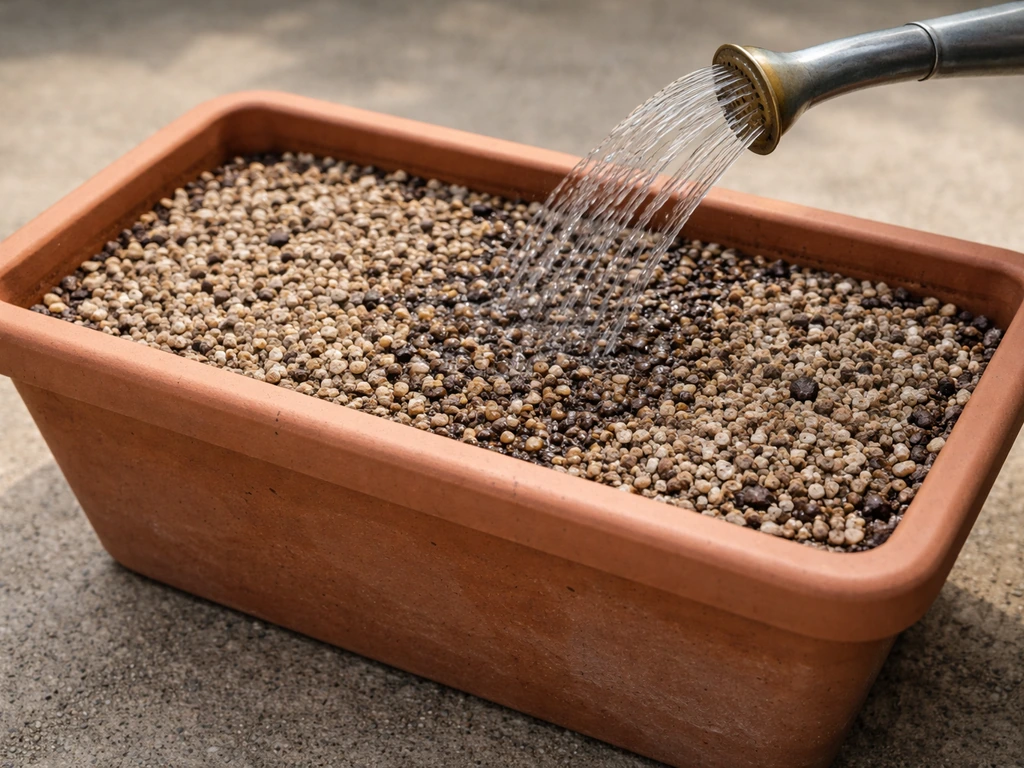
Overwatering is by far the most common way alpines die in containers. In spring and summer, water when the top of the grit surface starts to look and feel dry, usually every few days in hot weather. In cool or overcast conditions, you might not need to water for a week or more. Always water at the base of the plant rather than over the top. When you do water, water thoroughly so it drains out of the bottom of the pot rather than giving small sips that stay near the surface.
Over winter, drastically reduce watering for container plants. If you are in a rainy climate, the RHS recommends moving containers into the rain-shadow of a wall so they do not get waterlogged during dormancy. The goal is to keep roots slightly moist but not wet for the whole dormant period.
Feeding
Most alpine plants need very little feeding. The lean, low-fertility soil you have built for them is intentional. If you feed heavily with nitrogen-rich fertilizer, you will get lush, soft growth that is highly susceptible to fungal disease and attracts pests. If you want to give them anything, a very dilute, low-nitrogen, high-potassium feed (like a tomato fertilizer at quarter strength) once in spring is more than enough for most species. Many experienced alpine growers do not feed at all for the first two or three years.
Light, temperature, and your seasonal care plan
Light requirements
Most alpine species want full sun, meaning at least six hours of direct sunlight per day. If you are growing in a spot with less, stick to shade-tolerant genera like some primulas and ramondas, but expect slower growth and fewer flowers. If your container garden is in an exposed position, be aware that wind significantly accelerates moisture loss, so you may need to water more frequently or provide some wind shelter without blocking light.
Seasonal care calendar
- Spring (March to May): This is the most active period. Check that drainage holes are clear after winter. Resume watering as growth starts. Plant new additions. Remove any dead foliage from winter carefully. If using a sand plunge, gradually increase moisture as temperatures rise.
- Summer (June to August): Water regularly, checking moisture levels every two to three days in hot weather. Keep the surface grit layer topped up to protect crowns. In very hot climates, provide afternoon shade to reduce stress. Deadhead flowers to extend the display and prevent self-seeding where not wanted.
- Autumn (September to November): Reduce watering as temperatures fall. Cut back any untidy growth but leave the main crown intact as it offers some frost protection. In frost-prone areas, move tender container alpines to a sheltered spot. This is also a good time to take cuttings from this year's growth.
- Winter (December to February): Keep containers dry or move them under cover. Do not let pots sit in standing water. In very cold climates, insulate containers with fleece or move to an unheated greenhouse. Dormancy is healthy, so do not try to force growth with warmth or extra water.
Propagating alpines: seeds, cuttings, and division
Growing from seed
Growing alpines from seed is satisfying and economical, but it requires patience. The majority of alpine and rock-garden plants need some form of cold stratification to germinate, meaning the seeds must experience a cold, moist period before they will sprout. The easiest method for home gardeners is winter sowing: sow seeds in small pots filled with gritty compost in late autumn, then leave the pots outside in a sheltered spot where they experience natural cold without being damaged by extreme freezes. When spring arrives, the natural temperature shift triggers germination.
When watering freshly sown seed pots, bottom water them by standing the pot in a shallow tray of water until the surface of the grit just becomes moist. This prevents the fine seeds from being dislodged or buried by overhead watering. Some genera also benefit from soaking seeds in warm water overnight before sowing to break dormancy. Check species-specific guidance because stratification requirements vary significantly between genera.
Cuttings
Stem cuttings are the fastest way to increase stock of most cushion-forming alpines and are reliable for saxifrages, phlox, and dianthus. Take softwood cuttings in late spring or early summer, selecting healthy shoot tips about 3 to 5 cm long. Remove the lower leaves, dip the cut end lightly in rooting hormone if you have it (not essential), and insert into a tray or small pot of fine horticultural sand or perlite. Water well, then seal inside a clear plastic bag to maintain humidity. Keep in bright but indirect light until roots form, typically two to four weeks. Once rooted, pot up into your standard gritty alpine mix.
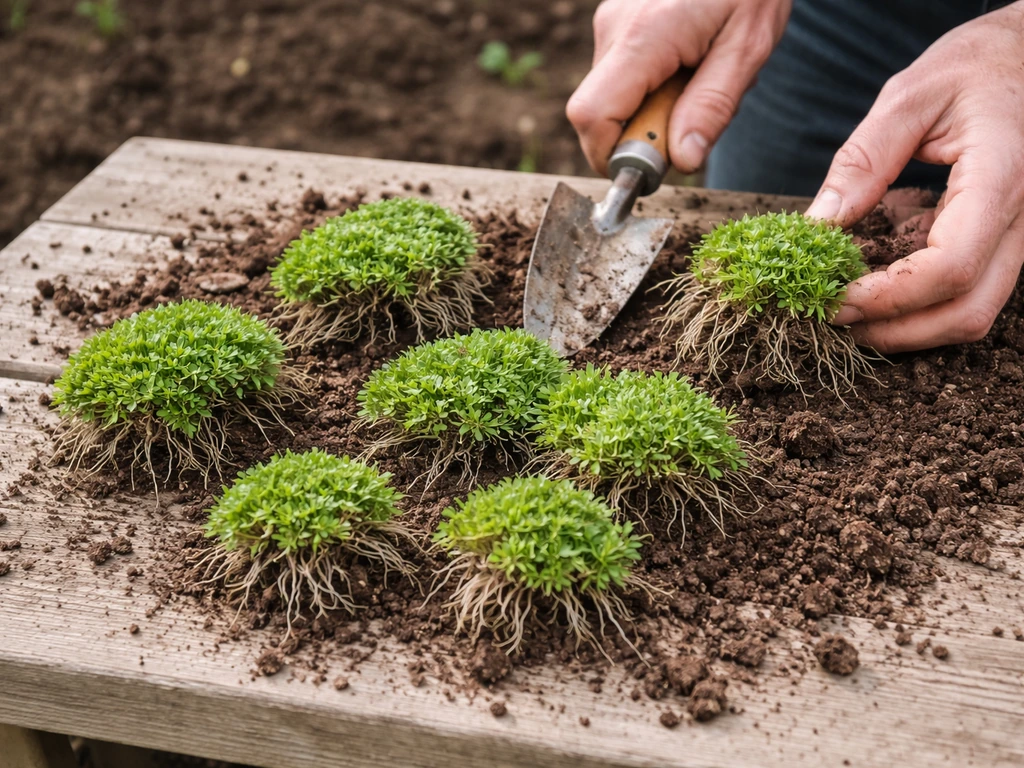
Division
Clump-forming alpines like saxifrages, primulas, and sedums can be divided in early spring or after flowering. Lift the whole clump, separate it into smaller sections with healthy roots and shoots, and replant immediately at the same depth. Water in well and keep out of direct sun for a few days while they settle. Division is the lowest-effort propagation method and often revitalizes older plants that have become woody or sparse in the centre.
Diagnosing and fixing common alpine problems
Most alpine problems come back to either too much moisture or too little light. Once you know what to look for, fixes are usually straightforward. Think of this troubleshooting section the way you would approach reviving struggling or dead plants: check the basics first before reaching for any product.
| Problem | Likely cause | Quick fix |
|---|---|---|
| Crown or root rot, plant collapses | Overwatering or poor drainage | Remove from pot, cut away rotten tissue, repot in drier, grittier mix, reduce watering immediately |
| Gray or brown fuzzy mold on leaves or stems (Botrytis) | Humid conditions, poor air circulation, wet foliage | Remove infected tissue, improve air circulation, reduce overhead watering, top-dress surface with grit |
| Leggy, stretched growth | Insufficient light (etiolation) | Move to a sunnier position; leggy growth cannot be reversed but new growth will be compact |
| Yellowing leaves with green veins | Nutrient imbalance or waterlogged roots | Check drainage first; if drainage is fine, a dilute balanced feed may help |
| Wilting despite moist soil | Root rot from prolonged wet, or transplant shock | Check roots; if rotted, treat as above; if healthy, reduce watering and provide shade for a week |
| Slugs and snail damage (ragged holes in leaves) | Common in wet or mild winters | Top-dress with sharp grit as a barrier, remove debris where slugs shelter, use slug controls if needed |
| Plant vanishes over winter | Frost heave or waterlogged dormancy | Improve drainage before next winter; move containers to a rain-shadow position |
Gray mold (Botrytis) is worth a specific mention because it is the most frequent disease you will encounter with alpines. It develops in humid or moist conditions and shows as water-soaked, soft patches that quickly develop a grayish-brown fuzzy coating. It spreads rapidly in still, damp air. The fix is always the same: remove infected tissue cleanly, improve airflow, stop overhead watering, and make sure your surface grit layer is in place. Botrytis cannot infect without free moisture on plant surfaces, so dry surfaces are your best prevention.
Some growers who start with alpines eventually branch out into other specialist groups. If you enjoy the lean-soil, low-input approach, you might find that growing medicinal plants shares some of the same principles: many are Mediterranean herbs that want well-drained, nutrient-poor soil and full sun.
Your starter checklist and first practical steps
Here is a simple, action-focused checklist to get your first alpine setup running this week. You do not need all of this at once, but working through it in order keeps things manageable.
- Choose your container: pick something wide and shallow with multiple drainage holes. A trough, hypertufa container, or even a terracotta bowl all work. Test drainage before filling by pouring water through the empty container and confirming it drains within a second or two.
- Mix your growing medium: combine 50% soil-based, peat-free compost with 50% horticultural grit or sharp sand. Mix thoroughly. It should feel gritty and almost sandy, not soft and spongy.
- Add a drainage layer: place 2 to 3 cm of crocks or coarse gravel at the base of the container before adding your mix.
- Pick your first species: for beginners, start with sempervivums, sedums, or aubrietia. Buy three or five small plants from a specialist nursery or garden centre (specialist nurseries have better-quality stock).
- Plant at the right depth: crown at or slightly above the soil surface. Firm gently. Do not bury the plant.
- Apply a surface grit layer: spread 1 to 2 cm of horticultural grit over the entire surface. This is not optional.
- Assess your light: place the container where it will receive at least six hours of direct sun. If you are unsure, use a free light-meter app to check before committing to a position.
- Water once well after planting, then leave it: check the surface grit layer daily for the first week. Water again only when it feels completely dry to the touch.
- Plan for winter now: decide where you will move the container when autumn arrives (rain-shadow of a wall or under cover) so you are not scrambling when the weather changes.
- Keep a simple log: note what you planted, when you last watered, and any changes you notice. Even a few lines per week will help you diagnose problems faster and improve season by season.
The fundamentals here are genuinely simple: gritty soil, great drainage, full sun, minimal feeding, and dry winters. Every alpine species has its own quirks, but if you have these foundations in place you will give yourself a real chance of success with almost anything you try. Start small, watch how your first plants respond, and adjust from there. That is how everyone who is good at growing alpines learned, one season at a time.
FAQ
How can I tell whether my alpine container needs water or is staying too wet?
Use a two-step check: first feel the gritty surface, but then also check weight. Lift the pot, if it is only slightly lighter than when freshly watered, wait, even if the top looks dry. Also inspect the grit layer after watering, it should darken slightly then dry within a day or two; if it stays damp for long, your mix or drainage is holding too much moisture.
What should I do if my alpine is getting leggy even though drainage seems good?
Legginess usually means insufficient light, not a watering-only problem. Move the pot to its brightest position with at least six hours of direct sun, and rotate containers weekly so growth stays compact. If the plant is in shade due to nearby walls or taller plants, consider using taller containers or repositioning before adjusting fertilizer.
Can I use stones from my garden or riverbed as the grit in my alpine mix?
Be careful with grit sourced from outdoors. Avoid limestone or very fine sand that can change soil chemistry or pack down. Rinse thoroughly to remove dust, and if you see residue when wet, that fine material may reduce aeration. For best results, use horticultural grit or sharp sand labeled for gardening.
How do I prevent crown rot or fungal issues in damp seasons?
Keep the crown dry and increase air movement. The surface grit layer should fully cover the compost, and the plants should not sit in splashback water. Water at the base, water earlier in the day so surfaces dry quickly, and remove any dead or infected leaves promptly. In very humid weather, provide a little extra spacing between pots.
Are alpines okay to fertilize, or will feeding always cause problems?
Feeding is not automatically harmful, the risk is timing and strength. Stick to a single light, low-nitrogen feed once in spring, then stop. Avoid any late-season nitrogen, it can produce soft growth that fails in cold weather. If you already used a compost with added nutrients, skip feeding the first year.
Should I mulch my alpine bed, or does the surface grit layer replace mulch?
For alpines, the grit or gravel surface layer is the functional mulch. In practice, do not add leafy organic mulch on top, it traps moisture and increases rot risk. If you want a protective layer for erosion control, use only fine gravel or grit similar to what you put on containers.
Is it better to grow alpines in the ground or in containers?
Containers are more forgiving for beginners because you control drainage and shelter. In-ground can work if you have naturally fast-draining, lean soil and a dry winter microclimate, but heavy winter rain is where many failures happen. If you are unsure, start in troughs or wide pots, then move a proven species to the ground once you know it survives your winters.
What winter approach should I use if I cannot move containers to shelter?
If you cannot bring pots under cover, focus on reducing standing rain around the base. Put pots on pot feet or bricks so water can drain freely, and keep them angled slightly so runoff does not pool. Choose a sheltered spot behind a wall or hedge where wind and rain are reduced, and keep the surface grit intact to protect crowns.
Can I grow alpines outdoors on a balcony, and what changes are needed?
Yes, but balcony conditions often exaggerate drying in summer and wetting in winter. Use wide, shallow containers, double-check drainage, and plan for heat management by moving to cooler or partial-shade during peak sun. In winter, elevate containers and protect from direct rain. Strong wind is common on balconies, so check moisture more frequently but avoid soaking.
How deep should I plant alpines, especially if I am dividing older clumps?
Keep planting at the same depth the plant previously sat, and do not bury the crown. After division, set each piece so the crown is at or just above the soil surface, then water in and keep the surface covered with grit. Planting deeper increases the chance of crown rot during winter dormancy.
What is the easiest propagation method for beginners, and when should I do it?
For many beginners, division or stem cuttings are easier than seed. Divide clumps in early spring or after flowering, then replant immediately and keep out of direct sun briefly. For cuttings, take softwood tips in late spring or early summer and root in fine sand or perlite in bright, indirect light.
Why am I not getting germination from alpine seeds despite winter sowing?
Most failures come from mismatched cold stratification needs or seeds that are too buried or kept too wet. Ensure you sow into gritty compost, bottom water so the top is only lightly moist, and do not cover too deeply. If some genera require a longer cold period, leaving the pots outside for only a short winter may not be enough, so follow the specific stratification window for that species.
My alpine has flowers, but the plant slowly declines. What should I check first?
Check the basics in this order: light, watering habits, and soil aeration. If it is flowering then weakening, it can be receiving too much nitrogen or staying too wet between waterings. Confirm the mix is gritty and drains well, reduce watering frequency, and avoid any additional fertilizer until you see stable growth.