Growing ornamental plants successfully comes down to one thing: matching the plant to the conditions you actually have, not the conditions you wish you had. Once you nail that, the rest is just consistent care. Whether you are working with a sunny backyard, a shaded balcony, or a few windowsills inside, there are ornamentals that will genuinely thrive there. This guide walks you through every step, from picking the right plants to troubleshooting problems months down the road.
How to Grow Ornamental Plants: Step-by-Step Guide

Marcus Holloway
17 Apr 2026
Choosing ornamental plants for your climate and space
Start with your USDA Plant Hardiness Zone. This number tells you the coldest temperature your area typically sees in winter, which is the single biggest filter for whether a perennial or shrub will survive outdoors year after year. You can find your zone in about 30 seconds by entering your ZIP code into the USDA map's Quick Zip Code Search. One important note: if you recently heard your zone changed on the 2023 updated map, that does not automatically mean you need to pull plants out or change everything you are growing. Zone updates are refinements to the data, not emergency orders.
Beyond hardiness, think about light and space honestly. A south-facing window or open yard gets 6 or more hours of direct sun, which suits flowering ornamentals like roses, coneflowers, and zinnias. North-facing or heavily shaded spots are better for foliage plants like hostas, ferns, and caladiums. Measure your available footprint before buying anything, because a plant that outgrows its spot becomes a chore instead of a pleasure. For tight indoor spaces, compact cultivars labeled 'dwarf' or 'miniature' are genuinely smaller, not just marketing language.
If you enjoy unusual specimens beyond the standard nursery selection, exploring how to grow rare plants can open up a whole new layer of ornamental possibilities, especially once you have the basics locked in. Similarly, gardeners who want their ornamental beds to pull double duty might look into how to grow medicinal plants, many of which are visually striking and easy to work into a mixed border.
Planting fundamentals: soil, containers, light, water, and feeding

Soil and containers
Never use straight garden soil in containers. It compacts badly, drains poorly, and often carries pathogens. A reliable all-purpose potting mix contains perlite or vermiculite for drainage, and a proven DIY ratio is roughly one-third potting soil, one-third peat moss, and one-third perlite or vermiculite. This gives roots the air pockets they need to breathe between waterings. Container roots cannot spread out to find water the way in-ground roots do, so the growing medium you choose is doing extra work.
Every container must have drainage holes. If you love a decorative pot that does not have them, either drill holes in the bottom or drop a smaller drained pot inside it as a liner. Containers without drainage turn into soggy root traps within a few waterings. Also, do not go too large too fast: a pot just slightly bigger than the plant's rootball is the sweet spot. Oversized pots hold excess wet soil around roots that are not yet growing into that space, which can cause rot.
Light

Light is the one input you cannot fully compensate for with better watering or fertilizer. If a flowering ornamental says 'full sun,' it means at least 6 hours of direct light daily. Grow lights can substitute indoors, but position them 6 to 12 inches above foliage plants and 12 to 18 inches above most flowering plants, adjusting for heat output. Check your plants weekly because slow stretching (called etiolation) toward a single light source is an early sign they are not getting enough.
Watering
Water when the top inch or two of soil is dry for most ornamentals, rather than on a rigid calendar schedule. Soil moisture sensors are a worthwhile investment if you have a lot of containers or tend to forget: they read actual soil water content and help you make smarter irrigation decisions instead of guessing. Small containers dry out faster and create more dramatic wet-dry swings, so if you travel or have a busy schedule, larger containers or self-watering inserts are genuinely helpful.
Feeding
For potted ornamentals, liquid fertilizers applied frequently at low rates, no less often than weekly during the growing season, tend to produce steadier growth than heavy monthly doses. The key danger with fertilizing containers is salt buildup. Each time you fertilize with liquid, apply enough so that roughly 10% of the liquid drains out the bottom of the pot. That leaching action flushes accumulated salts before they reach concentrations that burn roots. If you inherited a plant that was heavily fertilized and you are now moving it to a slower-growth situation, flush the pot thoroughly with plain water before resuming a lighter fertilizer schedule.
Setting up different growing environments
Most ornamentals grow perfectly well in traditional soil or containers, but the site you are reading this on exists precisely because some growers want to push beyond that, and ornamentals are more adaptable than many people realize.
Traditional soil and in-ground beds
In-ground planting gives roots the most room to spread and find their own water and nutrients. Amend heavy clay with compost and perlite before planting. Sandy soil needs organic matter added to hold moisture. Aim for a loose, crumbly texture you can push a finger into easily to about 2 inches. Work the bed to at least 12 inches deep for perennials and shrubs.
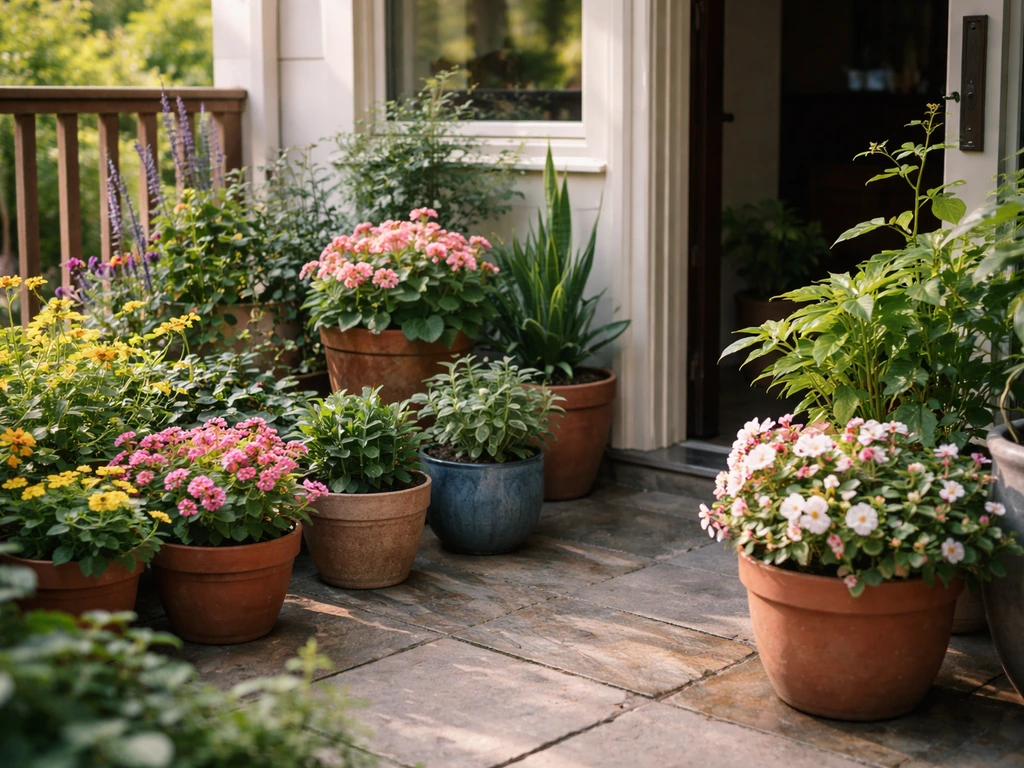
Container gardening
Containers let you move plants seasonally, control soil quality completely, and grow ornamentals on balconies or patios with no ground access. The tradeoffs are faster drying, salt buildup risk, and root restriction over time. Re-pot annually for fast growers, every 2 to 3 years for slow ones, moving up only one container size at a time.
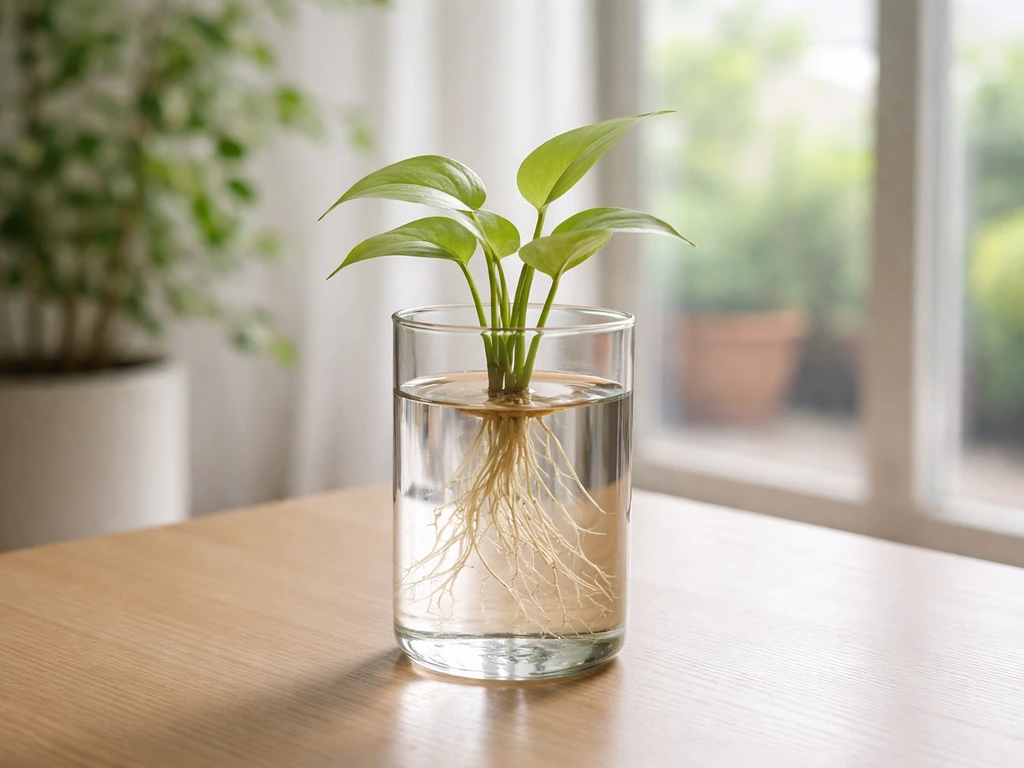
Water growing and hydroponics
Several ornamentals grow surprisingly well in water or hydroponic systems, including pothos, peace lilies, begonias, and impatiens. In a basic water setup, change the water every 5 to 7 days to prevent stagnation and algae, and add a diluted hydroponic nutrient solution at about one-quarter strength since roots in water absorb more efficiently than roots in soil. Avoid direct sunlight on the water vessel to keep algae growth down. Hydroponic systems like deep water culture or nutrient film technique work well for more serious setups and give you very precise control over nutrients.
Terrariums
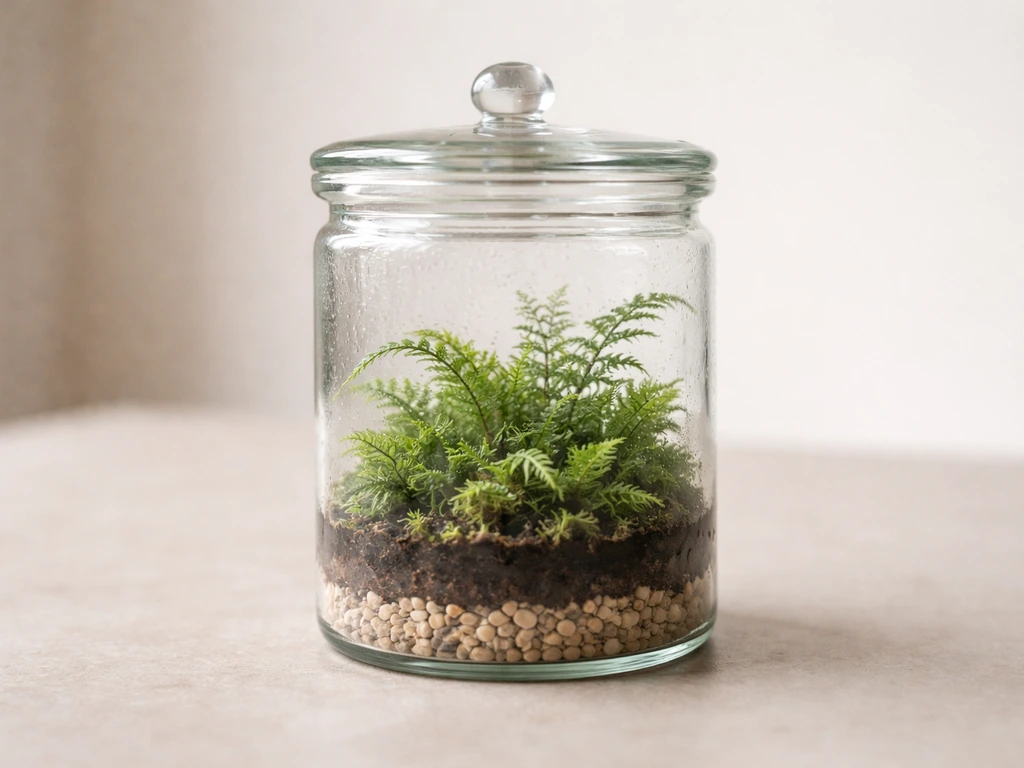
Terrariums are ideal for small ornamentals that love humidity, like mosses, ferns, nerve plants (Fittonia), and miniature orchids. Use a drainage layer of gravel or LECA at the bottom (about 1 to 2 inches), then a thin layer of horticultural charcoal to keep things fresh, then your growing medium on top. Closed terrariums recycle moisture and need almost no watering after the initial setup; open ones need occasional misting. Keep terrariums out of direct sun because the glass amplifies heat and will cook your plants.
Care routines by plant type
Foliage plants
Foliage ornamentals like hostas, caladiums, coleus, and ferns are grown for their leaves, so consistent moisture and moderate feeding keep them looking their best. Water when the top inch dries out, feed with a balanced liquid fertilizer (20-20-20) every 1 to 2 weeks during the growing season, and wipe dust off large leaves monthly so they can absorb light efficiently. If you have ever accidentally let a foliage plant dry out completely and written it off, it is worth knowing that how to grow dead plants back to health is often more doable than it looks, especially for rhizomatous species.
Flowering plants
Annuals like petunias, marigolds, and zinnias need consistent watering and a fertilizer higher in phosphorus (the middle number on the label) to push blooms. Perennials like coneflowers and black-eyed Susans are more drought tolerant once established but benefit from one good feeding in early spring as new growth starts. Both benefit enormously from deadheading, which is covered in detail below.
Bulbs
Spring-flowering bulbs like tulips and daffodils are planted in fall and need a cold period (vernalization) to bloom. Plant them at a depth about three times the bulb's diameter, pointy side up. After flowering, let the foliage die back naturally before cutting it, because that dying foliage is feeding the bulb for next year. Summer bulbs like dahlias and cannas are planted in spring after frost risk has passed and need lifting and storing indoors in cold climates.
Ornamental shrubs
Shrubs like hydrangeas, spireas, and ornamental grasses need a strong start with good soil preparation at planting time, because they are long-term residents. Water deeply but infrequently once established to encourage deep root systems. Feed once in early spring with a slow-release granular fertilizer. Pruning timing matters a lot here, which the next major section covers. For gardeners curious about lower-maintenance shrubs suited to harsher conditions, looking into how to grow alpine plants is a useful parallel, since many alpine species are ornamental and surprisingly tough.
Solving the most common problems quickly
Yellowing leaves
Yellow leaves are the most common distress signal and frustratingly have multiple causes. Work through this quick diagnostic: If yellowing is on the lower or older leaves and the plant looks otherwise fine, it is probably normal aging. If yellowing is widespread and the soil is soggy, overwatering is the issue (let it dry out and improve drainage). If yellowing comes with pale new growth, suspect a nitrogen deficiency and feed. If yellowing is between leaf veins (the veins stay green), that is often iron or magnesium deficiency, fixable with a micronutrient supplement or Epsom salt flush.
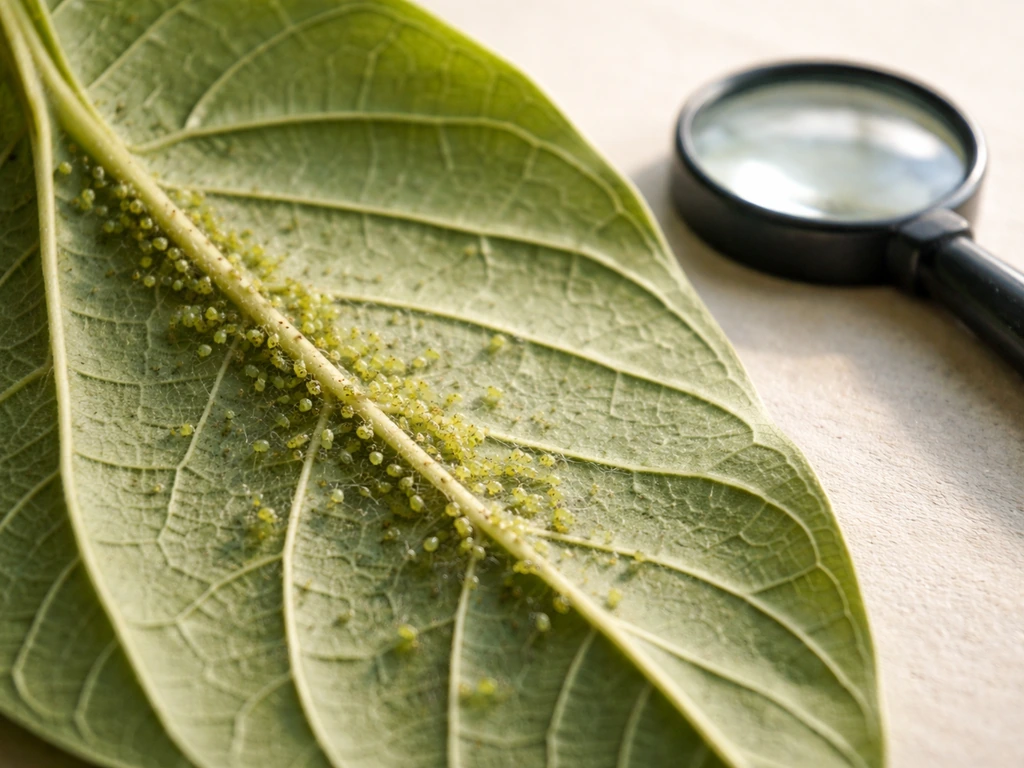
Pests
The most common ornamental pests are aphids, spider mites, mealybugs, and fungus gnats. Check the undersides of leaves regularly because that is where most pests hide. For aphids and spider mites, a strong spray of water from a hose or sink nozzle physically removes a lot of them. Neem oil or insecticidal soap handles most soft-bodied pest infestations without harsh chemicals. For fungus gnats in containers, let the soil dry out more between waterings since their larvae live in consistently moist soil.
Disease: powdery mildew and others
Powdery mildew shows up as a white, dusty coating on leaves and affects almost every category of ornamental plant. It thrives in crowded conditions with poor air circulation. Pruning out congested growth improves airflow and reduces recurrence. If you had a powdery mildew problem last season, start a preventive fungicide schedule in spring when new growth first appears.
Choosing mildew-resistant varieties when shopping is the single best long-term fix. Other fungal diseases like black spot (roses) and botrytis (crowded bedding plants) follow the same logic: good air flow, avoid wetting foliage when possible, and remove infected material promptly. Powdery mildew tends to worsen in [humid conditions](https://extension. umn.
edu/plant-diseases/powdery-mildew-trees-and-shrubs), and UMN Extension notes that keeping leaves from staying wet with frequent rain or irrigation can help reduce the problem.
Nutrient problems
Over-fertilizing is just as damaging as under-fertilizing. Salt buildup from excess fertilizer burns root tips and shows up as brown leaf edges or general wilting despite wet soil. If you suspect over-fertilization, flush the pot with plain water until it runs freely from the drainage holes, then hold off on fertilizing for 2 to 4 weeks. Measuring soluble salt concentration with a water-saturated paste test gives you a more accurate diagnosis if problems persist.
| Symptom | Most Likely Cause | Quick Fix |
|---|---|---|
| Yellowing lower leaves only | Normal aging or nitrogen deficiency | Feed with balanced fertilizer if widespread |
| Yellow leaves, soggy soil | Overwatering / root rot | Improve drainage, reduce watering frequency |
| Yellow between leaf veins | Iron or magnesium deficiency | Apply micronutrient supplement or Epsom salt |
| White dusty coating | Powdery mildew | Improve airflow, apply fungicide if recurrent |
| Brown leaf edges, wilting despite wet soil | Fertilizer salt buildup | Flush pot with plain water, skip fertilizing |
| Tiny moving dots on leaf undersides | Spider mites | Spray off with water, apply neem oil |
| Sticky residue, small clusters on stems | Aphids | Strong water spray, insecticidal soap |
Pruning, deadheading, propagation, and seasonal upkeep
When and how to prune
Timing pruning correctly is one of those things where a small detail makes a big difference. For spring-flowering shrubs like forsythia and lilac, prune immediately after they finish blooming so the plant has time to set new flower buds for next year. Prune them in fall instead and you will cut off next year's flowers. For most deciduous trees and shrubs that are not spring-bloomers, late winter, just before spring growth starts, is the ideal window. Wounds are exposed for only a short time before the plant seals them as growth begins. Avoid heavy pruning in fall when leaves are dropping, since that sends mixed signals to a plant already going into dormancy.
Deadheading for more blooms
Deadheading means removing spent flowers before they set seed. The logic is simple: a plant's job is to reproduce, so once it makes seeds it slows flower production. Remove spent blooms and it keeps trying. For annual flowers, cut the whole spent flower stem back to just above the first set of healthy leaves below it. For perennials, cutting back the initial flower stalks entirely after blooming can trigger a second flush of blooms in late summer on many species. The key to making this work is frequency: grooming every few days during peak growing season is far more effective than one big cleanup session once a month.
Basic propagation methods
Stem cuttings work for most foliage ornamentals and many flowering plants. Take a 4 to 6 inch cutting just below a leaf node, remove the lower leaves, dip the cut end in rooting hormone powder, and place it in moist perlite or a perlite-peat mix. Keep it in bright indirect light and mist daily. Most cuttings root in 2 to 4 weeks. Division is the easiest method for clumping perennials and ornamental grasses: dig up the plant in early spring or fall, split the clump with a sharp spade, and replant immediately. Bulb offsets (the small bulbs that form around the parent bulb) can be separated at lifting time and grown on as new plants.
Seasonal maintenance checklist
- Spring: Feed all ornamentals as new growth begins, start mildew prevention if needed, divide overcrowded perennials, plant summer bulbs after last frost.
- Summer: Deadhead every few days, water consistently, watch for pest activity especially during heat waves, feed containers weekly with diluted liquid fertilizer.
- Fall: Plant spring bulbs, cut back dead annuals, lift and store tender summer bulbs before frost, do final slow-release feeding for perennials.
- Winter: Prune dormant shrubs and trees in late winter just before growth resumes, check stored bulbs for rot, plan any new bed layouts for spring.
Designing your space for long-term success
Spacing matters more than most beginners expect. Planting too close creates the airflow problems that invite powdery mildew and other diseases, makes plants compete for light, and means you are constantly pulling things apart two seasons later. Check the mature spread listed on the plant tag and space accordingly, even though a freshly planted bed looks sparse at first. Use annuals to fill gaps in new perennial beds while the perennials establish.
For companion planting in ornamental beds, think in layers: tall background plants like ornamental grasses or tall phlox, mid-height bloomers like coneflowers and black-eyed Susans, and front-of-border edging plants like sedums or marigolds. Repeating one or two key plant varieties across a bed creates visual cohesion without requiring design expertise. Mixing plants with different bloom times means you always have something going, rather than a big early-summer show followed by months of green.
Color and texture contrast make combinations work. Pair fine, feathery textures (ornamental grasses, ferns) with bold round leaves (hostas, ligularia) for visual interest even when nothing is in bloom. Limit yourself to three or four colors in a bed if you are not sure where to start: too many colors creates visual noise and looks accidental rather than planned.
Long-term success really does come down to observation. Walk your garden or check your containers every few days during the growing season. You will catch pest problems early, know when deadheading is needed, and see which plants are thriving versus struggling. The gardeners who grow ornamentals well are not necessarily the ones with the most knowledge upfront, they are the ones who stay curious and keep looking. Every failed plant teaches you something useful, and that knowledge compounds quickly over just one or two seasons.
FAQ
How do I know I’m watering correctly if I’m not using a moisture sensor?
Most ornamentals can handle temporary inconsistency, but the pattern matters. If you let the soil dry out completely in a container and then soak it, roots experience big wet-dry swings that invite stress pests and nutrient issues. For best results, water thoroughly until a little drains out, then wait until the top inch (or two in larger pots) is dry before watering again.
When should I fertilize ornamental plants in containers, and when should I stop?
For potted plants, fertilizer timing should follow active growth, not the calendar. Start feeding when you see new leaves or stems pushing, and stop or reduce as growth slows in late fall. Also, if you recently repotted into fresh mix, pause fertilizing for a few weeks because many potting mixes already include nutrients.
Can I mix different ornamental plants in the same pot or window box?
Yes, but avoid two common mistakes: over-crowding and forcing the wrong light. If you can, start with a small group of plants that share the same light needs, then expand. When plants are crowded, you reduce airflow and increase mildew risk, so even small spacing changes can matter more than people expect.
What should I do if my plants look wilted but the soil is already moist?
If your ornamentals are wilting while the soil is wet, don’t automatically assume they need more water. Common causes include salt buildup, root stress from poor drainage, or overly large pots holding cold wet soil. Flush the pot if you suspect fertilizer salts, confirm drainage holes are clear, and move the plant to its correct light level to avoid heat or light stress.
How can I choose the right pot size without repotting too often?
Not always. Labels and tags describe plant size at maturity, but two plants can occupy the same “container size” and still compete differently based on root behavior. A fast-growing plant may need an earlier repot even if it fits today, while a slow-growing plant can often stay longer. Use the mature spread as a baseline and watch root activity through drainage holes for real-time clues.
My ornamental is getting tall and leggy, what’s the best fix?
When a plant stretches toward light, it usually needs either more hours of direct light or a closer grow light, not more fertilizer. Increase light gradually to avoid shock, rotate the container weekly for even growth, and confirm your light height stays within the recommended range for that plant type.
How can I tell whether yellow leaves are from overwatering or nutrient problems?
Overwatering is often the hidden cause of yellowing, even when the plant looks “otherwise fine.” Check whether yellowing starts on lower or older leaves, and compare moisture level at the root zone. If the soil stays wet for days, adjust watering frequency and improve drainage, then wait for new growth to replace the damaged leaves.
What’s the most effective way to treat common pests like aphids or mites on ornamentals?
Start by isolating the plant because some pests spread quickly, then check undersides of leaves and leaf joints. For soft-bodied pests, insecticidal soap works best when you thoroughly coat both sides of foliage, repeat as directed because eggs can survive, and avoid spraying during intense sun or high heat to prevent leaf burn.
How do I stop fungus gnats in my container plants?
If fungus gnats are in containers, letting the top portion of the mix dry more between waterings is the fastest cultural fix because the larvae need consistently moist soil. Also avoid leaving standing water in saucers, and consider bottom-watering for a period so the surface dries out instead of staying damp.
What should I do if powdery mildew keeps coming back each season?
Powdery mildew is rarely solved by watering changes alone. Focus on airflow (prune crowded growth), reduce leaf wetness when possible, and remove heavily infected leaves early. If you want prevention, start before symptoms appear on new growth rather than waiting until the white coating is obvious.
What’s the biggest mistake when rooting ornamental cuttings?
Most cuttings benefit from humidity plus bright indirect light, but the biggest success factor is moisture control in the rooting medium. Keep perlite or the mix consistently lightly moist, don’t let it dry out completely, and avoid keeping the cutting in deep shade because roots can’t form well without enough energy production.
When is the best time to divide clumping ornamentals, and when should I avoid it?
Division timing depends on the plant’s growth cycle. Many clumping perennials do well in early spring or fall, but spring-blooming perennials should be divided after they bloom, when possible, to avoid removing developing flower shoots. If you divide in fall, replant immediately and keep the soil evenly moist while roots recover.
How much spacing should I follow if my bed looks empty when I plant?
Use the spacing information on the plant tag, then add an extra buffer if your area is humid or you’ve had mildew before. Crowding not only increases disease pressure, it also makes flowering weaker because plants compete for light and nutrients. If your bed already looks too tight, thin or remove some plants earlier rather than waiting two seasons.
How do I deadhead different ornamentals without cutting off the wrong parts?
If you want re-blooming, deadhead frequently during peak bloom, but don’t remove leaves or buds. For annuals, removing the spent flower and stem back to healthy leaves encourages new buds. For many perennials, cutting back flower stalks can trigger a second flush, but cutting too much foliage at once can reduce vigor.
Why didn’t my spring bulbs bloom, and what should I do after they flower?
Mature bulbs need a cold period, and also need the right post-bloom care. Don’t cut foliage immediately after flowers fade, because the plant is replenishing the bulb. If bulbs fail to bloom, common causes include planting too shallow, poor soil drainage, or moving them too early before the foliage has time to die back naturally.