Good soil is the single biggest factor in whether your plants thrive or just survive. The short answer: great soil for most plants is loose and crumbly, drains well but holds some moisture, smells earthy (not sour or rotten), and contains a mix of organic matter plus mineral particles that let roots breathe. You can build that from scratch in about 20 minutes with a few bag ingredients, or you can fix what you already have with a couple of targeted amendments. This guide walks you through both paths, with specific recipes and proportions you can use today.
How to Make Good Soil for Plants to Grow Well

Marcus Holloway
20 Apr 2026
What 'good soil' actually means for plant health
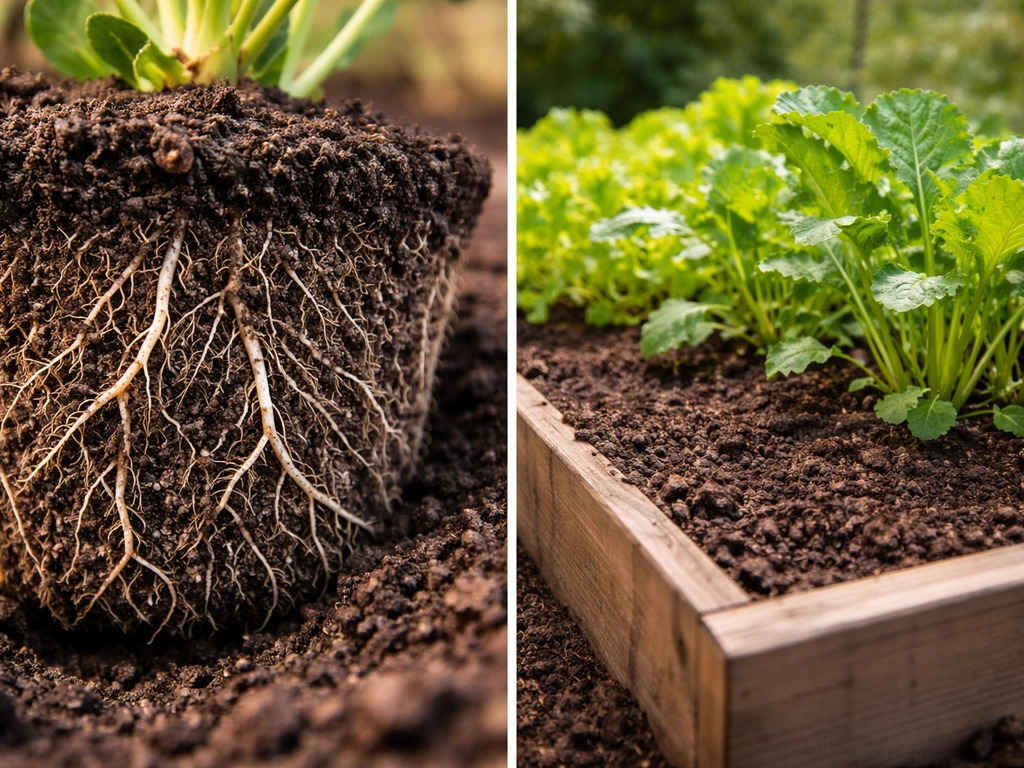
Soil does four things for a plant: anchors its roots, delivers water, supplies nutrients, and provides oxygen. When any one of those breaks down, the plant tells you about it through yellowing leaves, stunted growth, or wilting even after watering. Understanding why each factor matters makes it much easier to diagnose and fix problems instead of just guessing.
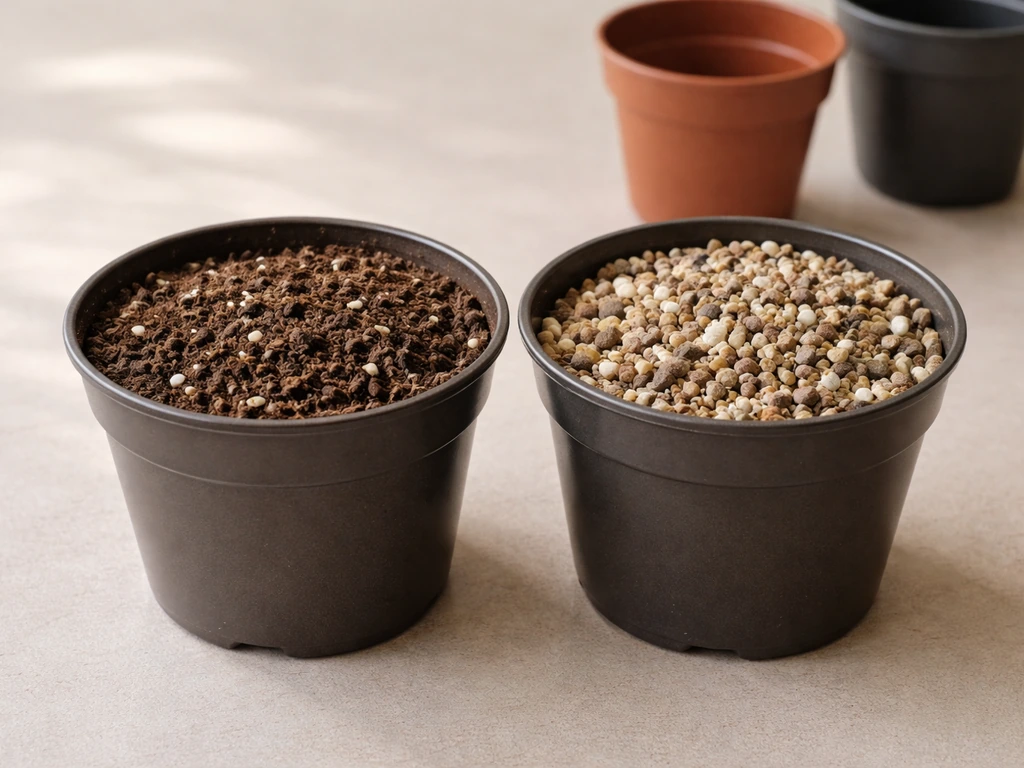
Structure is the foundation. The ideal garden loam is roughly 40% sand, 40% silt, and 20% clay, with about 5 to 10% organic matter layered throughout. That balance gives you pore spaces for air and water movement, clay particles that hold onto nutrients, and sand that keeps things from packing solid. In container mixes, you replicate this artificially with ingredients like perlite (for air pockets), coco coir or peat moss (for moisture retention), and compost (for nutrients and biology).
Organic matter is what separates living soil from dead dirt. It feeds the microbial communities that break down nutrients into forms plant roots can actually absorb. Worm castings, compost, and aged bark all contribute to this living layer. Without it, even a perfectly textured soil eventually becomes a sterile growing medium, and you end up dependent on synthetic fertilizers to keep things going.
pH controls nutrient availability more than almost anything else. Most vegetables and houseplants do best between pH 6.0 and 7.0. Outside that range, nutrients like iron, phosphorus, and calcium lock up in the soil and become unavailable to roots, even if those nutrients are physically present. That is why a plant can look nutrient-deficient on perfectly fertilized soil if the pH is off.
Drainage and aeration are two sides of the same coin. Roots need oxygen just as much as they need water. Soil that stays waterlogged pushes oxygen out of the pore spaces and creates the anaerobic conditions that rot roots and breed pathogens. The goal is soil that drains excess water within an hour or two but stays moist, not soggy, for a day or more.
Quick soil check: texture, drainage, and basic diagnosis
Before you buy anything or mix anything, spend five minutes checking what you are working with. This applies whether you are evaluating garden bed soil, a bag of potting mix, or the dirt in a container you inherited.
The squeeze test (feel method)
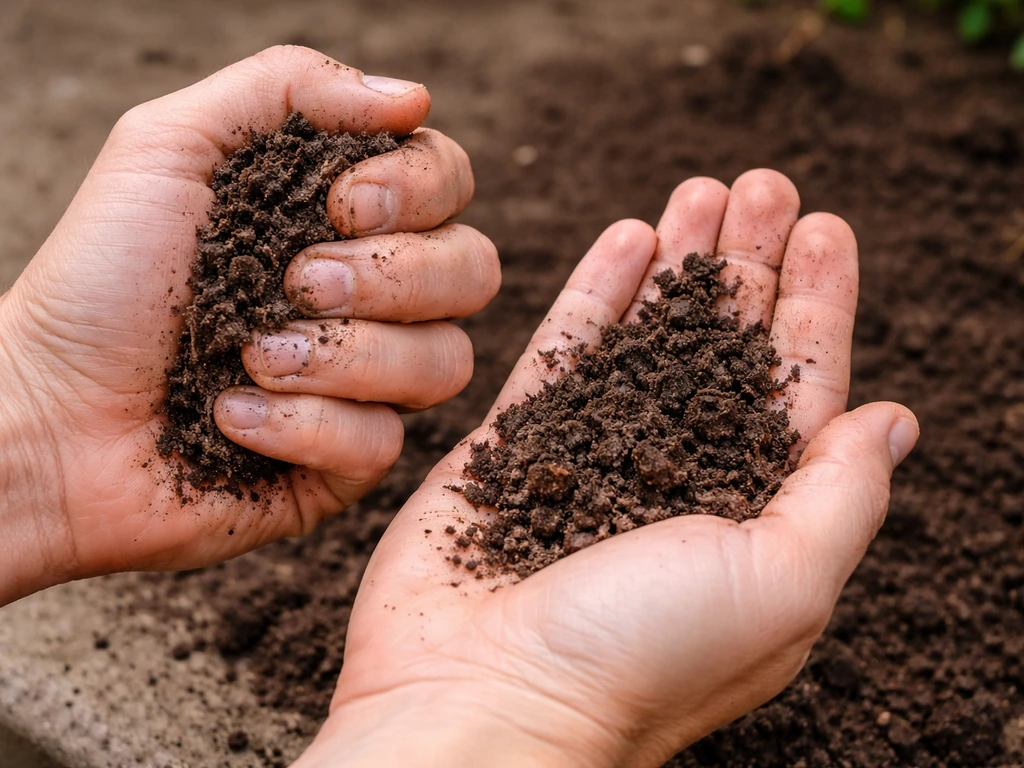
Grab a handful of moist (not soaking wet) soil and squeeze it in your fist. Open your hand. If it falls apart immediately, the soil is very sandy and will dry out fast. If it holds a tight, slippery ribbon you can press out between thumb and finger, it is heavy in clay and will compact and drain poorly. If it holds its shape loosely and crumbles when you poke it, you are close to a good loam. Aim for that last result.
The jar test for garden beds
For garden soil, the jar test gives you a clearer picture of texture. Fill a clear jar one-third with soil, top it up with water, shake it vigorously, then set it down and watch. Sand settles first (within a minute or two), silt settles over a few hours, and clay may stay suspended for a day or more. The relative depths of those layers show you your approximate sand, silt, and clay proportions. This method, supported by Montana State University extension, is genuinely useful before you start amending a new garden bed.
The drainage test
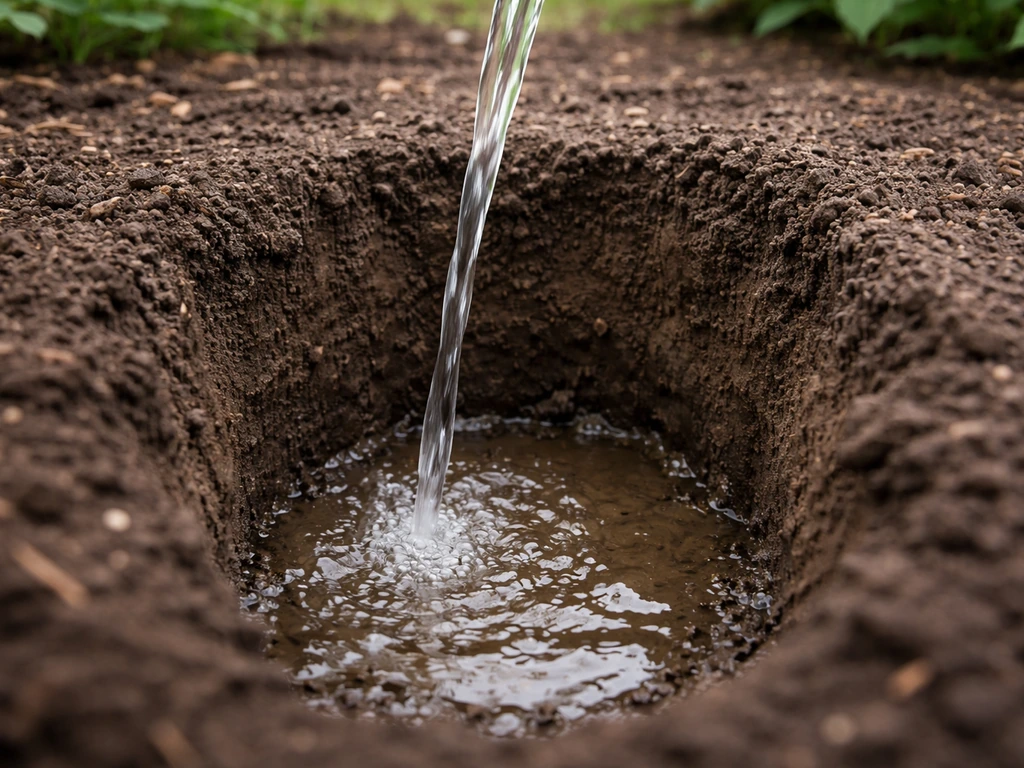
Dig a hole about 12 inches deep, fill it with water, let it drain, then fill it again and time how long it takes to empty. Well-draining soil empties within an hour or two. If it takes four or more hours, you have a drainage problem. In containers, just water thoroughly and watch the drainage holes: water should run freely within seconds, not pool on the surface for minutes.
Quick visual and smell check
- Good soil smells earthy and slightly sweet, like a forest floor after rain.
- Sour, sulfur-like, or rotten smell means anaerobic conditions, usually from overwatering or poor drainage.
- Pale gray or white color in garden soil can indicate high clay, low organic matter, or salt buildup.
- White crusty residue on the surface of potting mix is almost always salt buildup from fertilizer, which needs to be flushed out.
- Healthy soil has visible crumb structure, tiny clumps held together by organic matter and microbial activity.
- Completely uniform, dry powder means the organic matter has broken down and the structure has collapsed.
Building a great DIY soil mix: core ingredients and what each one does
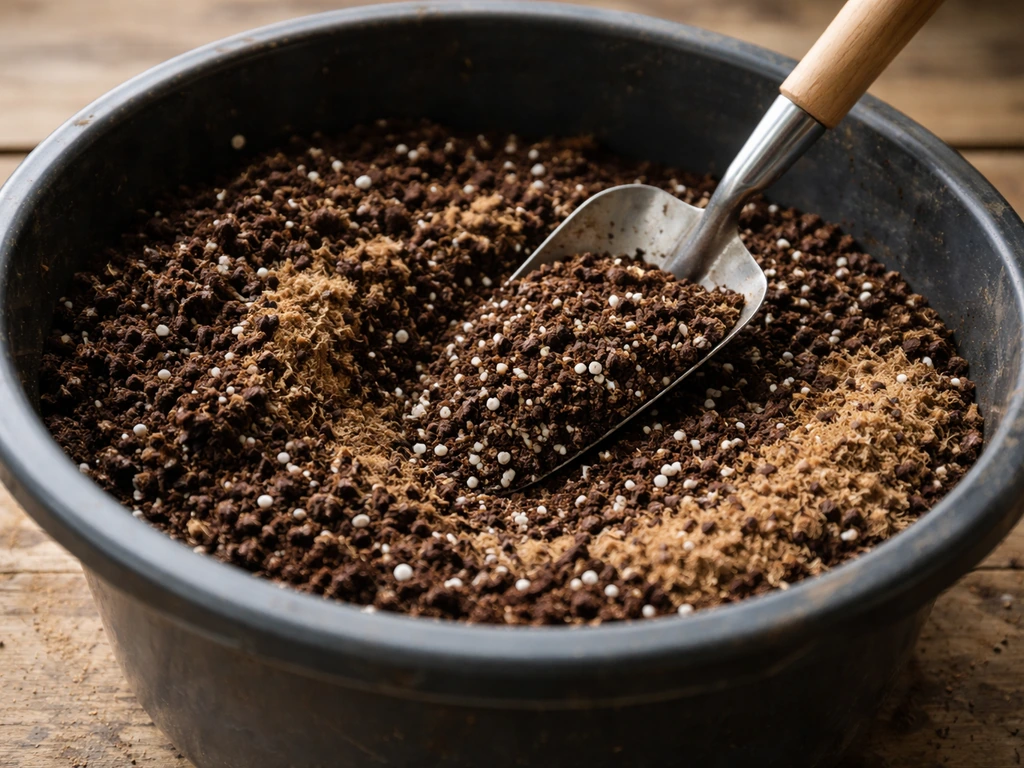
You do not need 15 ingredients to make good potting mix. Most great mixes rely on three to five components, each doing a specific job. Here is what to know about each one before you start combining them.
| Ingredient | What it does | When to use it | Proportion range |
|---|---|---|---|
| Compost | Adds nutrients, organic matter, and microbial life | Almost every mix | 20–40% |
| Peat moss | Holds moisture, slightly acidic, lightweight | General mixes, seedlings, tropicals | 20–40% |
| Coco coir | Same as peat but more sustainable, neutral pH | Swap for peat in any mix | 20–40% |
| Perlite | Creates air pockets, prevents compaction, improves drainage | All container mixes | 10–30% |
| Pumice | Like perlite but heavier, better for top-dressing, long-lasting | Succulents, cacti, heavy outdoor mixes | 20–40% |
| Vermiculite | Holds moisture and nutrients, softer than perlite | Seed-starting mixes, fine root plants | 10–20% |
| Worm castings | Concentrated gentle nutrition and microbial inoculant | Any mix needing a fertility boost | 5–20% |
| Coarse sand or grit | Improves drainage and weight in mixes that need it | Succulents, cacti, raised beds | 10–30% |
| Pine bark fines or leaf mold | Improves structure, feeds beneficial fungi, long-lasting | Tropical mixes, orchids, general beds | 10–20% |
One thing worth knowing: many commercial potting mixes are intentionally soilless, meaning they contain no actual garden dirt. That is not a bad thing. Soilless mixes based on peat or coco coir plus perlite are sterile, lightweight, and free of the soilborne pathogens that can devastate container plants. The tradeoff is that they have almost no inherent fertility, so you need to supply nutrients through compost, worm castings, or regular fertilizing.
Soil recipes by plant type
Different plants evolved in very different soil conditions, so there is no single mix that is perfect for everything. These recipes use widely available ingredients and proportions backed by real extension research. Measure by volume, not weight.
General-purpose container mix (houseplants, mixed flowers, herbs)
A simple, reliable starting point used by many master gardener programs combines one part sphagnum peat moss or coco coir with one part perlite or vermiculite. If you want more fertility built in, the UC Master Gardener formula is excellent: one-third quality commercial potting soil, one-third compost, one-sixth coco coir, and one-sixth perlite. Add a small amount of cottonseed meal or worm castings to that mix for a gentle nitrogen boost and you have a well-rounded container medium that handles most common houseplants and herbs.
Succulent and cactus mix
Succulents and cacti need fast drainage above all else. Their roots evolved to sit in near-dry mineral soil, and they will rot quickly in a moisture-retaining mix. Use roughly 50% coarse sand or pumice plus 30% perlite plus 20% coco coir or a small amount of compost. The mix should feel gritty, not fluffy, and water should run straight through within seconds. If you are buying a commercial cactus mix, check it by squeezing a damp handful: if it holds together in a clump, it is too moisture-retentive. Cut it with extra perlite or pumice.
Vegetable and herb garden mix (raised beds or containers)
Vegetables are hungry and need both good drainage and consistent moisture retention. A classic North Country Master Gardeners formula of two-thirds compost to one-third perlite or vermiculite works well for container vegetables. For raised beds, blend equal parts compost, topsoil (or a loamy base soil), and a drainage amendment like coarse perlite or aged bark. Keep pH between 6.2 and 6.8 for most vegetables: tomatoes target around pH 6.5 and should be limed if pH drops below 6.0, while carrots target pH 6.0 and benefit from lime below 5.5. Start testing early in the season so you have time to adjust before planting.
Seed-starting mix
Seedlings are more vulnerable than established plants, so seed-starting mix needs to be fine-textured, sterile, and free-draining. Utah State University Extension describes damping-off as a soilborne issue and recommends using clean, appropriate media for seedlings, since pathogens can be present even in small amounts of dirt blank" rel="noopener noreferrer">seed-starting mix needs to be fine-textured, sterile, and free-draining.. Use equal parts peat moss or coco coir plus vermiculite. blank" rel="noopener noreferrer">Skip compost or worm castings in the seed-starting phase: fresh seedlings do not need heavy nutrition and compost can introduce pathogens. University of Minnesota extension is clear that you should never reuse old potting mix for seed starting, and you should not use garden soil or compost directly, because damping-off pathogens spread easily through shared media and cannot be reversed once symptoms appear.
Tropical and leafy houseplant mix (pothos, monsteras, philodendrons)
Tropical plants want moisture-retentive but airy soil that mimics forest floor conditions. Try 40% peat moss or coco coir, 20% perlite, 20% compost, and 20% pine bark fines or leaf mold. The bark improves structure, feeds beneficial fungi, and keeps the mix from compacting over time. Worm castings added at about 10 to 15% replace or reduce the compost portion and add a gentle fertility boost. These plants generally tolerate pH between 5.5 and 6.5, so a slightly acidic mix is fine.
Amending existing soil vs. starting fresh
Whether to amend what you have or start from scratch depends on what your soil diagnosis turned out to be. In-ground garden soil can almost always be improved in place. Container soil often makes more sense to replace entirely, especially if it has been used for more than one growing season.
Fixing garden bed soil
For heavy clay soil, the most reliable long-term fix is organic matter, not gypsum. Iowa State University extension is direct about this: incorporating well-rotted manure, compost, or peat is the practical strategy for improving clay structure. Gypsum can help in specific situations (high-sodium soils in arid regions, for example), but for most home gardeners, adding 3 to 4 inches of compost worked into the top 8 to 12 inches of soil each season is the approach that consistently works. Clay soil may also benefit from raised beds if drainage is a persistent issue.
For sandy soil that dries out too fast, the solution is the same: organic matter. Compost, worm castings, and leaf mold all increase the water-holding capacity of sandy soil by filling spaces between particles with moisture-retaining material. Apply 2 to 4 inches and work it in thoroughly. Repeat each season. Sandy soil improves quickly compared to clay, often showing noticeable difference within a single growing season.
Refreshing or replacing container potting mix
Potting mix breaks down over time. Peat and coco coir decompose, perlite floats to the top and washes out, and the remaining material becomes dense and poorly aerated. If your container mix looks dark, compacted, and pulls away from the pot walls when dry, it is time to replace it. For annual containers, replace the whole mix each season. For perennial houseplants, top-dress with fresh compost or worm castings annually, and plan a full repot every one to two years. Never use straight garden soil in containers: it compacts too heavily in pots, reduces drainage dramatically, and can introduce pests and diseases. This is one of the most common mistakes beginners make.
Soil testing and tuning: pH, nutrients, and microbial health
A basic soil test takes the guesswork out of amending and fertilizing. You can buy inexpensive pH meters or test strips at any garden center, or send a soil sample to your local cooperative extension lab for a full nutrient and pH report (usually under $20 and worth every cent for a new garden bed).
Understanding and adjusting pH
For most vegetables, aim for pH 6.0 to 7.0, with the sweet spot around 6.2 to 6.8. Tomatoes want pH around 6.5; carrots target pH 6.0. If your soil pH is too low (too acidic), add agricultural lime (calcium carbonate) gradually: work it in and retest after a few weeks. If pH is too high (alkaline), sulfur or acidic organic matter like peat moss and pine bark will bring it down slowly. Do not expect instant results: pH adjustment in soil takes weeks. In containers with soilless mix, pH fluctuates more quickly and can be tuned with pH-adjusted watering or liquid amendments.
Reading nutrient deficiency symptoms
Nutrient problems show up in predictable patterns. Nitrogen deficiency typically shows as uniform yellowing of older (lower) leaves first, since nitrogen is mobile and the plant moves it upward to new growth. Phosphorus deficiency often produces weak, stunted growth and sometimes a purplish tinge on leaf undersides. Potassium deficiency may not show obvious symptoms right away but eventually appears as browning leaf edges. Before you reach for fertilizer, though, check your pH: a pH problem can mimic almost any nutrient deficiency by locking up nutrients that are already in the soil.
Avoiding salt buildup from over-fertilizing
One of the most common indoor container problems is high soluble salt concentration from too much fertilizer or applying it too frequently. The signs are white crusty deposits on the soil surface or pot rim, combined with brown leaf tips, wilting, and sometimes stem rot at the soil line. The fix is leaching: water the container slowly and thoroughly until water runs freely from the drainage holes, then repeat two more times. This washes accumulated salts down and out of the root zone. University of Maryland extension recommends this flush-leach method as the primary corrective step. After flushing, hold off on fertilizing for at least four to six weeks.
Supporting microbial health
The microbial community in soil is what makes nutrients available to roots. Compost and worm castings both inoculate your mix with beneficial bacteria and fungi. Avoid over-sterilizing your soil unless you genuinely need it for seed starting: healthy garden soil and container mix should teem with life. Avoid using strong chemicals like bleach or hydrogen peroxide in your soil unless you are dealing with a specific disease outbreak. Overuse kills the beneficial organisms you are trying to cultivate. Instead, support microbial life by adding compost annually, avoiding synthetic fertilizer overuse, and not letting your soil dry out completely between waterings.
Repotting and watering right after you make your mix
Mixing up a great soil recipe is only half the job. How you put it in the pot and water it in makes a real difference in how well plants establish.
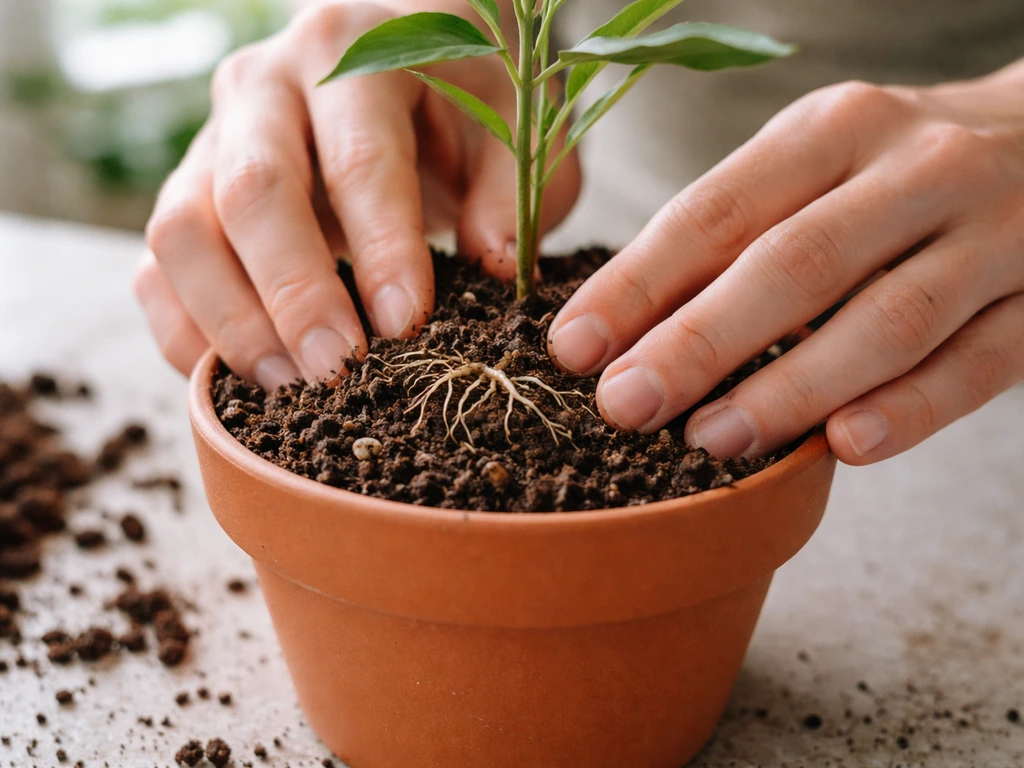
When filling a container, do not pack the soil down. Press it in gently to remove large air pockets, but leave some loose structure so roots can push through easily. Fill the container to about an inch below the rim so water has room to pool briefly before soaking in rather than running straight over the edge. University of Georgia extension guidance specifically calls out not to pack soil tightly in containers, as compaction defeats the purpose of a well-structured mix.
After repotting, water slowly and thoroughly. Let water soak in rather than pouring it all at once. The goal is to wet the entire root zone and settle the mix around the roots without creating hard-packed layers. Once water runs freely from the drainage holes, stop and let the pot drain fully. Do not water again until the top inch or two of soil feels dry to the touch. New transplants are vulnerable to root rot if kept too wet, and the fresh soil holds moisture more efficiently than compacted old mix.
For the first two to four weeks after repotting, hold off on liquid fertilizer. A well-made mix with compost or worm castings already contains enough nutrition to support establishment. Adding fertilizer on top of a fresh mix, especially a concentrated one, risks salt stress on roots that are still adjusting. This is a common beginner mistake and one that is easy to avoid.
Common mistakes and how to troubleshoot poor growth
Even experienced growers hit soil problems. Here are the most frequent ones and how to diagnose and recover from them.
Using garden soil in containers
Garden soil compacts in pots, kills drainage, and introduces pests and pathogens. If you have already done this and your plant is struggling, the best fix is to repot into a proper container mix. Try not to amend the garden soil in the pot with perlite after the fact: by the time you add enough perlite to actually improve drainage, the ratio of original soil to amendment gets unwieldy. Start fresh.
Skipping drainage and creating anaerobic mixes
If your soil smells sour or sulfurous, roots are sitting in waterlogged, oxygen-depleted conditions. Pull the plant, check the roots (healthy roots are white or light tan; rotted roots are brown, mushy, and smell bad), trim off any rotted sections, and repot into fresh well-draining mix. Improve drainage going forward by adding more perlite or pumice and ensuring your pot has working drainage holes.
Using fresh manure
Fresh manure burns roots with ammonia and can introduce harmful bacteria. Always use well-aged or composted manure. If your soil smells of ammonia after you add manure, it was not ready. Till it in and wait several weeks before planting.
Over-fertilizing
White crust on soil, brown leaf tips, and wilting despite moist soil all point to salt toxicity from too much fertilizer. Flush the container thoroughly with plain water, as described earlier. Going forward, fertilize at half the recommended rate and frequency, especially in slower-growing winter months.
Ignoring pH before fertilizing
If a plant looks nutrient-deficient but responds poorly to fertilizer, test the pH. A soil locked outside the 6.0 to 7.0 range will hold nutrients hostage no matter how much you add. Fix the pH first, then reassess fertility.
Signs your soil is finally working
You will know your soil is doing its job when roots appear white and firm at the pot edge, new growth is consistent and the right size for the plant type, leaves hold their color without tips browning or lower leaves yellowing, and the soil surface stays crumbly rather than forming a hard crust. Give any soil change two to four weeks before judging results: plants adjust gradually, and improvement shows up in new growth, not old damaged leaves.
Soil building is genuinely one of the most satisfying parts of growing plants once it clicks. Whether you are working with clay-heavy garden beds (a challenge covered in detail when looking at how to help plants grow in clay soil), wondering how different soil types affect growth, or just starting from scratch with a bag of amendments and some containers, the principles here give you a reliable foundation. Mix right, test early, adjust gradually, and your plants will show you the results. If you are working with red soil, the same soil test, drainage, and organic matter principles will help you dial in the right mix and pH for healthier growth. With those soil basics in place, you can follow a reliable approach for how to grow plants in soil, from potting and watering to ongoing maintenance. If you want a quick roadmap for building and improving garden soil step by step, focus on texture, organic matter, drainage, and pH first.
FAQ
Should I always add compost to improve any soil I have?
Use compost or worm castings only when the goal is feeding and biology, not when you need fast aeration. For example, if you see water pooling or slow drainage, prioritize increasing pore space (perlite, pumice, coarse bark). Adding more compost to clay that is staying wet can worsen oxygen shortage, even if it improves fertility over time.
How often should I test pH and nutrients for container plants?
For pots, do not expect “soilless” mixes to stay at the same pH and fertility forever. Even in a good recipe, nutrients and pH drift as you water, especially with hard water. Recheck pH and nutrient needs every season for vegetables and every 6 to 12 months for houseplants, then adjust with pH-controlled watering or gentle liquid amendments.
My potting mix smells okay but I get fungus gnats. What should I do first?
If you see fungus gnats and damp soil, it usually means the mix stays too wet at the surface, not that you need more nutrients. Let the top inch dry slightly between waterings, improve drainage, and consider removing the top 1 to 2 inches of constantly damp mix and replacing it with fresher, fluffier material. Also avoid frequent “small sips” of water that never flush the root zone.
What if plants wilt even though the soil is wet?
If your plant is wilting right after watering, suspect the soil is not distributing water or it is compacted. Check whether water runs through quickly or pools. In compacted mixes, simply adding perlite “on top” often fails because compaction remains underneath, the fix is repotting or at least thoroughly reworking the root ball into a properly aerated mix.
Can I use manure instead of compost in my soil recipe?
Yes, but the product labeling matters. “Composted manure,” “aged manure,” and “composted bark” are generally safer than fresh manure, yet you should still avoid heavy application in seed-starting mixes. A good rule is to keep compost use lighter for seedlings and heavier for established plants, then top-dress rather than bury large amounts near tender roots.
When is it safe to add compost or worm castings to seed-starting mix?
For seedlings, the biggest mistake is mixing in anything that is not sterile and fine-textured. Use a dedicated seed-starting mix (peat or coco plus vermiculite). If you want to add nutrients, do it later via a diluted fertilizer once true leaves appear, rather than adding compost or castings at sowing.
Should I use gypsum to fix clay soil, or stick with compost?
If you have a bed that is mostly clay, gypsum may help only in specific cases, such as very saline conditions. For typical home garden clays, the most reliable approach is repeated organic matter additions plus time, then improving drainage with raised beds if water still stands. Expect structural improvement across seasons, not days.
How do I water sandy soil so it actually holds moisture for plants?
Sandy soil can benefit from compost, but also watch how you water. Deep, thorough watering less often encourages deeper roots, while frequent light watering can keep sand too wet in the top layer and too dry below. Combine 2 to 4 inches of organic matter with watering schedules that saturate the root zone, then allow it to partially dry before the next irrigation.
How can I tell fertilizer burn from nutrient deficiency?
Do a quick “salt check” before you flush everything: look for white crust on soil surface or pot rim, and note if leaf tips brown while the soil stays damp. If that matches, leach slowly until drainage runs freely, then pause fertilizing for 4 to 6 weeks. After that, switch to half-strength fertilizer and water normally so salts do not build again.
My pH keeps drifting in containers. Could my tap water be the cause?
Yes, and it is one reason pH swings quickly in containers. If your water is high in hardness, the mineral load can raise pH and salt concentration, especially with frequent feeding. Consider using pH-adjusted water or occasionally flushing with plain water, then retest pH in the mix to confirm.
When should I replace potting mix versus top-dress it?
If your container mix is pulling away from the pot edge, has compacted into dense clumps, or dries into a hard hydrophobic crust, replace it. Top-dressing helps only when the mix still holds air and drains normally. For annual containers, complete replacement each season prevents recurring compaction and nutrient depletion.