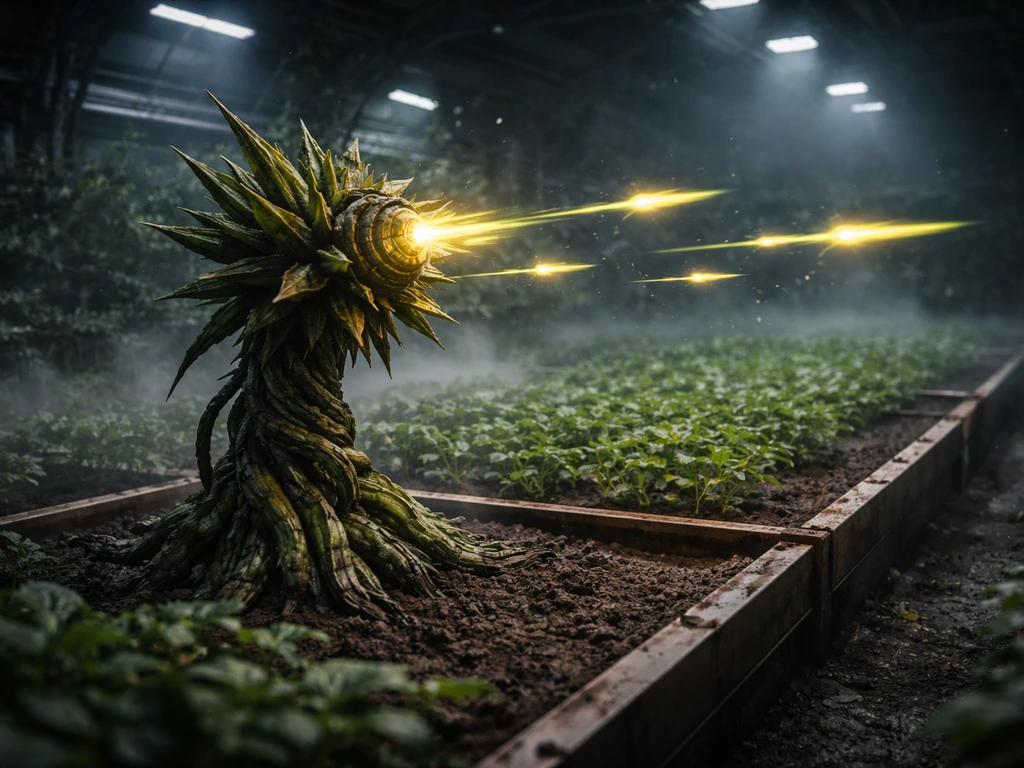
Plant Species X in ARK: Survival Evolved (and ARK: Survival Ascended) is a defensive turret plant you grow in a Large Crop Plot. Once mature, it shoots projectiles at nearby threats, acting like an automated base defense. To grow it successfully, you need the right seed, a Large Crop Plot filled with water and fertilizer, and enough patience to let it cycle through four growth stages over roughly 13 to 15 in-game days. To learn the same step-by-step approach for Species X crop plants, see our guide on how to grow stock plants. Get those basics right and you'll have a living, shooting perimeter defense on your hands.
Ark Plant Species X: How to Grow, Care, and Troubleshoot

Marcus Holloway
26 Apr 2026
What Plant Species X is (and where it fits in ARK)
Plant Species X is not a decorative or food-producing crop. It's a combat plant, essentially a biological turret that, once fully grown, targets and shoots spike projectiles at players, dinos, or creatures that wander into its range. Think of it as a living landmine with a line of sight. That's what makes it so popular for base defense, especially in PvP, but it's also why the setup requirements are a bit more specific than just dropping seeds in dirt.
You'll find Plant Species X available across several ARK maps. The seed drops most commonly from bushes in the Swamp biome and the Redwood biome on The Island. On other maps like Scorched Earth, Aberration, and Ragnarok, seed sources vary by biome equivalent, but the farming and care mechanics stay the same regardless of the map you're on. If you're playing on a modded server, double-check whether the mod changes the seed source or crop plot requirements, as some overhaul mods tweak growth rates or placement rules.
In ARK: Survival Ascended, the core mechanics carry over from Survival Evolved with some visual and performance updates, but the fundamental grow loop (seed, water, fertilizer, time) remains intact. The guidance in this article applies to both versions unless noted otherwise.
Getting set up: seeds, crop plots, and placement
Getting the seeds
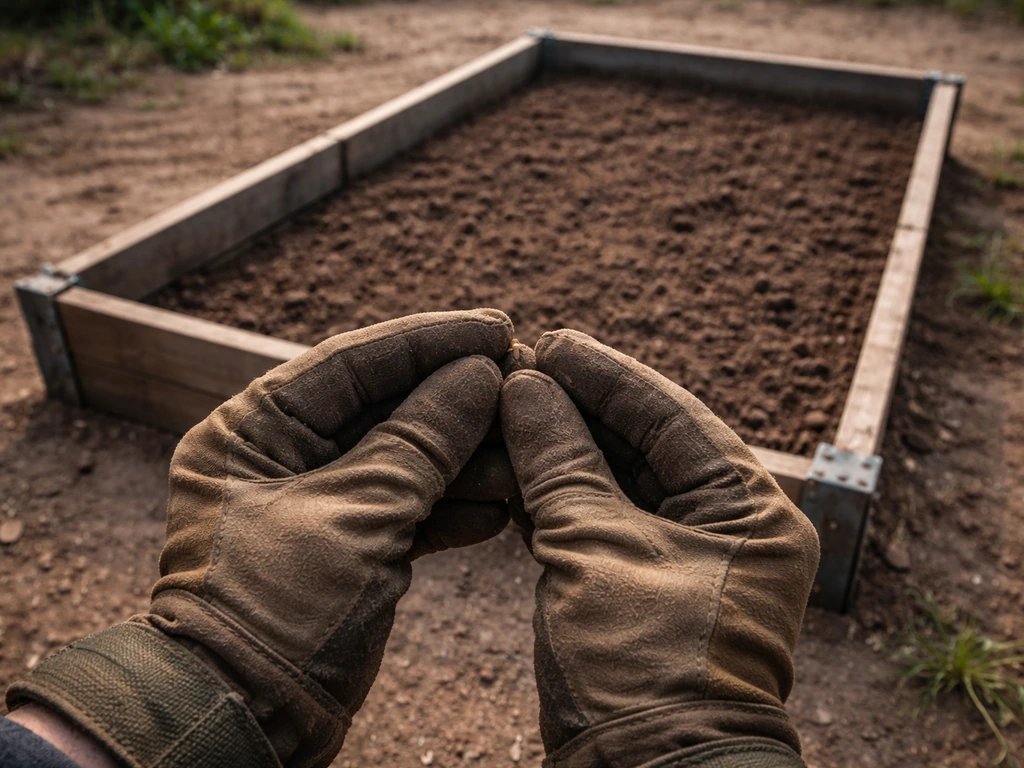
You need a Plant Species X Seed to start. The most reliable way to get one is by harvesting bushes in the Swamp or Redwood biome using your hands or a dino with a good berry-gathering yield (a Bronto or Triceratops works well). The seeds are rare drops, so harvest in bulk and expect to grab berries and other seeds before you find what you're after. According to the ARK Official Community Wiki's Biomes page, the Swamp biome seed drop includes rare seed acquisition for Plant Species X seeds are rare drops. Having a high-efficiency gatherer speeds this up considerably.
Once you have seeds, hold onto extras. Growing more than one plant at once is both practical and efficient since you'll already have the fertilizer and water infrastructure in place.
The right crop plot matters
You must use a Large Crop Plot. Plant Species X will not grow in a Small or Medium Crop Plot. The Large Crop Plot gives the plant the physical footprint it needs and is the only structure compatible with Species X, Y, and Z. Craft it using the appropriate engram and place it on a flat, stable surface, preferably inside or adjacent to your base walls so the mature plant's turret range covers your defensive perimeter.
Placement and location tips
Think about firing arcs before you place. A mature Plant Species X shoots in a roughly 180-degree forward arc, so align the plot so that arc faces outward toward likely attack vectors. Place multiple plots in a staggered line or arc to eliminate blind spots. Also keep in mind that other players and tames can be hit, so don't plant them in high-traffic areas of your own base without a plan to navigate safely.
Ideal growth conditions: light, temperature, and moisture
ARK's farming system abstracts light and temperature compared to real-world gardening, but moisture and nutrients are very concrete mechanics. Here's what actually matters in-game.
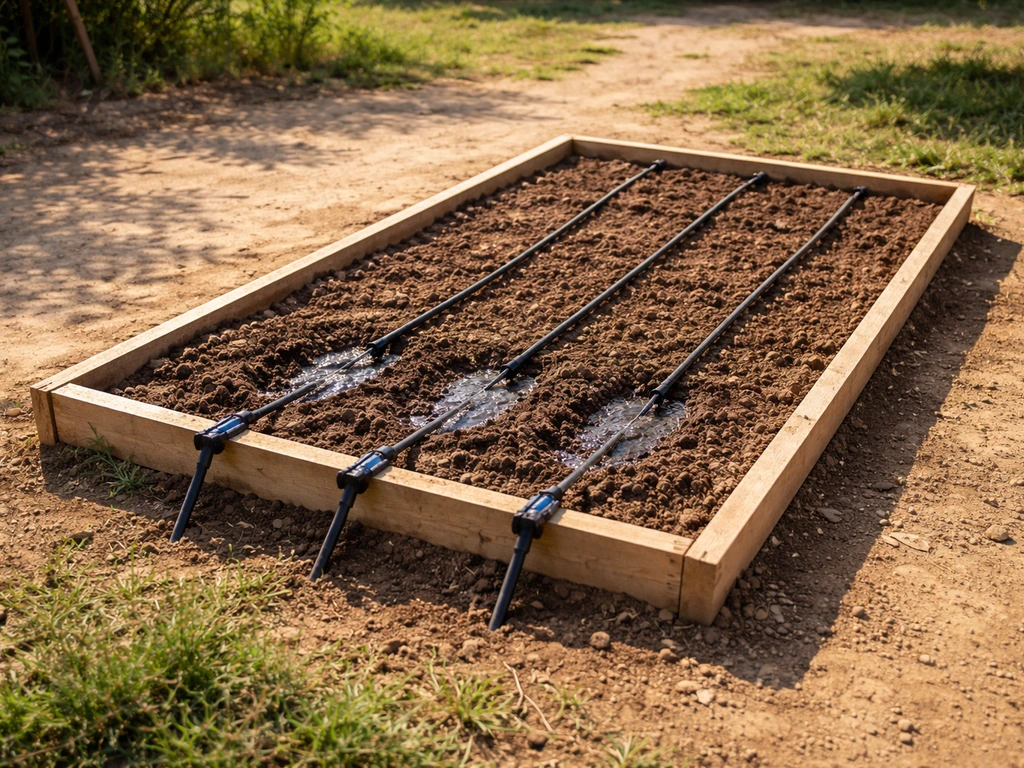
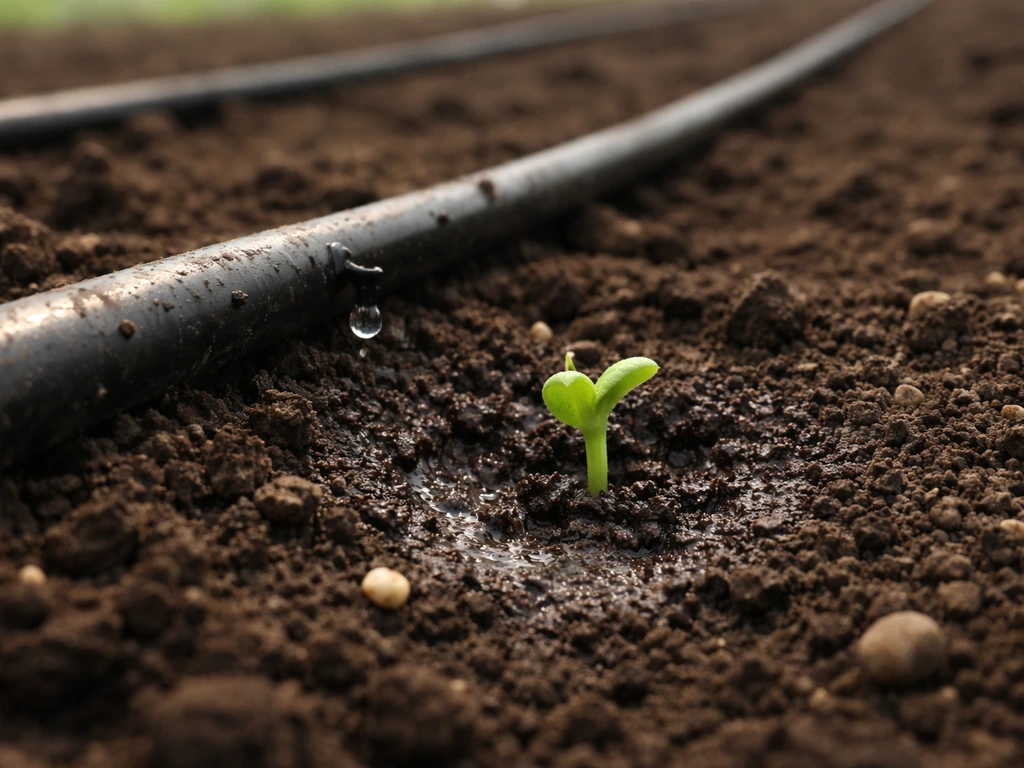
- Water: The crop plot needs water to progress past planting. Connect it to an irrigation pipe network fed by a Tap and a water source (reservoir, well, or direct river connection). Without water, the seed will sit in the plot and do nothing.
- Fertilizer/Nutrients: The plot also needs fertilizer to consume when the seed is planted and throughout growth. Feces (from dinos or humans), Fertilizer items, or Bonemeal Fertilizer all work. Keep the fertilizer value above zero or growth pauses.
- Light: Unlike real-world plants, there is no sunlight mechanic for crop plots in ARK. You can place them indoors or in shade without penalty. Covered placements are often smarter for defense.
- Temperature: There's no in-game temperature requirement for crop plot growth in base ARK. The plant grows regardless of whether you're in the snow biome or the desert, as long as water and fertilizer are present.
The key takeaway is that water and fertilizer are your only two real environmental levers. If either runs out, growth stalls. Keep both topped up and the plant will move through its stages on schedule.
Substrate and medium choices: what goes in the crop plot
In ARK, the 'substrate' is the combination of water and fertilizer inside the crop plot rather than a physical soil type. You don't choose between loam, sandy mix, or coco coir here. Instead, you manage two resources: the water level (shown as a percentage) and the fertilizer value (shown as a number). Both deplete over time and must be replenished.
For fertilizer, your best early-game options are dino feces placed directly into the crop plot inventory or crafted Fertilizer from the Compost Bin (using thatch and feces). As your base scales up, a steady supply of dino feces from a pen of herbivores like Phiomias gives you a near-passive fertilizer pipeline. Later, Industrial Fertilizer from a chemistry bench is the most nutrient-dense option and lasts much longer per unit.
For water, the cleanest setup is a full irrigation network: a water reservoir or direct river/ocean connection, pipes running to Flexible Intake or Tap, and a pipe outlet connected to your crop plot. Once the network is live, the plot stays topped up automatically. If you're early-game and can't build irrigation yet, you can manually fill the plot with a Waterskin or Water Jar as a stopgap, but this gets tedious fast.
| Fertilizer Source | How to Get It | Efficiency | Best For |
|---|---|---|---|
| Dino Feces | Collected from dino inventory | Low per unit | Early game, passive |
| Compost Bin Fertilizer | Thatch + feces in compost bin | Medium | Mid-game standard |
| Human Feces | Consume Stimberries/laxatives | Very low | Emergency only |
| Bonemeal Fertilizer | Craft from bones | Medium-high | Mid to late game |
| Industrial Fertilizer | Chemistry Bench | Very high per unit | Late game, scaling up |
Planting and your first-week care routine
Once your Large Crop Plot is placed, irrigated, and has fertilizer in its inventory, you're ready to plant. If you're playing Sims FreePlay instead of ARK, the exact steps differ, but the core idea is to keep the right resources supplied and let the plant finish its growth cycle before harvesting. Open the crop plot inventory and place your Plant Species X Seed inside. If water and fertilizer are both present, the seed will be consumed and the plot will shift to the 'Seeded' growth stage almost immediately, typically within about a minute of in-game time.
If the seed sits in the inventory and doesn't get consumed, that's your first diagnostic checkpoint: check whether water is actually registering (look for the water percentage in the plot's UI) and whether fertilizer is in the plot's inventory, not just nearby. Both need to be directly in or connected to the plot.
- Place the Large Crop Plot on a flat surface in your intended defense position.
- Connect irrigation: run a pipe from your water source to a crop plot connector, confirm the water percentage shows above 0%.
- Add fertilizer to the crop plot inventory (any type works to start).
- Place the Plant Species X Seed into the crop plot inventory.
- Confirm the plot switches to 'Seeded' status within about a minute.
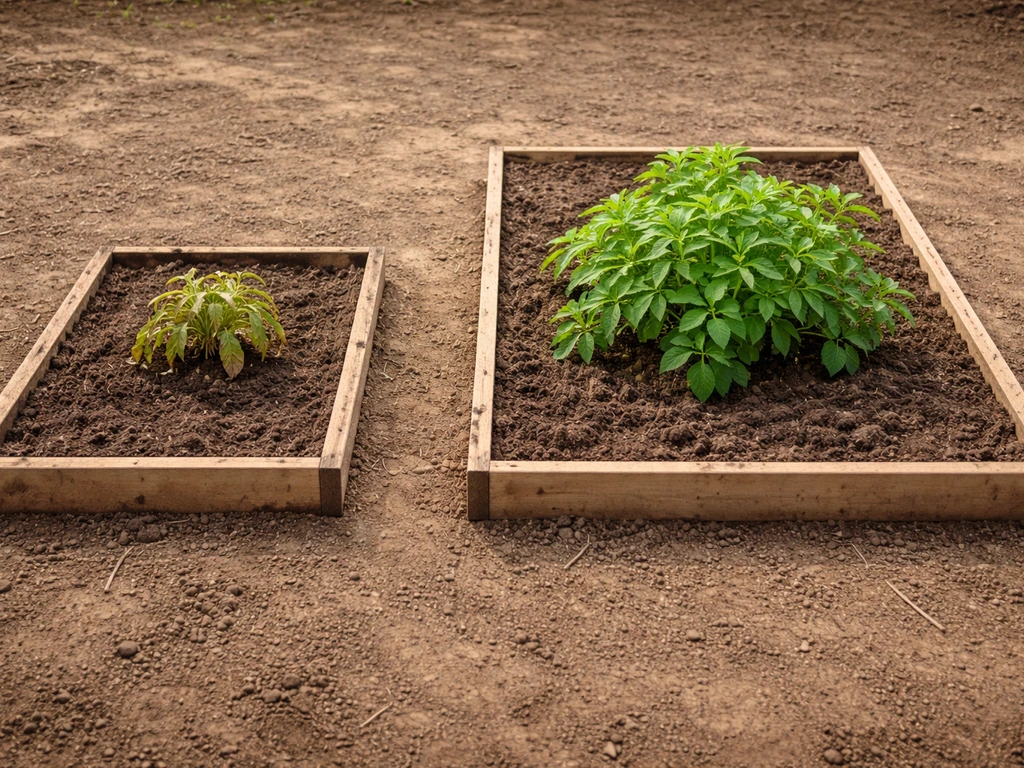
- Check back after roughly 7 in-game days: the plant should have moved from Seedling to Midling.
- Refill fertilizer and confirm water is still active at each check-in.
The growth stages and approximate timing look like this: Seeded happens almost instantly once conditions are met, then Seedling to Midling takes around 7 in-game days, Midling to Growthling takes about 5 in-game days, and Growthling to Fruitling (the fully mature, shooting stage) takes another 1 to 2 in-game days. If you also want the real-world schedule behind “when to plant throw and grow,” pair this ARK growth timeline with general planting timing for the seedlings stage. Total time from seed to turret is roughly 13 to 15 in-game days if conditions stay consistent throughout.
Ongoing care: watering, feeding, and maintenance
Once the plant hits Fruitling stage, it will start producing 'Plant Species X Trap' items and functioning as a turret. At this point, your care routine simplifies to three repeating tasks: keep water flowing, keep fertilizer stocked, and collect the trap items so the inventory doesn't fill up and block further production. Plant turrets will not shoot if no water is in the crop plot, and plant turrets consume fertilizer when firing, according to the patch notes.
- Water: If you're on a proper irrigation network, this is hands-off. Check the pipe connections after server restarts or updates, as disconnected pipes are a common gotcha.
- Fertilizer: Check the crop plot inventory every few in-game days. How fast it depletes depends on your server's fertilizer consumption rate settings. On official servers, a full stack of Fertilizer lasts several real-time days. On boosted servers, it might go faster or slower.
- Trap item collection: Open the inventory and remove stacked trap items regularly. A full inventory means the plant stops producing and, on some server configs, may stop shooting.
- Damage checks: The crop plot and plant can take damage from raids or wandering wildlife. Repair the plot with the required materials if it takes hits.
There's no pruning mechanic for Plant Species X in the traditional sense, but you do want to think about field of fire. If you've built walls or structures that now block the plant's arc, reposition the plot or adjust your base layout. The plant doesn't shoot through walls, so an obstructed turret is a wasted one.
Troubleshooting common growth problems
Most Plant Species X failures come down to a small handful of issues. Here's a quick 'if this, then that' breakdown to help you diagnose fast.
| Problem | Most Likely Cause | Fix |
|---|---|---|
| Seed won't get consumed / stays in inventory | No water connection or no fertilizer in the plot | Confirm irrigation is live and fertilizer is in the plot inventory, not just nearby |
| Growth has stalled mid-stage | Water ran out or fertilizer depleted | Refill both; growth will resume once both are active again |
| Plant is at Fruitling but not shooting | No nearby valid targets, or plot is set to passive | Check the plot's turret settings in the UI; set it to aggressive toward players/dinos as needed |
| Trap items stopped appearing | Plot inventory is full | Open inventory and remove items; production resumes when space opens up |
| Plot says it needs water but pipes are connected | Broken pipe segment or missing reservoir water | Walk the pipe network and look for disconnected segments; refill reservoir if needed |
| Plant was killed or destroyed | Raid damage, wild dino attack, or decay | Repair or rebuild the plot, replant a new seed; keep backup seeds in a chest nearby |
| Growth is much slower than expected | Server rate multipliers set low, or fertilizer quality is poor | Check your server's crop growth multiplier settings; switch to higher-quality fertilizer |
One beginner mistake I see a lot: placing the crop plot inside a fully enclosed room and wondering why it's not shooting anything. The plant needs line of sight to targets. If you wall it in completely, it can't fire. A common fix is placing plots along the inside of your outer wall with gaps or mesh panels that allow the plant's projectiles to exit while still being protected from direct melee attacks.
Harvest, outputs, and scaling up your plant defense
A mature Plant Species X produces Plant Species X Traps as its harvestable output. These traps are thrown like grenades and ensnare targets on impact, making them useful both as a base defense resource and as a handheld tool for solo players trying to immobilize dinos for taming. Collect them regularly from the plot inventory and store them for on-the-go use.
Scaling up means placing more Large Crop Plots in a coordinated layout. A common defensive configuration is a row of four to six plots along each vulnerable wall face of your base, staggered so their firing arcs overlap. Before you expand, make sure your irrigation network has the capacity to feed multiple plots without pressure dropping, and that your fertilizer supply (ideally a Phiomia pen with a Compost Bin nearby) can keep pace. Running out of fertilizer across a dozen plots at once during a raid is a bad time. If you are looking specifically for how to grow plants in teapot Genshin, the growth loop depends on managing the right inputs and timing so your plants keep producing.
If you want to get more out of your farming infrastructure, it's worth knowing that the same crop plot system supports Plant Species Y (a grenade-launcher type plant) and Plant Species Z (a light/stun plant), both requiring the same Large Crop Plot setup. Once you have your water and fertilizer pipeline running smoothly for Species X, branching into the others is mostly just a seed-sourcing exercise. The care routine is nearly identical.
For players who want to go deeper on general plant growing principles beyond ARK, the same core logic of matching a plant to its right medium, managing moisture and nutrients consistently, and scaling up your setup once you've got the basics dialed in applies whether you're growing in-game crops or real-world plants. If you want a step-by-step guide for real-world gardening too, check out how to plant and grow for the general process.
If you’re also trying to understand the real-world basics of plug plants, see our guide on plug plants how to grow as a related comparison for seedling care. If you also want the general, real-world version of how to grow, see our guide on how to plant and grow seedlings.
If you are asking how to grow plants in a teapot in Genshin Impact, the same idea of managing the right placement and resources applies how to grow plants in teapot genshin. If you want to go beyond ARK’s specific crop plants, these same fundamentals map well to learning how to plant and grow real-world seedlings too. If you want a practical plant how to grow guide inside ARK, focus on keeping the right water and fertilizer levels topped up so the plant can advance through its stages on schedule how to grow plants. The fundamentals transfer more than you'd expect.
FAQ
Can I grow Plant Species X in multiple crop plots at once, or does it share water and fertilizer between plots?
Each Large Crop Plot tracks its own water percentage and fertilizer value. If you run one irrigation line that feeds several plots, pressure or flow can affect how fast each plot refills, so verify every plot’s water meter stays high, and confirm fertilizer is placed directly into each plot’s inventory (not only in a nearby container).
What happens if I plant the seed but the plot never reaches the Fruitling (turret) stage?
Most stalls are caused by one of two missing inputs. The seed will not progress if water percent drops to zero or fertilizer runs out in that specific plot. A quick check is the plot UI, confirm the water meter is nonzero and the fertilizer number remains above zero, then wait for the next stage tick after replenishing.
Should I harvest Plant Species X Traps as soon as they’re produced, or can I leave them in the plot?
Leave them too long and the plot inventory can fill, which interrupts further trap production. The practical approach is to collect traps on a predictable interval (for example after each growth cycle milestone) and keep at least some free space in the plot inventory.
Is line of sight the only reason Plant Species X won’t shoot, or can placement still fail even outdoors?
Line of sight is the biggest factor, but placement can still waste output if an obstacle blocks the projectile path after it spawns. Test by placing one plot where its firing arc faces outward from your base wall, then confirm projectiles can travel unobstructed to the outside before scaling up to multiple plots.
Do I need to protect Plant Species X from enemies, or is it safe once it’s mature?
Even if it keeps firing, players and tames can still destroy the crop plot itself. If you are building in PvP, place the plots inside your protected perimeter (or use outer-wall coverage) so the plant cannot be reached and broken during a raid.
What is the safest way to avoid hitting my own tames and teammates with the turret arc?
Because it fires in a forward arc, avoid positioning plots so the arc overlaps your internal corridors where friendly movement happens. If you must defend a shared entrance, stagger plots so their arcs overlap toward the exterior approach, and keep a clear “friendly path” inside the base with fewer line-of-fire angles.
If the seed never gets consumed when I put it in the inventory, what should I check first?
Check three things in order: the plot must be a Large Crop Plot, the plot must show water available (water percent in the plot UI), and fertilizer must be in the same plot inventory. If those are correct, the seed should switch to the seeded stage quickly, usually within about a minute.
Do I have to use dino feces specifically, or can I rely on compost and crafted fertilizer only?
You can rely entirely on Compost Bin output and later Industrial Fertilizer, but early on it can be slower to scale if your thatch and feces input is limited. Using a small herbivore pen (like Phiomias) plus compost gives you a steady baseline, then you can upgrade to Industrial Fertilizer once your chemistry bench is ready.
How do I scale to many Plant Species X plots without running out of fertilizer mid-raid?
Treat fertilizer supply as your limiting resource, not the number of plots. Before placing more plots, estimate how long your current fertilizer stock lasts, then confirm your herbivore pen plus compost pipeline can replenish the extra fertilizer required across all plots during continuous growth and trap generation.
Does the growth timeline change on modded servers or with server settings?
Mods and custom server settings often alter growth speed, seed drop behavior, or crop plot rules. After you upgrade to a new mod pack or change settings, run a short test with one plot and time the seeded-to-midling progression, then extrapolate rather than assuming the standard 13 to 15 day total.