Plug plants are one of the easiest ways to get a head start on growing almost anything, and if you have a batch sitting in front of you right now, the good news is: you can get them into their new home today. With the right timing and care, you can build the same kind of reliable results using this guidance on how to plant and grow.
Plug Plants How to Grow: Step-by-Step Setup and Care

Marcus Holloway
19 Apr 2026
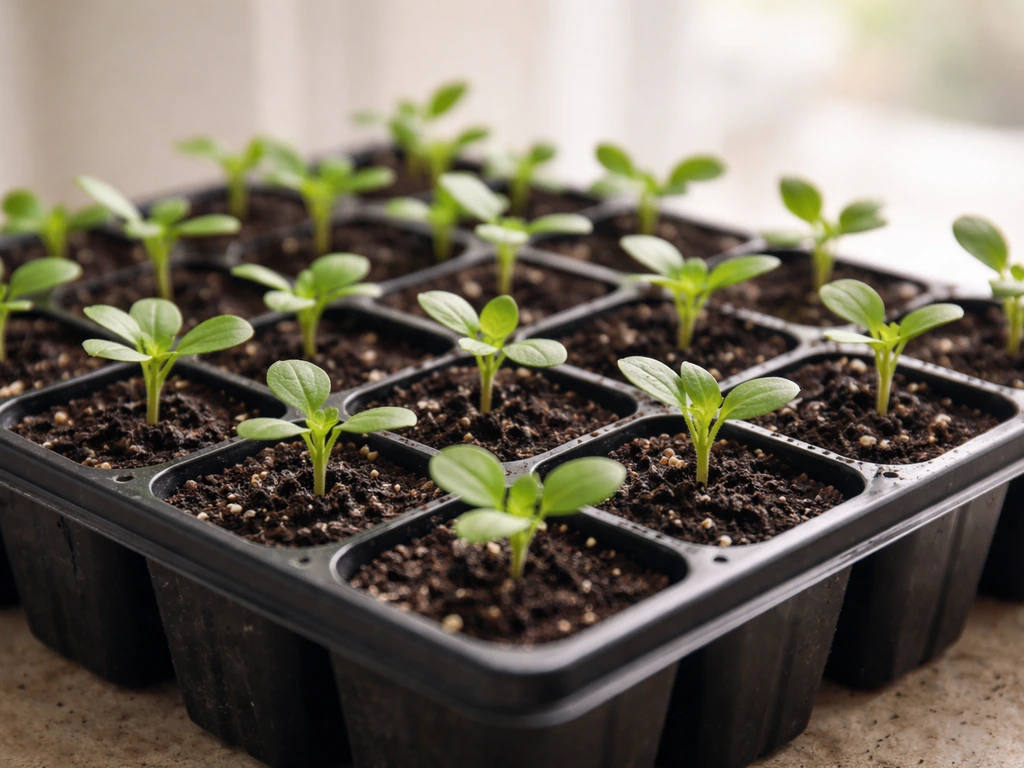
A plug plant is simply a young seedling that was germinated and raised in a small individual cell inside a larger tray. Each cell holds one plant with its own compact, self-contained root ball. That intact root ball is the whole point. It means when you move the plant, you are not ripping roots out of shared soil.
The roots travel with the plant, settled inside their little cone of growing media, which is why plug plants typically establish faster and suffer far less shock than bare-root transplants or seeds you start yourself.
What plug plants actually are and why growers love them
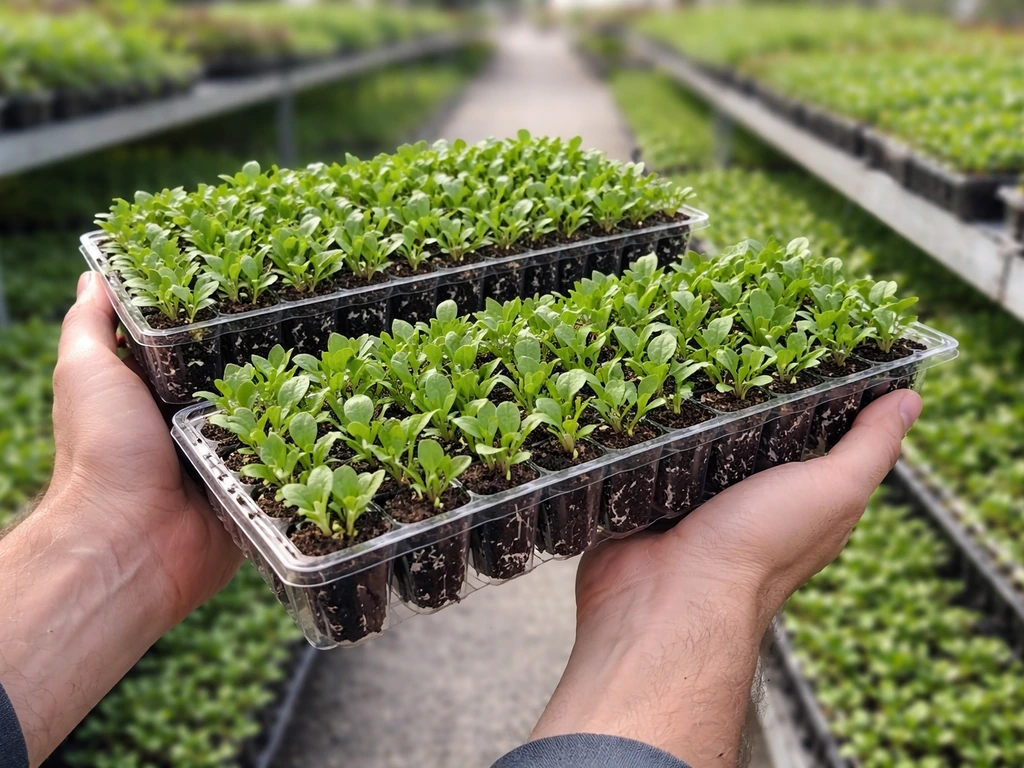
Picture a miniature ice-cube tray, but each compartment holds a seedling instead of water. That is basically a plug tray. They come in standardized sizes ranging from around 50 cells all the way up to 500-plus cells per tray, with each cell holding a single plant in a uniform growing medium. Commercial nurseries use them because they produce consistent, uniform seedlings, reduce seed waste, and make large-scale handling much simpler. For home growers, the benefit is more personal: you skip the fussiest phase of growing (germination and early seedling care) and start with something that is already alive, rooted, and ready to grow.
One design detail worth knowing: plug cells are open at the bottom, which causes what is called air pruning. When a root tip reaches the open base and hits the air, it stops elongating and instead branches back into the plug. This gives plug plants a bushy, fibrous root system rather than one long tap root that can circle and strangle itself. It is a small thing, but it sets the plant up for much stronger establishment once you transplant it.
Compared with growing from seed yourself, plugs save time, reduce variability, and give you a much higher success rate per plant. Compared with bare-root plants, they lose far less moisture during transplant because the root zone is already wrapped in media. Research on strawberry production, for example, found that plug plants can save significant water during establishment and show stronger early survival than bare-root alternatives, even when final yields take a season to equalize. That survival advantage applies broadly: fewer plugs are needed to hit your target plant count because the losses are smaller.
How to pick the right plug plants before you even get home
Not all plugs are created equal, and the decisions you make at the point of purchase matter more than most people realize. Start with the plant species. If you are growing specific ark plant species x, focus on its light, soil, and blank" rel="noopener noreferrer">watering needs before you set up your plug schedule Start with the plant species.
If you are growing a specific variety of ark plant species x, follow tailored warmth, light, and moisture needs so the plugs can establish correctly ark plant species x how to grow. Annuals like petunias, tomatoes, and basil are the most forgiving plugs for beginners because they grow fast and respond well to transplanting. Once you have the right plugs, you can apply the same care basics to how to grow stock plants effectively.
Perennials and brassicas are a little slower to establish but still straightforward. If you are applying these same timing and care habits in Sims FreePlay, check our guide on how to grow and harvest a plant on Sims FreePlay for the best results. If you are buying online or by mail, check the dispatch schedule against your last frost date, because plugs delivered too early and then left outdoors will not survive a frost.
When you are looking at plugs in person, here is what a healthy one looks like: the leaves are a consistent, species-appropriate green with no yellowing at the base, the stem is stocky rather than long and leggy, the root ball holds its shape when you gently tip it out of the cell, and there is no visible mold, slime, or fungus gnats flying around the tray. Reject anything where the roots are brown and mushy, the leaves have obvious spots or stippling, or the stem collapses when you hold it. A compact, slightly firm plug with visible white root tips is exactly what you want.
Timing is the other major variable. When you are planning your schedule, knowing when to plant and grow plugs and transplants based on your conditions can make a big difference. Most spring bedding plugs are dispatched from late March through May in temperate climates. Tender plants like tomatoes, peppers, and basil should not go outside until nighttime temperatures are reliably above 10 degrees Celsius (50 degrees Fahrenheit). Hardy annuals and brassicas can handle a light frost once established but not at plug stage. If your plugs arrive before conditions are right, pot them on into small individual containers and keep them somewhere bright and frost-free until the window opens.
Setting up your growing environment before you plant
The most common mistake people make with plug plants is shoving them into inadequate soil and hoping for the best. The growing medium really matters here because plugs start small and the first few weeks are all about root expansion. Use a good-quality, peat-free multipurpose compost or a dedicated seed and potting mix. Avoid using heavy garden soil straight into containers because it compacts, drains poorly, and can harbor pathogens that overwhelm a young plant. If you want to improve drainage, add about 20 to 30 percent perlite by volume. This is especially important in containers where waterlogging is a common killer.
Container size matters too. Do not go too big too fast. A plug coming out of a 50-cell tray has a root ball roughly the size of a large thimble. Dropping it into a huge pot means a lot of moist, root-free compost sitting around the roots, which is a perfect environment for rot.
The right first step is to move plugs into individual pots around 7 to 9 cm (about 3 inches) in diameter, or into module trays with cells around that size, and grow them on for a week or two before moving up again. For outdoor beds, spacing depends on the plant, but as a general rule, give bedding plants 20 to 30 cm apart and larger vegetables like tomatoes 50 to 60 cm.
Check your light setup before planting. Plug plants need bright, indirect light for the first few days, then full light appropriate for their species. A south-facing windowsill works for most seedlings indoors. If you are using grow lights, position them 20 to 30 cm (8 to 12 inches) above the plugs and run them for 14 to 16 hours per day for vegetables and fast-growing annuals.
Prepare your containers or bed by filling with moistened compost, leveling it off, and making your planting holes before the plugs even come out of their tray. Having everything ready means the roots spend as little time exposed to air as possible. Once your containers and compost are ready, follow a simple plant how to grow routine to give your plug plants the best chance to take off.
Step-by-step: transplanting plug plants for the fastest root-up
Follow these steps in order and you will give your plugs the best possible start. The whole process takes about 10 to 15 minutes per tray once you have your setup ready.
- Water your plug tray about an hour before transplanting. The plugs should be evenly moist but not dripping. If the surface looks muddy or waterlogged, wait another hour before handling them.
- Pre-moisten your potting compost by mixing in water before filling your containers. It should feel like a wrung-out sponge: damp throughout, not wet enough to drip when squeezed.
- Fill your containers or prepare your bed and make the planting holes first. Use a pencil, dibber, or your finger to create a hole slightly larger than the plug root ball.
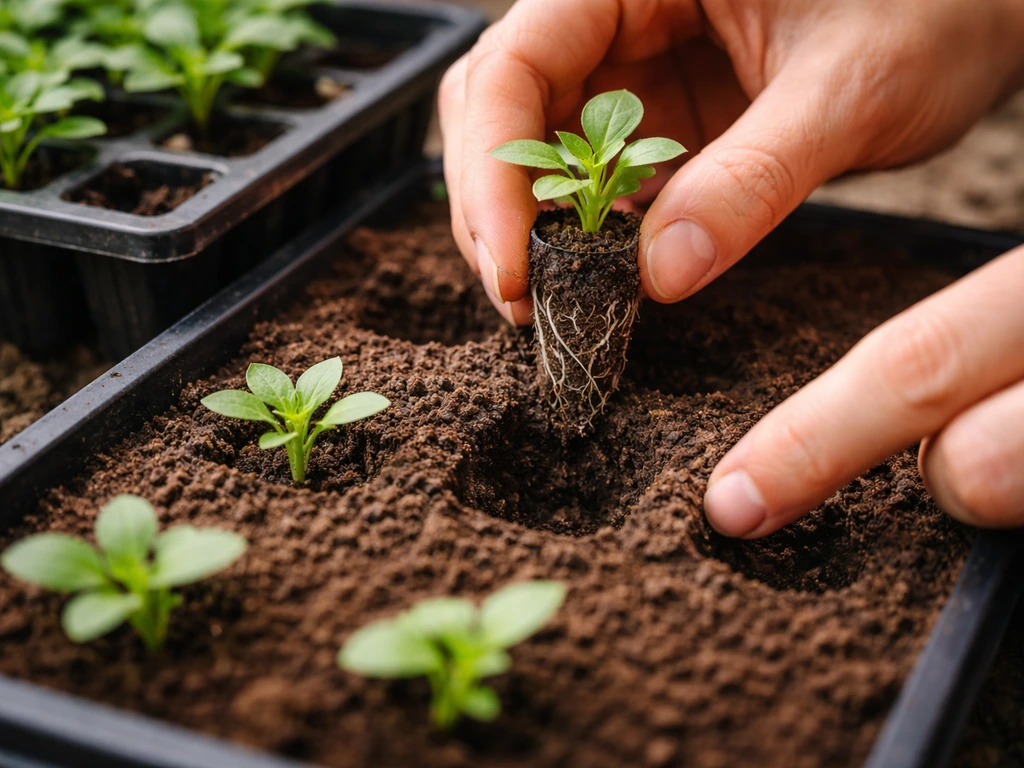
- To remove a plug from the tray, press gently upward from the bottom of the cell with your finger or a pencil. Do not pull from the stem. The plug should slide out cleanly with its root ball intact.
- Place the plug into the hole so that the top of the root ball sits at the same level as the surrounding compost surface. Planting too deep can cause stem rot; too shallow leaves roots exposed to drying out.
- Firm the compost gently around the root ball using two fingers. You want good contact between the plug media and the surrounding compost, but do not compress so hard that you destroy the structure.
- Water in slowly and directly into the soil around the plug, not onto the leaves or stem. The Iowa State University Extension specifically recommends watering slowly into the planting hole and avoiding overhead spraying at this stage, because it can displace the plug media and disturb the root ball.
- Label your plants and note the date. This sounds obvious but becomes essential when you are troubleshooting in two weeks and can not remember what you planted.
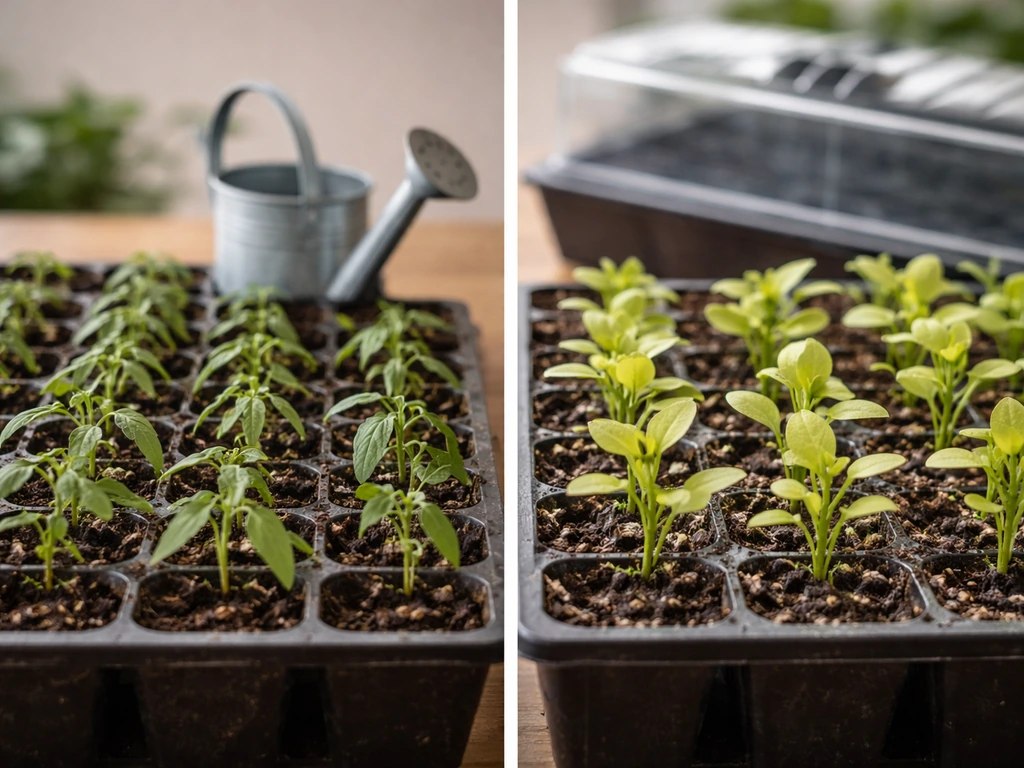
After transplanting, move your newly potted plugs into a sheltered spot with bright but indirect light for the first 48 to 72 hours. Hardening off means gradually exposing transplants to outdoor conditions by placing seedlings in a shaded, protected spot on warm days and bringing them in at night, increasing sun each day.
This brief acclimatization period lets the roots start to extend into the surrounding media before you expose the plant to full sun or outdoor conditions. UMN Extension also emphasizes gradually hardening off seedlings before moving them outdoors to help prevent leaf scorch from sun or wind expose the plant to full sun or outdoor conditions.
Think of it like resting after a big move before you start reorganizing the house. Even a short recovery window dramatically improves establishment speed.
Aftercare checklist: the first two to three weeks matter most
This is the phase where most people either win or lose with plug plants. The root system needs to extend from the plug media into the surrounding compost, and almost everything you do in the first few weeks is in service of that one goal.
- Watering: Check moisture daily by pushing your finger about 2 cm into the compost near the plug. Water when it feels dry at that depth. Keep in mind that until the roots extend outward, the plant can only access moisture within the original plug root ball, so that small zone must stay consistently moist without becoming waterlogged.
- Light: Give most plug plants at least 6 hours of direct or strong indirect light per day. Leggy, pale growth in the first week almost always means insufficient light, not a nutrient problem.
- Temperature: Most tender plugs prefer daytime temperatures of 15 to 20 degrees Celsius (60 to 68 degrees Fahrenheit) and nighttime temperatures no lower than 10 degrees Celsius (50 degrees Fahrenheit). Hardy plugs like brassicas and sweet peas can tolerate cooler conditions but still benefit from protection against hard frost in their first weeks post-transplant.
- Hardening off (for plugs going outdoors): If your plugs have been grown in a greenhouse or indoors and you are moving them outside, they need a gradual transition. Start by placing them outside in a sheltered spot for 1 to 2 hours on day one, then increase exposure by 1 to 2 hours per day over 7 to 10 days. This acclimates the leaves to stronger UV light and wind without triggering stress wilting.
- Feeding: Wait at least 10 to 14 days after transplanting before applying any fertilizer. The root system needs to stabilize first. Once established, a balanced liquid feed diluted to half strength works well for most plants.
- Checking progress: Healthy plug plants will show new leaf growth within 7 to 14 days of transplanting. That visible growth is a reliable sign the roots are extending and the plant has accepted its new environment.
When things go wrong: quick fixes for common plug plant problems
Even when you do everything right, plug plants can hit problems in their first few weeks. Most issues have clear visual symptoms and straightforward fixes. Here is how to read what your plants are telling you.
| Symptom | Most Likely Cause | Quick Fix |
|---|---|---|
| Wilting shortly after transplant (soil is moist) | Transplant shock, roots not yet extended | Move to shade for 48 hours, mist leaves lightly once, do not add more water |
| Wilting with dry, pulling-away compost | Underwatering | Water slowly and thoroughly into the root zone, check again in 30 minutes |
| Yellowing lower leaves within days of planting | Overwatering or waterlogged roots | Stop watering, check drainage, let compost dry out before watering again |
| Long, floppy stems reaching toward the light | Insufficient light (etiolation) | Move to a brighter spot or lower your grow light to 20 cm above the plant |
| Slow or no growth after 2 weeks | Root establishment delay, possibly cold temperature or compact soil | Check soil temperature (aim for at least 12°C), loosen any compacted surface compost |
| Tiny flies around the soil surface | Fungus gnats (larvae damage roots in wet compost) | Let the top 3 cm of compost dry out between waterings; use sticky yellow traps |
| White crusty deposits on soil surface | Mineral salt buildup from overfeeding or hard water | Flush the compost with plain water twice, then ease off on fertilizer |
| Scorched or bleached leaf edges after moving outside | Sunscald from too-rapid hardening off | Move back to partial shade and restart a slower hardening-off schedule |
| Holes in leaves, sticky residue, or distorted new growth | Aphids, caterpillars, or whitefly | Remove pests by hand, use a diluted insecticidal soap spray, isolate affected plants |
Transplant shock deserves a specific mention because it worries people the most. It is completely normal for plugs to look a bit sad for the first 24 to 72 hours after planting. The plant is redirecting energy from leaf production into root extension. As long as the compost is not waterlogged and the temperature is reasonable, the plant almost always recovers on its own. Resist the urge to water more or move the plant repeatedly, both of which make the situation worse. Give it three days before you start troubleshooting.
Best practices that separate thriving plugs from struggling ones
Once your plugs are established, a few ongoing habits make a noticeable difference in how well they grow. On fertilizing: most multipurpose composts contain nutrients for about four to six weeks. After that, plants in containers need supplemental feeding. A balanced liquid fertilizer (look for roughly equal N-P-K numbers, like a 5-5-5 or 7-7-7) applied every two weeks at half the recommended dose is less likely to cause nutrient burn than a full-dose monthly application. For flowering plants, switch to a higher-potassium feed (tomato feed works brilliantly for this) once you see the first flower buds forming.
Spacing is one of the most underestimated factors for beginner growers. Crowded plants compete for light, air circulation drops and fungal disease increases, and root systems compete for water and nutrients. It feels wasteful to leave space between small plugs, but that space is exactly what lets them grow into the plants they are supposed to be. If you have extra plugs and limited space, pot the extras into their own containers as backups rather than squeezing everything together.
A useful habit is to do a quick visual check of your plug plants at the same time every day, ideally when you water. You are looking for new leaf growth as a positive sign and checking for any of the symptoms in the table above. Catching problems early, especially pests and overwatering, makes a huge difference to outcomes. Most plug plant failures that feel sudden were actually building up over several days of unnoticed stress.
If you want to expand beyond plug plants, the principles here connect directly to broader transplanting and growing skills. Understanding how to support a plant through its early root establishment phase, whether you are working with plugs, rooted cuttings, or seedlings you started yourself, is one of the most transferable skills in growing. If you want more species-specific steps for how to grow plant x after transplanting, use this as your next guide: how to grow plant x. If you want more step-by-step guidance on how to grow stock plants after you start them, see how to grow stock plants how to grow plant x.
Once you have a few successful plug transplants under your belt, more advanced methods like growing plants in water, hydroponics, or unusual containers become much more approachable because you already understand what roots need to thrive. If you want to grow plants in a teapot in Genshin, the key is matching the right plant type and keeping it growing under proper conditions.
Your quick-reference success checklist
- Plugs are healthy: stocky stems, no yellowing, white root tips visible, root ball holds its shape
- Timing is right: no frost risk for tender plants, conditions match species requirements
- Growing medium is a good-quality multipurpose or potting compost, moistened before use
- Container size is proportional: first pot should be only slightly larger than the plug root ball
- Planting holes are made before plugs come out of the tray
- Plugs are removed by pushing from the base, not pulling from the stem
- Planted at the correct depth: root ball top level with surrounding compost surface
- Watered in slowly and directly into the soil, not sprayed overhead
- Moved to bright but indirect light for the first 48 to 72 hours
- Outdoor plugs are being hardened off gradually over 7 to 10 days
- No fertilizer applied in the first 10 to 14 days post-transplant
- New leaf growth visible within 14 days confirms successful establishment
FAQ
Can I reuse the plug trays and the growing media from old plugs?
You can reuse trays, but not the same plug media. Old media can compact, lose structure, and carry pathogens or fungus gnats. Rinse trays well and sanitize if possible, then start with fresh seed and potting mix or multipurpose compost for new plugs.
How long can plug plants stay out of their tray before I transplant them?
Plan to transplant as soon as possible. If roots are exposed to air, they dry quickly and establishment slows. If you must pause, keep the plugs shaded and lightly covered, and set them into prepared moistened compost before continuing.
Should I break up the root ball or tease roots when planting plugs?
No. Keep the root ball intact so the plug media and its root hairs stay undisturbed. Teasing or breaking often resets root growth and increases transplant stress, especially in the first week.
What’s the best way to water plug plants right after transplanting?
Water gently and thoroughly to settle compost around the plug, then avoid watering again until the top layer starts to dry slightly. Waterlogging is a common killer, because young roots are still expanding into media and cannot drink fast.
My plugs look fine, but they stop growing after potting. What usually causes this?
Most often it is temperature or light being too low, not lack of fertilizer. Check that nights are above the species threshold, and that seedlings get bright light or adequate grow light height and daily duration. Also confirm the compost is not staying constantly wet.
Is it normal for the leaves to yellow at the base after transplanting?
Mild yellowing can happen as the plant reallocates energy to roots, especially within the first 24 to 72 hours. If yellowing spreads upward, leaves become soft or translucent, or stems weaken, treat it as an overwatering or nutrient imbalance signal rather than normal shock.
Do I need to harden off plug plants before planting outdoors?
Usually yes, even if the species tolerates cool weather. Move plants gradually from sheltered bright conditions to stronger sun and outdoor wind over several days. Skipping hardening often causes leaf scorch and delays root establishment.
Can I plant plug plants directly into garden soil without potting on first?
You can, but only if conditions are already warm enough and the soil drains well. If your plugs arrive early or nights are still cool, pot them on into 7 to 9 cm containers first so they keep growing instead of stalling in cold, wet beds.
What if my plugs have visible mold or fungus gnats in the tray?
Fungus and pests often point to excess moisture and poor airflow. Remove dead or heavily affected material, increase ventilation, and adjust watering to keep the surface from staying damp. For fungus gnats, let the top layer dry more between waterings and consider a targeted control method if the infestation persists.
How much fertilizer should I use on plug plants in their first weeks?
Skip heavy feeding early on. Since many compost mixes include nutrients for several weeks, start with a balanced liquid fertilizer only after that window, and apply at half strength every couple of weeks for containers to reduce burn risk.
Why do plugs sometimes get leggy even though I followed the timing?
Legginess usually comes from insufficient light or lights too far away. Ensure seedlings receive bright light, and if using grow lights, keep them close enough and run them long enough (typical setups are 14 to 16 hours daily). Also avoid letting plants lean toward a single window.
What spacing should I use if I’m transplanting into a raised bed?
Use the same species spacing as in the ground, but account for airflow in the tighter environment. If the bed is in a humid area or you expect heavy foliage, err on the wider end of the spacing guidance to reduce fungal issues.
Can I fertilize or water differently if the plug species is a brassica or perennial?
Yes, but the biggest early difference is pace. Brassicas and many perennials establish more slowly, so prioritize consistent moisture that is not soggy and make sure light is strong. Fertilize later than with fast bedding annuals, and avoid pushing growth before roots have spread.
How do I know if I should pot up again versus planting outside?
Pot up if the root ball is filling the cell and plants look crowded, or if they are waiting for a weather window. Plant outside when night temperatures and soil conditions match the plant’s tolerance and the plug has started producing steady new growth, not just surviving.