Growing a plant successfully comes down to three things: picking the right plant for your actual conditions, getting it into the ground (or pot, or water) correctly, and then following through with consistent care. That's it. Every other detail is just a variation on those three steps. Whether you're working with a sunny backyard, a dim apartment corner, or a mason jar on a windowsill, the same logic applies, match the plant to the environment, give it a proper start, and keep up with the basics. Here's how to do all of that, from scratch.
How to Plant and Grow: Step-by-Step Guide for Beginners

Marcus Holloway
2 Apr 2026
Choosing the right plant for your space
Before you buy a single seed or seedling, look at your space honestly. How many hours of direct sunlight does it actually get? Walk around at noon and at 3pm. Be honest about what you see. Most people overestimate their light. A room with one north-facing window gets maybe 2 hours of usable light, that's a very different situation from a south-facing patio that bakes in sun all day.
For outdoor growing, leafy greens and herbs like lettuce, spinach, kale, parsley, and chives will do fine with 3 to 6 hours of partial shade. Fruiting vegetables, tomatoes, peppers, cucumbers, squash, need 6 to 8 hours of full, direct sun. If your garden bed gets less than 4 hours of sunlight, you're working in partial-shade territory, and your plant choices should reflect that. Trying to grow tomatoes in a shady spot is a setup for frustration, not food.
For indoor growing, low-light tolerant plants are your best friends if windows are limited. The ZZ plant (Zamioculcas zamiifolia) is one of the most forgiving options out there, it handles low light and actually prefers to dry out between waterings, which makes it perfect for busy people or anyone who's killed plants by overwatering before. If you want something flowering and easygoing outdoors, catmint (Nepeta x faassenii) is a beginner-friendly full-sun option that's also drought-tolerant once established.
A good rule of thumb: match the plant's natural habitat to what you can realistically offer. A cactus in a low-light bathroom will slowly decline. A fern in a hot, sunny windowsill will crisp up. You can bend these rules a little, but not a lot. How to grow plant X for your specific conditions starts with this honest environment assessment, skip it and everything else gets harder.
Planting basics: soil, containers, timing, and depth
Soil and growing media
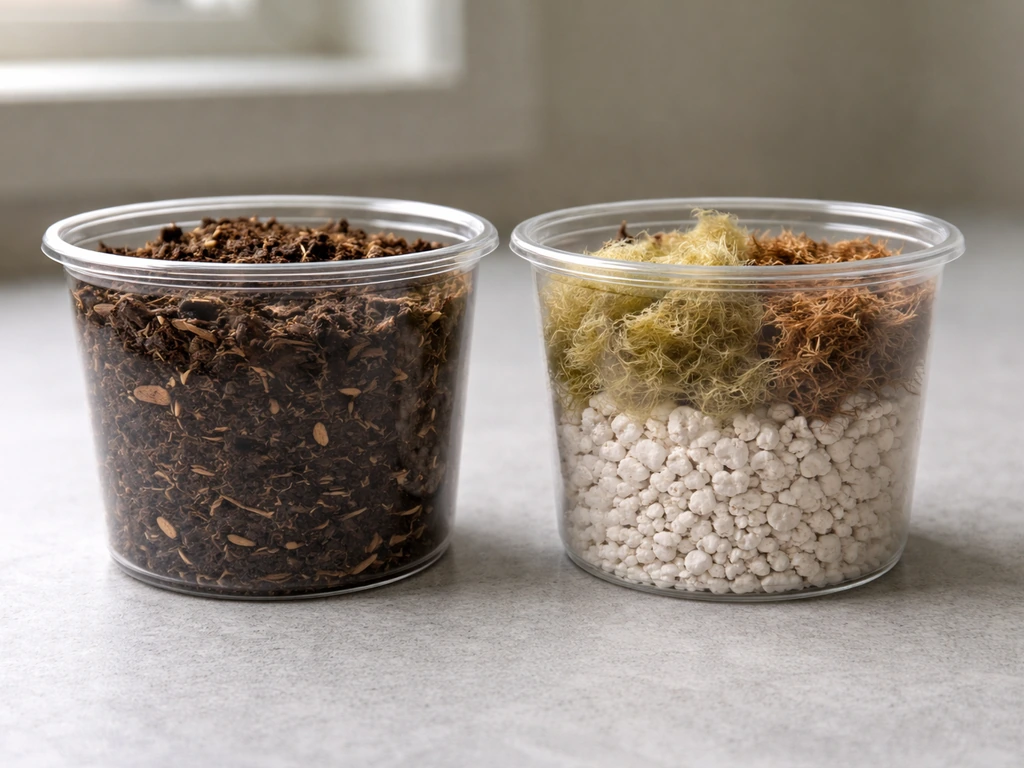
Soil isn't just dirt, it's the life-support system for your plant's roots. For most container plants and raised beds, a good potting mix (not garden soil) is the right starting point. Potting mix is lighter, drains better, and won't compact the way garden soil does in a pot. For vegetables in the ground, amend your native soil with compost before planting to improve drainage and nutrient content. A simple test: grab a handful of moist soil and squeeze it. If it holds a loose ball and crumbles when you poke it, the texture is about right. If it smears like clay or falls apart like sand, it needs work.
For soil-less setups like hydroponics, you'll use media like perlite, rockwool, clay pebbles, or coco coir instead. These materials anchor roots and hold moisture without drowning them. The goal is the same as good soil: support, oxygen, and water access for the roots.
Containers vs in-ground
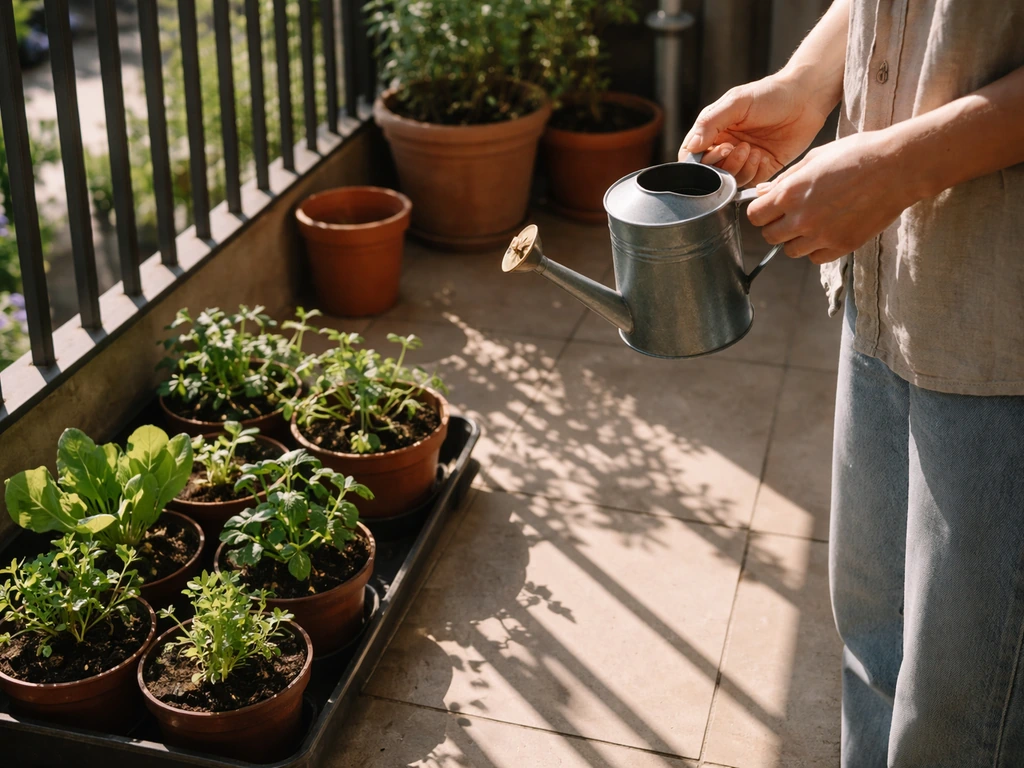
Containers give you flexibility, you can move plants to chase sunlight or dodge frost, but they dry out faster and need more frequent feeding. In-ground planting gives roots more room and access to natural soil ecosystems, but you're locked into that spot. For beginners, containers are forgiving because you control the soil quality from the start. Whatever container you use, drainage holes are non-negotiable. Standing water at the bottom of a pot is the number one killer of houseplants.
Timing
Timing matters most for outdoor growing. Most vegetables and annual flowers are planted after the last frost date for your region. Check your local frost dates before you start, planting too early and losing seedlings to a late freeze is a beginner mistake that's totally avoidable. For indoor plants, timing is much more flexible, though growth tends to slow in winter due to lower light levels, so spring and early summer are ideal for starting new plants.
Planting depth
A reliable general rule: plant seeds at a depth of roughly two to three times their diameter. A tiny basil seed gets barely covered; a large bean seed goes in about an inch deep. For transplants, you're aiming to match the soil level they were already growing at, with a few exceptions (tomatoes can be buried deeper since they root along their stems, which is actually beneficial). Too shallow and roots dry out; too deep and seedlings exhaust themselves trying to reach light.
Step-by-step: sowing seeds vs transplanting seedlings
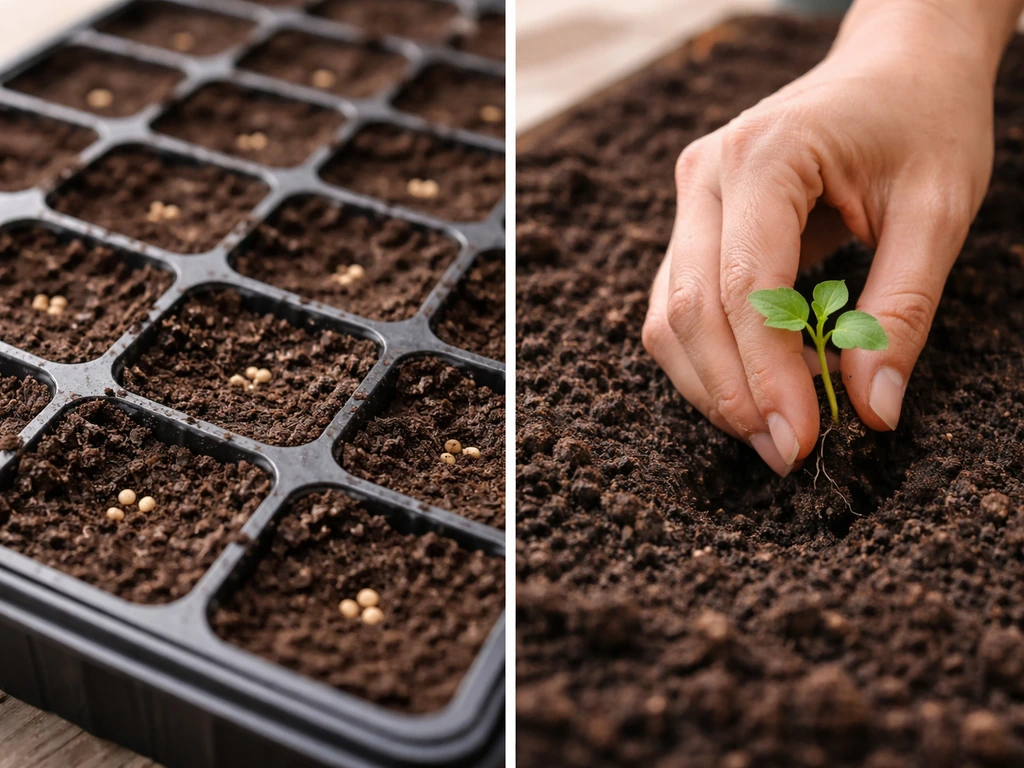
Sowing seeds
- Fill your container or seed tray with moist (not soaking) seed-starting mix.
- Make a small indent at the correct depth for your seed type.
- Place 1 to 2 seeds per cell or spot, then cover lightly with mix.
- Water gently — a spray bottle works better than a watering can here to avoid displacing seeds.
- Cover with a humidity dome or plastic wrap to retain moisture until germination.
- Place in a warm spot (most seeds germinate best between 65°F and 75°F / 18°C to 24°C).
- Once seedlings emerge and show their first true leaves, remove the cover and move to brighter light.
- Thin to one seedling per cell once they're about 2 inches tall, keeping the strongest one.
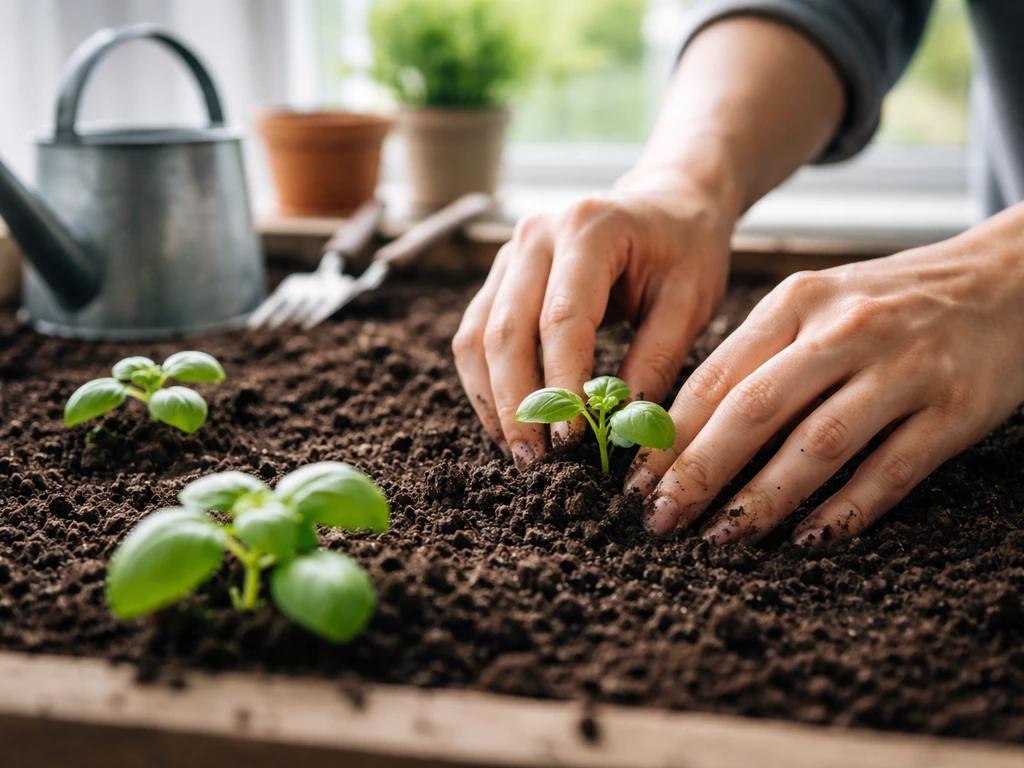
Transplanting seedlings
- Water the seedling thoroughly an hour before transplanting — moist root balls hold together better.
- Dig a hole slightly larger than the root ball in your prepared soil or container.
- Gently remove the seedling from its nursery pot, loosening any circling roots with your fingers.
- Set the plant in the hole at the right depth (matching its previous soil line for most plants).
- Fill in around the roots, pressing soil lightly to eliminate air pockets — don't pack it hard.
- Water deeply right after planting to settle the soil and make first contact with roots.
- If transplanting outdoors, shelter new plants from intense afternoon sun for a few days while they adjust.
If you're starting from plug plants, those small pre-rooted seedlings sold in trays, the process is even simpler. Plug plants and how to grow them on into healthy specimens is mostly about getting them settled quickly into good soil and keeping moisture consistent in those first two weeks.
Light, watering, temperature, and fertilizing schedules
Light
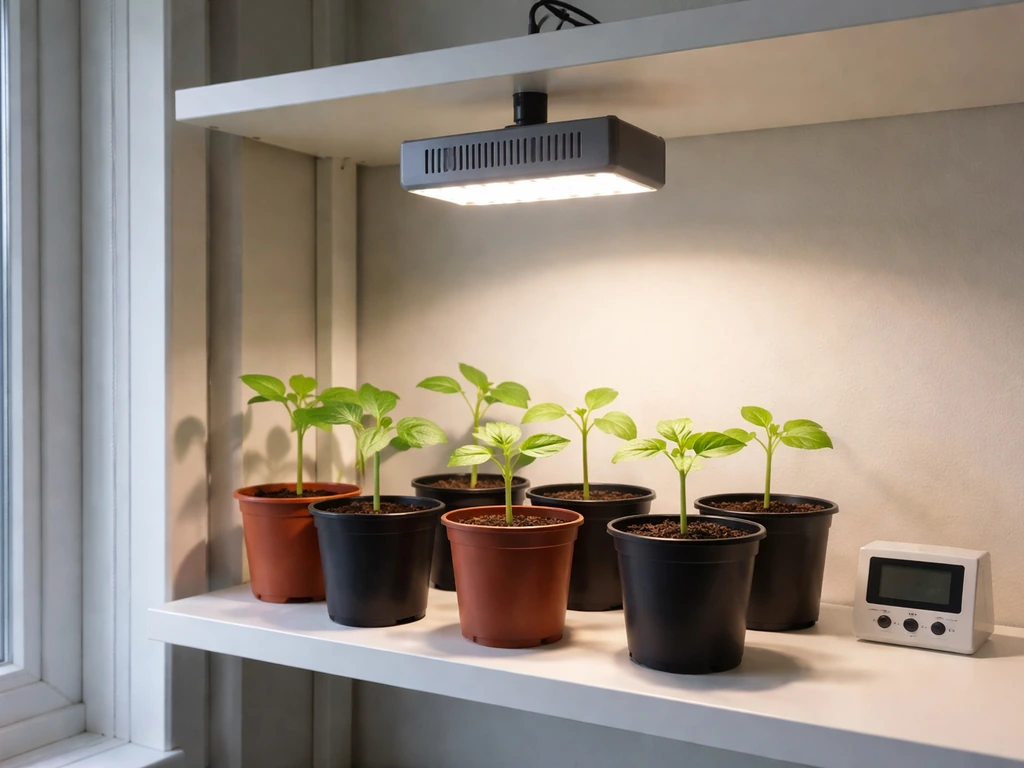
Light is the engine that drives everything. Without enough of it, plants can't photosynthesize efficiently, and no amount of water or fertilizer compensates for that. Indoors, most houseplants labeled as 'medium light' need at least a few feet from a bright window. 'Low light' plants like ZZ plants and pothos can survive further back, but they'll grow slowly. If your space genuinely lacks natural light, a basic grow light on a 14-to-16-hour timer will do the job for most herbs and leafy greens, you don't need an elaborate setup.
Watering
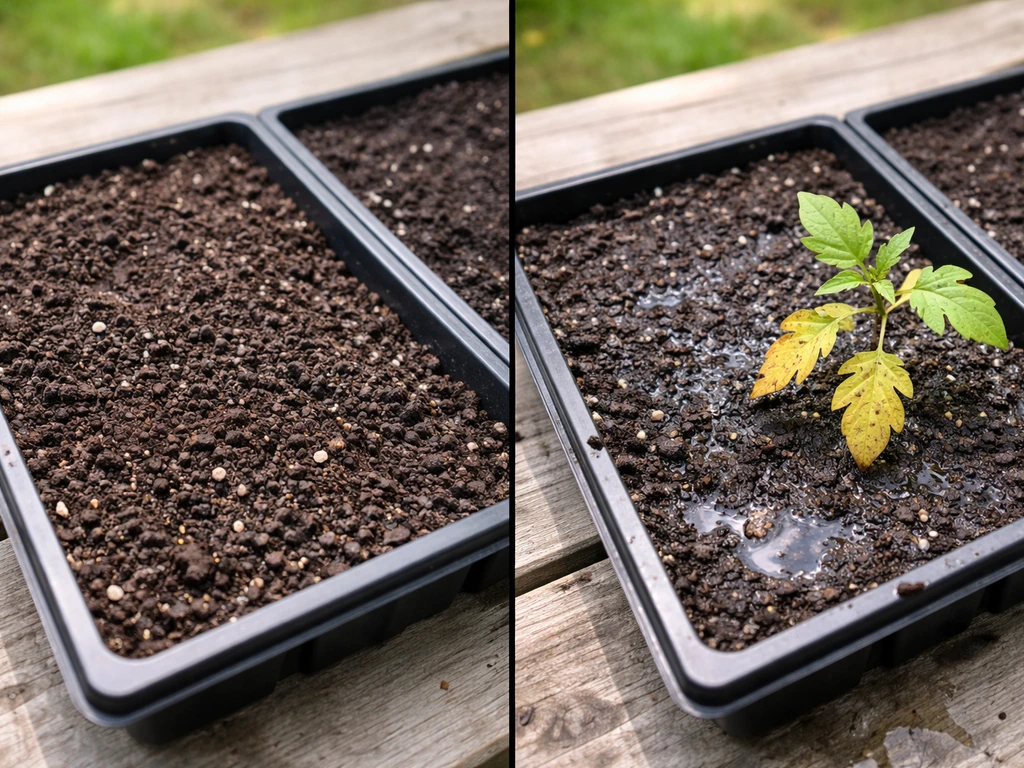
Overwatering is the most common way people kill plants, and it's not about adding too much water at once, it's about watering again before the plant actually needs it. The fix is simple: check before you water. Stick your finger about an inch into the soil. If it's still moist, wait. If it's dry at that depth, water thoroughly until it drains from the bottom. For succulents and drought-tolerant plants, let the soil dry out almost completely between waterings. For moisture-loving tropicals, keep the top inch consistently moist but never waterlogged.
Signs of overwatering: yellowing leaves (especially lower ones), soggy soil, mushy stems at the base, or a faint musty smell from the pot. Signs of underwatering: crispy leaf edges, wilting that doesn't recover after watering (at first), and very dry, pulling-away-from-the-pot-edges soil.
Temperature
Most common houseplants and vegetables thrive between 60°F and 80°F (15°C to 27°C). For many plants, UGA Cooperative Extension recommends a general seed-germination temperature range of 65°F to 75°F between 60°F and 80°F. Cold drafts, air conditioning vents, and heating radiators are all stress points, keep plants away from them. Outdoors, pay attention to both frost dates and heat waves; extreme heat can cause bolting in leafy greens (they shoot up and go bitter) just as surely as a frost kills tender seedlings.
Fertilizing
Think of fertilizer as a supplement, not a fix-all. Healthy soil with good compost won't need much extra feeding. For container plants, nutrients wash out with every watering, so a light feeding every 2 to 4 weeks during the growing season (spring through early fall) keeps things topped up. Use a balanced liquid fertilizer (look for roughly equal N-P-K numbers, like 10-10-10) for most plants. Flowering and fruiting plants benefit from a lower-nitrogen, higher-phosphorus formula once they start blooming. Don't fertilize newly transplanted plants for the first 2 to 3 weeks, let them settle first. Over-fertilizing causes salt buildup in the soil and can actually burn roots.
Care after planting: pruning, training, pests, and common problems
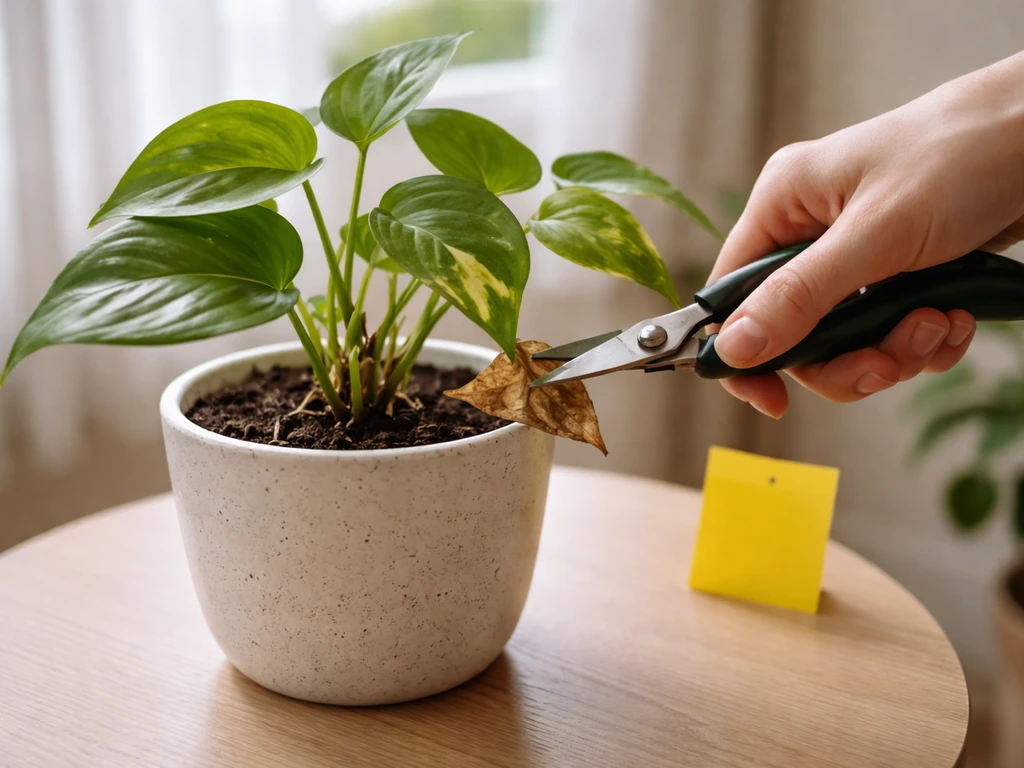
Once your plant is growing, the work shifts from setup to maintenance. For most houseplants, that means occasional pruning to remove dead or damaged leaves, which redirects the plant's energy into new growth. For vining plants like pothos or beans, you can train them along a trellis, stake, or shelf for a neater look or better light exposure. Pinching back the growing tips of herbs like basil encourages bushy growth and delays flowering, which is exactly what you want if you're harvesting for the kitchen.
Pests are an inevitability, not a failure. The most common indoor culprits are fungus gnats (tiny flies around the soil, caused by consistently wet topsoil), spider mites (fine webbing on leaves, usually in dry conditions), and mealybugs (white cottony clusters at leaf joints). For most of these, a diluted neem oil spray applied every 5 to 7 days handles the problem without harsh chemicals. Outdoors, aphids and caterpillars are common, a strong jet of water knocks aphids off, and hand-picking caterpillars works fine for small garden beds.
Yellowing leaves are the universal distress signal, but they have multiple causes: overwatering, underwatering, low light, nutrient deficiency, or just natural aging of lower leaves. Before panicking, run through your basic care checklist. In most cases, yellowing leaves on an otherwise healthy plant is just the plant shedding older growth, completely normal.
Growing in different environments: indoor, outdoor, hydroponics, water, and terrariums
The same plant can often be grown in multiple ways, and your environment shapes which approach makes the most sense. Here's a quick breakdown of how the basics shift across different setups.
| Growing Method | Best For | Key Difference from Soil | Common Beginner Pitfall |
|---|---|---|---|
| Indoor soil/pots | Houseplants, herbs, small vegetables | Needs drainage holes; soil dries faster | Overwatering |
| Outdoor in-ground | Vegetables, perennials, large plants | Richer ecosystem, more root space | Planting too early before last frost |
| Hydroponics | Leafy greens, herbs, fast growers | Nutrients delivered in water; no soil | pH and nutrient imbalance |
| Growing in water | Cuttings, lucky bamboo, bulbs | No growing media needed; roots submerged | Letting water go stagnant; algae buildup |
| Terrarium | Tropical or desert plants in closed/open glass | Humidity-controlled microclimate | Overcrowding or wrong plant mix |
For hydroponic growing, nutrients that normally come from soil are dissolved directly into the water your plant roots sit in. You'll need to monitor pH (aim for 5.5 to 6.5 for most crops) and top up nutrient solution regularly. It sounds technical but there are simple starter kits that handle most of the guesswork. The payoff is faster growth and higher yields in a smaller footprint, leafy greens grown hydroponically can be ready to harvest in half the time compared to soil.
Growing plants in water (propagation or semi-aquatic growing) is one of the simplest methods for beginners. Cuttings from pothos, coleus, or impatiens will root in a glass of water within a few weeks. Change the water every 5 to 7 days to prevent stagnation and algae, and keep the container out of direct sun to slow algae growth further. Once roots are 2 to 3 inches long, you can move them into soil or keep them in water long-term with a diluted liquid fertilizer.
Terrarium growing creates a self-contained microclimate inside glass. Closed terrariums work well for moisture-loving tropical plants like ferns, mosses, and nerve plants because the condensation cycle keeps humidity high with almost no watering. Open terrariums suit succulents and cacti, which need airflow and drier conditions. The key mistake to avoid is mixing high-humidity and low-humidity plants in the same container, they'll fight each other's needs.
It's worth noting that growing environments don't have to be serious or conventional. Even game-inspired growing challenges, like learning the quirky mechanics of how to grow plants in a teapot in Genshin or figuring out ark plant species X and how to grow them in a survival game context, often get people curious about real-world plant biology in a fun, low-stakes way. That curiosity is worth following.
Troubleshooting and your 'what to do next' checklist
If your plant isn't thriving, go through this checklist in order. Most problems come back to one of these basics, and diagnosing systematically beats guessing every time.
- Check the soil moisture: stick your finger an inch in. Wet when it shouldn't be? Hold off watering. Bone dry for days? Water thoroughly now.
- Assess the light: count the actual hours of direct or bright indirect light the plant receives. If it's under 2 hours for a sun-loving plant, move it.
- Look at the roots: if the plant is in a pot, check if roots are circling out of drainage holes — it may need repotting into a container one size up.
- Check for pests: inspect both sides of leaves and at stem joints for insects, webbing, or sticky residue.
- Evaluate the temperature and airflow: is the plant near a vent, drafty window, or radiator? Move it if so.
- Review your fertilizing: if you haven't fed the plant in months and it's been growing actively, apply a balanced liquid fertilizer. If you've been feeding heavily and see brown leaf tips, flush the soil with plain water.
- Consider the season: slower growth in winter is normal — don't overcompensate by watering or feeding more.
- Look at the whole picture: one yellow leaf is usually not a crisis. Five yellow leaves on a plant that was fine last week means something changed — trace back what did.
When you're ready to go deeper on a specific plant or situation, it helps to dig into species-specific guidance. Understanding plant growing needs at the individual level, rather than just general rules, is what separates plants that survive from plants that genuinely thrive. And if you're working with a seasonal planting schedule, knowing when to plant throw and grow varieties can make timing decisions much clearer.
If you enjoy the full growing loop, planting, tending, and harvesting, then exploring how to grow and harvest a plant on Sims Freeplay compares to the real process is actually a surprisingly relatable way to understand growth cycles. And for growers looking to scale up or multiply their best plants, learning about how to grow stock plants for cuttings and propagation is a natural next step once you've got the basics down.
The biggest thing I'd tell anyone just starting out: the plants you kill teach you more than the ones that coast along effortlessly. Every failed plant is a data point. You learn what too much water looks like, what real sun stress does to leaves, and what a root-bound plant feels like when you unpot it. Give yourself permission to make those mistakes, learn from them, and keep going. Most plants are more resilient than people think, and so are most growers.
FAQ
I don’t know how much sun my space really gets, how do I choose without guessing?
Start with a short “fit test” before you commit, measure your direct sun hours and also your brightest indoor corner. If you cannot supply the plant’s minimum light, choose a lower-light species or plan to use a grow light, because changing watering and fertilizer will not fix weak light.
Can I plant in the same spot year-round if I move the pot or rotate it?
Yes, but do it deliberately: rotate the pot every week so one side does not continuously stretch, and expect slower growth in winter even with a healthy schedule. If leaves are leaning toward the window, that is your cue to move the plant closer or add supplemental light.
How do I avoid overwatering when I’m watering on a schedule?
Do not “calendar water.” Instead, water based on how the soil feels at the root zone, as you described (check about an inch down, or use the weight of the pot as a proxy once you learn it). Overwatering often happens because the top looks dry while deeper soil stays wet.
My plant is yellowing and the soil stays wet, what should I do first?
If you can, improve the pot’s drainage first: confirm there are drainage holes and use a potting mix that drains well. When a plant is already suffering, let the soil dry more than usual, remove any standing water, and avoid fertilizing until new growth appears, because salts and nutrients can worsen root stress.
Is the seed planting depth always the same, or are there exceptions?
For seeds, follow the general 2 to 3 times depth rule, but also check whether your seed is one of the “light germinators” that needs light to sprout. For those, you barely cover the seed and keep the surface evenly moist until germination.
Can I bury any transplant deeper like tomatoes to help them root?
When transplanting, match the current soil level and avoid burying tender stems or crown tissue. If you bury tomatoes deeper, that is a specific benefit for that crop, while most other transplants can rot if buried too deeply.
My plant wilts after I water, is that underwatering or something else?
If the top inch is dry but the soil clumps and feels cool or heavy, wait longer, that often means deeper moisture is still present. If the plant droops and does not perk up after watering, it may actually be root stress from staying wet too long or from salt buildup, so check drainage and consider a partial flush if you have fertilized.
Can I mix plants with different watering needs in a terrarium?
Do not combine a “wet-loving” plant and a “dry-loving” plant in the same closed container. In terrariums, closed systems recycle moisture, so choose ferns and mosses for closed lids, and use open terrariums for succulents and cacti with better airflow.
Is soil-less growing harder than growing in soil for beginners?
Use a simple decision rule: if it needs consistent moisture at the root level, use a media and setup designed for that (soil or coco with careful watering). If it needs drying between waterings, ensure the container and mix can dry quickly. Hydroponics and soil-less media can work for many plants, but the pH and nutrient management adds a layer that beginners should learn gradually.
How do I know if I’m fertilizing too much?
If you are using fertilizer, start light and only during active growth. Overfeeding is usually worse than slight underfeeding, because salt buildup can burn roots; flush the pot with clean water if you see crusty salts on the soil surface or if growth stalls soon after feeding.
Can I keep cuttings in water indefinitely, or should I move them to soil?
Yes, you can propagate in water, but long-term success depends on giving enough light and eventually transitioning to soil or adding an appropriate diluted fertilizer. Also keep the cutting out of direct sun to reduce algae, and change water at least every 5 to 7 days to prevent oxygen depletion.
What pest should I look for, and what common mistake causes re-infestation?
Treat pests as an identification problem first, then choose the gentlest control that matches the pest. Fungus gnats usually mean the top layer is staying too wet, spider mites often show up when conditions are dry and hot, and mealybugs tend to hide in leaf joints, so you may need to wipe stems and repeat treatments consistently.
When something goes wrong, what’s the fastest way to diagnose the real cause?
If you find yourself troubleshooting, run the checklist in a tight order: light first, drainage and watering second, temperature and drafts third, then nutrients, then pests. For example, most “nutrient deficiency” claims in beginners turn out to be low light or irregular watering.