Growing any plant well comes down to the same core process: correctly identify what you have, match it to the right environment, and stay consistent with a handful of simple routines. This guide walks you through every step, from pinning down your plant's exact identity to building a care schedule you can actually stick to. Whether you're starting from seed, a cutting, or a division, and whether you're working with a windowsill pot or a full hydroponic setup, this is the practical roadmap you need.
How to Grow Plant X: Step-by-Step Care Guide

Marcus Holloway
12 Apr 2026
First, correctly identify your plant
Before anything else, you need to know exactly what you're growing. "Plant X" is a placeholder, and a vague ID will send your care routine in completely the wrong direction. Common names are notoriously unreliable: 'spider plant' refers to at least a dozen unrelated species depending on the country you're in. Get the scientific name (genus and species) if you can.
Two reliable databases for this are the International Plant Names Index (IPNI), which tracks the correct spelling, authorship, and publication history of plant names, and Kew's Plants of the World Online (POWO), which is especially useful for confirming whether a name is currently accepted or has been reclassified. When searching POWO, use exact spelling and correct capitalization, and try the "name:" prefix to narrow results quickly.
POWO (Plants of the World Online) is Kew Science’s global plant name resource, and it includes evidence for how plant names are accepted or treated as synonyms in each name record.
Once you have the scientific name, note the variety or cultivar if there is one, because that single distinction often changes everything. A standard Ficus benjamina and a variegated cultivar like 'Starlight' have meaningfully different light needs. Check the plant's native range next, because that tells you whether it evolved in tropical rainforest shade, semi-arid scrubland, or temperate woodland, and that native context is the single best guide to the conditions you need to recreate.
If you're working through a broader planting project and want a solid general reference for matching a plant to its ideal conditions, how to plant and grow covers the fundamentals in detail. For anything involving outdoor placement, check your USDA Plant Hardiness Zone: the map divides the country into 10°F zones (numbered 1 through 13) based on the average annual extreme minimum winter temperature over a 30-year period, which tells you whether your plant can survive winter outdoors where you live.
Light, temperature, and watering: get these right first
These three variables are where most plants are won or lost. Get them right and the plant will often tolerate mediocre soil or an imperfect fertilizer schedule. Get them wrong and nothing else you do will fix it.
Light
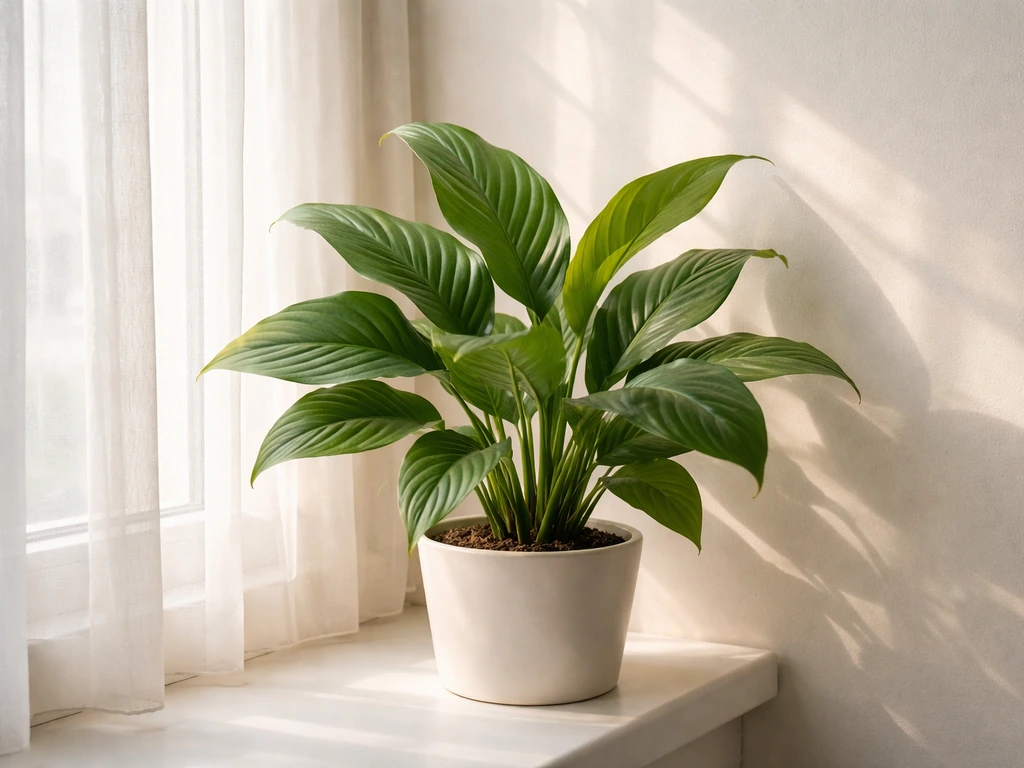
Match light intensity to what the plant experiences in the wild. Tropical foliage plants that live under a canopy (think pothos, calathea, most ferns) want bright indirect light, which means within 3 to 5 feet of an east or north-facing window, or back from a south-facing one. Succulents, cacti, and most herbs need direct sun for at least 4 to 6 hours a day. Low light intensity is one of the most common contributors to houseplant decline, so if your space is genuinely dim, use a full-spectrum grow light set 6 to 12 inches above the plant for 12 to 16 hours a day.
Temperature
Most houseplants are comfortable between 60°F and 80°F (15°C to 27°C), which maps neatly onto normal home temperatures. The danger zones are cold drafts from windows in winter and hot blasts from heating vents. Check both, because a plant sitting two inches from a drafty single-pane window in January is experiencing temperatures that are 10 to 15°F colder than the rest of the room. Tropical plants become stressed below 55°F and can sustain tissue damage near 45°F.
Watering
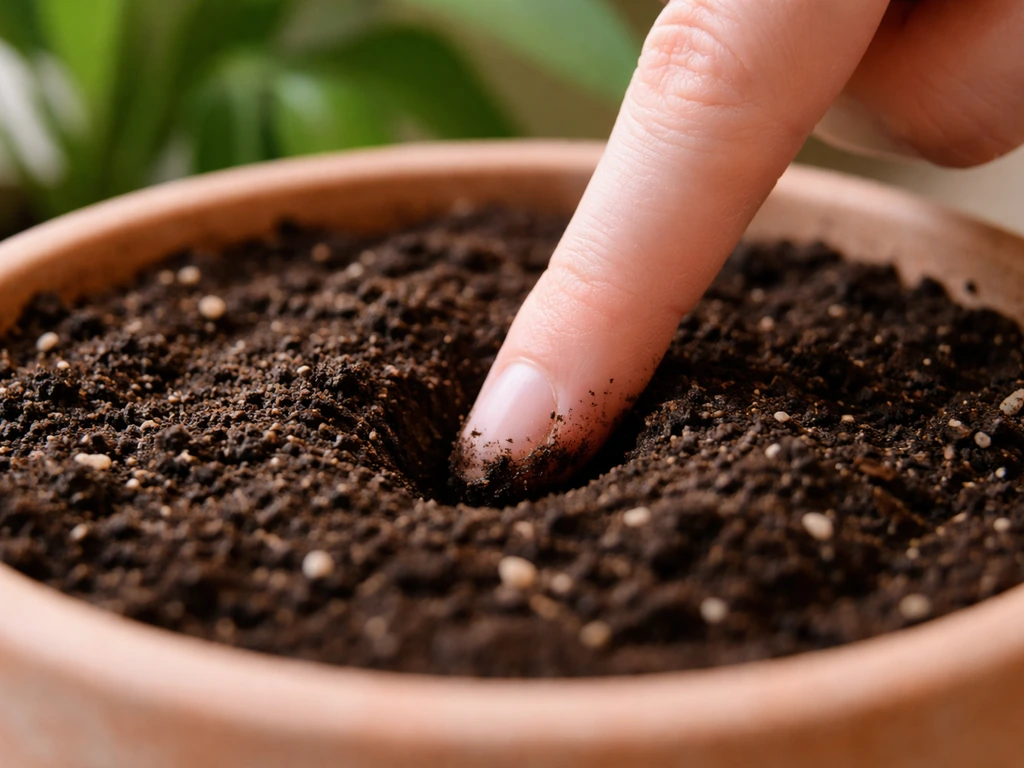
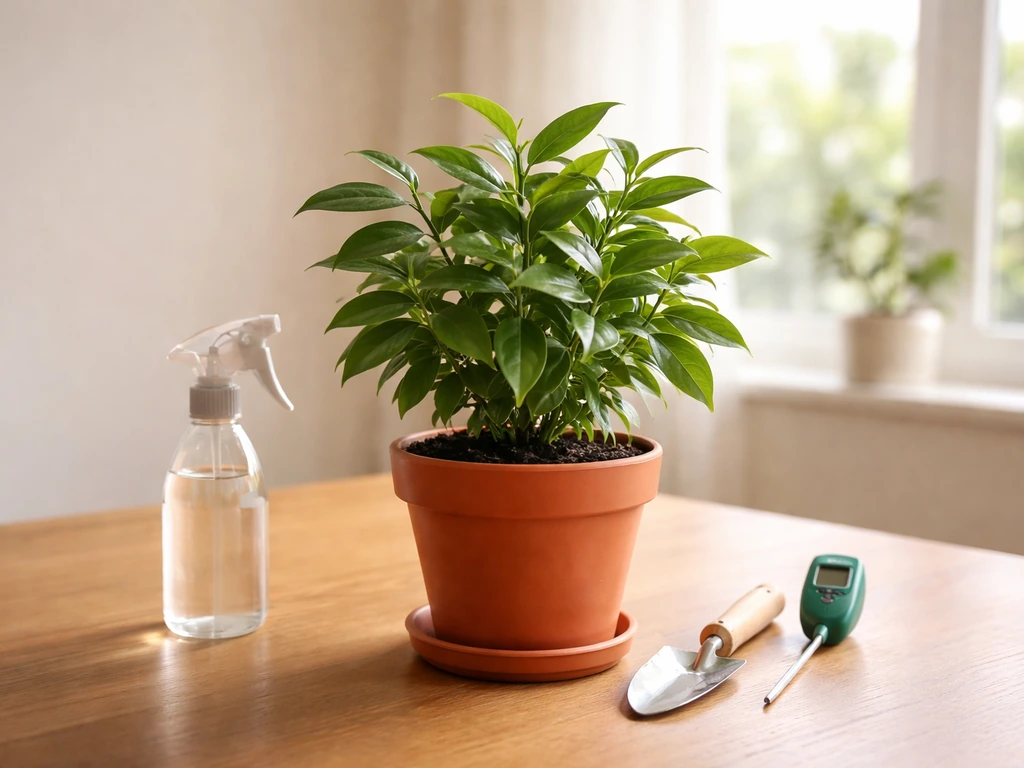
The single most useful rule: water the plant, not the schedule. The finger-test is genuinely reliable. Push your finger about an inch into the soil; if it feels moist, wait. For drought-tolerant plants (succulents, cacti, snake plants), let the top 2 to 3 inches dry out before watering. For moisture-loving plants (ferns, peace lilies), water when the top half-inch is dry. Bottom watering (setting the pot in a tray of water for 20 to 30 minutes) encourages deep root growth and reduces the risk of overwatering the crown, which is especially useful for rosette-forming plants. Always use a pot with drainage holes.
Picking the right growing medium
Soil, water, hydroponics, and terrariums each have genuine strengths and the right choice depends on your plant and your lifestyle. Here's how they compare.
| Growing Method | Best For | Key Advantage | Main Limitation |
|---|---|---|---|
| Soil (potting mix) | Most houseplants, herbs, edibles | Familiar, forgiving, widely available | Overwatering risk; can harbor pests |
| Water growing | Easy-root plants (pothos, coleus, impatiens) | Zero soil mess, root progress is visible | Limited nutrient supply without additives; not long-term for most plants |
| Hydroponics | Fast-growing crops, herbs, leafy greens | Precise nutrient control, faster growth | Setup cost, learning curve, power dependent |
| Terrarium | High-humidity tropicals (ferns, mosses, small aroids) | Stable humidity, low watering frequency | Not suitable for succulents or large plants |
For most beginners, a well-draining potting mix is the right starting point. A standard mix of 60% potting soil, 20% perlite, and 20% orchid bark works for the majority of tropical houseplants and balances moisture retention with aeration. If you're curious about unconventional containers, it's worth knowing that growing plants in a teapot and similar novelty vessels can absolutely work as long as drainage is managed carefully.
For hydroponics at home, the simplest realistic systems are kratky (passive, no pump), deep water culture (DWC), and nutrient film technique (NFT). Kratky requires the least equipment and is a great first step. For terrarium growing, choose a closed terrarium for mosses and ferns that love humidity above 70%, and an open terrarium for succulents and air plants that need airflow.
How to start your plant: seed, cutting, or division
The right starting method depends on what you have access to and how quickly you want results.
Starting from seed
Seed starting is the slowest but cheapest route, and it's the only option for many annual flowers and vegetables. Use a fine-textured seed-starting mix, not standard potting soil (the coarser texture can impede germination). Sow at the depth specified on the packet, usually 2 to 3 times the diameter of the seed, and keep the mix consistently moist but not waterlogged. A humidity dome or cling film over the tray maintains moisture until germination. Bottom heat of around 70°F accelerates germination for warm-season crops. Once seedlings emerge, remove the cover and move them to strong light immediately to prevent leggy, weak growth.
Starting from cuttings
Stem cuttings are the fastest way to propagate most houseplants and many shrubs. Take a 4 to 6 inch cutting just below a node (the bump where leaves emerge), remove the lower leaves so at least one node is bare, and dip the cut end in rooting hormone powder or gel. Research from university extension programs shows that rooting hormones consistently speed up rooting and increase root density compared to untreated cuttings.
Insert the cutting into a rooting medium made from sand, perlite, or vermiculite (or a mix of these), which provides the drainage and aeration that roots need without the pathogens that standard potting mix can harbor. For most leafy softwood cuttings, keep the propagation environment around 60 to 65°F and maintain high humidity, either with a plastic bag tent or a propagation dome, until you see new leaf growth, which signals successful rooting.
If you want to go deeper on propagation for specific plant types, plug plants and how to grow them on covers the transition from rooted cutting to established plant really well.
Starting from division
Division is the simplest propagation method for clumping plants like hostas, snake plants, peace lilies, and ornamental grasses. Remove the plant from its pot, gently tease apart or cut the root ball into sections, making sure each section has at least 2 to 3 healthy stems and a portion of roots. Pot each division into fresh mix and water lightly. Expect a brief wilting period of 2 to 5 days as the plant recovers; this is normal and not a sign of failure.
Planting step by step
- Choose a pot 1 to 2 inches larger in diameter than the root ball (too large = overwatering risk).
- Add a layer of your chosen medium, leaving room for the root ball so the crown will sit about an inch below the pot rim.
- Place the root ball or cutting, fill around it with medium, and press gently to eliminate large air pockets.
- Water thoroughly until water runs from the drainage hole, then let it drain completely.
- Place in appropriate light and resist the urge to fertilize for the first 4 to 6 weeks while roots establish.
Fertilizing and avoiding nutrient problems
Plants need three primary macronutrients: nitrogen (N) for leaf and stem growth, phosphorus (P) for root and flower development, and potassium (K) for overall cellular health. Most balanced houseplant fertilizers (labeled 10-10-10 or 20-20-20) cover all three. A slow-release granular fertilizer applied every 3 to 4 months works for low-maintenance situations. Liquid fertilizer applied at half the label strength every 2 to 4 weeks during the active growing season (spring through early fall) gives you more control.
Overfertilizing is just as damaging as underfeeding. Fertilizer toxicity from excess soluble salts causes brown leaf tips and margins, mimicking underwatering. University extension research is clear that using the correct fertilizer analysis, the right rate, and the right frequency are all necessary together: getting just one of those wrong creates problems. If you suspect salt buildup, flush the pot with plain water three to four times the pot's volume to leach out excess salts, then hold fertilizer for 4 to 6 weeks. If you're building up a stock of cuttings or mother plants for propagation, how to grow stock plants goes into the specific nutrition strategies for keeping those plants productive and healthy.
| Symptom | Likely Nutrient Issue | Fix |
|---|---|---|
| Pale, yellowing older leaves | Nitrogen deficiency | Apply balanced liquid fertilizer at recommended rate |
| Purple or red leaf undersides | Phosphorus deficiency | Use fertilizer with higher P middle number |
| Brown leaf edges (with healthy center) | Potassium deficiency or salt toxicity | Check salt buildup; flush soil or adjust fertilizer |
| New leaves pale/yellowing, veins stay green | Iron or magnesium deficiency | Apply chelated iron or Epsom salt solution (1 tsp/gallon) |
| Rapid dark green growth, no flowers | Nitrogen excess | Switch to low-N or bloom fertilizer |
Common problems and how to fix them
Pests
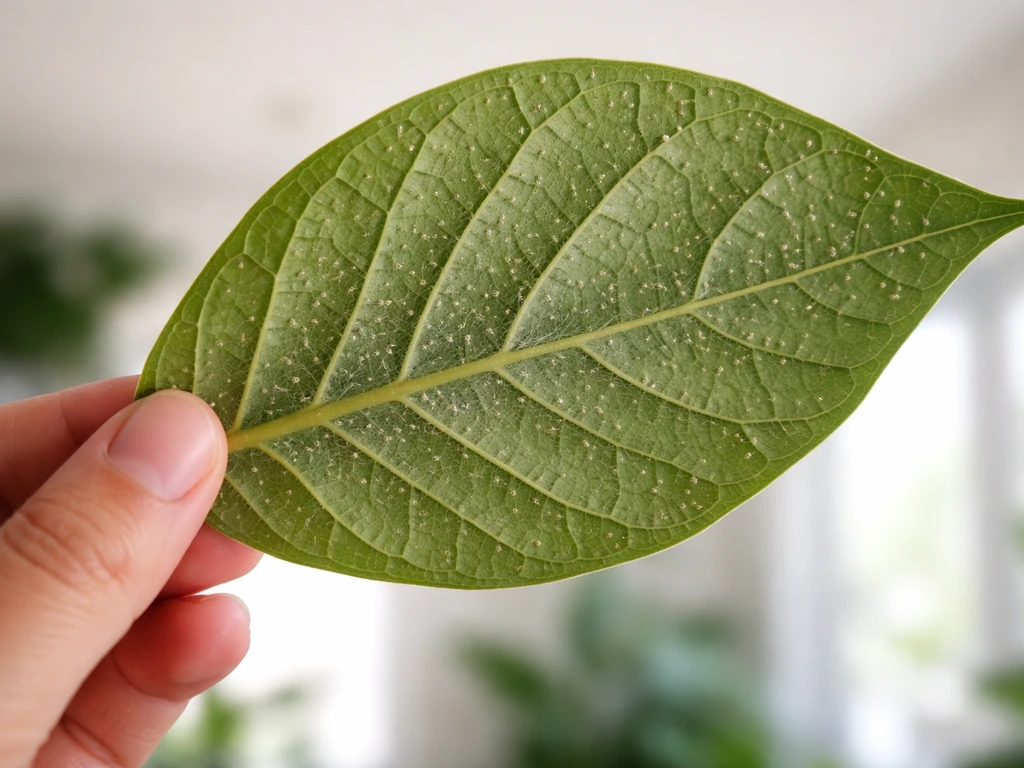
The most common houseplant pests are spider mites, mealybugs, scale insects, fungus gnats, and aphids. Inspect new plants carefully before bringing them home and quarantine them for 1 to 2 weeks as standard practice. For early-stage infestations, wiping leaves with a cotton ball soaked in isopropyl alcohol works well for mealybugs and scale. Insecticidal soap spray (coat all leaf surfaces, including undersides) is effective for soft-bodied pests like aphids and spider mites.
Neem oil is a useful broad-spectrum option because it disrupts insect development at multiple life stages rather than just killing adults, but it requires thorough coverage of every plant surface to be effective. Yellow sticky traps are excellent for catching and monitoring flying pests like fungus gnats and winged aphids before populations explode. For severe, widespread infestations, especially with scale or mealybugs, the most practical decision is often to discard the plant rather than risk spreading pests to everything nearby.
Fungus gnats are specifically attracted to consistently moist soil; letting the top inch dry out between waterings is the single most effective prevention. If they're already established, a layer of sand or fine gravel over the soil surface interrupts their egg-laying cycle.
Yellowing leaves
Yellow leaves are the most common distress signal and the most frustrating to diagnose because the causes range from overwatering to underwatering, nutrient deficiency, low light, root disease, and pests. Start with the most likely culprit: overwatering. Check the roots by removing the plant from its pot. Healthy roots are white or light tan and firm. Dark brown, mushy, or foul-smelling roots indicate root rot. Trim the damaged roots with sterile scissors, dust with cinnamon (a mild antifungal), and repot into fresh, dry mix.
Brown tips, wilting, and drooping
Brown leaf tips with a yellow halo usually point to overfertilization or salt buildup. Brown tips without yellowing often mean low humidity or inconsistent watering. Wilting in a well-watered plant almost always means root rot or compacted soil blocking root respiration. Drooping in dry soil is straightforward underwatering. If a plant wilts immediately after watering, that's a strong signal the roots can't function, either from rot, severe compaction, or a rootbound condition.
Slow or leggy growth
Slow growth is usually a light or temperature issue. Leggy growth (long stems, wide spacing between leaves) is almost always too little light. Move the plant closer to a window or add a grow light. Mold on the soil surface typically means the soil is staying wet too long; improve airflow and reduce watering frequency. Root problems (circling, crowded roots visible from drainage holes) slow growth significantly and are the trigger to repot.
Pruning, training, repotting, and keeping things going long-term
Pruning and training
Pruning serves two purposes: removing dead or damaged material (always do this) and shaping the plant for bushier, more compact growth. For most foliage plants, pinching off the growing tip just above a leaf node encourages two new shoots to branch from that point. Do this in spring when the plant has energy to respond. For vining plants like pothos or philodendron, regular pinching keeps them from getting leggy. Training climbing plants onto a moss pole or trellis gives them something to grip and often triggers larger leaf development, especially in aroids. For plants with a more architectural shape (fiddle-leaf figs, dracaenas), remove only crossing or dead branches.
Repotting
Repot when roots are circling the inside of the pot, growing from drainage holes, or when growth has clearly stalled despite good light and consistent watering. For most houseplants, that's every 1 to 2 years. Spring is the best time because the plant's active growth phase helps it recover quickly. Go up just one pot size (about 2 inches in diameter) at a time: jumping to a much larger pot means excess wet soil around the roots, which is a direct path to root rot. When repotting, gently loosen the outer roots before placing in the new pot, and water thoroughly after.
Acclimating to new conditions
Any significant change in light, humidity, or temperature should be gradual. Moving a plant from a dim room to a bright window directly can cause sunscald within a day or two. Move it to brighter conditions incrementally over 2 to 3 weeks. Similarly, when moving plants outdoors in spring, a process called hardening off, where you increase outdoor exposure by a couple of hours each day over 7 to 10 days, prevents leaf burn and cold shock. Knowing when to plant, throw, and grow is a skill that saves a lot of frustration, especially for seasonal growers managing outdoor transitions.
Symptom-based troubleshooting and a quick grower checklist
When something looks wrong, resist the urge to immediately change multiple things at once. Diagnose first. Here's a fast-reference map of symptoms to likely causes.
| Symptom | Most Likely Cause | First Action |
|---|---|---|
| Yellow leaves (older, lower) | Overwatering or nitrogen deficiency | Check soil moisture and root health; adjust watering |
| Yellow leaves (new growth) | Iron or micronutrient deficiency | Apply chelated iron; check pH (should be 6.0–7.0 for most plants) |
| Brown tips with yellow halo | Salt buildup or overfertilization | Flush soil thoroughly; pause fertilizing for 4–6 weeks |
| Brown tips, no yellow | Low humidity or inconsistent watering | Increase humidity (pebble tray or humidifier); check watering schedule |
| Wilting in moist soil | Root rot or compacted soil | Check roots; trim rot; repot into fresh mix |
| Wilting in dry soil | Underwatering | Water thoroughly; bottom-water for deep penetration |
| Leggy, stretched growth | Insufficient light | Move closer to window or add grow light |
| White crusty deposits on soil | Salt buildup from hard water or excess fertilizer | Flush soil; consider filtered water |
| Sticky residue on leaves | Aphids, scale, or mealybugs | Wipe with alcohol; apply neem oil or insecticidal soap |
| Small flies around soil | Fungus gnats | Let soil dry between waterings; use yellow sticky traps |
| Webbing under leaves | Spider mites | Increase humidity; spray with insecticidal soap |
| Mold on soil surface | Poor airflow or consistently wet soil | Improve airflow; reduce watering frequency |
If you've ever tried in-game plant care and wondered how it compares to the real thing, growing and harvesting plants on Sims Freeplay is a fun parallel, but real plants give you immediate, observable feedback that makes troubleshooting much more satisfying. If you're also managing plants in survival game contexts and want to compare mechanics, growing Plant Species X in Ark is an interesting contrast to real-world growing principles.
Your quick grower checklist
Use this after every read-through or whenever you're setting up a new plant. For a broader introduction that covers general principles applicable to any plant you're growing, plant how to grow basics is a great companion resource.
- Scientific name confirmed (variety or cultivar noted if applicable)
- Native habitat researched (tropical, arid, temperate) and care matched accordingly
- USDA hardiness zone checked for outdoor placement
- Light level assessed with a light meter app or window proximity test
- Temperature and draft risks identified and addressed
- Watering method chosen (top or bottom) and frequency calibrated to current season
- Growing medium selected and prepared (soil, water, hydro, or terrarium)
- Pot size correct (1–2 inches larger than root ball, with drainage holes)
- Propagation method chosen and rooting hormone/conditions prepared if needed
- Fertilizer type, rate, and schedule set for the active growing season
- Pest inspection completed; sticky trap in place if flying pests are a risk
- Pruning/training plan in place for vining or fast-growing plants
- Repotting date or trigger noted (roots at drainage holes = repot time)
- Symptom log started: note any changes weekly so you can catch problems early
FAQ
How to grow plant x if I bought it from a store and it’s already declining?
Treat store decline as a transition problem first. Keep it in bright, indirect light for 1 to 2 weeks, water only based on the finger test, and avoid repotting right away unless it’s rootbound or sitting in soggy, poorly draining mix. If multiple days show limp stems plus wet soil, check roots for rot and repot into dry, well-draining mix.
What’s the best way to tell whether plant x needs more light or more water?
Use timing. If leaves droop and the soil is dry, it’s water need. If the soil is wet and leaves droop, it’s usually root impairment, lack of oxygen, or rot, not thirst. Also look at new growth direction, leggy stretching points to low light, while yellowing with wet soil points to overwatering or nutrient uptake issues.
How to grow plant x when my apartment has low humidity?
First, check whether plant x is a high-humidity native (ferns, many calatheas). If humidity is low, raise it with a humidifier near the plant (aim for steady levels), group plants together, and avoid misting as a primary strategy because droplets evaporate quickly and can encourage leaf spotting. Use a hygrometer so you’re not guessing.
How to grow plant x with yellow leaves, but I’m not sure which cause it is?
Do a two-step check: inspect roots and evaluate light and drainage. Remove from the pot, confirm whether roots are firm and light-colored (healthy) or dark and mushy (rot). Then compare your light setup to the plant’s needs: slow growth plus stretching supports low light, while swollen wet soil plus mushy roots supports root rot.
How do I know if I should repot plant x right now or wait until spring?
Wait if conditions are stable and the plant isn’t suffering immediate root issues. Repot immediately when you see circling roots, roots pushing from drainage holes, or persistent wet soil that never dries within a reasonable window for that plant type. If growth has stalled but the mix still dries correctly and roots look mostly healthy, hold off until the active growing season.
How to grow plant x successfully from a cutting if it’s rotting instead of rooting?
Reduce moisture in the rooting environment and prevent contact with decaying tissue. Keep the cutting upright with at least one node above the medium, use clean propagation media (sand/perlite/vermiculite), and ensure the pot or container has drainage. If a leaf touches wet medium, remove or reposition it, and keep temperatures near the target range because too-cool conditions slow rooting and increase rot risk.
Can I grow plant x in a container without drainage holes?
It’s usually a bad idea for most houseplants because excess water and low oxygen quickly lead to root rot. If you must use a decorative pot, place the plant in a nursery pot with drainage inside and empty the outer cache tray after watering. Never let the plant sit in standing water for hours.
How to grow plant x in hydroponics if I’m worried about nutrient burn?
Start at a lower nutrient concentration than you think you need, then increase slowly as growth confirms uptake. Change or refresh nutrient solution on schedule for your system type, keep solution temperature stable, and rinse the roots during transitions if you notice brown tips or leaf edge scorch that doesn’t match light stress.
What’s the safest way to flush salts if plant x shows fertilizer tip burn?
Flush with plain water that fully drains from the bottom. Use enough water to run through multiple times the pot volume (so salts leave the soil, not just dilute it), then do not fertilize for 4 to 6 weeks. Make sure future fertilizing is at half-strength or less until you see stable new growth.
How to grow plant x outdoors if I’m in a cold climate or near frost?
Check hardiness and also how the plant handles wet cold soil. Even if a plant survives winter temperatures, it may fail from cold, waterlogged roots. Use well-draining soil, consider temporary protection, and acclimate gradually using hardening off over 7 to 10 days before full exposure.
What’s a quick mistake to avoid when using grow lights to grow plant x?
Don’t set the light too far away or run it too long on day one. Start with the suggested height range, then observe spacing and leaf color over a week. If you see bleaching or leaf edge scorch, raise the light or reduce daily hours, if you see stretching, lower the light or extend the photoperiod.
How to grow plant x when pests keep coming back after treatment?
Treat the entire plant thoroughly and plan follow-up. Many eggs survive, so repeat insecticidal soap or neem coverage on a cycle appropriate to the pest life cycle, inspect undersides and stems every few days, and quarantine new or treated plants so you don’t reintroduce the problem.