Growing healthy indoor plants comes down to matching three things correctly from the start: the right plant for your actual light conditions, a watering habit based on what the soil tells you (not a calendar), and an environment that stays reasonably warm, humid, and well-aired. Get those three things dialed in and most common problems, like yellow leaves, leggy stems, and root rot, solve themselves before they start.
Tips to Grow Indoor Plants: Light, Water, Soil Fixes

Marcus Holloway
13 May 2026
Choose plants that actually fit your home
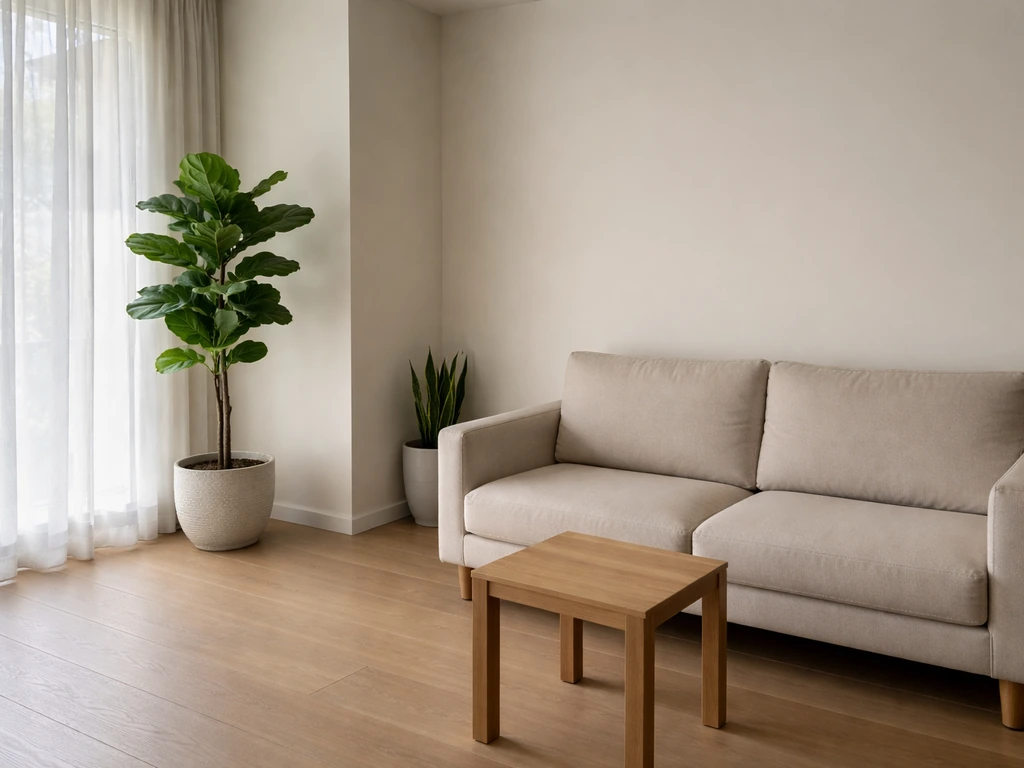
The single biggest reason people kill houseplants is buying the wrong plant for the space, not any lack of skill. A fiddle-leaf fig in a north-facing apartment hallway is always going to struggle. So before you buy anything, take an honest look at the light in each room and match plants to it.
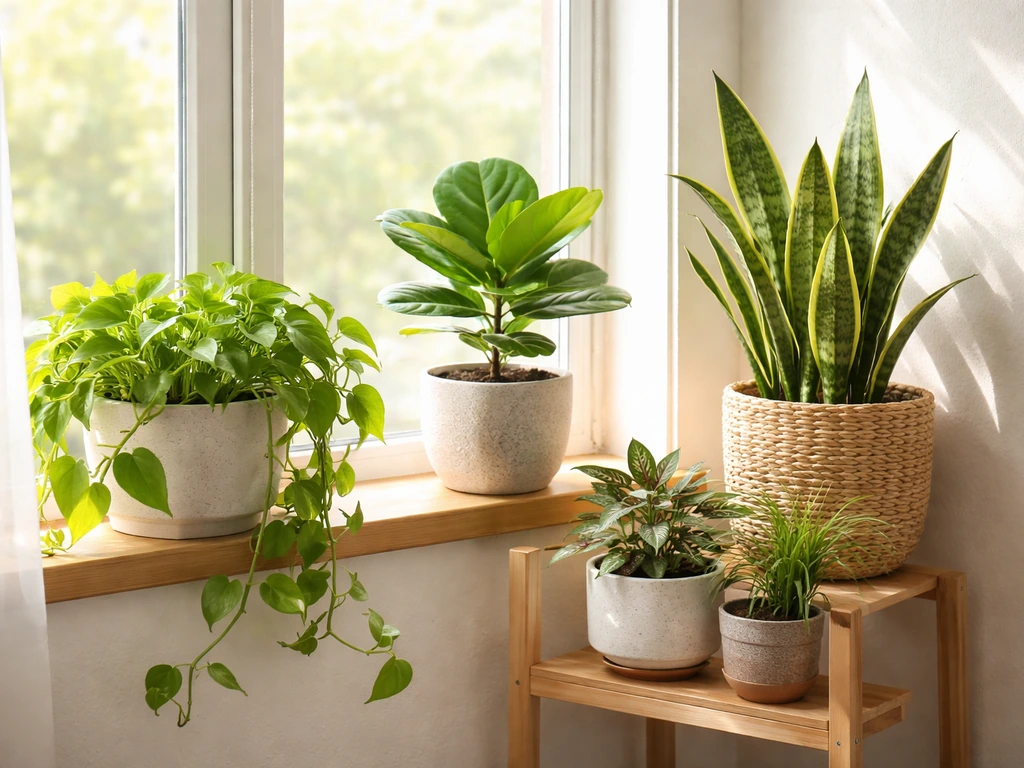
For genuinely low-light spots (think hallways, windowless bathrooms, or rooms with small north-facing windows), stick to pothos, snake plants, ZZ plants, cast iron plants, or peace lilies. These are not just 'tolerant' of low light, they are genuinely adapted to it. For bright indirect light near east or west-facing windows, you have a much wider range: monsteras, philodendrons, spider plants, rubber trees, and most ferns will thrive. South-facing windows with direct sun suit succulents, cacti, herbs like basil or rosemary, and most fruiting plants.
Also think about your lifestyle honestly. If you travel often or forget to water, pick drought-tolerant species like pothos, snake plants, or succulents. If you want to experiment with different growing setups beyond potted soil, think about whether you want a simple water-propagation jar, a small hydroponic kit, or a terrarium. Each works indoors, and the plant you choose should suit the method too.
Set up your light situation properly
Light is the one resource you cannot fake with fertilizer or better soil. It is worth spending real time on this.
Window placement by compass direction
The University of Illinois Extension uses foot-candles (the brightness one foot from a single candle) to give practical distance guidelines. For east or west-facing windows, most medium-light plants do well placed 3 to 10 feet from the glass. South-facing windows are much brighter, so shade-tolerant plants should sit 15 to 20 feet away to avoid scorching. North-facing windows provide the lowest light and are really only reliable for the most shade-adapted species.
You can get a rough sense of your light levels using a smartphone lux meter app. They are not lab-accurate, and independent testing has found many popular apps are unreliable at extreme ranges, but they give you a useful ballpark for comparing spots in your home. Point your phone camera toward the light source, not the plant, and take a few readings at different times of day. Morning light differs a lot from midday.
When natural light is not enough
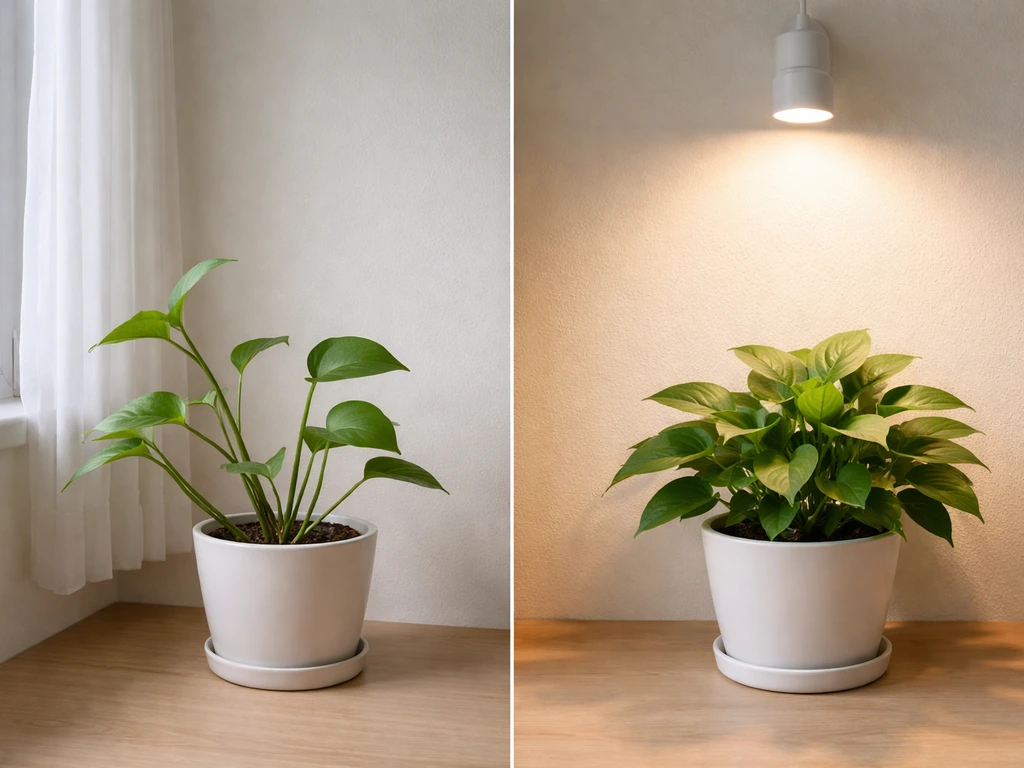
If your home genuinely does not have good natural light, grow lights are not just a luxury. WSU Extension specifically recommends supplementing with artificial lighting when natural conditions fall short. A full-spectrum LED grow light positioned 6 to 12 inches above most foliage plants for 12 to 16 hours a day will replace a mediocre window almost entirely. Timers make this completely hands-off. Clip-on grow lights cost under $30 and are a practical fix for dark apartments or winter months when daylight shrinks.
Signs you need more light: stems stretching toward the window, leaves getting smaller and farther apart on the stem (leggy growth), pale or washed-out leaf color, and very slow or no new growth. Move the plant closer to the light source or add a grow light before changing anything else.
Get watering right: the finger test, timing, and the big mistakes
Overwatering kills far more houseplants than underwatering does. The fix is simple: stop watering on a schedule and start watering based on what the soil actually tells you.
The finger test (and why it works)
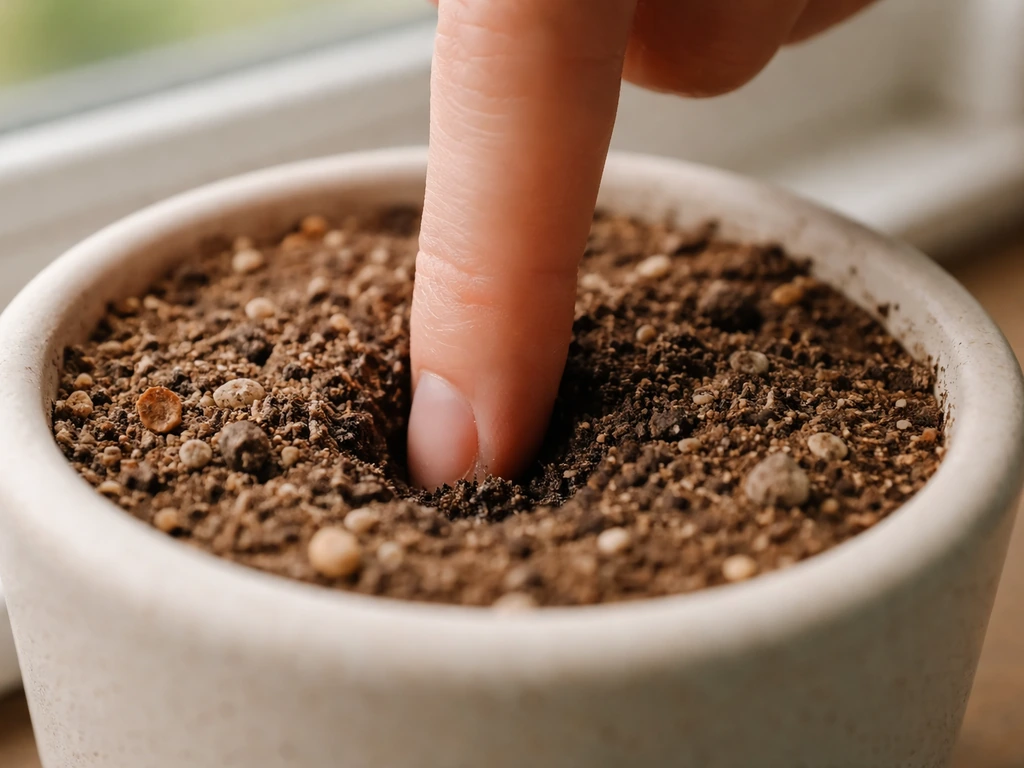
Push your finger 1 to 2 inches into the soil. If it feels cool and moist, wait. If it feels dry, water thoroughly until it drains from the bottom. That is the whole system. WSU Extension and the University of Minnesota Extension both recommend this tactile check as the most reliable beginner method because it accounts for real conditions: the season, pot size, humidity, and plant type all affect how fast soil dries, and the finger test adjusts for all of them automatically.
How to water correctly
When the soil is dry enough to water, do it thoroughly. Pour water slowly until it runs out of the drainage hole, which means the entire root zone got a drink, not just the top inch. Leave about an inch of space at the top of the pot so the water does not spill over before it soaks in. Then let the plant dry out again before you water next.
Common watering mistakes to avoid
- Watering on a fixed schedule regardless of soil condition: the soil does not care what day it is.
- Giving small sips instead of a thorough soak: shallow watering encourages weak, shallow roots.
- Using a pot without drainage holes: water pools at the bottom and suffocates roots.
- Going too large with pot size: an oversized pot holds moisture much longer than roots can use, which creates the same waterlogged conditions as overwatering. RHS specifically warns against severe overpotting for this reason.
- Ignoring the substrate: bark mixes used for orchids dry faster than standard potting soil, so you water more frequently. Cactus mix dries much faster than all-purpose mix. Always factor in what your plant is growing in.
Signs of overwatering vs. underwatering
| Symptom | Likely Cause | Quick Fix |
|---|---|---|
| Yellow, mushy, or dropping leaves | Overwatering or root rot | Let soil dry out; check roots; repot if roots are soft and dark |
| Brown, crispy leaf tips or edges | Underwatering or low humidity | Water thoroughly; increase misting or use a pebble tray |
| Wilting despite moist soil | Root rot (roots cannot uptake water) | Inspect roots; trim rotten sections; repot in fresh mix |
| Wilting with dry soil | Underwatering | Water deeply and consistently |
| Soil pulling away from pot edges | Severely dry soil (hydrophobic) | Soak the pot in water for 20 minutes to re-wet |
The RHS notes clearly that waterlogged soil reduces oxygen to roots, which is what triggers root rot and the yellow-leaf cascade that follows. Healthy roots are firm and white or light tan. If you unpot a struggling plant and the roots are soft, brown, and smell bad, you caught overwatering damage. Trim the rotten roots, let them air dry briefly, and repot into fresh well-draining mix.
Soil, soilless, and hydroponics: pick your growing medium

Most houseplants grow in potting soil, but that is not the only option, and for some plants it is not even the best one. Here is a quick breakdown of what each approach involves so you can match the method to your setup.
| Medium | Best For | Main Advantages | Main Watch-Outs |
|---|---|---|---|
| Standard potting mix | Most foliage plants, herbs, tropicals | Widely available, forgiving, retains moisture and nutrients | Can compact over time; needs good drainage |
| Bark/chunky mix | Orchids, anthuriums, aroids | Excellent airflow to roots, faster drainage | Dries fast, needs more frequent watering checks |
| Cactus/succulent mix | Cacti, succulents, drought-tolerant plants | Very fast drainage, prevents rot | Low nutrient retention; fertilize more often |
| Water propagation | Cuttings, pothos, philodendrons, begonias | No soil needed; easy to monitor roots | Needs regular water changes; limited long-term nutrition |
| Hydroponics (LECA, NFT, DWC) | Herbs, lettuce, fast-growing plants | Precise nutrient control, no soil pests, fast growth | More setup cost; learning curve for nutrient management |
| Terrarium substrate | Mosses, ferns, small tropicals, carnivorous plants | Self-contained humidity, low maintenance once established | Not suitable for drought-tolerant plants; can overheat |
If you are starting out, standard potting mix handles 90% of common houseplants well. Just avoid using garden soil indoors, it compacts hard, drains poorly, and brings in pests. If you want to explore growing plants in water or try a small hydroponic setup, pothos and herbs like mint or basil are ideal starter candidates. They root easily in water and adapt to hydroponic systems without much fuss.
Control temperature, humidity, and airflow
Most common houseplants prefer temperatures between 60 and 80°F (15 to 27°C), which is essentially the range most people keep their homes at. The bigger issues are sudden temperature swings, cold drafts from windows in winter, and the hot dry air coming off heating vents. Keep plants away from vents, exterior doors, and drafty windowsills during cold months. A plant sitting against a cold single-pane window on a January night is experiencing temperatures much lower than your thermostat suggests.
Humidity matters more than most people realize, especially for tropical plants. Most tropical foliage plants prefer humidity between 40 and 60%, but the average heated or air-conditioned home runs closer to 20 to 30%. You have a few practical options: group plants together (they create a micro-humidity zone through transpiration), use a pebble tray filled with water beneath the pot (not touching the drainage hole), or run a small humidifier near your plant area. Misting is temporary and does not raise ambient humidity meaningfully, but it can help with pests.
Airflow is often completely overlooked. Stagnant air encourages fungal disease and invites pests. A gentle fan running on low a few hours a day, or just opening a window periodically, goes a long way. Good airflow also strengthens stems over time because plants respond to slight movement by building thicker cell walls. It is also essential if you are running grow lights indoors, since lights raise ambient temperature and moving air keeps things balanced.
Fertilizing and pruning to keep growth going
When and how to fertilize
Most potting mixes include some starter nutrients, but those are gone within a few months. After that, plants depend on you to feed them. A balanced liquid fertilizer (look for roughly equal N-P-K numbers like 10-10-10 or 20-20-20) diluted to half the recommended dose works well for most foliage plants during the active growing season, which is roughly March through September. Fertilize every two to four weeks during that window, then stop or cut way back in winter when most plants slow down. Feeding a dormant plant just builds up unused salts in the soil, which can burn roots.
Specialized fertilizers matter in some cases. Orchids prefer a low-phosphorus formula. Cacti and succulents do better with a cactus-specific fertilizer applied sparingly. Plants in hydroponic systems need dedicated hydroponic nutrient solutions since there is no soil to buffer or release minerals. For terrariums, you usually need very little fertilizer because you want controlled growth, not rapid expansion.
Pruning for bushier, healthier growth
Pruning is not just cosmetic. Cutting back leggy stems encourages a plant to branch out and produce multiple new growth points instead of one long, weak stem. For most tropical foliage plants, just pinch off or cut the tip of a stem just above a leaf node (the bump where a leaf meets the stem). The plant responds by pushing out two or more new shoots from below the cut. Do this regularly on vining plants like pothos, heartleaf philodendrons, and tradescantia to keep them full and bushy rather than sparse and trailing. Remove dead or yellowing leaves promptly since they are a drain on the plant and can harbor disease.
Troubleshoot the most common indoor plant problems
Yellow leaves
Yellow leaves are the most common distress signal and also the most confusing because they have multiple causes. Overwatering and root rot are the most frequent culprits: if the lower leaves are yellowing and the soil has been consistently moist, suspect waterlogging and check the roots. Nutrient deficiency (especially nitrogen) also causes yellowing but usually starts at older leaves and progresses slowly. Low light can yellow leaves too, especially if growth has been slow and the plant is stretched. Work through each cause systematically before reaching for fertilizer.
Leggy, stretched growth
Long gaps between leaves and stems reaching hard toward the window mean the plant is not getting enough light. Move it closer to the light source or add a grow light. Then prune back the leggy sections to encourage the plant to push new, fuller growth. Do not expect the stretched parts to fill back in on their own.
Common indoor pests
A few pests show up repeatedly with indoor plants, and catching them early makes a big difference. Here is what to look for and what to do about each one.
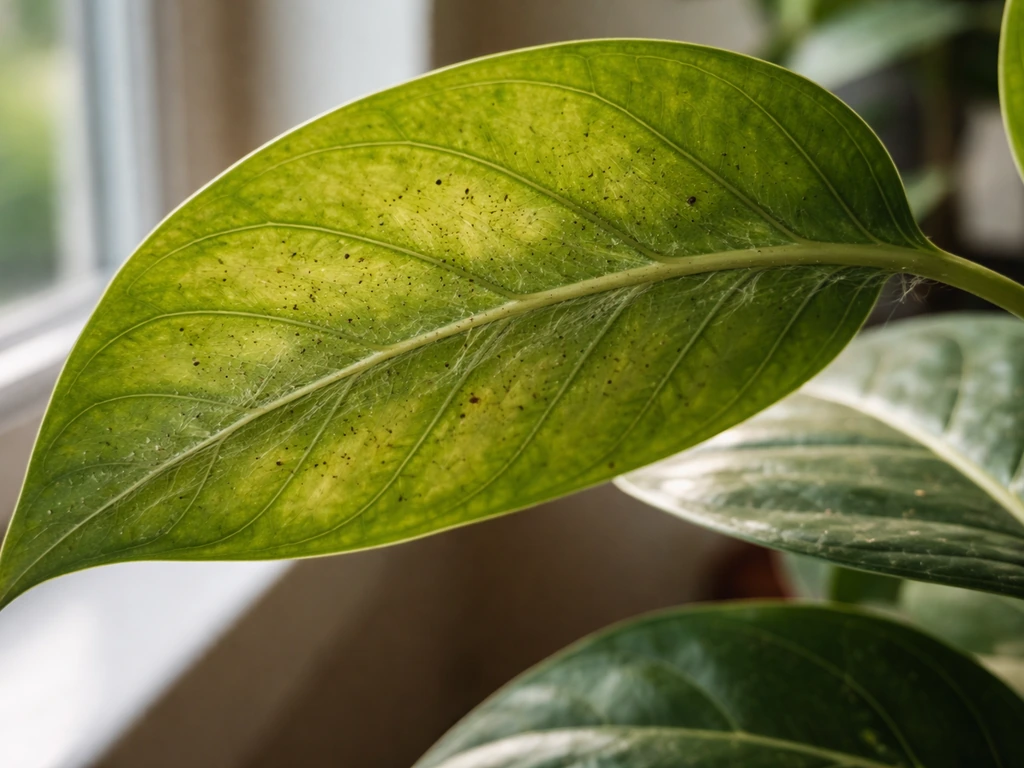
- Spider mites: Tiny moving dots on leaf undersides with fine webbing, especially in hot and dry conditions. Wipe leaves with a damp cloth, increase humidity, and spray with neem oil or insecticidal soap every 5 to 7 days for three rounds.
- Mealybugs: White cottony clusters at leaf joints and stem crevices. Dab with rubbing alcohol on a cotton swab, then spray with neem oil. Isolate affected plants immediately.
- Scale: Brown or tan bumps on stems that look like part of the plant. Scrape off with a soft toothbrush or fingernail, wipe with alcohol, and follow up with neem oil.
- Fungus gnats: Small flies hovering around soil, their larvae feed on roots. Let the top 2 inches of soil dry out completely between waterings. Yellow sticky traps catch adults; a diluted hydrogen peroxide soil drench (1 part 3% hydrogen peroxide to 4 parts water) kills larvae.
- Aphids: Soft green, black, or white clusters on new growth. Blast off with water, then use insecticidal soap. Check new growth weekly.
Disease symptoms to watch for
Most indoor plant diseases come from the same source: excess moisture combined with poor airflow. Powdery mildew shows up as a white powdery coating on leaves, usually in humid stagnant air. Improve ventilation and reduce overhead watering. Root rot, as described earlier, is the result of waterlogged soil over time. Leaf spot (brown or black lesions with a yellow halo) often comes from water sitting on leaves or from fungal splash when watering. Water at the soil level, not overhead, and remove affected leaves to slow its spread.
A beginner-friendly routine and your next steps this week
You do not need to overhaul everything at once. Once you nail light, watering, temperature, and airflow, it becomes much easier to grow small plants indoors without them stalling or failing. Here is a simple, realistic weekly routine and what to do in the next few days to get on track.
Your action plan for this week
- Do a watering check today: Push your finger 1 to 2 inches into the soil of every pot. Only water the ones that are dry. If anything has been sitting in moist soil for more than a week, hold off and let it dry.
- Check your light: Stand at each plant's location and look toward the nearest window. Is there direct sun, bright indirect light, or just ambient room light? Match that observation to your plant's actual needs. If growth is leggy or pale, move the plant closer or order a grow light.
- Inspect leaves and stems: Flip leaves over and check the undersides. Look at stem joints. Spot any webbing, sticky residue, cottony fluff, or bumps? Treat early before it spreads.
- Check pot size and drainage: Make sure every pot has a drainage hole. If any plant is in a pot that is noticeably larger than its root ball, consider downsizing.
- Set a loose watering schedule: Not a fixed-day calendar, but a check-in habit. Every 3 to 4 days, do the finger test on all your plants. Water only the ones that are dry.
A simple ongoing weekly routine
- Every 3 to 4 days: Do the finger test and water as needed. Rotate pots a quarter turn so all sides get equal light.
- Weekly: Wipe dust off large leaves with a damp cloth (dust blocks light absorption). Remove dead or yellowing leaves. Quickly scan for pests.
- Every 2 to 4 weeks (growing season): Apply diluted liquid fertilizer. Check if any plants are root-bound (roots circling the bottom or poking out the drainage hole).
- Monthly: Assess light and placement. Move things around based on how growth looks. Prune any leggy stems to encourage bushier growth.
Once you have the basics stable, you can start branching out. Growing plants without bugs, maximizing size and growth rate, trying small indoor plant collections in limited spaces, and even scaling up to large statement plants are all natural next steps once your core routine is solid. For bigger, more vigorous indoor specimens, you also need to dial in fertilizing and pruning to keep growth going. The fundamentals covered here apply to all of them. Most plant problems are just small deviations from the basics, and once you know what to look for, diagnosing and fixing them gets fast.
You have probably killed a plant before. Almost everyone has. It does not mean you lack a green thumb. It usually means you got the wrong plant for the space, or watered on a schedule instead of checking the soil, or just got unlucky with a pest. If you are specifically trying to prevent bugs, the best first step is keeping plants healthy with good light, watering, and airflow, then checking leaves often for early signs pest. Those are all fixable. Start with one or two easy plants, nail the watering habit and light placement, and build from there.
FAQ
How fast should I move my indoor plant toward brighter light?
Aim for the brightest spot you can keep consistent, then adjust gradually. If you move a plant several feet closer to a window or turn on a strong grow light suddenly, you can trigger leaf scorch or bleaching. Do 1 incremental move per week (or start lights at fewer daily hours, then ramp up) and watch for washed-out patches or crisp, browned edges.
Can I grow indoor plants in water or switch between water and soil later?
Yes, but only if it comes with the right support. In water, most plants need enough light to grow and you should change or top up water regularly to reduce stagnation, usually weekly for clear containers. Also, roots formed in water often need time to adapt if you switch back to soil, so do the transition gradually by potting into light, well-draining mix and keeping it slightly more evenly moist for the first couple weeks.
What is the best way to raise humidity without increasing disease risk?
Don’t rely on indoor humidity alone to decide. For tropical plants, aim for a humidity strategy that matches your setup, for example a pebble tray plus grouping works for small collections, while a humidifier is more reliable in dry winters. If you do use a humidifier, place it a few feet from plants and keep the area from becoming consistently wet, since stagnant moisture can still worsen leaf spot and other fungal issues.
Is it okay to use decorative pots without drainage holes?
Use drainage as the “safety feature.” A pot without a drainage hole makes it easy to keep roots too wet even if you water carefully, which increases root rot risk. If you love a decorative cachepot, keep the nursery pot inside and empty any standing water after watering.
Should I fertilize year-round, or does it depend on how my plant is growing?
Fertilize based on active growth, not by calendar alone. If your plant has slowed due to low light, cold temperatures, or seasonal rest, reduce feeding or pause to prevent salt buildup. A quick check is new leaf growth and steady stem extension, if you are not seeing it, cut fertilizer strength or frequency.
How do I tell nutrient deficiency from overwatering when leaves turn yellow?
Most houseplant problems that look like “nutrient issues” are actually watering or light problems. If leaves are yellowing, confirm soil moisture first. If yellowing is paired with consistently wet soil, treat it as root/water damage. If soil is drying properly and light is adequate, then consider deficiency, and choose a fertilizer matching the plant type rather than jumping straight to stronger doses.
What’s the most common watering mistake people make?
You generally want to water until excess drains out, then stop. The mistake is “partial watering,” where water only wets the top layer and roots in the lower pot never get access to moisture evenly. A good sign you watered correctly is water flowing from the drainage hole after you pour slowly, and then the pot becomes noticeably lighter before you water again.
How do I know when to water if my home temperature changes a lot?
Season and temperature change the schedule, so track drying time instead. For many homes, the right cadence results in dry top layers and then full drying through the root ball before the next watering. If you measure, note how many days it takes for the soil to reach your finger-test dryness at your current temperature, then use that as your baseline for the next month.
Can I prune and fertilize at the same time?
Yes, but do it surgically. Remove only what is clearly dead or actively declining, and avoid pruning all at once after fertilizing heavily or when the plant is stressed by low light or cold drafts. For leggy growth, prune above a leaf node to encourage branching, then adjust light and airflow so new shoots can develop.
What are the earliest ways to spot common indoor plant pests?
Check early in the morning or after watering and look at the underside of leaves and along stems. Common “first signs” include tiny specks that smear, stippling, sticky residue, webbing, or moving specks when you tap a leaf over white paper. Isolate the plant immediately, then treat pests by repeating the chosen method on schedule rather than expecting one application to solve everything.
What should I do if I get fungus gnats or moldy soil?
If you’re seeing moldy soil smell, white crust on soil, or fungus gnats, the fix is usually surface-drying and reduced surface moisture. Let the top of the mix dry more between waterings, improve airflow, and consider removing debris on the surface. For gnats, yellow sticky traps help, but addressing moisture and egg-laying conditions matters most.
When should I repot, and when should I avoid it?
Not always, and it can be risky if roots are actively damaged. If you suspect root rot, repot into fresh, well-draining mix after trimming rotten roots and letting the cut areas air-dry briefly. If the soil is only staying wet because of poor drainage or a wrong mix, repot can help, but avoid frequent repotting if the plant is stable.
Why won’t my plant fill out again after I cut leggy growth?
Legginess usually means the light is too weak, then pruning becomes a “reset,” not a cure. Cut back to just above a node after you correct the light source or add grow lights. Expect bushy regrowth from the cut areas, but the original stretched sections typically will not fully revert to compact growth.
Can I run grow lights on a timer, and how do I avoid over-lighting?
You can, but choose a light source and duration that match the plant’s needs and your schedule. A timer helps prevent overdoing it, since too many hours can raise temperature and encourage disease if airflow is limited. If leaves are bleaching, reduce distance or shorten hours, then re-check plant response after several days.
How do cold drafts or heater air affect indoor plants?
Temperature swings can show up as stalled growth or crispy leaf edges, even if you’re watering correctly. Keep plants away from cold window panes in winter and hot, dry heater air in the same location during summer. If you notice drafts, move the plant a few feet back and use curtains or insulation to reduce sudden temperature changes.