A plant starts its life when a seed absorbs water, triggering internal chemistry that breaks dormancy and kicks off germination. From there, a root pushes down, a shoot pushes up, and the seedling begins trading sunlight and nutrients for energy. Get the basics right during those first few weeks, and the plant practically grows itself. Get them wrong, and you end up with rotted seeds, leggy sprouts, or a collapsed seedling at the soil line. This guide walks you through every stage, covers the most common failure points, and works whether you're growing in soil on a windowsill, a hydroponic tub, a glass terrarium, or a jar of water.
How Does a Plant Start Its Life and Grow Step by Step

Marcus Holloway
17 May 2026
The plant life cycle: from seed to seedling
Every plant you've ever admired started as something tiny and dormant. A seed is essentially a paused plant, complete with an embryo, a small food reserve, and a protective coat. Dormancy is the seed's survival strategy: it waits for conditions that signal a real growing season before committing. Those signals are warmth, moisture, and in some species, light. Once conditions line up, germination begins and the cycle is off and running.
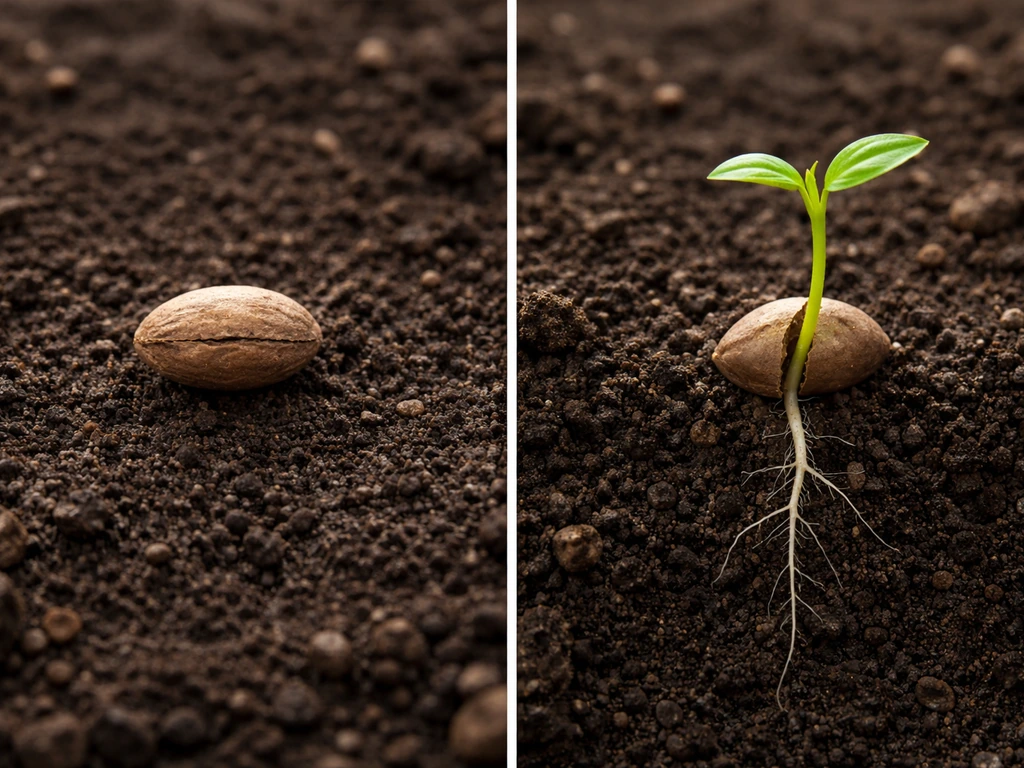
The basic stages go like this: seed absorbs water (imbibition), internal metabolism reactivates, the radicle (first root) emerges, the shoot follows, the seedling becomes a true plant with leaves making food via photosynthesis, and then the plant grows, matures, flowers, and sets seed. Following the plant from seed to seedling is the classic way to see how plants grow step by step. That last part closes the loop. For growers, the critical window is the first three stages.
If you want a step-by-step approach to how to grow nursery plants, start by choosing the right seeds and setting up the right conditions for germination and early growth the critical window is the first three stages. That's where most failures happen, and that's where this guide spends the most time.
One thing worth knowing upfront: seed age matters more than most beginners expect. Germination rate drops as seeds age. Onions, corn, lettuce, and impatiens can lose viability in as little as one to two years. If you're starting with seeds that have been sitting in a drawer for a few seasons, do a simple germination test first: fold ten seeds into a damp paper towel, keep it warm, and check how many sprout in the expected timeframe. If fewer than six out of ten sprout, your germination rate is below 60% and you'll want fresh seeds or to sow more densely than usual.
Germination: what seeds actually need and what kills them early

Water is the trigger. When a dry seed absorbs enough moisture, enzymes activate and the embryo starts producing energy from its stored starch. That's why the growing medium needs to stay consistently moist during germination but not soaking wet. Think damp sponge, not puddle.
Temperature ranges that actually work
Temperature is the other big lever. Each crop has a preferred germination range. Lettuce germinates best between 60 and 75°F. Tomatoes slow down dramatically below 50°F and can fail entirely above 104°F. Getting temperature wrong is one of the most overlooked reasons seeds just sit there doing nothing. A cheap seedling heat mat under your trays can make a huge difference if your home runs cool.
Light and the germination signal
Most vegetable and herb seeds don't need light to germinate and are covered with a thin layer of mix. But some seeds, like lettuce, are photoblastic, meaning light actually triggers their germination. The mechanism involves a pigment called phytochrome: red light flips phytochrome into an active form that promotes germination, while far-red light reverses that signal. In practice, this means photoblastic seeds should be surface-sown or barely covered so they receive ambient light. For most other seeds, darkness is fine until the sprout breaks through.
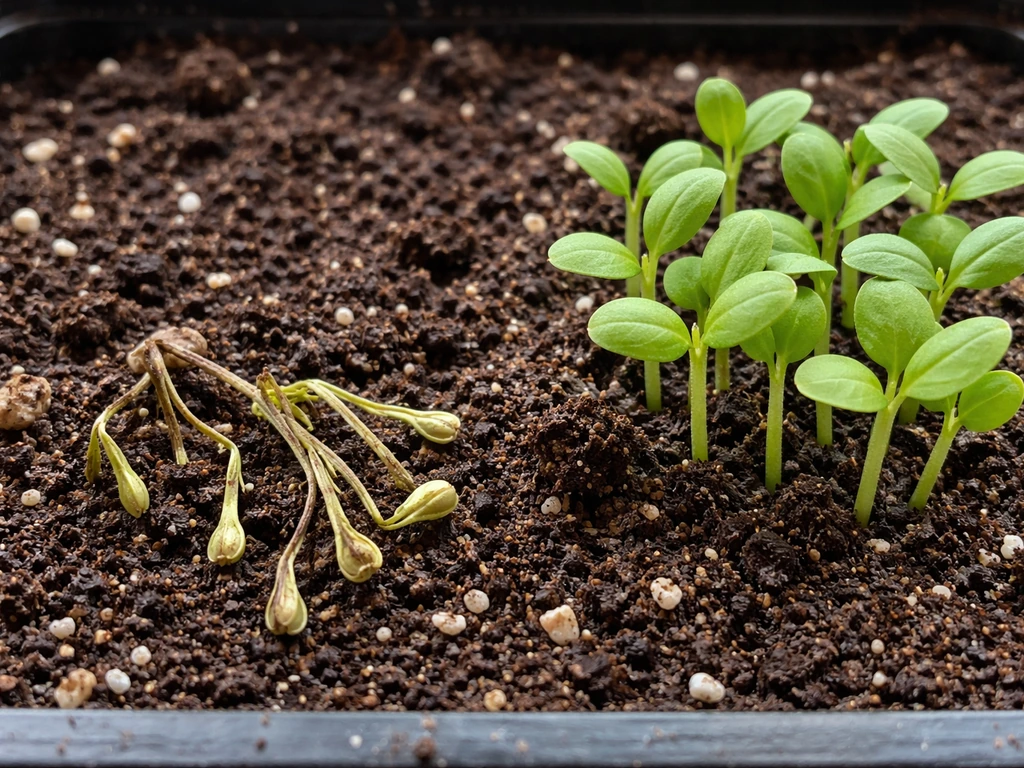
Damping-off: the silent killer of seedlings
Damping-off is the name for when seedlings collapse at the soil line, often seemingly overnight. It comes in two forms: pre-emergence (the seed or sprout rots before it ever breaks the surface) and post-emergence (the seedling looks fine, then suddenly falls over with a pinched, water-soaked stem near the base). The culprits are usually water molds like Pythium or Phytophthora in the pre-emergence stage, and Rhizoctonia in the post-emergence collapse.
The conditions that cause it are almost always in the grower's control. Overwatering is the main one. Combine wet soil with cool temperatures before germination (below 68°F/20°C), excessive shade, seeds planted too deep, overfertilizing young seedlings, and using dirty trays or pond water, and you've built a perfect environment for damping-off. The fix is to start with a sterile seed-starting mix made with peat or coconut coir for drainage, use clean tap water rather than collected run-off, keep temperatures in the appropriate range, and let the surface dry slightly between waterings once seedlings emerge.
- Use a sterile, well-draining seed-starting mix (peat or coir-based, not garden soil)
- Water from the bottom by setting trays in a shallow dish of water rather than pouring on top
- Keep soil temperatures in the recommended range for your specific crop
- Clean trays and containers with a dilute bleach rinse between uses
- Use clean tap water, not collected pond or run-off water
- Avoid planting seeds too deep and resist the urge to fertilize before the first true leaves appear
A note on seed priming
If you want to give seeds a head start, especially older ones or in tricky conditions, look into seed priming. Hydropriming is the simplest approach: soak seeds in plain water for about 48 hours, drain, and sow immediately. This partially activates pre-germination metabolism without letting the radicle emerge, so the seed hits the ground running. Osmopriming and halopriming use low-concentration salt solutions and run for longer (up to three days), but they're overkill for most home growers. Plain hydropriming is practical, free, and genuinely effective.
Early growth: roots, shoots, and how a seedling gets established
Once the radicle emerges, the plant's first job is to anchor itself and find water. The root grows downward, driven by gravity, while the shoot pushes upward toward light. This is not random: plants have hormonal systems, including auxins, that redistribute in response to gravity and light direction, steering each part where it needs to go. As a grower, your job is to make sure neither root nor shoot hits an obstacle too early.
The seedling's first leaves, called cotyledons, are not true leaves. They're the seed's stored food unfolding. Don't fertilize yet. The seedling is living off its reserves and can't handle extra nutrients at this stage. True leaves come next, and they look like miniature versions of the plant's adult leaves. Once you see the first set of true leaves, the plant is photosynthesizing on its own and you can begin very light feeding. If you want the big picture answer to how do new plants grow, it all starts here with true leaves making their own food.
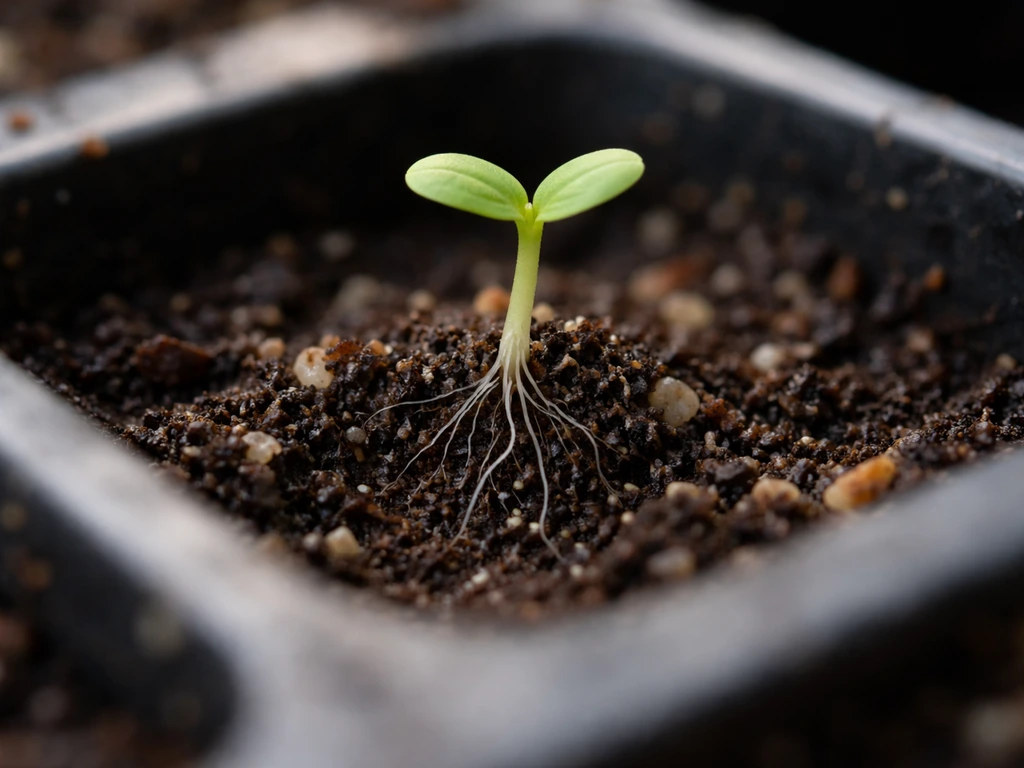
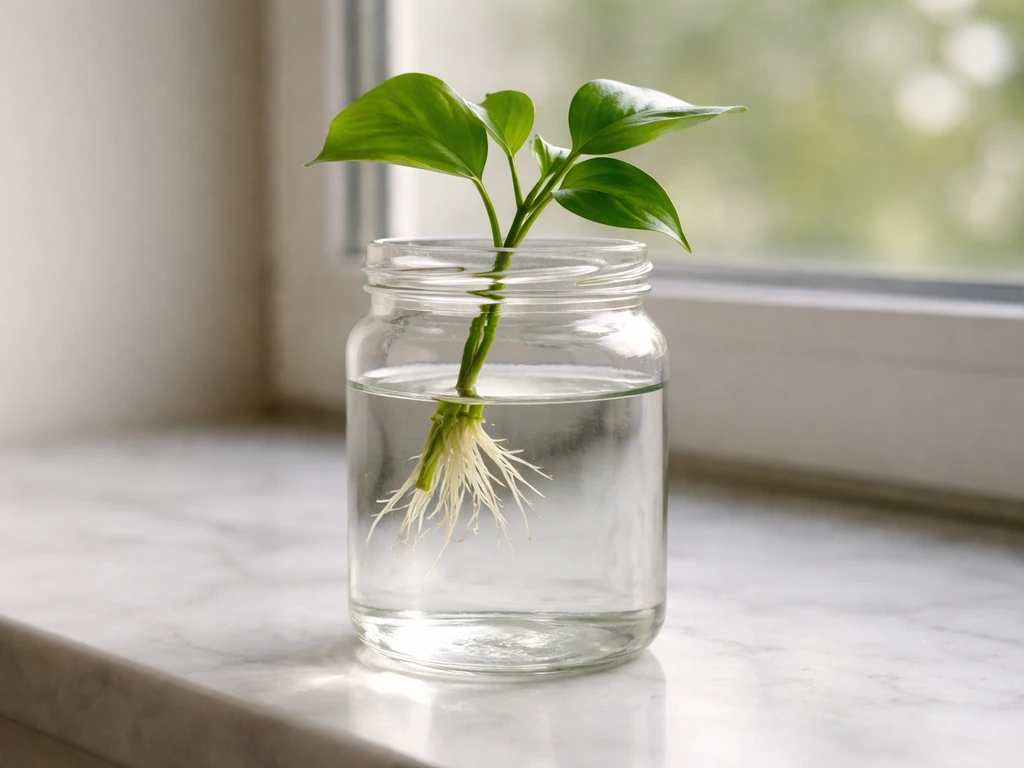
Root development during this phase matters enormously for long-term plant health. A healthy seedling root system should be white or cream-colored, branching, and firm. Brown, mushy, or sparse roots are a red flag. If you're starting in a transparent container or water, you can actually watch root development, which makes it easy to catch problems early. This is one reason water propagation has become popular with beginners: the transparency is built-in feedback.
What a growing plant actually needs from its environment
Light: the most commonly underestimated factor
Light is where most indoor growers struggle the most. Insufficient light intensity or duration is the primary reason seedlings go leggy: stretched, pale, and weak-stemmed. Leggy seedlings are reaching toward a light source that's too dim or too far away. A bright windowsill often looks sunny to human eyes but may only deliver a fraction of what a seedling needs.
If your seedlings are tall and spindly within a week of germination, move them closer to the light source or add a grow light. For most vegetables and herbs, 14 to 16 hours of light per day under a decent LED grow light or strong fluorescent positioned 2 to 4 inches above the seedlings makes a significant difference. Overcrowding also worsens legginess because seedlings compete for whatever light is available.
Water: consistency beats frequency
Plants want consistent moisture, not feast-and-famine cycles. Soil should feel like a wrung-out sponge. Let the top half-inch dry slightly between waterings for most seedlings, but never let the root zone fully dry out during the germination and establishment phase. The finger test works: push your finger an inch into the medium. Dry at the tip means water now. Still damp means wait.
Temperature and air movement
Once seedlings are established, air movement becomes surprisingly important. A gentle fan running for a few hours a day strengthens stems by simulating wind, a process called thigmomorphogenesis. It also reduces the surface moisture that fungi love. Keep temperatures stable in the range your specific plant prefers, and avoid cold drafts from windows in winter or hot air from heating vents blowing directly on trays.
Nutrition and growing medium: feeding without burning
Nutrients are the building blocks plants use to make everything from leaves to roots to flowers. The three main ones, always listed on fertilizer labels, are nitrogen (N) for leafy green growth, phosphorus (P) for root and flower development, and potassium (K) for overall plant function and stress resistance. Seedlings need very little of any of these at first. Wait for true leaves, then start at half the recommended fertilizer dose and work up gradually.
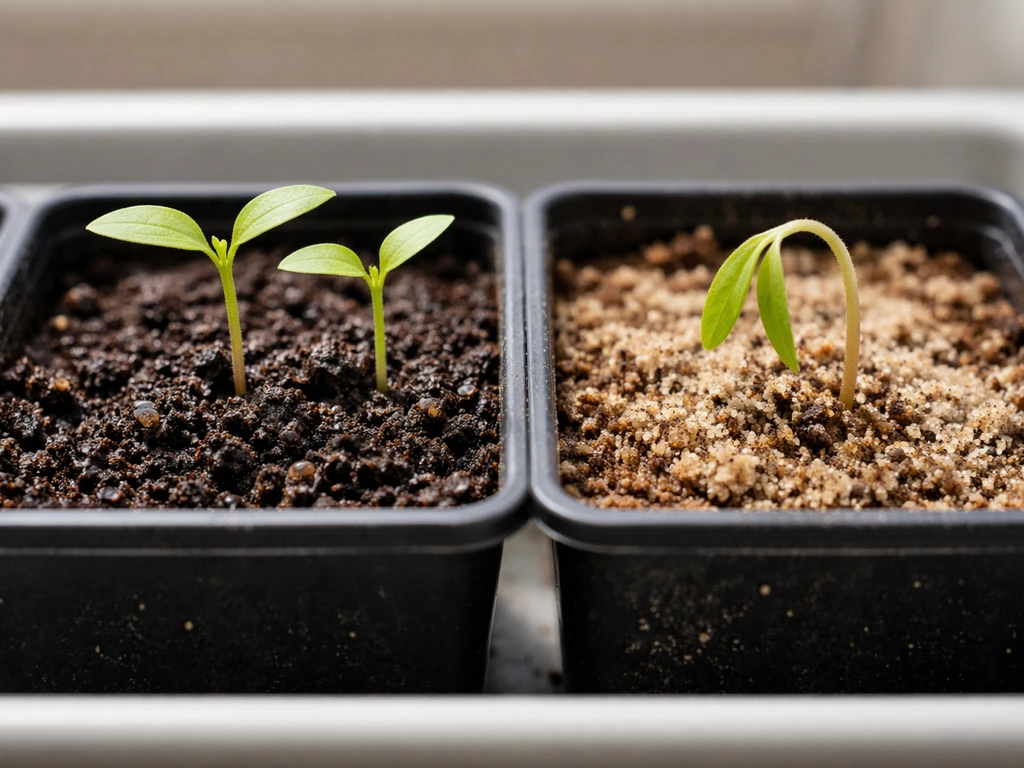
For soil growing, a quality seed-starting mix made with peat moss or coconut coir gives you good drainage and moisture retention without being too heavy or too nutrient-rich for young plants. Garden soil straight from the ground is not appropriate for seed starting: it's too dense, may contain pathogens, and has inconsistent fertility. Once plants are established and moved to larger containers, a standard potting mix with some slow-release fertilizer incorporated is a solid base.
Overfertilizing is a more common beginner mistake than underfertilizing. Symptoms of too much fertilizer include brown leaf tips, crusty white deposits on soil surface, and wilting even in moist soil. If you suspect overfeeding, flush the medium with plain water until it runs freely from the drainage holes, then hold off on feeding for a week or two.
Different ways to grow: soil, water, hydroponics, and terrariums
The beautiful thing about understanding plant biology is that it translates across setups. The plant still needs water, nutrients, light, and air regardless of what's holding its roots. Here's how each method works and what you need to manage differently in each one.
| Growing Method | How Nutrients Reach Roots | Key Thing to Manage | Best For |
|---|---|---|---|
| Soil | Dissolved in soil water, released by organic matter and microbes | Moisture consistency and drainage | Most plants, beginners, outdoor and indoor |
| Water propagation | Dissolved in plain water (limited) | Changing water every 5 to 7 days to prevent stagnation | Cuttings and early rooting stages |
| Hydroponics | Dissolved in a precisely mixed nutrient solution | pH (5.0 to 6.0) and EC (1.5 to 3 dS/m) | Fast growth, limited space, controlled environments |
| Terrariums | Soil layer with slow organic breakdown, minimal inputs | Humidity balance and avoiding overwatering in closed systems | Small tropical plants, ferns, mosses, low-maintenance setups |
Soil: the classic and forgiving starting point
Soil is the most forgiving medium for beginners because beneficial microbes help buffer mistakes. Use a quality seed-starting mix for germination and a standard potting mix for established plants. Make sure containers have drainage holes. Most beginner failures in soil come down to overwatering, wrong light, and starting seeds in plain garden soil instead of a proper mix.
Water propagation: simple and visual
Water propagation means rooting cuttings in plain water, which is a great way to start new plants from existing ones without buying seeds. Place a healthy stem cutting with at least one node in a jar of room-temperature water, keep it in bright indirect light, and change the water every five to seven days to prevent stagnation and bacterial buildup. Once roots are an inch or more long, you can pot the cutting into soil or keep it in water long-term with a diluted liquid fertilizer added occasionally.
Hydroponics: faster growth, tighter management
In hydroponics, roots grow directly in a nutrient solution instead of soil, and the plant gets everything it needs dissolved in water. The payoff is faster growth and higher yields in less space. The tradeoff is that you have to manage the chemistry yourself. pH is the most critical variable: nutrient availability is optimized in a slightly acidic range of pH 5.
0 to 6. 0. Above that, certain nutrients become chemically unavailable even if they're in the water. Electrical conductivity (EC) measures the total dissolved nutrient concentration and should sit between 1.
5 and 3 dS/m for most crops. Watch out for water with high alkalinity (above 75 ppm) because it can push your nutrient solution pH up over time. A basic pH meter and EC meter are not optional in hydroponic growing. They're your diagnostic tools.
Terrariums: growing in a closed or semi-closed world
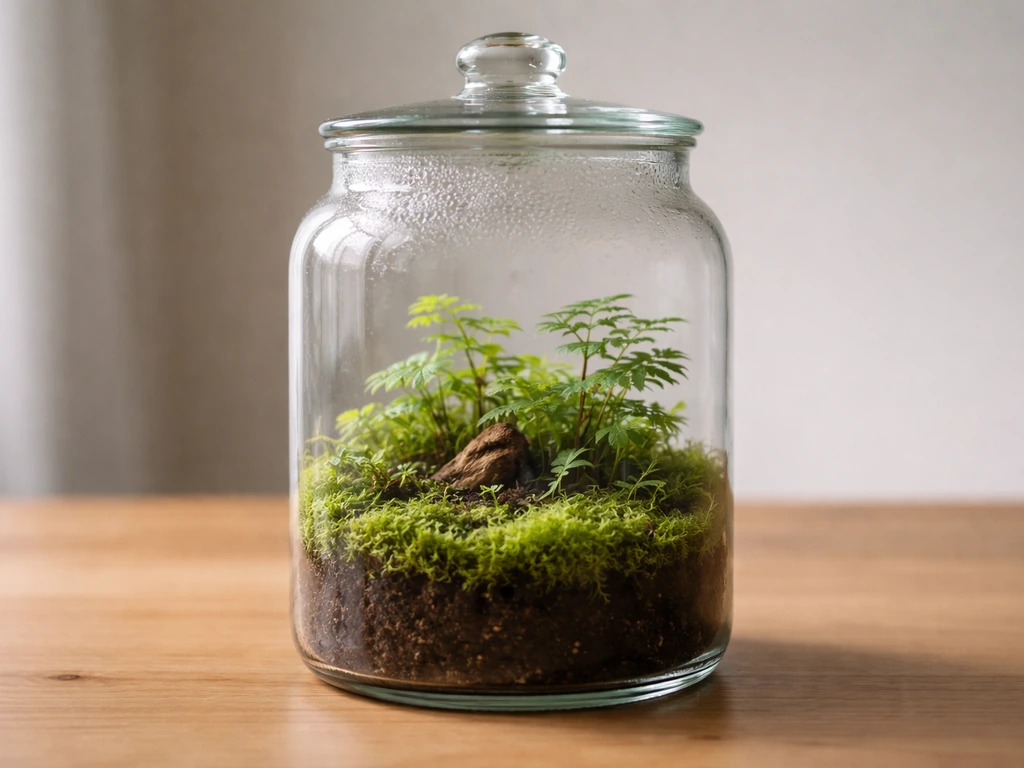
Terrariums create a miniature ecosystem where humidity stays naturally high due to the enclosure. This makes them excellent for tropical plants, ferns, mosses, and small aroids that thrive in humidity but struggle in dry indoor air. The main risk is overwatering: in a closed terrarium, water cycles back through condensation and the soil rarely dries out. Use a well-draining layer at the bottom (gravel or lava rock), a thin separation layer, and a light moisture-retaining soil mix. Open the terrarium occasionally to prevent mold buildup, and choose plants sized appropriately for the container so they don't outgrow the space.
Troubleshooting common growth problems
Even experienced growers run into problems. Here's how to read what your plant is telling you and what to do about it right now.
| Symptom | Likely Cause | Fix |
|---|---|---|
| Seeds not sprouting after 2+ weeks | Old seeds, wrong temperature, too dry or too wet | Do germination test, check soil temp with thermometer, adjust watering |
| Seedlings collapse at soil line | Damping-off (Pythium or Rhizoctonia) | Improve drainage, reduce watering, increase airflow, use sterile mix going forward |
| Tall, stretched, pale seedlings | Insufficient light intensity or duration | Move closer to light source or add grow light 2 to 4 inches above seedlings |
| Yellow leaves on seedlings | Nitrogen deficiency, often from insufficient fertilizer | Apply diluted liquid nitrogen fertilizer at half strength; green-up usually visible within a week |
| Brown leaf tips | Overfertilizing or salt buildup | Flush medium with plain water, hold off feeding for 1 to 2 weeks |
| Roots brown and mushy | Root rot from overwatering or poor drainage | Let medium dry, repot into fresh mix, trim rotted roots before repotting |
| Slow or stalled growth | Low light, wrong temperature, or pH lockout in hydro | Check light hours, verify temperature range, test pH if in hydro setup |
| White mold on terrarium soil surface | Excess humidity and poor airflow | Open terrarium daily, remove mold, reduce watering frequency |
One thing worth saying clearly: yellow, leggy seedlings are not dead seedlings. If you catch legginess early, moving them under stronger light and applying a diluted nitrogen fertilizer can green them up within about a week. Plants are more resilient than they look, and most early problems are recoverable if you diagnose them quickly. Normalize the failures. Every grower has killed plants. The goal is to kill fewer of them over time by understanding what went wrong.
If you're moving seedlings from indoors to outdoors at any point, don't skip hardening off. This is a gradual acclimation process where you expose plants to outdoor conditions (wind, direct sun, temperature swings) for a little longer each day over one to two weeks. Skipping it and putting a coddled indoor seedling in full outdoor sun can scorch the leaves in hours. Also, if you're using biodegradable pots, trim the collar of the pot down to soil level at transplanting time so it doesn't wick moisture away from the root zone.
Your action plan for starting a plant right now
Use this checklist whether you're starting from seed, a cutting, or a small seedling. It works for soil, water, hydroponics, or a terrarium setup.
- Check your seeds: if they're more than one to two years old for short-lived species, do a germination test before committing to a full sowing
- Choose your medium: sterile seed-starting mix (peat or coir-based) for seeds, fresh potting mix for established plants, or prepare your hydroponic reservoir with a balanced nutrient solution at pH 5.0 to 6.0 and EC 1.5 to 3 dS/m
- Set your temperature: use a thermometer to verify the medium stays in the right germination range for your specific crop (check the seed packet and aim for the middle of that range)
- Manage moisture: water from the bottom when possible, keep medium evenly moist but never waterlogged, and let the surface dry slightly between waterings once seedlings emerge
- Get light right immediately: position grow lights 2 to 4 inches above seedlings or place on the brightest windowsill you have; run lights 14 to 16 hours daily for most vegetables and herbs
- Add air movement: run a small fan on low for a few hours per day to strengthen stems and reduce moisture-related fungal risk
- Hold fertilizer until true leaves: once the first true leaves appear, start feeding at half the recommended dose and increase gradually
- Watch for early warning signs: leggy growth means more light, collapsed seedlings mean damping-off, yellow leaves usually mean nitrogen deficiency, brown tips usually mean overfeeding
- Harden off before any move outdoors: spend one to two weeks gradually exposing plants to outdoor conditions before leaving them outside full-time
- Keep notes: jot down what you planted, when, and what conditions you set. When something works or fails, you'll have data to learn from instead of guessing
Once your plant is established and actively growing, the questions shift toward how to encourage more foliage, manage plant size, or scale into different growing methods. To grow more leaves on plants, focus on getting enough light, consistent moisture, and the right early feeding schedule for vigorous new growth encourage more foliage. A simple way to encourage fuller foliage is to get light intensity right and avoid overfeeding when plants are young encourage more foliage. The biology stays the same. The more you understand what's happening inside the plant at each stage, the more confidently you can adjust what's happening outside it.
FAQ
How long does it usually take for seeds to sprout after soaking or sowing?
Timing varies by species and temperature, but a common mistake is waiting too long without checking early. Start counting from sowing, then do a quick look at the medium surface after a few days (without disturbing roots). If nothing changes by the midpoint of the crop’s typical window, recheck temperature, planting depth, and moisture level rather than adding more water or fertilizer.
Should I keep seeds in the dark or on a windowsill while they germinate?
Most seeds germinate in darkness, but windowsills can be misleading because temperature swings are often bigger than you think. If you use a windowsill, place trays away from direct hot sun spots and cold glass, use a consistent warming method if your home is cool, and rely on the specific seed’s light requirement (for example, surface-sown for photoblastic types).
Why do some seeds swell but never sprout?
Swelling usually means moisture and imbibition happened, but germination can still stall from incorrect temperature range, planting too deep, or seed quality problems. If seeds have swollen for several days but show no radicle, reduce soaking time, adjust temperature toward the crop’s preferred range, and consider a second round using fresh or tested seeds.
What’s the safest way to water during germination so I don’t cause damping-off?
Avoid puddling and avoid wetting the stem zone. Use a fine mist or bottom-watering so moisture rises evenly, keep the top surface slightly drying between waterings once seedlings emerge, and aim for “wrung-out sponge” moisture rather than continuously saturated media.
How can I tell the difference between “too little light” and “overwatering” in seedlings?
Legginess and pale growth point to insufficient light, while overwatering often brings collapse, water-soaked stems near the base, or slow, weak growth with consistently wet media. Check the medium depth (for example, the top half-inch drying and the finger test) and confirm light intensity or distance before changing fertilizer or watering frequency.
Do seedlings need fertilizer the moment they sprout?
Usually no. After cotyledons open, seedlings rely on stored reserves first, and fertilizer too early can burn roots or worsen damping-off risk. Wait until you see true leaves, then start with a diluted dose and only if growth looks healthy and the medium is not staying overly wet.
My seedlings are leggy and the stems are thin. Can I fix it without starting over?
Often yes. Increase light intensity immediately, reduce overcrowding, and gently adjust distance to the light source. If stems are very stretched, some growers gently deepen seedlings when transplanting (only if the stem is sturdy and you’re not burying cotyledons too aggressively). Avoid heavy fertilizer corrections during this phase.
Is seed priming safe, and will it ruin old seeds?
Priming is generally safe when done in clean, plain water and drained promptly, especially hydropriming around a couple of days. However, priming does not restore dead seeds, and very old seeds may show low viability. If you try it, sow immediately after draining and maintain proper temperature and moisture so they can complete germination.
How deep should I plant seeds?
A reliable rule is shallow sowing, seed depth often about two to three times the seed thickness, and smaller seeds get barely covered. Planting too deep delays sprouting and raises damping-off risk. If the packet is unavailable, start shallow, then adjust in future batches based on how quickly and uniformly they emerge.
Can I reuse old seed-starting mix, or should I start fresh each batch?
For starting from seed, fresh sterile mix is safer because pathogens can persist and trigger damping-off. Reusing can work only if you’re confident it was heat-treated and handled cleanly, but most home growers benefit from using a new bag for each seed-start cycle, especially after prior failures.
What pH and EC problems show up first in hydroponics, and what should I do immediately?
The early symptom is often slowed growth or pale leaves before obvious burns. Check pH first because nutrient availability shifts quickly, then confirm EC against your crop target. If either is out of range, flush or refresh the solution rather than adding extra nutrients blindly, and keep measurements consistent using properly calibrated meters.
In terrariums, how do I prevent constant wetness and mold?
Closed terrariums can stay wet because condensation recycles water, so you need a drainage layer and a mix that doesn’t hold too much water. Use a breathable plan, ventilate occasionally, and choose plants that match the container scale so they don’t force the system into perpetual high humidity.
When is the right time to transplant seedlings into bigger pots?
Transplant after you have true leaves and the root system can handle handling. If you wait too long, roots can tangle and transplant shock increases. If you transplant too early, the plant may struggle in the new mix because seedlings are still sensitive to nutrient concentration and moisture swings.
Do I need to harden off seedlings every time I move them outdoors?
Yes, whenever the plants have grown indoors under lower light and more stable conditions. Hardening off should include incremental exposure to wind, stronger sun, and cooler or warmer outdoor temperatures. Skipping it often causes leaf scorch in hours, even if the plant looks fine the day before.
How do I know when it’s time to switch from “seedling feeding” to regular feeding?
Use plant signals, not a calendar alone. When true leaves are established, growth is upright, and the media is not repeatedly soaked, you can gradually move from half-dose seedling feeding to your normal schedule. If you see brown tips, crusting, or wilting while the medium is still moist, pause feeding and flush before continuing.