To grow green, healthy plants indoors, you need three non-negotiables: the right amount of light for your specific plant, water only when the soil actually needs it (not on a fixed schedule), and a well-draining potting mix so roots never sit in soggy soil. Get those three things consistently right, and almost any leafy houseplant will reward you with dense, vivid green growth. Everything else, fertilizing, humidity, pruning, is just fine-tuning on top of that foundation.
How to Grow Green Plants: Step-by-Step Guide

Marcus Holloway
22 May 2026
Start here: the easiest green plants to actually keep alive
If you've killed plants before, it wasn't necessarily your fault. You may have just started with the wrong plant. Some species are genuinely forgiving of beginner mistakes; others punish every misstep. Start with the forgiving ones, build your confidence, then branch out.
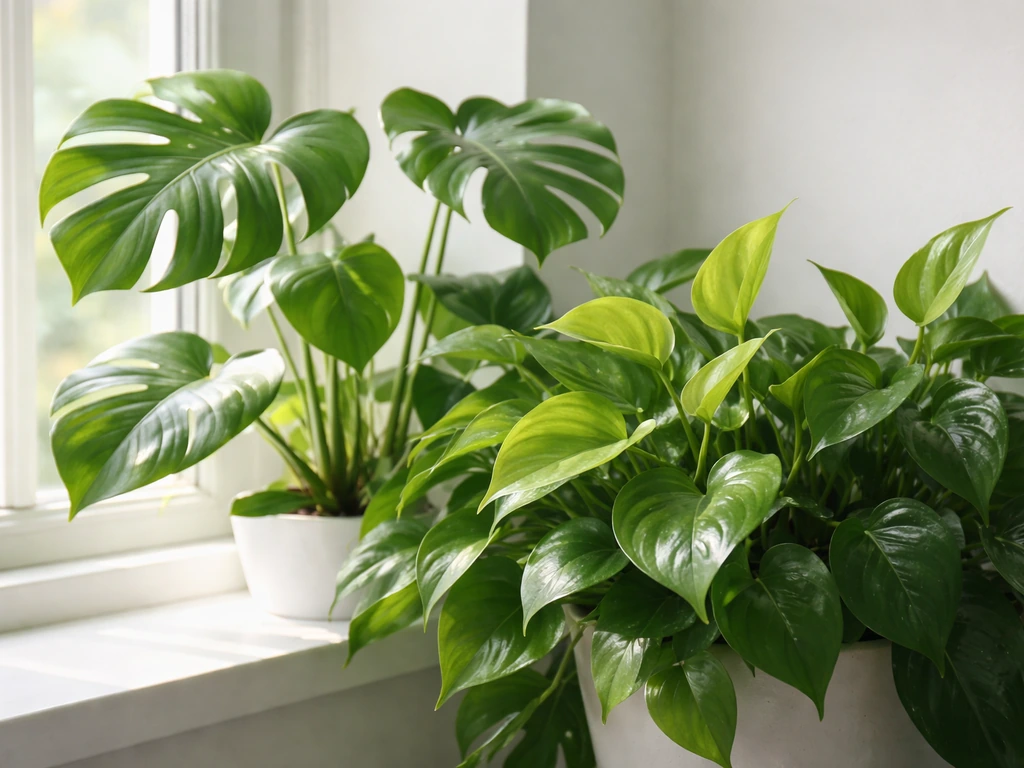
- Pothos (Epipremnum aureum): The ultimate beginner plant. It trails beautifully, tolerates low to bright indirect light, and only needs watering once the potting medium dries out. Mist the leaves occasionally and it stays lush. Hard to kill.
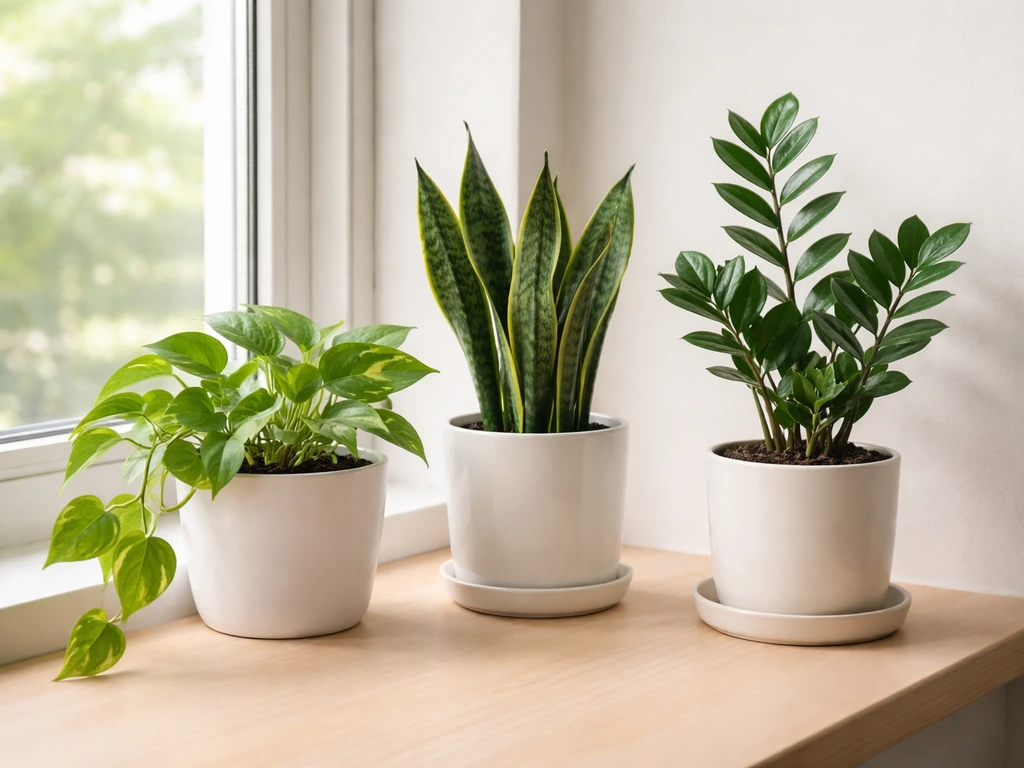
- ZZ Plant (Zamioculcas zamiifolia): Survives in very low light—even under fluorescent office bulbs—and its thick rhizomes store water, so missing a watering or two won't hurt it. The one rule: never let it sit in wet soil.
- Spider Plant (Chlorophytum comosum): Has fleshy, water-storing roots that buffer inconsistent watering. It handles medium light well, grows fast, and produces little offshoots (called spiderettes) you can propagate for free.
- Snake Plant (Sansevieria/Dracaena trifasciata): Thrives on neglect. Low light, infrequent watering, no fuss. One of the best plants for small apartments or rooms with limited windows.
- Peace Lily (Spathiphyllum): Droops dramatically when thirsty—which is actually useful because it tells you exactly when to water. Tolerates low light and grows well in average indoor humidity.
All five of these are widely available, inexpensive, and genuinely hard to kill once you understand their basic needs. Pick one or two to start. Mastering a couple of easy plants teaches you more about watering instincts and light reading than any book can.
What actually keeps a plant green: light, water, and nutrients explained
Chlorophyll is what makes plants green, and chlorophyll is only produced and maintained when the plant has enough light, water, and key nutrients, especially nitrogen. When any of these fall short, chlorophyll breaks down and leaves go yellow. Think of them as a three-legged stool: knock out one leg and the whole thing tips over.
Light: more than just 'bright' or 'dark'
Most houseplants want bright indirect light, meaning light that fills the room but doesn't hit the leaves directly. A spot 2 to 4 feet from a south- or east-facing window is usually ideal. Direct midday sun through glass can scorch tropical houseplants; very dim corners will cause leggy, pale, stretched growth. A quick test: hold your hand 12 inches above a white piece of paper.
If you see a sharp, crisp shadow, the light is bright enough for most plants. A faint, blurry shadow means it's on the low end; only the most shade-tolerant plants (ZZ, snake plant, pothos) will genuinely thrive there. If your space lacks natural light, a basic LED grow light running 12 to 14 hours a day is a real, affordable fix.
Water: less is almost always more
Overwatering kills more houseplants than underwatering. The goal isn't a strict weekly schedule, it's reading the plant and the soil. For most leafy houseplants, water thoroughly when the top 1 to 2 inches of soil feel dry, then let excess water drain fully from the pot. For pothos, use a well-drained potting medium and [let the potting medium dry out between waterings](https://plants.
ces. ncsu. edu/plants/epipremnum-aureum/common-name/pothos/). Never leave a pot standing in a saucer of water for more than 30 minutes.
If you're growing a drought-tolerant plant like a ZZ or spider plant, let the soil dry out almost completely before watering again. If you are growing a [spider plant](https://plants. ces. ncsu.
edu/plants/chlorophytum-comosum/), the North Carolina Extension Gardener Plant Toolbox notes that it is drought tolerant and stores water in its roots, which helps beginners manage irregular watering. If you're growing something moisture-loving like a peace lily, check the soil every 2 to 3 days and water once the top inch is dry.
Nutrients: feeding for green, leafy growth
Nitrogen is the nutrient most responsible for green, leafy growth. A balanced liquid fertilizer (look for ratios like 10-10-10 or 20-20-20) diluted to half strength works well for most houseplants during the growing season (roughly March through September in the Northern Hemisphere). Feed every 2 to 4 weeks. In fall and winter, most houseplants slow down and don't need fertilizing at all. Over-fertilizing is a real problem, salt buildup in the soil causes brown leaf tips and root damage. When in doubt, use less than the label says.
Temperature, humidity, and airflow
Most tropical houseplants are comfortable between 60°F and 80°F (15°C to 27°C), which aligns with the typical home temperature range. Keep plants away from cold drafts near windows in winter and away from heating or air conditioning vents. Humidity is a factor many beginners overlook: tropical plants prefer 40 to 60% relative humidity, but most homes run drier. Misting leaves (as recommended for pothos), grouping plants together, or using a small pebble tray with water under the pot can raise local humidity without a humidifier. Good airflow around plants also helps prevent fungal issues, don't crowd plants into tight spaces with no air movement.
Setting up your growing environment: pots, soil, and drainage
The container and growing medium you choose will determine whether your plant thrives or slowly declines from root problems. Get this right before you even bring the plant home.
Choosing the right pot
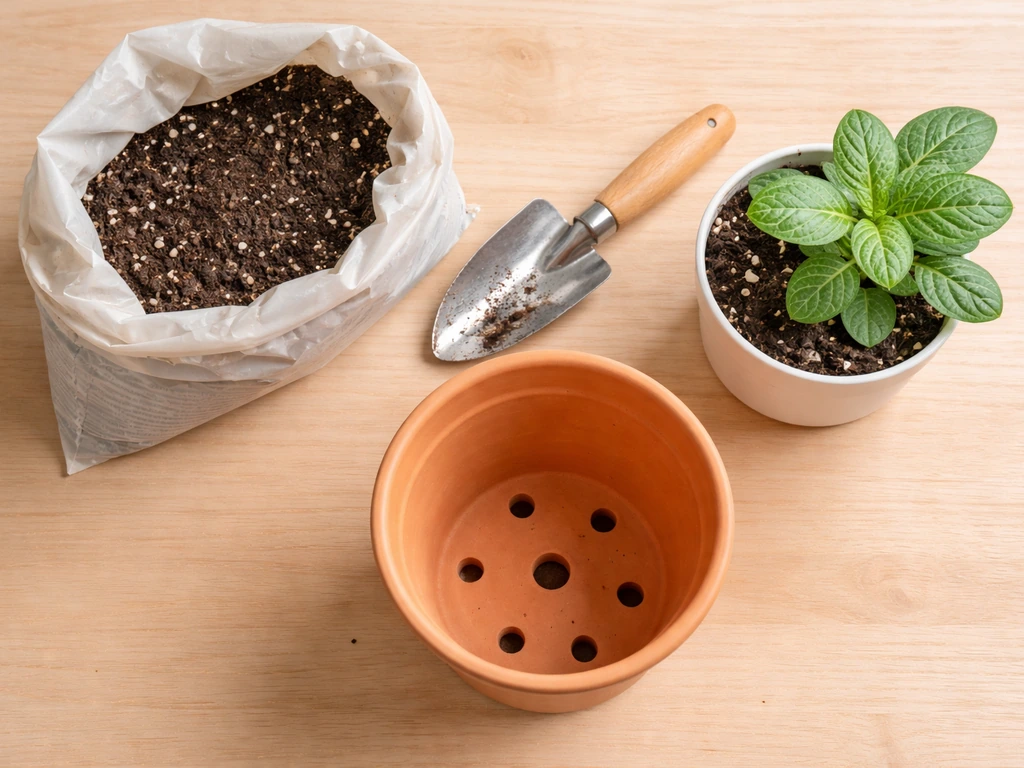
Always use a pot with drainage holes. This is non-negotiable. Water that can't escape pools at the bottom, starves roots of oxygen, and causes root rot. Terracotta pots are great for beginners because they're porous, they dry out faster, which forgives overwatering. Plastic pots retain moisture longer, which works well for thirsty plants or if you tend to forget to water. Pot size matters too: choose a pot only 1 to 2 inches larger in diameter than the plant's root ball. An oversized pot holds too much moisture around roots and increases rot risk.
Potting mix: matching the medium to the plant
A standard all-purpose potting mix works for most foliage houseplants, but you can improve drainage significantly by mixing in perlite (about 20 to 30% by volume). Perlite is the little white granules you sometimes see in bagged soil, it keeps the mix airy and prevents compaction. For drought-tolerant plants like ZZ and snake plants, lean even heavier on drainage: a cactus mix or a 50/50 blend of potting soil and perlite is ideal. For moisture-loving tropicals, a standard mix with some coconut coir added will hold water a bit longer without getting waterlogged.
Drainage layer and setup tips
- Place a small piece of mesh screen or a coffee filter over the drainage hole before adding soil—it keeps mix from washing out without blocking water flow.
- Skip the layer of gravel or rocks at the bottom of the pot. This is a persistent myth: it actually raises the water table inside the pot, making waterlogging worse, not better.
- Use a saucer under the pot to catch overflow, but empty it within 30 minutes of watering.
- If you love decorative pots without holes, use them as cachepots—put the plant in a plain plastic nursery pot with holes inside the decorative one, and lift it out to water.
A step-by-step care routine for healthy, leafy growth
Consistency beats perfection. A simple routine you actually follow will outperform an elaborate system you abandon after two weeks. Here's a practical weekly and seasonal rhythm that works for most green houseplants.
- Check soil moisture every 2 to 3 days: Push your finger about an inch into the soil. If it's still moist, wait. If it's dry, water thoroughly until it drains from the bottom. Don't rely on a schedule—rely on what you actually feel.
- Water deeply, not lightly: When it's time to water, pour slowly until water runs freely from the drainage holes. Shallow watering only wets the top layer and encourages shallow root growth.
- Wipe leaves monthly: Dust blocks light absorption. Use a damp cloth to wipe down large-leafed plants once a month. Mist smaller, fine-leafed plants to clean and boost humidity at the same time.
- Rotate the pot every 2 to 4 weeks: Plants grow toward light. Rotating the pot keeps growth even and prevents one-sided, lopsided plants.
- Feed during the growing season: Apply a balanced, half-strength liquid fertilizer every 2 to 4 weeks from spring through late summer. Stop feeding in fall and winter.
- Check for pests weekly during watering: Flip a few leaves over and look for tiny insects, webbing, or sticky residue. Catching pests early makes them easy to treat.
- Remove dead or yellow leaves promptly: Dead leaves invite fungus and pests. Snip them off cleanly at the stem with sterilized scissors.
Once this routine becomes habit, usually after 3 to 4 weeks, you'll stop second-guessing your plants. You'll start reading them intuitively: noticing when a leaf looks duller than usual, or when the soil is staying wet longer than it should, or when growth has stalled. That's when you've made the leap from following instructions to actually understanding your plants.
Growing green plants in soil, water, hydroponics, and terrariums
Soil isn't the only way to grow healthy green plants. Depending on your space, budget, and goals, one of these other methods might suit you better. Here's a plain-language breakdown of each, with honest pros and cons. If you're looking for a bigger-picture plan, this guide on how to grow your own plants at home walks you through choosing the right method for your space.
| Method | Best For | Key Advantage | Main Watchout | Recommended Plants |
|---|---|---|---|---|
| Soil (potting mix) | Beginners, most houseplants, any space | Familiar, forgiving, widely available | Overwatering risk; soil can compact over time | Pothos, ZZ, spider plant, snake plant, peace lily |
| Water propagation | Rooting cuttings, minimalist displays | Zero soil mess; easy to monitor roots | Not a long-term growing method for most plants; roots adapted to water struggle in soil | Pothos, philodendron, tradescantia, coleus |
| Hydroponics / semi-hydroponics | Fast growth, repeated success, no-soil environments | Precise nutrient delivery; excellent root oxygenation; no overwatering | Higher setup cost; needs monitoring of pH and nutrient solution | Lettuce, herbs, pothos, peace lily, most tropical foliage plants |
| Terrariums | Small spaces, high-humidity plants, display pieces | Self-regulating humidity; low maintenance once balanced | Not suitable for drought-tolerant plants; can go wrong fast if overcrowded or overwatered | Ferns, mosses, nerve plant (Fittonia), small peperomia |
Growing in soil
Soil growing is where most people start, and it's the right choice for the vast majority of houseplants. If you want a simple starting point, learn how to grow green plants at home by applying the same light, water, and nutrients basics to your chosen houseplant grow healthy green plants. The main skill to develop is reading moisture correctly rather than watering on autopilot. If you're growing plants at home across different rooms and lighting conditions, soil gives you the most flexibility to adjust your care by plant type.
Growing in water
Many leafy plants like pothos and philodendron will happily live in a vase of water for months, even years. For hanging plants, many trailing varieties like pothos are a great place to start because they grow well at home with bright light and consistent watering pothos and philodendron. Change the water every 1 to 2 weeks to prevent stagnation and add a few drops of liquid fertilizer every 4 weeks to keep growth going. It's a clean, visual way to grow plants on a windowsill or desk, just don't expect the same vigor as a soil-grown plant, and know that if you try to move a water-rooted cutting to soil later, it will need a short adjustment period.
Hydroponics and semi-hydroponics
Hydroponics delivers nutrients directly to roots via a water-based solution, cutting out soil entirely. Semi-hydroponics uses an inert medium like LECA (lightweight expanded clay aggregate) in a reservoir system to wick nutrients up to roots. Both methods produce fast, lush green growth and eliminate overwatering almost entirely. The tradeoff is setup cost and a learning curve around maintaining the right nutrient concentration and pH (typically 5.5 to 6.5 for most houseplants). If you want to grow green plants at a larger scale or in a space where soil is impractical, hydroponics is worth exploring seriously. If you want faster, greener results, learning hydroponics is one of the most practical ways to grow show plants at home.
Terrariums
A terrarium is a self-contained glass container that creates its own miniature humid ecosystem. Closed terrariums (with a lid) can go weeks between waterings because moisture recycles inside. They're beautiful and low maintenance once set up correctly, but they only work for humidity-loving, small-growing plants like ferns, mosses, and Fittonia. Never put a drought-tolerant plant like a succulent or ZZ plant in a closed terrarium, it will rot quickly. For a step-by-step setup, the key rules are: use a thin drainage layer of horticultural charcoal, choose plants with similar humidity and light needs, and resist the urge to overwater at the start.
Why your plant is turning yellow or brown (and how to fix it)
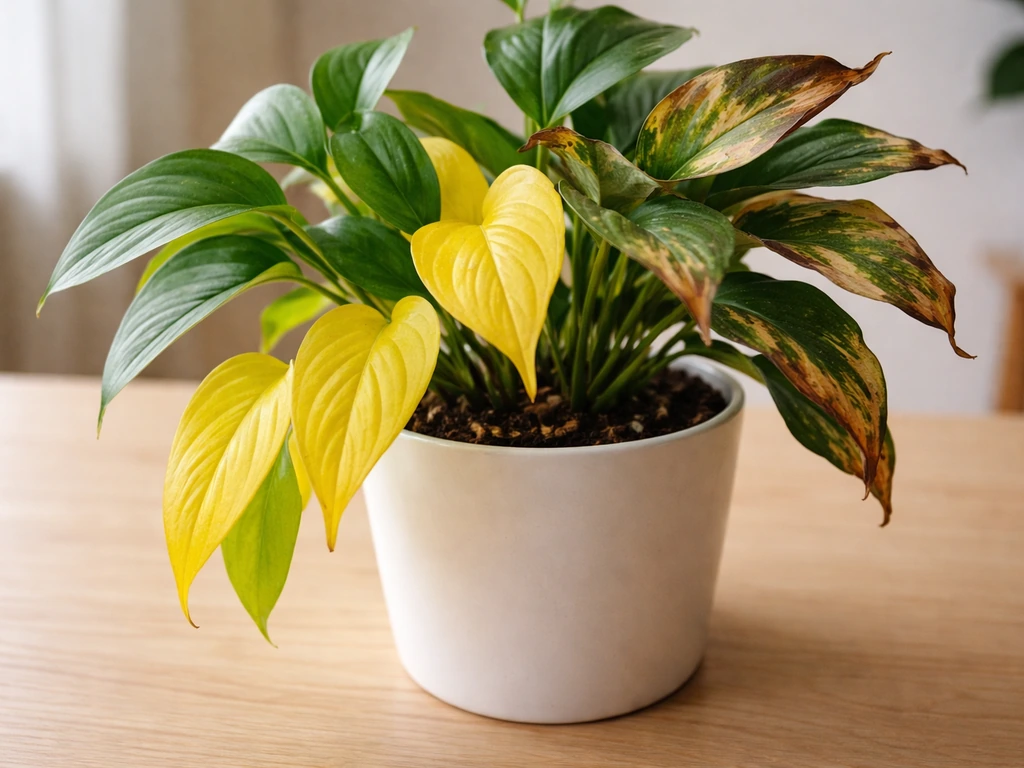
Yellow or brown leaves are your plant's way of sending a message. The trick is learning to read which message. Here are the most common causes and how to diagnose and fix each one.
Yellow leaves
| Symptom | Most Likely Cause | Fix |
|---|---|---|
| Yellowing lower leaves, soggy soil | Overwatering / root rot | Let soil dry out completely; check roots and trim any black/mushy ones; repot into fresh, dry mix |
| Yellowing all over, dry soil | Underwatering or pot-bound roots | Water thoroughly; check if roots are circling the bottom and repot if needed |
| Pale yellow-green new growth | Nitrogen deficiency | Apply a balanced liquid fertilizer at half strength; feed every 2 to 4 weeks during growing season |
| Yellow leaves with fine webbing underneath | Spider mites | Wipe leaves with a damp cloth; spray with neem oil solution or insecticidal soap; repeat weekly for 3 weeks |
| Yellow leaves in low-light spot | Insufficient light | Move plant closer to a window or add a grow light |
Brown tips and edges
Brown crispy tips almost always mean low humidity, overfertilizing, or fluoride/salt buildup in the soil. Try misting your plant more often, grouping it with other plants, or flushing the soil thoroughly with water every 2 to 3 months to wash out accumulated salts. If you've been fertilizing heavily, take a break for a month. Brown mushy spots on leaves (not tips) usually mean fungal disease from too much moisture and poor airflow, cut off affected leaves, reduce watering, and improve ventilation.
Leggy, stretched growth
Long, spindly stems with large gaps between leaves mean the plant is reaching desperately for more light. This is called etiolation. Move the plant to a brighter spot or add a grow light, then prune the leggy stems back to encourage bushier, more compact new growth. The plant won't naturally 'unstretch' the existing stems, but new growth under better light will be compact and green.
Drooping or wilting
Drooping has two opposite causes: too dry or too wet. Check the soil before reacting. If it's bone dry, water thoroughly and most plants will perk up within a few hours. If the soil is already soggy, the roots may be suffocating or rotting, stop watering, improve drainage, and consider repotting. A plant wilting in wet soil despite recent watering is a warning sign of root rot and needs immediate action.
Common pests: quick identification and treatment
- Fungus gnats: Tiny flies hovering around soil. Caused by consistently moist topsoil. Let soil dry out more between waterings; use a yellow sticky trap to catch adults; treat soil with a BTi (Bacillus thuringiensis israelensis) drench to kill larvae.
- Mealybugs: White cottony clusters in leaf joints and stem crevices. Dab with rubbing alcohol on a cotton swab; spray neem oil solution; repeat weekly.
- Scale: Brown bumps stuck to stems. Scrape off with a soft toothbrush dipped in soapy water; follow with neem oil spray.
- Spider mites: Tiny dots on leaves with fine webbing underneath. Thrive in dry conditions. Increase humidity, wipe leaves down, and use insecticidal soap spray.
- Aphids: Small soft-bodied insects, often green, clustering on new growth. Knock off with a strong water spray; treat with insecticidal soap.
Leveling up: pruning, propagation, repotting, and long-term care
Once your plants are stable and growing well, this is where the real fun starts. These next-level habits will keep your plants looking their best for years.
Pruning for bushier, fuller growth
Pruning isn't just cosmetic, it redirects the plant's energy. When you cut a stem just above a node (the bump or joint where a leaf attaches), the plant sends out two or more new shoots from that point instead of one. This is how you turn a sparse, leggy plant into a dense, bushy one. Use clean, sharp scissors or pruning shears, blunt tools crush stems and invite disease. Prune in spring or early summer when growth is most active. For trailing plants like pothos, trim long vines back by a third to encourage new growth from the base.
Basic propagation: free new plants from what you already have
Most leafy houseplants are easy to propagate from stem cuttings. Cut a stem with at least 2 to 3 leaves and one or two nodes, remove the lowest leaves, and place it in a glass of water or directly into moist potting mix. Water propagation lets you watch roots develop, which is satisfying and educational. Once roots are 1 to 2 inches long, pot the cutting into soil. Spider plants make this even easier, they produce spiderettes on long runners that you can snip off and pot directly.
When and how to repot
Repot when roots start circling the bottom of the pot, when they poke out of drainage holes, or when a plant that used to grow well suddenly stalls despite good care. Most houseplants need repotting every 1 to 2 years. Choose a new pot only 1 to 2 inches larger in diameter than the current one. Spring is the ideal time. Gently tease apart any tightly circling roots before placing the plant in fresh potting mix, then water it in and let it settle in a slightly shadier spot for a week while it adjusts.
Long-term troubleshooting checklist
If a plant that used to look great starts declining, work through this checklist before assuming the worst.
- Has the light changed? (New season, curtains added, moved to a different room?)
- When did you last repot? Rootbound plants decline even with perfect watering.
- Have you fertilized recently, or have you not fertilized in over 6 months?
- Is the soil draining properly, or does it stay wet for more than 5 days after watering?
- Have you checked the undersides of leaves for pests in the last 2 weeks?
- Has the indoor temperature dropped below 60°F (15°C) near the plant?
- Is there adequate airflow around the plant, or is it packed tightly against other objects?
Growing green, thriving plants indoors is genuinely learnable, even if you've struggled before. The most important shift is moving from a fixed routine to actually observing your plants and responding to what you see. These tips to grow plants at home can help you turn that foundation into steady, healthy growth observing your plants. Start with a forgiving plant like a pothos or ZZ, nail the basics of light and watering, and build from there. Once you have that foundation, exploring other methods like hydroponics, water growing, or terrariums becomes much more rewarding and a lot less frustrating.
FAQ
Can I move my houseplant to chase better light, and will it adapt?
Yes, but only if the plant is already established. If you need to rotate for even light, do it gradually (about 1/4 turn every week) rather than flipping the pot all at once, which can trigger temporary leaf drop.
My plant is yellowing, should I fertilize more?
Start by checking the soil moisture and light first, then look at growth speed. If it is not growing and leaves are staying small or pale, reduce fertilizer or pause it, then confirm it is getting bright indirect light, most yellowing that is not caused by overwatering is light-related.
How do I handle hard water when learning how to grow green plants indoors?
In most cases, use rainwater or distilled water if you have hard tap water with heavy minerals. If you only have tap water, let it sit out overnight and periodically flush the pot (run water through until it drains) to reduce salt buildup.
Should I cut off brown leaf tips, and what does that usually indicate?
Brown tips often respond better to fixing the cause than trimming. Trim only the dead part with clean scissors, then flush the soil and pause feeding for a few weeks if you suspect salt buildup, repeated heavy trimming without addressing the root cause will not improve new growth.
Will self-watering planters help me grow greener plants, or will they cause problems?
A wicking system or self-watering pot can work, but only if the reservoir does not keep the entire root zone wet. Use them with drought-tolerant plants cautiously, and always confirm drainage and that the plant is not sitting in consistently saturated media.
What should I do if my plant stays green but grows slowly?
When you grow in a low-light spot, expect slower growth and greener color only if the plant receives enough nitrogen and consistent watering. For most leafy plants, low-light “green” can look dull and stretched, which is a sign to increase light or use a grow light on a timer.
How can I tell if my pot size is causing overwatering?
A pot that is too large is a common mistake, even when the mix is good. If the soil stays wet for many days, move to a pot only 1 to 2 inches wider, or refresh the mix and ensure perlite is in the blend.
When pruning for bushier growth, how do I know where to cut?
Before you prune, check for new growth nodes and remove only above a node when you want branching. If a stem is actively deteriorating, make the cut back to healthy tissue, then sterilize tools to avoid spreading disease.
How do I decide whether to repot or keep troubleshooting light and watering?
It depends on the plant and environment. In general, repot if roots are circling, the plant is root-bound, drainage has worsened, or growth stalls despite correct light and watering, not on a calendar alone.
How long should I keep water-rooted cuttings more moist after planting in soil?
Propagating in water can be slower to transition. When you pot rooted cuttings, keep the soil slightly more evenly moist for the first 1 to 2 weeks (not soggy), then return to your normal watering rhythm to reduce transplant shock.
Does misting actually help, or is there a better way to increase humidity?
Most plants do not need misting for humidity relief unless you are raising local moisture. Instead, use groupings, pebble trays, or a small humidifier, and ensure airflow because misting without airflow can worsen fungal issues.
What should I do if my plant droops even though I watered it recently?
If drooping happens right after watering and soil is wet or waterlogged, treat it as a possible root problem. Stop watering, improve drainage, and consider repotting into fresh mix, because continued watering can worsen suffocation and rot.