The best beginner plants to grow right now are pothos, snake plants, ZZ plants, spider plants, basil, radishes, and cherry tomatoes. Each of these survives a range of mistakes, recovers quickly, and gives you visible progress fast enough to actually feel like you're winning. If you've killed plants before, it wasn't entirely your fault. Most beginner failures come down to three things: wrong light, overwatering, and picking a plant that was never forgiving to begin with. This guide fixes all three, and gets you set up for real success today.
Beginner Plants to Grow: Easy Picks and Care Guide

Marcus Holloway
6 Apr 2026
The best beginner plants (and why they're actually easy)
Not all "easy" plants are equally easy. Some just need infrequent watering. Others bounce back from neglect. A few grow so fast you can see daily progress, which is exactly what a beginner needs to stay motivated. Here's a honest breakdown of the top picks, what makes each forgiving, and what light level they actually need.
| Plant | Why It's Beginner-Friendly | Light Needed | Difficulty |
|---|---|---|---|
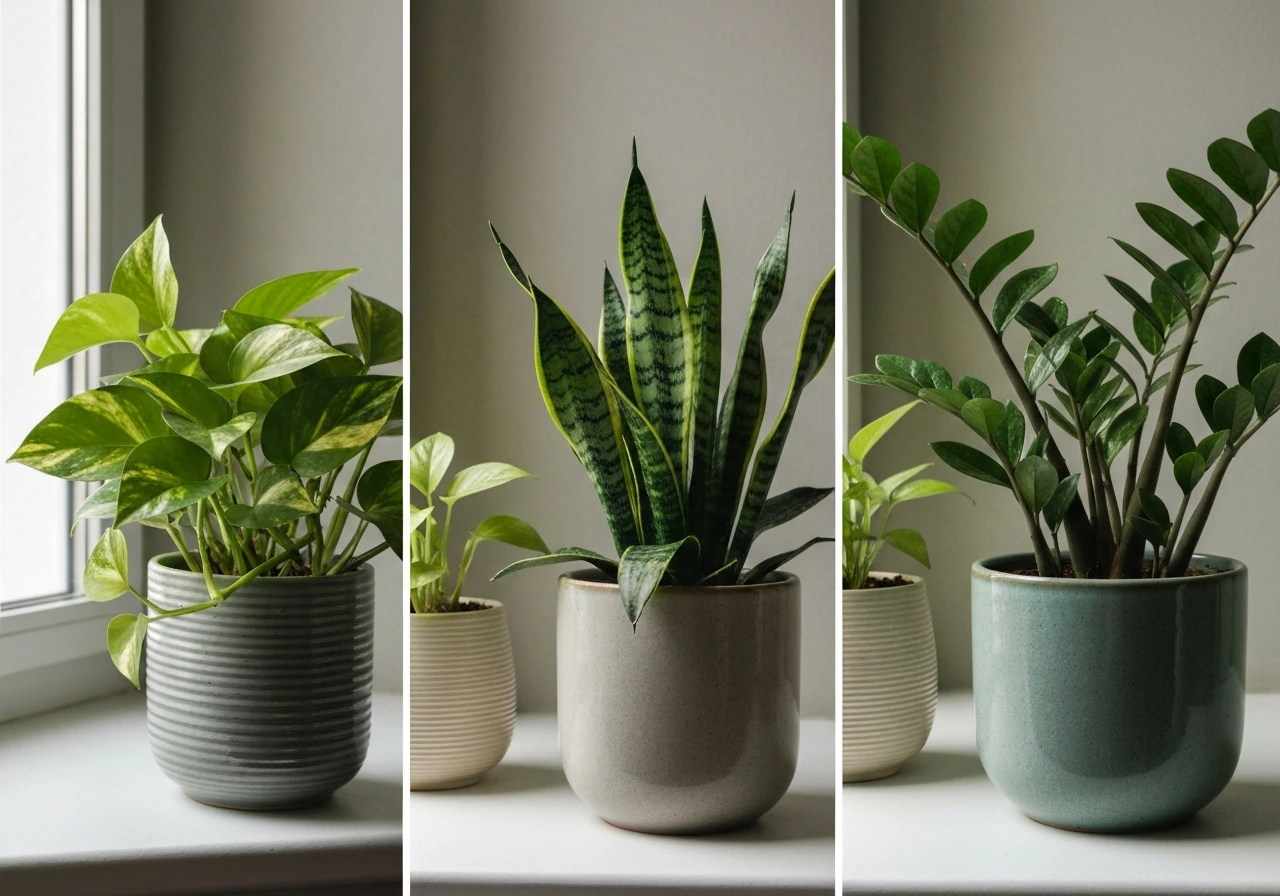
| Pothos | Survives low light and irregular watering; trails or climbs visibly | Low to bright indirect | Very easy |
| Snake plant (Sansevieria) | Tolerates drought, low light, and neglect for weeks | Low to medium indirect | Very easy |
| ZZ plant | Stores water in rhizomes; almost impossible to kill by forgetting to water | Low to medium indirect | Very easy |
| Spider plant | Produces baby offshoots, very tolerant of inconsistent care | Medium to bright indirect | Easy |
| Basil (indoors or out) | Fast-growing, edible, gives instant feedback on care quality | Bright (6+ hours) | Easy |
| Radishes (outdoors) | Ready to harvest in 3-4 weeks; great confidence builder | Full sun | Very easy |
| Cherry tomatoes (outdoors) | High yield, fast feedback, widely available as starter plants | Full sun (6-8 hours) | Easy-moderate |
If you want a deeper breakdown of what makes these plants so forgiving compared to others, easy to grow plants for beginners covers the full reasoning behind each pick in more detail. But for now, the short version is this: start with pothos or a snake plant indoors, start with radishes or cherry tomatoes outdoors, and you'll have something alive and thriving within weeks.
Picking the right plant for your space
Your environment matters more than your skill level at this stage. A plant that thrives in a bright south-facing apartment will struggle in a north-facing office, and the best outdoor plant for a sunny yard will rot in a shaded balcony. Before you buy anything, spend a few minutes honestly assessing what you're working with.
Indoors: match the plant to your windows
Window direction is the most reliable way to predict how much light your indoor space gets. South-facing windows get the most light, including some direct sun during the day, which works for basil, succulents, and most herbs. East and west-facing windows give you medium-to-bright indirect light, which is the sweet spot for pothos, spider plants, and most beginner houseplants. North-facing windows are genuinely low light, but snake plants and ZZ plants handle it without complaint. University of Maryland Extension research confirms this framework: east and west windows give "medium-bright" indirect light, while south windows provide "bright light" with some direct sun. If you're unsure, place your hand about a foot from the window at midday. A sharp, clear shadow means bright light. A faint or blurry shadow means medium light. No shadow at all means low light.
If you're choosing plants specifically for an indoor setup, easy to grow houseplants for beginners is a great companion read with specific picks tailored to common indoor light situations, including apartments with limited natural light.
Outdoors: sun, space, and season
Outdoors, the variables shift. Most food plants like tomatoes, radishes, and herbs need 6 to 8 hours of direct sun per day. Containers on a sunny patio work great for all of these. If your outdoor space is shaded (common with balconies between tall buildings), you're better off with leafy greens like lettuce or spinach, which handle partial shade reasonably well. If you want to explore what grows well in your specific outdoor environment, beginner plants to grow outdoors gives detailed guidance on matching plant choices to outdoor conditions, including small-space options.
Limited space and unconventional setups
Small space isn't a barrier. Pothos, snake plants, and ZZ plants all thrive in 6-to-8-inch pots on a shelf or windowsill. For food growing in tight spaces, a single cherry tomato plant in a 5-gallon bucket on a balcony will produce dozens of tomatoes. The key is matching pot size to plant size, not squeezing large plants into small containers because it looks tidy.
Setting up your grow space: the basics that actually matter
Getting setup right from the start saves you from most beginner problems. Here's what to prioritize.
Light first, always
Light is the single most important variable, and also the most commonly misjudged. Missouri Extension research shows that improper light intensity is one of the most frequent causes of houseplant failure, with symptoms including spindly growth, yellowing leaves, and little to no new growth. Before you pick your pot or soil, figure out where the light is coming from and how strong it is, then choose your plant accordingly. If your best available spot is genuinely low light, commit to low-light plants like snake plants or ZZ plants rather than forcing bright-light plants into a dark corner.
Containers and drainage
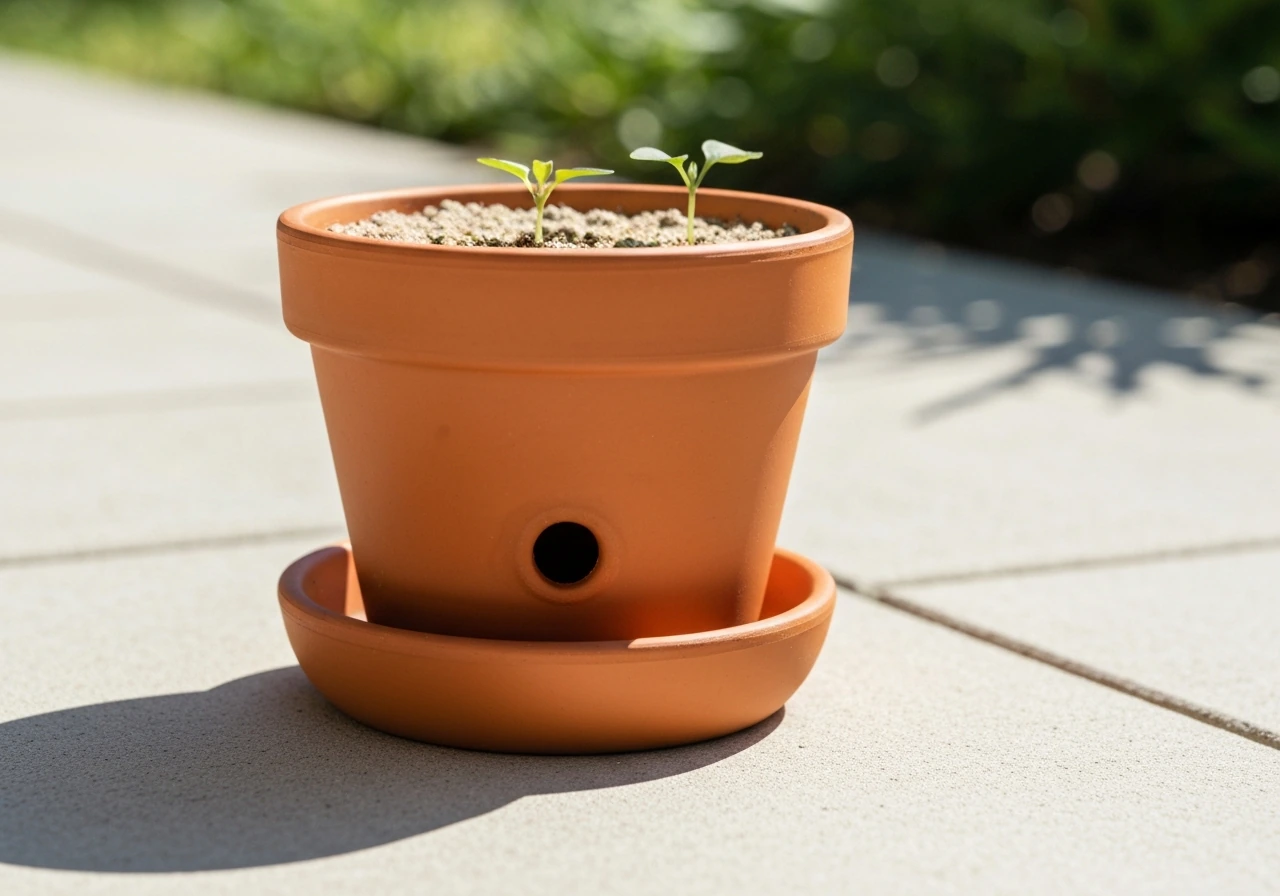
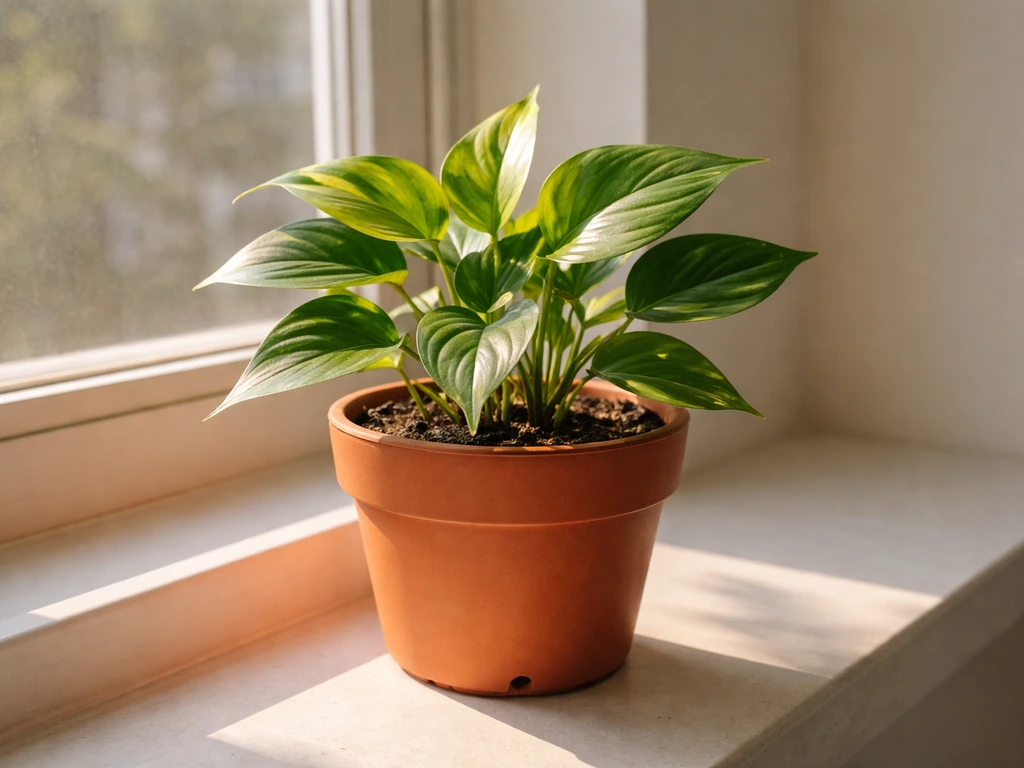
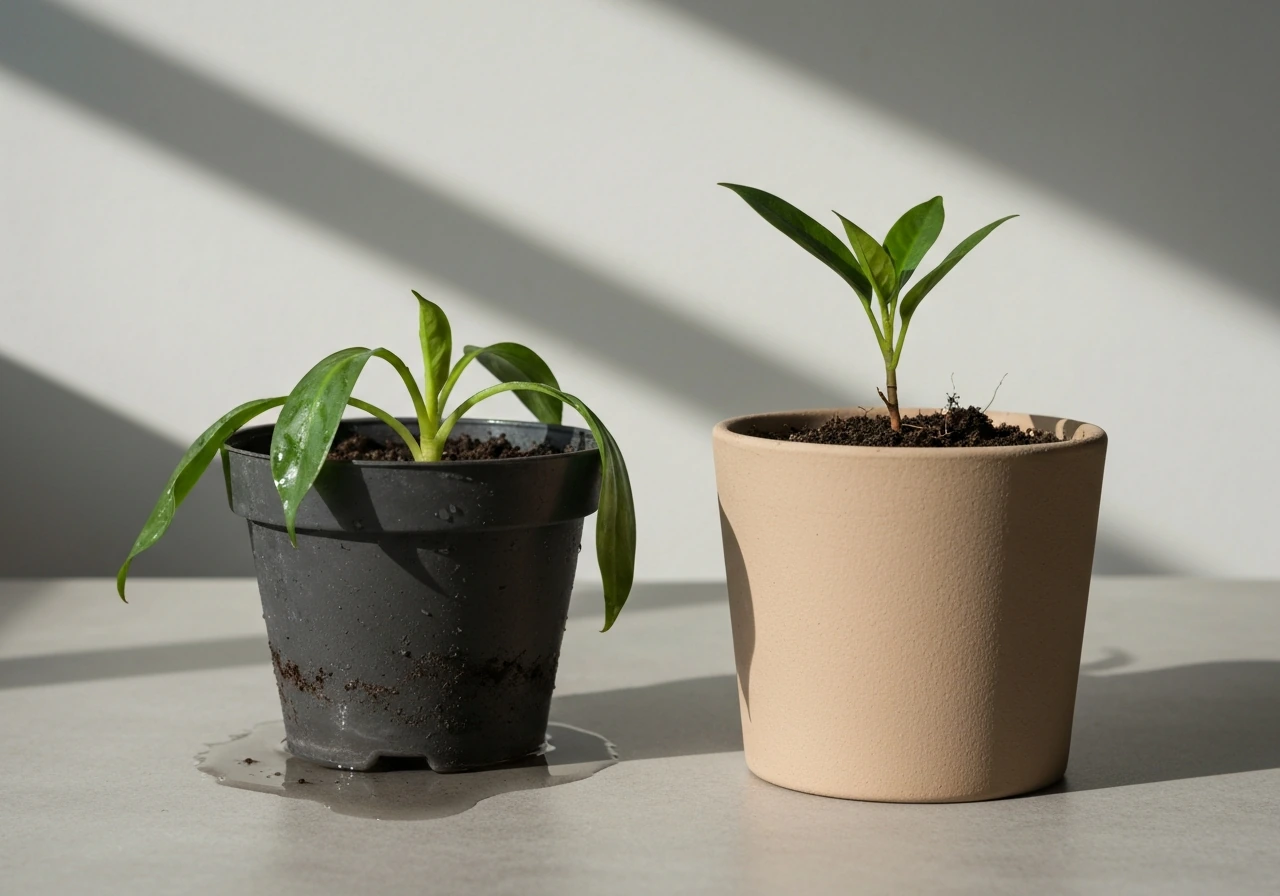
Use pots with drainage holes. This is non-negotiable for beginners. Without drainage, water sits at the bottom, roots rot, and the plant dies slowly in a way that looks like underwatering (droopy, yellowing), which tricks you into watering more and accelerating the problem. For most beginner houseplants, a standard plastic or terracotta pot with one or more holes in the bottom is perfect. Terracotta breathes better and dries out faster, which actually makes it more forgiving for beginners prone to overwatering. Plastic retains moisture longer, which suits low-light setups where soil dries slowly anyway.
Soil and growing medium
For most beginner plants, a standard all-purpose potting mix (not garden soil, which compacts badly in containers) is all you need. For succulents or snake plants, mix in about 30 percent perlite or coarse sand to improve drainage. For herbs and tomatoes outdoors, use a potting mix formulated for containers, not straight topsoil. University of Maryland Extension explains that for containers, roots do not access “garden soil” beyond the pot, and it discusses “topsoil/planting soil/potting soil” as distinct choices, which supports using proper potting media for container growing use a potting mix formulated for containers, not straight topsoil.. The soil is doing two jobs: anchoring roots and regulating moisture. A well-draining mix gives you much more room for watering mistakes in either direction.
Watering setup
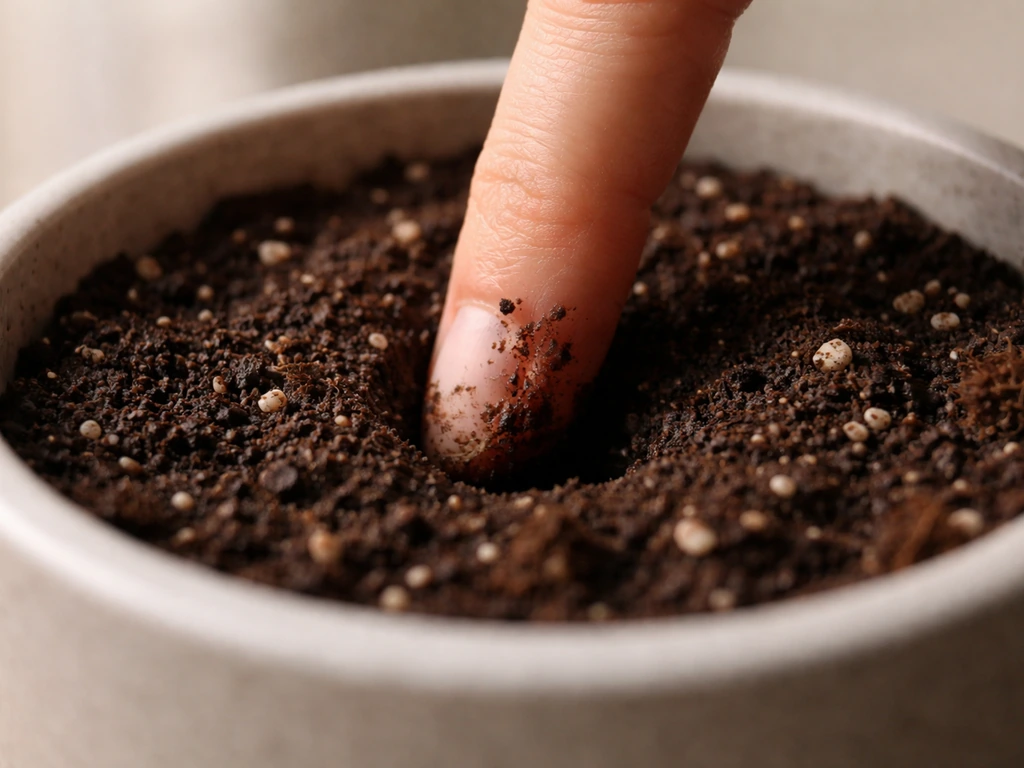
The most reliable method for container watering is the finger test: push your finger about 2 to 3 inches into the soil. If it still feels moist, wait. If it's dry at that depth, water thoroughly until water drains freely from the bottom. OSU Extension recommends checking daily at first to learn each plant's rhythm, then adjusting once you recognize the pattern. This matters more than any watering schedule, because schedules don't account for seasonal changes, pot size differences, or humidity swings.
A simple care routine that keeps beginner plants healthy
Once your plants are set up, the maintenance is honestly minimal. Here's what a solid beginner routine looks like on a weekly basis.
- Check soil moisture every 2 to 3 days using the finger test (2 to 3 inches deep). Water only when the top layer is dry.
- Rotate your pot a quarter turn every week so all sides of the plant get even light exposure. This prevents lopsided growth toward the window.
- Wipe dust off large leaves with a damp cloth once a month. Dust blocks light absorption more than most beginners realize.
- Feed with a balanced liquid fertilizer (like 10-10-10) at half the recommended strength once every 4 weeks during spring and summer. Skip feeding in fall and winter when growth slows.
- Trim dead or yellowing leaves at the base with clean scissors. This isn't just cosmetic; it prevents the plant from wasting energy on dying tissue.
- Do a 30-second pest check: flip a few leaves and look at the undersides for tiny bugs, sticky residue, or webbing. Catching pests early makes treatment easy.
For a full walkthrough of what caring for young plants looks like from the very first week, how to grow starter plants breaks down the early-stage process in detail, including what "healthy growth" actually looks like so you know when things are on track.
Mistakes beginners almost always make (and how to dodge them)
These are the patterns that kill the most beginner plants. Most are fixable once you know to look for them.
- Overwatering on a schedule instead of by feel. Watering every Sunday regardless of soil moisture is one of the fastest ways to kill a plant. Use the finger test every time.
- Putting a plant in a decorative pot without drainage holes. The plant looks fine for 2 to 3 weeks, then collapses from root rot. Always use drainage.
- Placing a low-light plant in a bright sunny window and vice versa. Research the light needs of your specific plant before you place it.
- Using garden soil in containers. It compacts, drains poorly, and introduces pests. Always use potting mix.
- Fertilizing a struggling plant. Fertilizer is food for healthy plants, not medicine for sick ones. Fix the underlying problem first.
- Repotting too soon. Most beginner plants don't need repotting for the first 12 to 18 months. Repotting too early stresses roots unnecessarily.
- Buying the most beautiful or exotic plant at the nursery. Gorgeous plants are often high-maintenance. Stick to the beginner list until you've built confidence.
There's a full resource worth bookmarking if you want to understand the full spectrum of what makes certain plants reliably survivable: anyone can grow these plants covers a curated collection of low-stakes choices that hold up even when beginners make several of the above mistakes at once.
Troubleshooting: what's actually wrong with your plant
Most plant problems show up in the leaves. Here's a quick guide to reading those signals and fixing them, broken down by symptom.
Yellow leaves
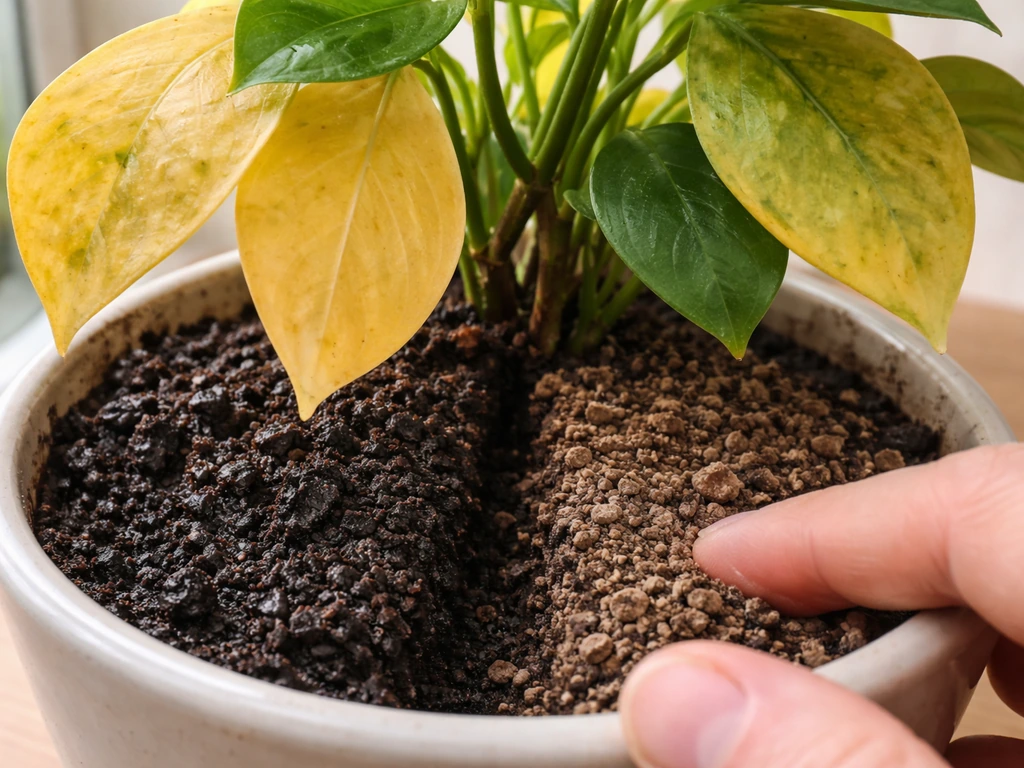
Yellow leaves are the most common beginner complaint, and they have several possible causes. Overwatering is the most likely culprit: check the soil. If it's soggy or has been wet for more than a week, let it dry out fully before watering again and consider improving drainage. Poor light is the second most common cause. Missouri Extension research confirms that yellow foliage is a classic symptom of insufficient light, alongside spindly shoots and little to no growth. If the plant is in a low-light corner and turning yellow, move it closer to a window. Natural lower leaves also yellow as a plant ages, which is normal. One or two yellow leaves on an otherwise healthy plant isn't a crisis.
Drooping or wilting
A drooping plant is usually either thirsty or drowning, and you need to diagnose which one before you act. Do the finger test: if the soil is bone dry, water it thoroughly and the plant should perk up within a few hours. If the soil is wet and the plant is drooping, you have a root problem (usually root rot from overwatering). In that case, ease off water, check drainage, and if the problem persists, consider repotting into fresh dry soil after trimming any black, mushy roots.
Slow or no growth
Slow growth in spring and summer usually comes down to light or nutrients. Move the plant to a brighter spot and add a half-strength balanced fertilizer. If the plant is growing slowly in fall or winter, that's almost always normal. Most houseplants go semi-dormant when light levels and temperatures drop. Don't fertilize more in winter trying to push growth, it won't help and can damage the roots.
Pests
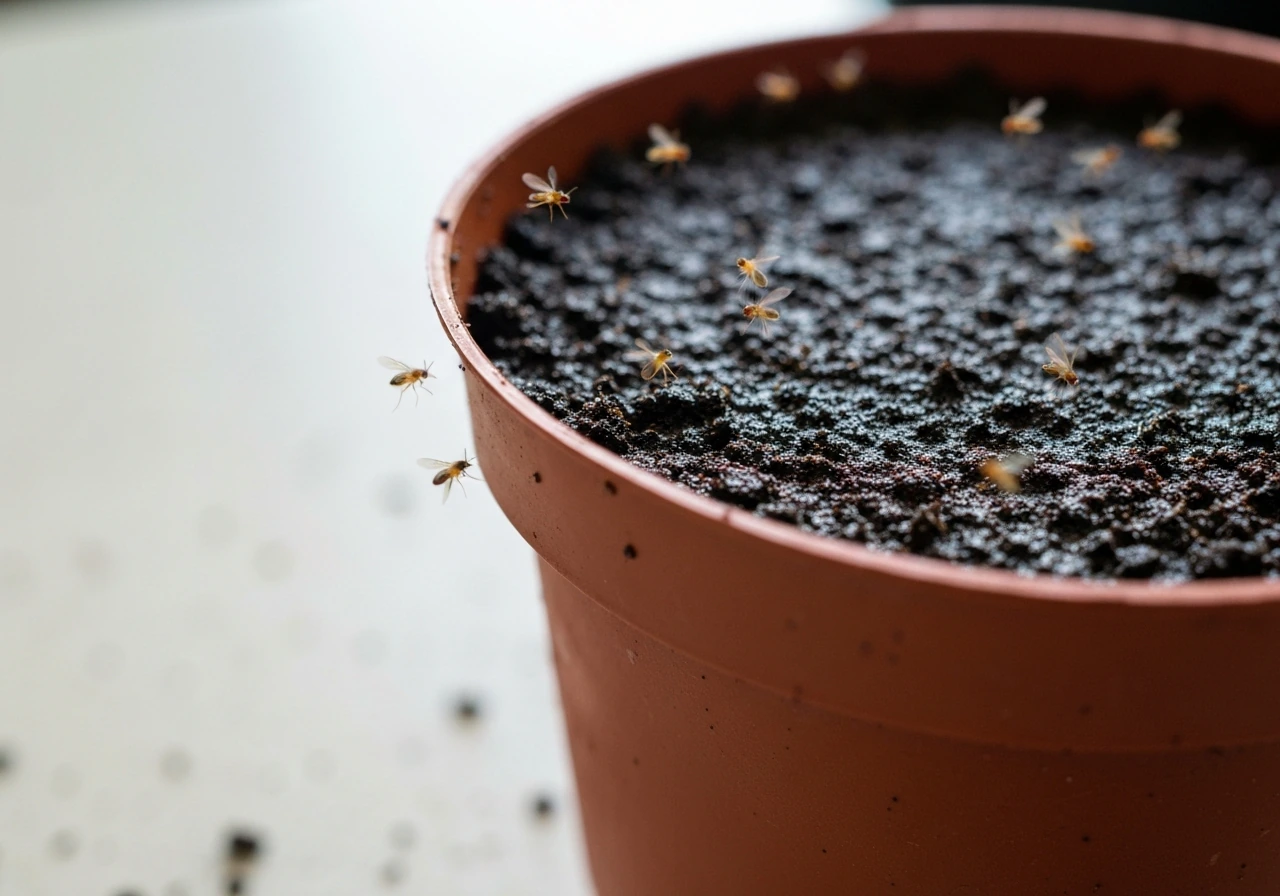
The most common pests on beginner plants are fungus gnats (tiny flies hovering around soil), spider mites (fine webbing on undersides of leaves), and mealybugs (white cottony clusters at leaf joints). Fungus gnats are mostly a sign of consistently wet topsoil. Letting the top inch or two dry out between waterings usually resolves it. Spider mites respond well to a weekly wipe-down with a damp cloth or a neem oil spray diluted to label strength. Mealybugs can be dabbed off with a cotton swab dipped in rubbing alcohol. Catching all of these early makes treatment straightforward. That's why the weekly pest check in your care routine matters.
When you're ready to level up your growing
Once you've kept a few plants alive for a couple of months and they're growing well, you have enough foundational understanding to start exploring more interesting setups. Here's a rough progression to consider.
Water propagation is the easiest next step. Pothos and spider plants root readily in a glass of water. Cut a stem below a node (the little bump where leaves attach), remove the lower leaves, and place the stem in water in a bright spot. You'll see roots in 1 to 3 weeks. It's satisfying and costs nothing.
Terrariums are a natural progression for indoor beginners who want a low-maintenance, self-contained setup. A closed terrarium creates its own humidity cycle and can go weeks without watering. They work especially well with small tropical plants like fittonia or moss. The visual appeal is also a big draw, and they're forgiving because the enclosed environment buffers humidity swings.
Hydroponics is worth considering if you want faster growth, more control over nutrients, or you're growing food plants indoors. Herbs like basil and mint grow noticeably faster in a basic kratky hydroponic setup (a passive method that requires no pumps or electricity) compared to soil. It sounds complicated but the entry-level version is just a jar of water with nutrients and a net pot. How to grow plants for beginners covers both the soil path and the bridge into alternative growing methods, so it's a good reference once you're ready to experiment beyond basic containers.
The honest signal that you're ready to advance is simple: your current plants look consistently healthy, you can diagnose a problem when it comes up, and you understand your space's light situation. That's the foundation. Everything else, hydroponics, terrariums, propagation, is just applying that same core knowledge in a different container.
The shortest path from here to a thriving plant
Pick one plant from the beginner list above that matches your actual light situation. Buy a pot with drainage holes and a bag of all-purpose potting mix. Put it in the right light for that plant. Check the soil moisture with your finger every 2 to 3 days and water only when dry. That's it for the first month. Resist the urge to fertilize, repot, or add more plants before you've established one successful routine. Once you have that first win, the rest of this gets much easier. Good starter plants to grow is worth a look when you're ready to add a second or third plant and want to diversify beyond the core list here.
FAQ
What beginner plant should I choose if my apartment has very inconsistent light?
If you’re not sure what “light” really means in your space, start with a low-light tolerant plant (snake plant or ZZ plant) and use the hand-shadow test. Then place the plant where it will stay for at least 2 to 3 weeks before moving it again, because frequent moving makes yellowing and slow growth harder to diagnose.
How often should I water beginner plants, really?
Aim for “moist but not wet,” especially for indoor houseplants. The finger test is the best guide, and for most beginners the soil should dry out in between waterings. A helpful rule is to reduce watering frequency when you notice yellow leaves and increase only when the soil dries to the 2 to 3 inch depth.
What should I change with watering in fall and winter?
Don’t rely on a calendar, rely on soil moisture and the season. Overwatering is most common when people keep watering on schedule even as light levels drop. If growth stalls in winter, reduce watering, stop fertilizing, and wait for the pot to dry before adding water again.
Will a larger pot help my beginner plant stay healthy longer?
Choose drainage over bigger pots. Oversized containers stay wet longer, which raises the odds of root rot. For most beginner houseplants, use a pot that’s only slightly larger than the root ball, with holes in the bottom, then adjust watering based on how quickly that specific pot dries.
Can I use regular garden soil for beginner plants in containers?
Yes, but avoid it for most indoor beginners. Garden soil compacts in containers and can hold too much water. Use all-purpose potting mix, and for plants that tolerate less moisture (snake plant, succulents), blend in about 30% perlite or coarse sand for better drainage.
My plant looks droopy, how do I know if it needs water or less water?
A plant that’s “droopy” can be thirsty or drowning. Do the finger test first, if the soil is bone dry, water thoroughly, if it’s wet, hold water immediately and check drainage. If you see black, mushy roots, repot into fresh dry mix after trimming the damaged parts.
Do tomatoes and radishes need different watering or setup than houseplants?
For container food plants, match your pot and support to the crop. Tomatoes and many herbs need enough sun (about 6 to 8 hours outdoors) plus a container designed for root growth, while radishes need consistent moisture but not soggy soil. Also, don’t start seeds too late in the season, radish and leafy growth depend on cooler weather.
How do I get rid of fungus gnats without hurting my plants?
If fungus gnats show up, the fix is usually drying the top layer between waterings rather than spraying randomly. Let the top 1 to 2 inches dry, check drainage, and avoid keeping the soil constantly wet. You can also remove decaying plant debris because that’s where adults lay eggs.
What’s the most effective early treatment for spider mites or mealybugs on beginner plants?
If spider mites or mealybugs appear, treat early and isolate if possible. Wipe undersides of leaves for spider mites weekly and use diluted neem only as directed on the label, for mealybugs dab with rubbing alcohol using a cotton swab. Recheck every few days until you stop seeing new spots.
Why is my beginner plant growing slowly, is it normal or not?
Slow growth can be normal, but you should rule out light issues first. If growth is slow during spring and summer, move the plant to a brighter window and use half-strength balanced fertilizer. If it’s slow in winter, stop fertilizing and focus on correct light and reduced watering.
Can fertilizer cause yellow leaves in beginner plants?
You’re usually over-fertilizing or under-lighting. Yellowing plus weak growth often points to insufficient light, yellow plus soggy soil points to overwatering. If you fertilize, use half-strength and only in spring and summer after the plant has stable light, then stop in winter.
How do I water-propagate pothos or spider plants without them rotting?
You can propagate pothos and spider plants in water successfully, but avoid submerging too much leaf tissue. Cut below a node, remove lower leaves so only the node area is in water, and use a bright spot for rooting. Once roots are a few inches long, transfer into soil and treat it like a new transplant (light and less frequent watering at first).
When is it actually safe to add a second plant?
Start with one plant that matches your actual light, then keep the routine stable. Once it’s clearly healthy for 6 to 8 weeks and you can diagnose leaf or watering issues, add a second plant with a similar light need or slightly higher tolerance so you’re not managing totally different care at the same time.
Are closed terrariums always low-maintenance, and what can go wrong?
If you’re trying a terrarium, remember it’s more about managing humidity swings than watering frequency. Use a closed terrarium for plants that tolerate higher humidity, and if condensation becomes heavy and constant, open briefly for airflow. Also, avoid mixing plants with very different light needs, the enclosure can exaggerate mismatch.