You need a pot with drainage holes, a bag of general-purpose potting mix, a plant that matches your light situation, and a watering can. That's genuinely it to get started. The details matter, but they're not complicated, and if you've killed plants before, I'd bet money it was one of three things: too much water, too little light, or the wrong soil.
How to Grow Plants for Beginners: Step-by-Step Guide

Marcus Holloway
19 May 2026
This guide walks you through every step, from picking your first plant to diagnosing problems when something looks off. If you want an even simpler starting point, stick to easy to grow houseplants for beginners and match them to your light and watering habits. If you're looking for good starter plants to grow, start by picking options that match your current light and watering comfort level.
Choosing your first plant and finding the right spot
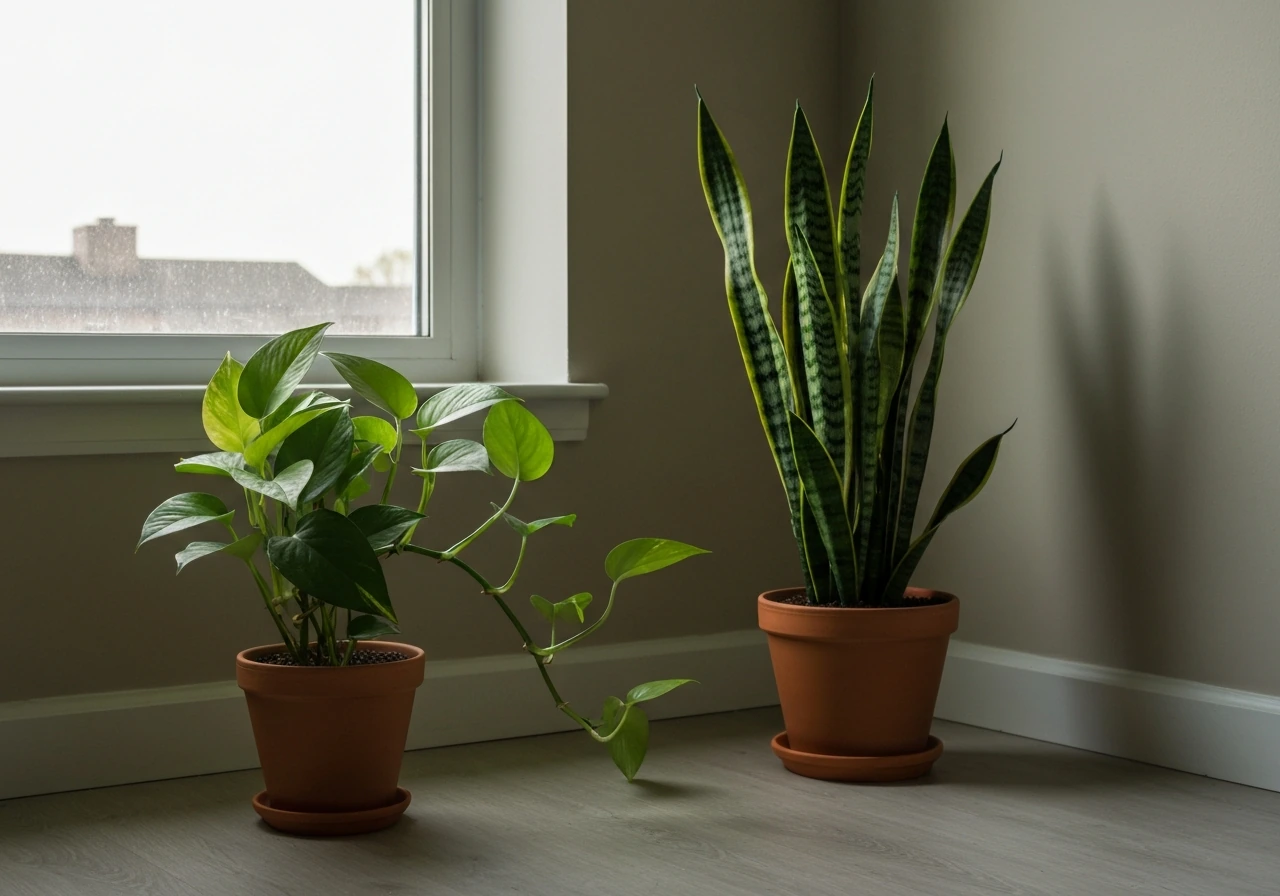
The single best thing you can do as a beginner is match the plant to the space you already have, not the other way around. If you want more ideas beyond this guide, check out beginner plants to grow that match different light levels and watering habits. Walk around your home and notice where light actually lands. A bright south- or west-facing windowsill gets enough light for most herbs, succulents, and pothos. A north-facing room or a spot several feet from any window is genuinely low light, and most plants will struggle there except for snake plants, ZZ plants, and pothos.
For absolute beginners, these are the plants I'd recommend first. Snake plants (also called mother-in-law's tongue) tolerate everything from dim interiors to bright light, need almost no water in winter, and are nearly indestructible. Pothos vines are fast, forgiving, and will tell you clearly when they need water by drooping slightly. Succulents are great if you have a genuinely sunny window and tend to forget to water. Spider plants and peace lilies round out the list for medium-light spots. If you want to grow outdoors, you'll have more options with consistent direct sun, and starting with herbs like basil, mint, or cherry tomatoes gives you something edible as a reward.
Pick one or two plants to start. You'll learn faster from one healthy plant than from six struggling ones. Once you're confident, you can branch out into more specific beginner plants suited to your exact setup, whether that's houseplants, outdoor beds, or something more adventurous.
What plants actually need: light, water, soil, and nutrients
Plants make their food from light, water, and carbon dioxide through photosynthesis. Everything you do as a grower is about giving them the right amounts of each input at the right time. Think of it like keeping a campfire going: too little fuel and it goes out, too much smothers it. Light drives the whole engine. Without enough of it, a plant can't process water fast enough, which is exactly why overwatering is so deadly in low-light rooms.
- Light: Plants need it to convert water and CO2 into sugars. More light generally means faster growth and higher water needs. Less light means the plant processes water slowly, so it stays wet longer.
- Water: Roots absorb water and the minerals dissolved in it. Roots also need oxygen, which is why waterlogged soil is as dangerous as drought. A dry root ball and a drowned one can look identical from the outside (both cause wilting).
- Soil/growing medium: Good potting mix holds moisture but also lets excess drain away and lets air reach roots. Garden soil from outside is too dense for containers and often carries pests and disease.
- Nutrients: Plants need nitrogen, phosphorus, and potassium (among others) to grow. A quality potting mix usually has enough nutrition for the first few weeks. After that, a basic balanced liquid fertilizer applied monthly during the growing season keeps most houseplants healthy.
Setting up your first grow: containers, soil, drainage, and tools
Getting the physical setup right from day one prevents the most common beginner failures. Here's exactly what to do.
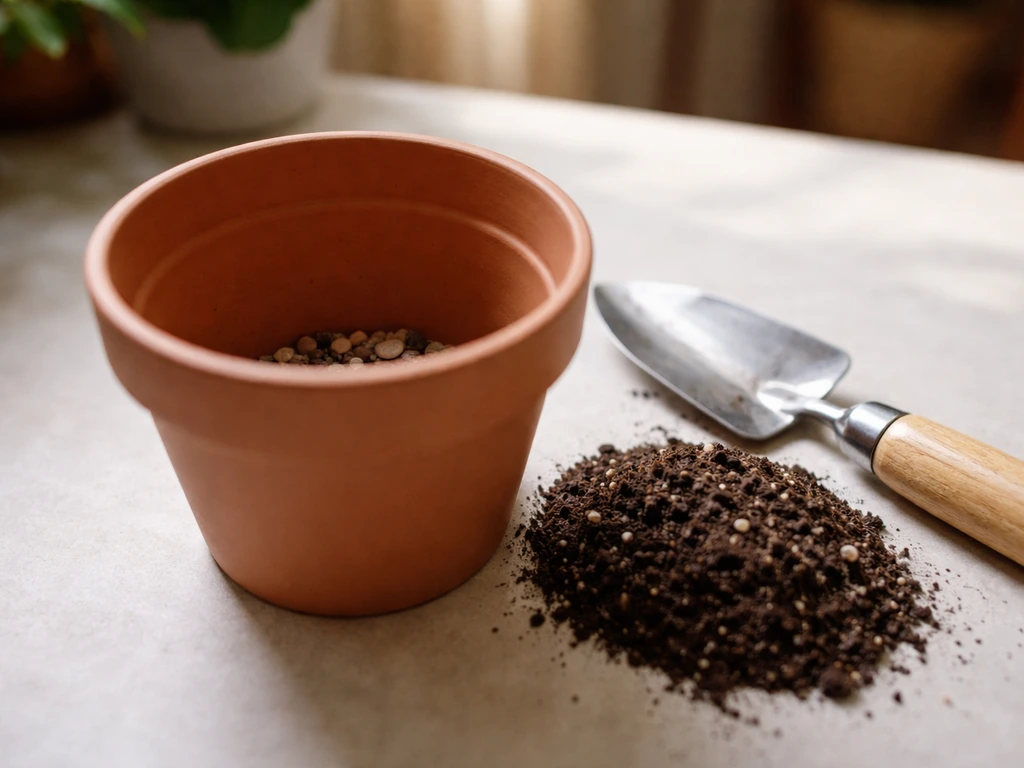
Pick the right container
Your pot must have at least one drainage hole in the bottom. This is non-negotiable. When water has nowhere to go, it pools around the roots and causes rot. If you fall in love with a decorative pot that has no holes, use the double-potting method: put your plant in a plain nursery pot with drainage, then set that inside the decorative one. Just lift it out to water and let it drain before putting it back. Avoid adding a layer of gravel or rocks to the bottom of a no-drain pot as a workaround. Research consistently shows it doesn't improve drainage and actually keeps the root zone wetter by raising the saturated zone.
Size matters too. A pot that's much too large for the plant holds more wet soil than the roots can use, which keeps things damp for too long. As a rule, go up only one pot size (about 1 to 2 inches in diameter) when repotting.
Choose the right potting mix
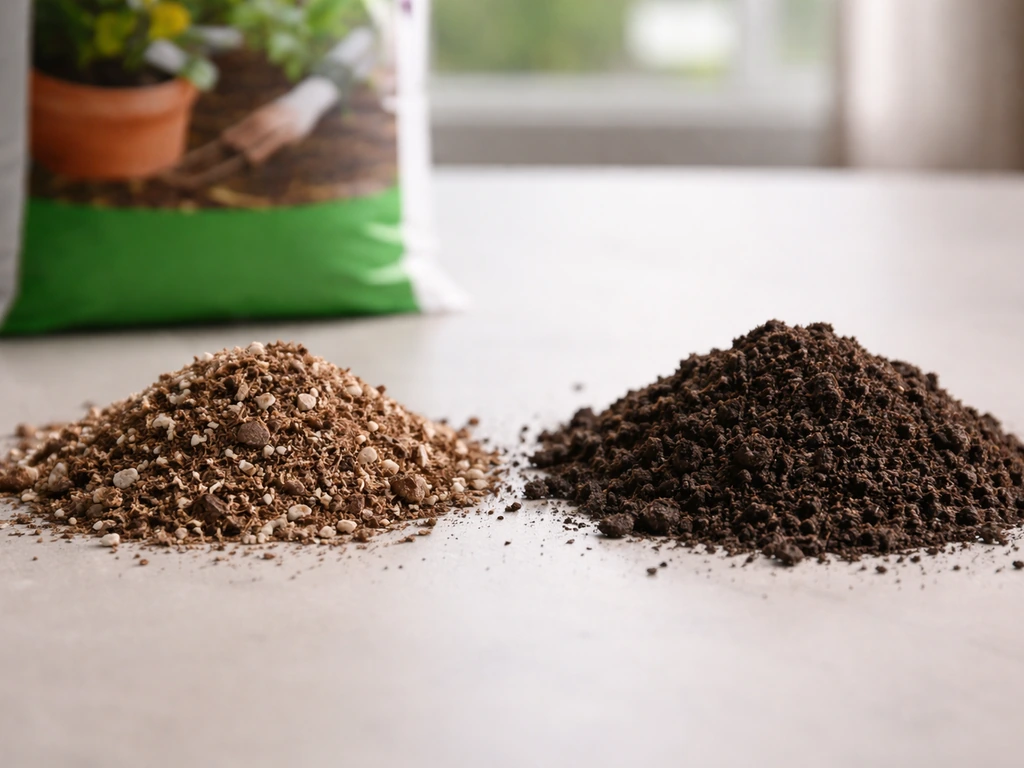
Buy a bag of general-purpose potting mix, not garden soil or topsoil. Most quality mixes are actually soilless blends: peat moss or coco coir for moisture retention, plus perlite or vermiculite for drainage and aeration. That combination holds enough water to feed roots while draining the excess and letting air in. The University of Maryland Extension also notes that houseplant potting media should be porous for root aeration and drainage, and that many mixes include peat moss, vermiculite, and perlite. For succulents and cacti, buy a mix specifically labeled for succulents or add extra perlite (about 50/50) to a standard mix. For seed starting, use a fine seed-starting mix rather than regular potting mix.
Minimal tools you actually need
- A watering can with a narrow spout for control (a repurposed bottle works fine)
- A small trowel or old spoon for moving soil
- A spray bottle for misting or humidifying if needed
- A saucer under each pot (to catch drainage, but empty it after watering so roots don't sit in water)
- Optional but useful: a cheap moisture meter, which takes the guesswork out of when to water
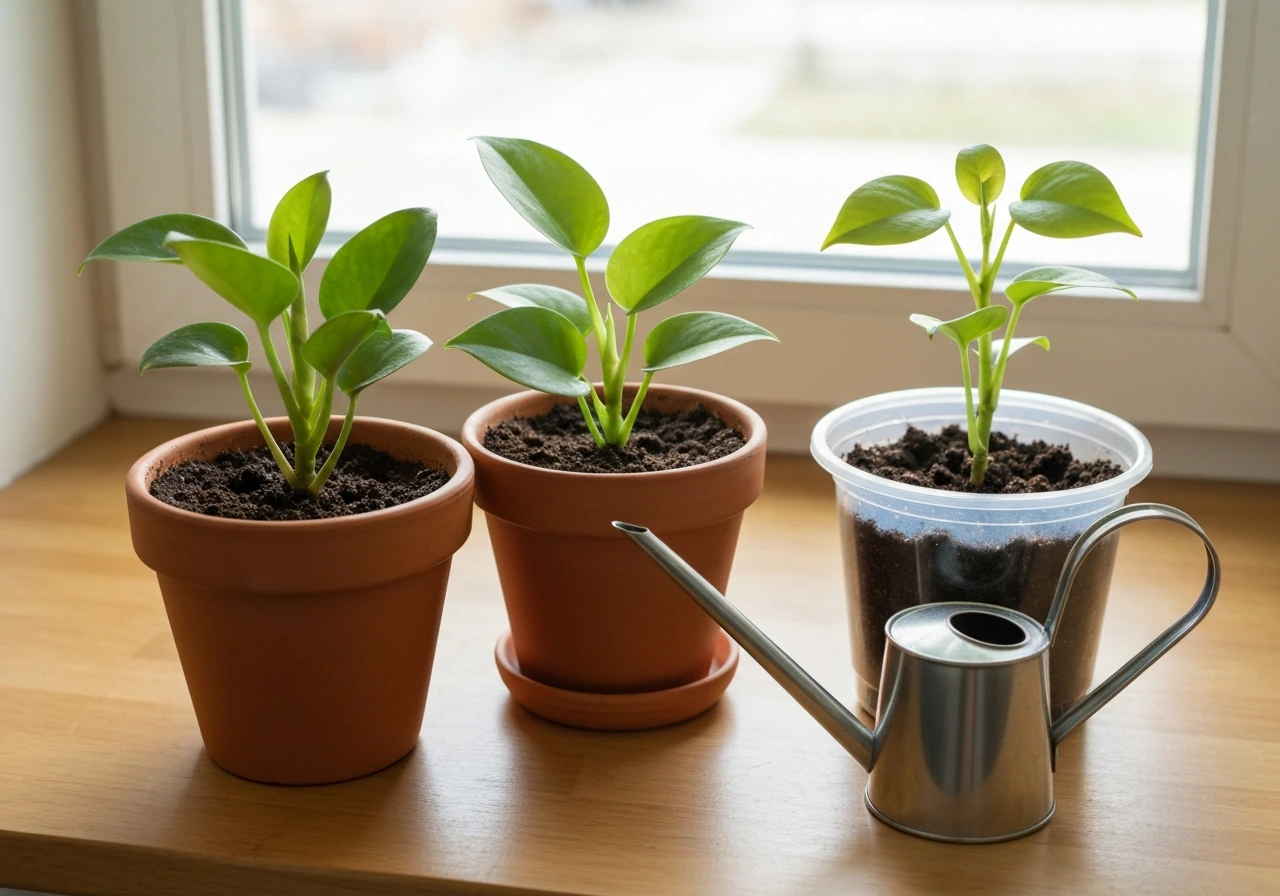
Potting up your plant step by step
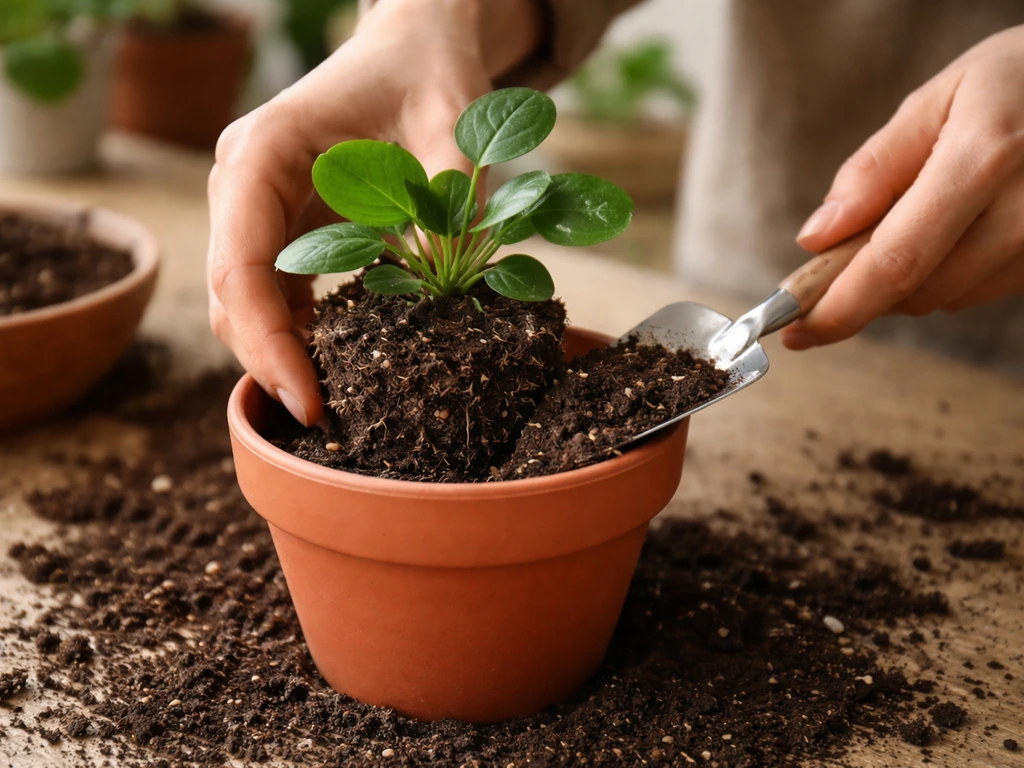
- Add a small amount of potting mix to the bottom of your container so the plant will sit at the right height (the top of the root ball should be about an inch below the rim).
- Remove the plant from its nursery pot and gently loosen any tightly circling roots.
- Set the plant in the center of the new pot and fill in around it with potting mix, pressing lightly to remove air pockets.
- Water thoroughly until water runs freely from the drainage holes, then let it drain completely before placing it in its saucer.
- Put the plant in its intended spot and don't move it constantly. Plants need a few days to adjust.
How to water correctly (and the mistakes that kill most plants)
Overwatering kills more houseplants than anything else. The fix is simple: water when the soil needs it, not on a fixed schedule. Stick your finger about an inch into the soil. If it still feels damp, wait. If it feels dry at that depth, water thoroughly. For most tropical houseplants, that's roughly every 7 to 10 days in a warm, bright room, but in winter or in low light it might stretch to every 2 to 3 weeks. Succulents and cacti want to dry out completely between waterings.
When you do water, water deeply. Pour slowly until water runs out of the drainage holes, which ensures the entire root ball gets moisture rather than just the top inch. Empty the saucer within an hour so roots are never sitting in standing water. Use room-temperature water when possible. Cold tap water can shock tropical plants, and if your tap water is heavily chlorinated, filling a jug the night before and letting it sit is enough to let it reach room temperature and off-gas some chlorine.
Bottom watering is a great technique for plants that dislike wet leaves (like African violets) or when the soil has dried out and become hydrophobic. Set the pot in a basin of water, let it sit for 20 to 30 minutes while the soil absorbs moisture from below through the drainage holes, then lift it out and let it drain. This also encourages roots to grow downward toward moisture rather than staying shallow.
A quick note on seasons: as light increases in spring and summer, your plants will drink more and need more frequent watering. In fall and winter when light drops and growth slows, pull back significantly. Watering on the same schedule year-round is one of the most common beginner mistakes.
Light and temperature: what your plants are actually experiencing indoors
Light is the most under-estimated variable in indoor growing. What feels bright to your eyes is often surprisingly dim for a plant. Light intensity is measured in foot-candles (FC). A medium-light environment, which suits most common houseplants, falls between 100 and 500 FC. That typically corresponds to a spot near an east- or west-facing window. A south-facing window in full direct sun can exceed 1,000 FC. A corner several feet from any window might be 25 to 50 FC, which is too low for almost everything except the most shade-tolerant plants.
You don't need a light meter to figure this out. The easiest diagnostic is watching the plant. When a plant doesn't get enough light, it gets leggy: stems become long, thin, and stretched as the plant reaches toward the light source. Leaves may also become pale or widely spaced. If you see this, move the plant closer to a window or add a grow light. A basic full-spectrum LED grow light placed 6 to 12 inches above the plant for 12 to 16 hours a day makes a real difference in darker spaces and doesn't need to be expensive.
| Light Level | Foot-Candles | Typical Location | Good Plant Choices |
|---|---|---|---|
| Low light | 25–100 FC | North window, dim corner | Snake plant, ZZ plant, pothos |
| Medium light | 100–500 FC | East or west window | Peace lily, spider plant, philodendron |
| Bright indirect | 500–1,000 FC | A few feet from a south window | Monstera, rubber plant, most herbs |
| Direct sun | 1,000+ FC | South or west windowsill | Succulents, cacti, tomatoes, basil |
Temperature is simpler. Most common houseplants are comfortable in the same temperature range humans prefer: 60 to 80°F (15 to 27°C). Keep plants away from heating vents, cold drafts near single-pane windows in winter, and air conditioning units blowing directly on them. Sudden temperature swings stress plants more than consistently being a few degrees off the ideal.
Fixing common problems: yellowing, wilting, pests, and more
Something going wrong is part of growing plants, not a sign you've failed. Most problems follow recognizable patterns once you know what to look for. Here are the most common ones and what to do.
Yellow leaves
Yellowing is the most common complaint and the most overdiagnosed. A few lower leaves yellowing and dropping on an otherwise healthy plant is completely normal, especially after a move or seasonal change. Widespread yellowing almost always points to overwatering, which suffocates roots by depriving them of oxygen. Check the soil: if it's been wet for a long time, let it dry out fully before watering again and make sure drainage is working. Yellowing can also mean low light, a nutrient deficiency (if the plant hasn't been fertilized in months), or roots being pot-bound. Start with watering and light before assuming the worst.
Wilting
Wilting is the plant's distress signal, but it has two opposite causes. Stick your finger into the soil immediately. Dry and pulling away from the pot sides means underwatering: water thoroughly and the plant will usually perk up within a few hours. Wet or soggy soil with wilting is more serious: it likely means roots have rotted from overwatering and can no longer move water to the leaves even though the soil is wet. In that case, remove the plant from the pot, trim any mushy black or brown roots, let the root ball air out for an hour, and repot in fresh dry mix.
Leggy, stretched growth
Long, spindly stems with wide gaps between leaves mean the plant is reaching for more light. Move it closer to a window or add a grow light. You can also trim leggy growth back to encourage bushier new growth from lower nodes.
Slow or no growth
If your plant looks stable but isn't growing, consider the season first. Most plants slow down or stop entirely in fall and winter when light hours drop. If it's spring or summer and growth is still stalled, check light levels, make sure the plant isn't root-bound (roots circling out of drainage holes is a sign), and consider whether it's been fertilized recently. A monthly dose of balanced liquid fertilizer during the growing season is usually enough to keep things moving.
Mold, fungus, and powdery mildew
White fuzzy mold on the surface of the soil is usually saprophytic fungus feeding on organic matter in the mix. It's not directly harmful to the plant but signals the soil is staying too wet for too long. Improve airflow, water less frequently, and scrape away the top layer of soil if it bothers you. Powdery mildew shows up as a white powdery coating on leaf surfaces and is a different issue: it spreads in humid, stagnant air with low light. Increase airflow, move the plant somewhere brighter, and remove heavily affected leaves. Wiping remaining leaves with a dilute neem oil or baking soda solution can help slow the spread.
Pests
The most common houseplant pests are fungus gnats, spider mites, mealybugs, and scale. Fungus gnats (tiny flies hovering around soil) are almost always a sign of chronically wet soil: let the top inch dry out between waterings and they'll disappear on their own. Spider mites leave fine webbing on leaves and thrive in dry, stuffy air: increase humidity and wipe leaves with a damp cloth. Mealybugs look like small white cottony blobs in leaf joints and can be removed with a cotton swab dipped in rubbing alcohol. Always quarantine a new plant for a week or two before putting it near your other plants to avoid introducing pests.
What to try next: growing in water, hydroponics, and terrariums
Once you're comfortable with soil growing, there are some genuinely interesting ways to grow plants without traditional soil that suit small spaces and limited budgets well. If you're also trying to learn how to grow starter plants, focus first on light, soil, and proper watering so new seedlings can establish strong roots grow plants without traditional soil. Each method works on the same core principles (roots need water, oxygen, and nutrients) but delivers them differently.
Growing in water (water propagation and vase growing)
Many houseplants, including pothos, philodendrons, and tradescantia, will grow happily in a jar of water indefinitely. Snip a stem just below a node, strip the lower leaves, and place it in a glass of water in a bright spot. Change the water every week to keep it oxygenated and prevent bacterial buildup. It's the simplest possible introduction to soil-free growing and a great way to propagate new plants for free.
Basic hydroponics
Hydroponics means growing plants with roots in a nutrient-enriched water solution rather than soil. The key difference from just growing in plain water is that you add a measured nutrient solution so plants get everything they need. One of the easiest setups for beginners is the Kratky method: a plant is suspended in a net pot above a sealed reservoir of nutrient solution.
As the plant drinks, the water level drops and an air gap forms above the water, giving roots the oxygen they need. No pumps, no electricity, no complicated equipment. It's surprisingly effective for herbs and leafy greens. The main thing to understand about all hydroponics is that root oxygenation is critical: roots sitting in stagnant, unaerated water without that air gap will suffocate just like in overwatered soil.
Terrariums
A terrarium is a glass container turned into a miniature growing environment, great for small spaces and plants that love humidity. Closed terrariums trap moisture and essentially water themselves through condensation cycles, making them nearly self-sufficient once set up. They need a drainage layer at the bottom (gravel or crushed pot shards) and activated charcoal to prevent bacterial buildup and odor in the absence of drainage holes. Open terrariums suit succulents and cacti, which need air circulation and don't want the humidity a closed system creates. The main risk in closed terrariums is excess moisture leading to mold or algae, so airflow and the right plant selection matter.
| Method | Best For | Skill Level | Main Watch-Out |
|---|---|---|---|
| Soil in pots | Almost any plant, all beginners | Beginner | Overwatering and poor drainage |
| Water vase/propagation | Cuttings, pothos, philodendron | Beginner | Stagnant water, no nutrients long-term |
| Kratky hydroponics | Herbs, lettuce, leafy greens | Beginner to intermediate | Maintaining correct nutrient solution |
| Closed terrarium | Ferns, moss, humidity-loving plants | Beginner with patience | Excess moisture causing mold |
| Open terrarium | Succulents, cacti, air plants | Beginner | Underwatering or wrong plant choice |
Start with soil, get comfortable with the basics of light and watering, and then experiment. Growing plants is one of those things that gets easier and more intuitive faster than most people expect. Once you understand the basics, anyone can grow these plants with a little attention and the right conditions Growing plants. The first healthy plant you keep alive for three months will teach you more than any guide can, and from there it tends to become genuinely hard to stop.
FAQ
How do I know if my plant needs water or more light?
Do a quick “touch test” at the same time each time you check. If the soil is damp at about an inch down but the plant looks pale or leggy, light is usually the issue. If the leaves look droopy and the soil is dry at that depth, it’s usually water. If you’re unsure, wait 12 to 24 hours before watering again, because repeated watering in low light is a common mistake.
What should I do if my plant is in a decorative pot with no drainage holes?
Use the double-pot method (nursery pot inside decorative cache pot). Never rely on a gravel layer, it can trap moisture around the roots. Also, check the nursery pot after watering, if water is taking a long time to drain or smell develops, switch to a different pot with real drainage.
Is it better to water on the same day each week or follow the soil?
For beginners, follow the soil, not the calendar. Even if your plant is “usually” on a 7 to 10 day routine, changes in season, window position, and room temperature can double or halve how quickly it dries. A fixed schedule is one of the fastest ways to overwater.
Can I use tap water straight from the faucet?
Often yes, if your tap water is not extremely cold and not unusually hard. If you notice white crust on soil or leaf edges, let water sit out overnight to reach room temperature and reduce chlorine, and consider occasional watering with filtered water to limit mineral buildup. Avoid repeatedly shocking tropical plants with very cold water.
How much light is “enough” when I don’t have a light meter?
Use plant behavior as the indicator. Healthy plants under too little light commonly stretch, become leggy, or develop larger spacing between leaves. If a plant is not growing during the season when it normally would, light is a prime suspect before you change soil or start heavy fertilizing.
Should I fertilize right away after buying a plant?
Usually wait. Many store plants have fertilizer in the pot, and adding more immediately can cause stress or burn. A safe beginner approach is to fertilize only during active growth (often spring and summer), using a diluted balanced liquid fertilizer, and resume only after you’ve confirmed you can maintain consistent watering and light.
What’s the difference between overwatering and underwatering besides wilting?
Both can wilt, but check soil moisture. Underwatered plants have dry soil that pulls away from pot edges. Overwatered plants often have wet or soggy soil and may smell musty, and the wilting is more persistent even when the pot is heavy. If the soil stays wet for days, you likely need to fix drainage and watering frequency, not just water less.
Why do some leaves yellow while the top looks fine?
A few lower leaves yellowing after a move or during seasonal change is often normal. If yellowing spreads upward, happens quickly, or the plant’s soil stays wet, focus on watering and light first. If yellowing comes with drooping plus damp soil, assume overwatering until proven otherwise.
What does “root-bound” look like, and when should I repot?
Look for roots circling around inside the drainage holes or slowly drying soil that stays compact. Repot when roots are clearly taking over the pot and growth has stalled, or when you see repeated drought despite proper watering. When repotting, move up only one pot size to avoid excess wet soil.
Can I grow plants from seed as a beginner?
Yes, but start with seed-starting mix and extra light. Seeds fail more often from low light and inconsistent moisture than from “bad seed.” Keep the mix lightly moist but not soggy, and plan for brighter conditions than you think, seedlings need much more usable light than most houseplants.
Are terrariums good for beginners, and how do I avoid mold in closed ones?
Closed terrariums can be beginner-friendly if you choose humidity-loving plants and don’t overwater during setup. The main mold trigger is excess moisture plus poor airflow. Keep the container clean, avoid adding plants that dislike high humidity, and if you see frequent condensation that won’t clear, crack the lid temporarily and let it cycle dry.
What should I do if I see fungus gnats in my home?
Treat the soil first. Let the top inch dry between waterings and remove any standing water in saucers. Fungus gnats often indicate chronically wet mix. Yellow sticky traps can help reduce adults while the underlying moisture issue improves.
Should I quarantine new plants, even if they look healthy?
Yes. A one to two week quarantine in a separate spot can prevent pests from spreading to your existing plants. Check the undersides of leaves and leaf joints for early signs, especially mealybugs, scale, and spider mites, before combining plants.
What’s the quickest way to avoid beginner losses in the first month?
Start with one plant, put it in the right light for your space, use a pot with drainage, and water based on soil moisture. The “fast fail” pattern is wrong light plus a fixed watering schedule. If you want higher success, take a photo of the plant and your watering date the first week, then adjust only one variable at a time.