Growing starter plants is genuinely one of the most satisfying things you can do as a gardener, and it is much more straightforward than most beginners expect. The short version: you sow seeds into a sterile, lightweight mix, keep them warm and well-lit, water carefully, and then harden them off before moving them to their permanent home. The longer version is what this guide covers, step by step, so you can get started today even if you have never grown a single plant from seed.
How to Grow Starter Plants From Seed Step by Step

Marcus Holloway
7 Apr 2026
What starter plants actually are (and why starting your own matters)
A starter plant is simply a young plant that you raise from seed (or a small cutting) so it is ready to grow on or transplant when conditions are right. You start them early, indoors or in a protected space, so they get a head start on the season. The alternative is either buying transplants from a nursery (expensive, limited variety selection) or direct-sowing into your garden later in the year (fine for some crops, not ideal for others). Starting your own gives you control over variety, timing, and quality, and it costs a fraction of buying transplants.
Starter plants also teach you the whole arc of a plant's life, from germination to transplant, which makes you a better grower overall. If you are just getting into growing plants and want to know which species are genuinely hard to kill, browsing a list of beginner plants to grow is a smart first move before you commit to seeds. But once you have a shortlist, this guide takes over.
Indoors vs. outdoors: choosing what to start and when
Not every plant needs to be started indoors. The decision comes down to two things: how long the plant needs to reach transplant size, and how sensitive it is to cold or frost. Slow-growing crops like tomatoes, peppers, and eggplant need 6 to 8 weeks indoors before they are ready to go outside. Lettuce can be ready in as little as 2 to 3 weeks. Fast crops like beans, squash, and sunflowers grow so quickly that starting them indoors often gives you rootbound seedlings before the soil is ready, so those are better direct-sown outdoors.
The general rule: if a crop needs more than 4 to 6 weeks to reach transplant size, or if it is frost-sensitive and your outdoor season is short, start it indoors. If you are growing primarily outdoors and want ideas that will thrive with minimal fussing, a guide to beginner plants to grow outdoors can help you narrow the list to species that do well with direct sowing in your climate.
| Crop | Weeks Indoors Before Transplant | Better Started Indoors or Direct-Sown? |
|---|---|---|
| Tomato | 6–8 weeks | Indoors |
| Pepper / Eggplant | 8 weeks | Indoors |
| Lettuce | 2–3 weeks | Either (fast both ways) |
| Basil | 4–6 weeks | Indoors |
| Squash / Cucumber | 2–3 weeks max | Direct-sow outdoors |
| Beans / Peas | Not recommended indoors | Direct-sow outdoors |
| Marigold / Zinnia | 4–6 weeks | Either |
Setting up containers, light, and growing medium
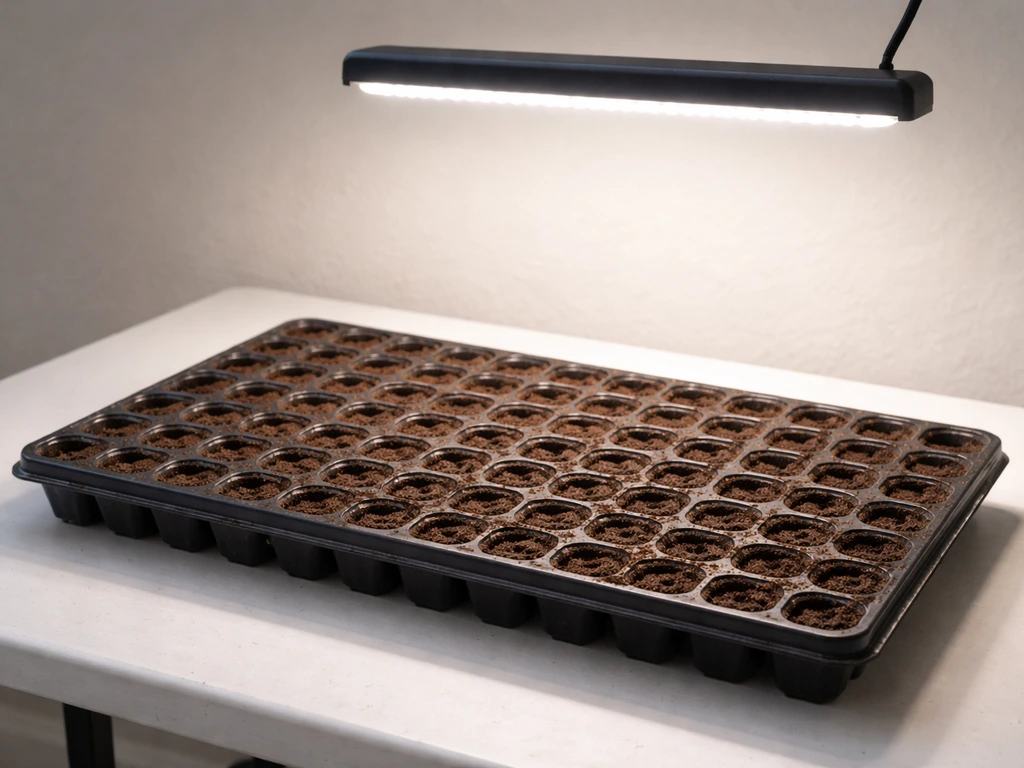
Containers
Any container with drainage holes works for seed starting. Cell trays (72-cell or 128-cell flats) are the most efficient for starting many seeds at once. You can also reuse yogurt cups, egg cartons, or small nursery pots, just punch a hole in the bottom. Avoid anything too large at the germination stage: small cells keep moisture consistent and make it easier to water without drowning your seeds.
Growing medium
Do not use regular potting mix or garden soil for seed starting. A dedicated seed-starting mix is sterile, which dramatically reduces the risk of damping-off (a fungal disease that kills seedlings at the soil line). Commercial soilless mixes typically contain peat moss or coconut coir combined with perlite and/or vermiculite, and they drain well while holding just enough moisture for germination.
If you want to make your own, the standard DIY approach is roughly half coir or peat moss and half perlite or vermiculite. If you go the DIY route, pasteurize your mix first by baking it in the oven at around 180°F to kill pathogens.
Buying a bag of premade mix is usually the easiest option for beginners and it removes one variable from the process.
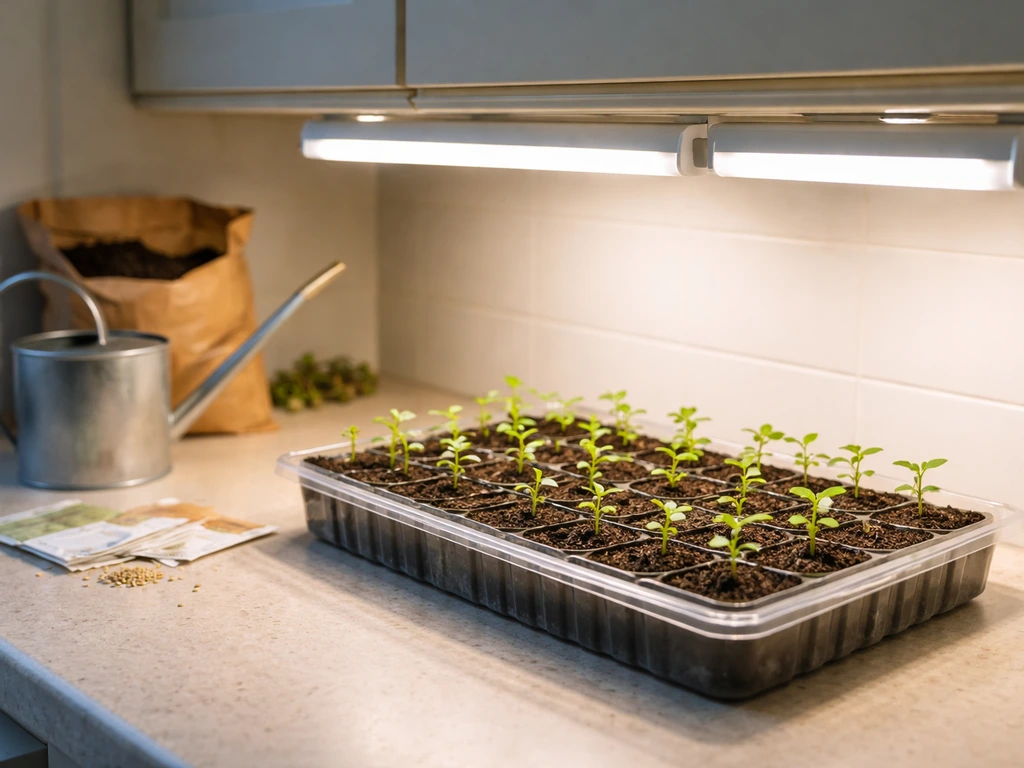
Light setup
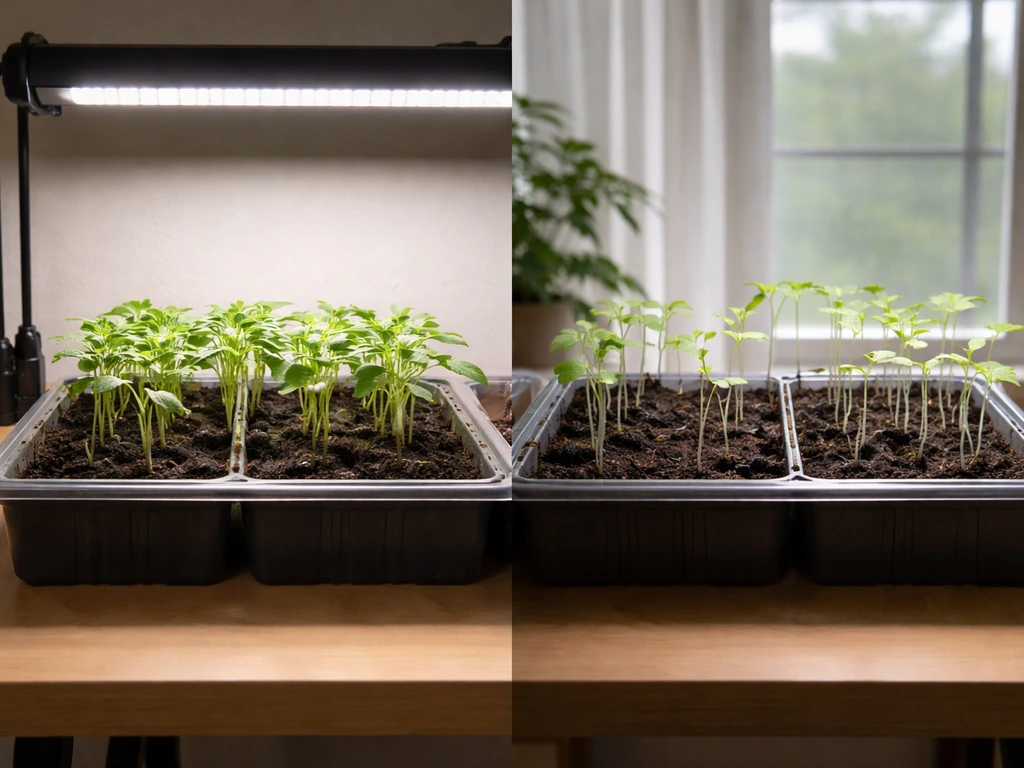
Light is the single biggest reason indoor seedlings fail. A south-facing window sounds fine in theory, but in spring the sun angle and hours of daylight usually fall short of what seedlings need. Vegetable seedlings want roughly 14 to 16 hours of light per day. Under standard fluorescent or LED shop lights, you can hit that target by running lights for 16 hours and keeping them close, within about 2 to 4 inches above the seedling canopy.
With LED grow light bars, mounting distance matters: a light hung closer may only need 8 hours to deliver the right daily light dose, while the same light mounted farther away might need 16 hours to compensate. Adjustable hang systems make this easy to dial in. If you are setting up a full growing space and want a broader overview of the process, a guide to how to grow plants for beginners covers the fundamentals in one place.
Sowing seeds: depth, spacing, and what to do right after
A practical rule for sowing depth: plant seeds no deeper than two to three times their diameter. Tiny seeds like lettuce or basil get pressed gently onto the surface or barely covered with a dusting of mix. Medium seeds like tomatoes go about 1/4 inch deep. Large seeds like squash or beans go about 1/2 to 1 inch deep. Sowing too deep is one of the most common germination failures because the seedling exhausts its energy reserves before it can reach the surface.
One important detail: some seeds need light to germinate, and lettuce is the classic example. If you bury lettuce seed under a half inch of mix, it will often sit there and do nothing. Press it onto the surface, mist it gently, and let light do its job. For seeds that need darkness, cover them and place a humidity dome or plastic wrap over the tray to hold in moisture and warmth.
Sow 2 to 3 seeds per cell to account for seeds that do not germinate. Once seedlings emerge and you can see which ones are strongest, thin to one per cell by snipping the extras at the soil line with scissors. Do not pull them out, since that can disturb the roots of the seedling you are keeping.
- Fill cells or containers to about 1/2 inch below the rim with pre-moistened seed-starting mix.
- Make a small indentation with your fingertip or a pencil at the appropriate depth for your seed.
- Drop 2 to 3 seeds per cell, then cover lightly or leave uncovered depending on the seed's light requirements.
- Label every tray immediately (you will forget what is where, everyone does).
- Mist the surface gently with a spray bottle so seeds make good contact with the mix.
- Cover with a humidity dome or plastic wrap and place on a heat mat if you have one.
- Check daily for germination; remove the dome and heat mat as soon as most seeds have sprouted.
- Move trays under lights within 24 hours of germination to prevent stretching.
The core four: watering, temperature, humidity, and airflow
Watering
Water thoroughly until it drains from the bottom, then wait until the mix is almost (but not completely) dry before watering again. This cycle, wet and then almost-dry, trains roots to grow downward in search of moisture and prevents the waterlogged conditions that cause damping-off. Bottom watering (setting trays in a shallow dish of water and letting the mix wick it up) is gentler than overhead watering for tiny seedlings. Misting with a spray bottle is fine for the first few days after sowing, but switch to bottom or gentle top watering once seedlings emerge.
Temperature
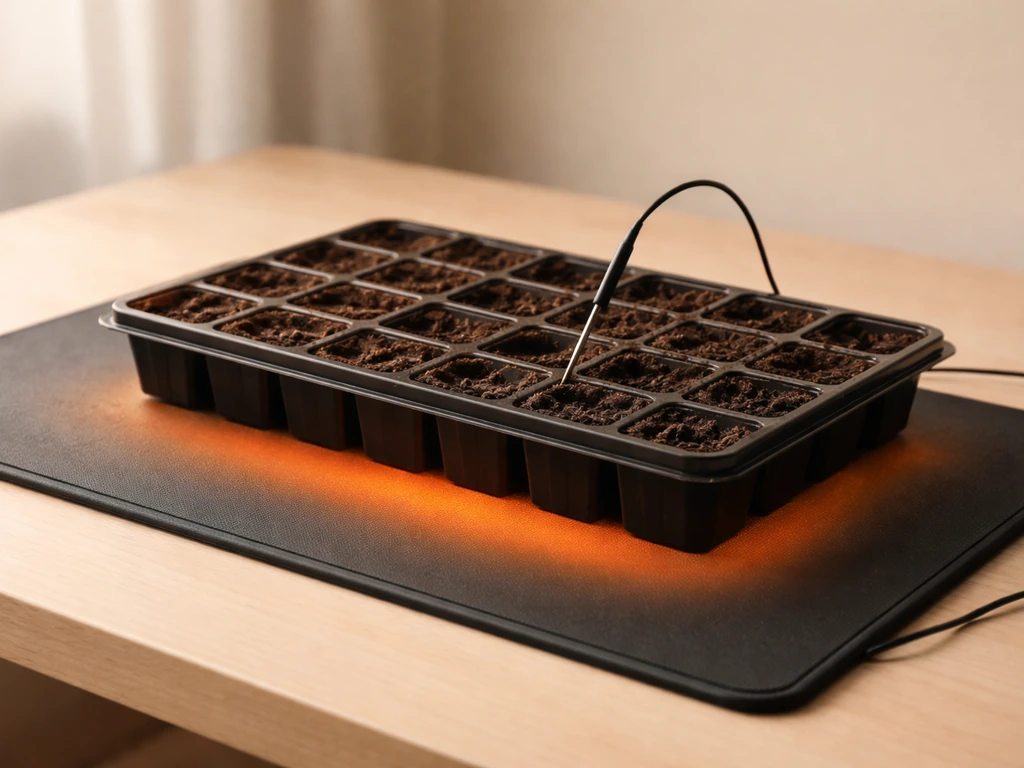
Most vegetable seeds germinate best between 65°F and 85°F, with warm-season crops like tomatoes and peppers preferring the upper end of that range. A seedling heat mat placed under your trays raises the medium temperature by about 10 to 20°F above room temperature, which can dramatically speed up germination. Once your seeds have sprouted, the heat mat's job is done. Remove it or turn it off, since seedlings grow best at slightly cooler temperatures than germination requires, typically 60 to 70°F during the day.
Humidity and airflow
Before germination, high humidity under a dome helps seeds stay moist. After germination, that same high humidity becomes a liability because it creates the conditions damping-off fungi love. Remove the dome, and set a small fan to blow gently across your seedlings for a few hours each day. This lowers surface humidity, strengthens seedling stems (the gentle resistance is like a mini workout), and reduces disease pressure significantly. Good airflow is one of the simplest and most overlooked steps in seed starting.
Feeding and potting up: timing and technique
When to start feeding
Most seed-starting mixes have little to no fertilizer in them, which is intentional: high nutrient levels can burn delicate seedling roots. Hold off on fertilizing until your seedlings have developed their first true leaves (the second set of leaves, which look like miniature versions of the adult plant's leaves). At that point, use a diluted liquid fertilizer at about half the recommended strength and apply it once a week. Going full strength too early is a common mistake that causes more problems than it solves.
Potting up
Seedlings started in small cells will need to move to larger containers before they go outdoors if their roots run out of space. The signal to pot up is visible roots coming out of the drainage holes, or a seedling that wilts quickly after watering even though the soil is moist. Move up one container size at a time, not straight from a tiny cell to a gallon pot. Fill the new container with a standard potting mix (not seed-starting mix, which is too fine for larger containers), water the seedling well first so it slides out without root damage, and settle it into the new pot at the same depth it was growing before.
Hardening off before transplanting
Hardening off is the gradual process of introducing indoor-grown seedlings to outdoor conditions: real sunlight, wind, temperature swings. Start 1 to 2 weeks before you plan to transplant. On day one, put your seedlings outside in a shaded, sheltered spot for about an hour, then bring them back in. Add 30 to 60 minutes of outdoor time each day, and slowly move them into more sun as the week progresses. By the end of the hardening period, seedlings should be spending most of the day outside. Skip this step and you will likely see scorched leaves, wilting, or transplant shock severe enough to set plants back by weeks.
When you finally transplant into the ground or a larger outdoor container, water immediately with a dilute starter fertilizer solution. This gives roots a gentle boost and helps them establish in the new environment. After that, keep the soil consistently moist (not waterlogged) for the first week while the plant settles in.
Picking plants that will actually work for you
One thing that genuinely changes how starter-plant growing goes for beginners is choosing the right species to begin with. If you pick something fussy, you will spend your first season troubleshooting instead of enjoying the process. Tomatoes are rewarding but demand attention. Herbs like basil and chives are more forgiving. Marigolds, zinnias, and nasturtiums are excellent for first-timers because they germinate quickly and are hard to kill. If you want a curated shortlist of species that are reliably beginner-friendly, take a look at some good starter plants to grow before you finalize your seed order.
If your growing space is primarily indoors and you are thinking about houseplants alongside seedlings, many of the same principles apply. Starting with species that tolerate lower light and irregular watering makes the learning curve much gentler. A solid list of easy to grow houseplants for beginners can help you fill your space with plants that are practically trying to thrive.
Common problems and how to fix them fast
Leggy, stretched seedlings
If your seedlings are tall, thin, and flopping over, they are not getting enough light. Move lights closer, within 2 to 4 inches above the canopy, and increase the photoperiod to 16 hours. You can also bury leggy tomato or basil seedlings deeper when you pot them up since they will grow roots along their buried stem. Prevention is better though: get seedlings under lights within a day of germination and keep the lights low from the start.
Damping-off and mold
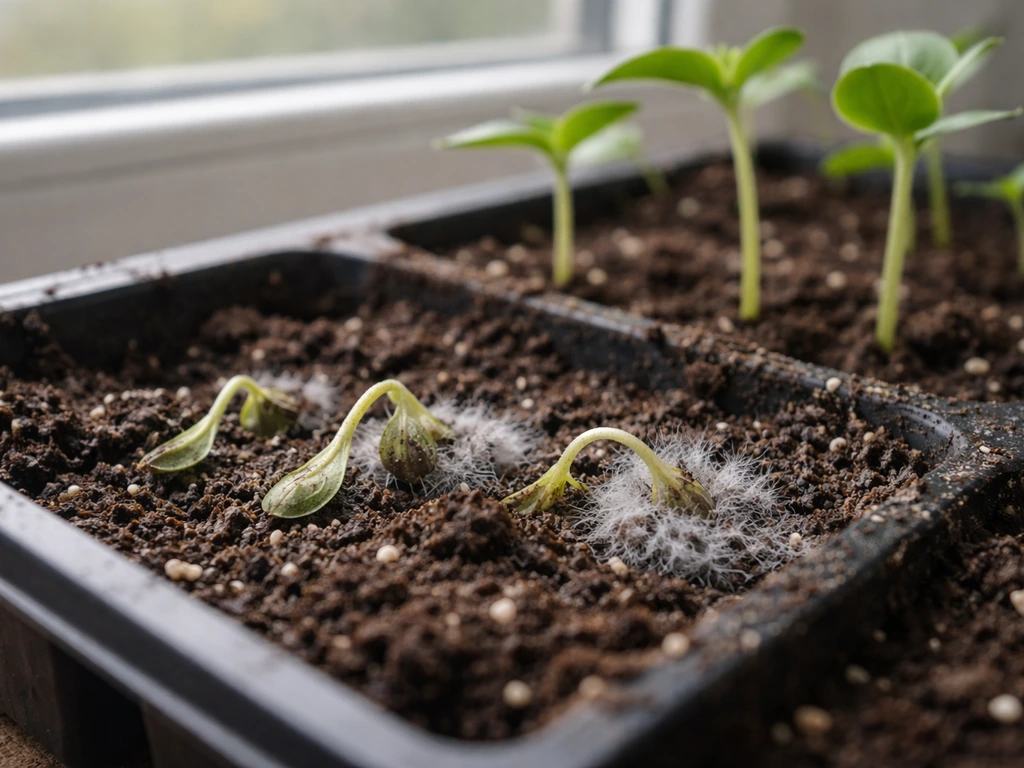
Damping-off looks like seedlings that suddenly collapse at the soil line, as if someone pinched the stem. It is caused by soilborne fungi that thrive in wet, stagnant conditions. Once it happens in a cell, that seedling is gone, but you can stop it spreading by improving airflow immediately (run your fan more), letting the mix dry out more between waterings, and removing any affected seedlings. Prevention is the real key: use sterile seed-starting mix, avoid overwatering, and keep air moving. Crowded seedlings make damping-off worse because they block light and airflow from reaching the soil surface.
Poor or uneven germination
If seeds are not sprouting, the usual suspects are: seeds sown too deep, mix that dried out before germination completed, temperatures that were too cold, or old seeds with low viability. Check the sowing depth first. If seeds were buried more than two to three times their diameter, that is likely the issue. Next, check your temperatures: peppers and eggplants will sit dormant in a tray at 60°F but germinate within a week at 80°F. A heat mat eliminates a lot of this variability.
Yellow leaves
Yellowing lower leaves on young seedlings often means one of three things: nitrogen deficiency (time to start feeding), overwatering (roots cannot take up nutrients if they are sitting in soggy mix), or temperature stress. If your growing area is cold, nutrient uptake slows even if nutrients are present. Warm the space up and start a dilute weekly feed once true leaves are visible.
Stunted growth
Seedlings that stop growing or just sit there looking sad are usually dealing with rootbound conditions (time to pot up), insufficient light, or cold temperatures. Check the roots: if they are circling the bottom of the container or coming out of the drainage holes, pot up immediately. If roots look fine, increase light duration and check that your growing space stays above 60°F at night.
Transplant shock
Plants that wilt dramatically after transplanting are experiencing shock from the sudden change in conditions. The fix is consistent moisture for the first week, partial shade if the sun is intense, and patience. If you hardened off properly, shock should be minimal. If you skipped hardening off, expect a rough week or two while the plant adjusts. Most healthy seedlings recover if you keep them watered and avoid adding extra stress.
You can do this, even if you have killed plants before
Most starter-plant failures come down to three things: not enough light, inconsistent watering, and skipping the hardening-off step. Fix those three and your success rate jumps dramatically. The rest is just fine-tuning. If you want to keep building your confidence with species that are genuinely forgiving, there are plenty of easy to grow plants for beginners that will reward your attention without punishing small mistakes.
And if you have ever looked at a healthy seedling tray and felt like you must be doing something wrong because it looks too simple, you are probably doing it exactly right. Starting plants from seed is straightforward once you have the setup dialed in. The goal of any good seed-starting routine is to make the basics automatic so you can focus on enjoying what grows. There are also plants that anyone can grow with minimal fuss, and working those into your rotation alongside more ambitious starts is a great way to keep your growing space feeling rewarding all season long.
FAQ
Should I keep a humidity dome on after my seeds sprout?
Yes, but treat it like a different goal. After sowing, cover with a humidity dome or plastic wrap only until seeds germinate, then remove it right away and run gentle airflow. Leaving covers on after sprouts appear increases damping-off risk because the tray stays too humid at the soil surface.
If I use sterile seed-starting mix, will damping-off still happen?
Sterilizing your mix helps, but it is not a substitute for watering and airflow. Damping-off still spreads when conditions stay wet and stagnant, especially in crowded trays. Use sterile seed-starting mix, water on a wet-then-almost-dry cycle, and add a small fan for daily airflow.
Can I leave grow lights on all day and night?
Do not. Germination lights are a different requirement than seedling growth, so running lights nonstop without adjusting height and duration can still lead to spindly growth if the light intensity is too low. Follow a consistent schedule (commonly about 14 to 16 hours for vegetables) and keep fixtures close enough to deliver enough light.
How do I bottom-water without keeping the mix constantly wet?
If you use bottom watering, it is still possible to overdo it. Only water until the mix is evenly moist and then let it approach the “almost dry” point before the next watering. Use trays with drainage and empty any standing water in the bottom reservoir after the mix wicks.
My seeds are not sprouting, how do I troubleshoot quickly?
It often is not the seed, it is the temperature or sowing depth. Warm-season crops can sit dormant at around 60°F, and seeds buried too deeply can run out of energy before reaching the surface. Check depth first, then confirm your seed-starting zone is near the germination range (often 65°F to 85°F, depending on the crop).
My seedlings have yellow lower leaves, should I fertilize right away?
Sometimes, but avoid assuming. Yellowing lower leaves are commonly linked to overwatering, cold temperatures, or delayed nutrient uptake rather than immediately needing fertilizer. Wait for true leaves before feeding, and let the space warm up if nights are cool, then reassess watering before adding nutrients.
Why are my seedlings tall, thin, and flopping even though I have them by a window?
You are likely dealing with poor light intensity or incorrect light distance. Move lights closer (about 2 to 4 inches above the canopy) and keep the photoperiod consistent. If seedlings are already leggy, you can bury more stem when potting up, but prevent it by placing lights promptly after germination.
What if hardening off is done but the weather is still cold or unpredictable?
For many crops, timing matters as much as hardening off. If nights are still near freezing or your seedlings were never properly acclimated, delay transplanting even if the plants “look ready.” On transplant week, aim to move them out only when temperatures and sunlight are stable, and watch for a windier, sunnier day that can increase stress.
Can I transplant directly from small cells into a large outdoor container?
Pot up in stages when roots are circling or visible through drainage holes, moving up one container size at a time. Going straight from tiny cells to a large pot can stay too wet for too long, which raises disease risk and slows root growth.
Should I always start fast crops like beans and squash indoors to get a head start?
Not ideally. Outdoors, many fast growers can be direct-sown, but indoor-started seedlings need root room and a transplant plan. If you start them too early, they may become rootbound before soil temperatures are ready. For quick crops, it is usually safer to direct-sow or start later with a clear transplant window.
Is it better to pull out weak seedlings or snip them at thinning time?
Thinning prevents overcrowding, which improves light and airflow and reduces damping-off pressure. Snipping extra seedlings at the soil line avoids root disturbance from pulling, which can damage the remaining seedling and slow growth.
Can I apply the same sowing and covering method to all seeds?
Yes, but do it selectively. If a crop requires darkness to germinate, keep the tray covered initially. For light-dependent seeds, cover them only lightly or not at all, and use misting to keep the surface moist. The key is matching the cover method to the seed’s germination needs, not using one rule for everything.