New plants grow by following a remarkably predictable sequence: a seed (or cutting) absorbs water and oxygen, triggers germination, sends out roots to anchor and feed itself, then pushes up a shoot that unfurls leaves and starts capturing light to make its own food. To learn more about the full process, including seed, germination, root growth, and leaf development, follow the plant's life cycle from start to finish plant life cycle.
How Do New Plants Grow Step by Step for Beginners

Marcus Holloway
24 May 2026
Once that photosynthesis engine is running and the roots are established, the plant shifts from survival mode into real growth. Every stage has a narrow set of requirements, and when something goes wrong, it's almost always because one of those requirements is off. This guide walks you through each stage and tells you exactly what to check and fix.
How new plants start: seed, seedling, or cutting
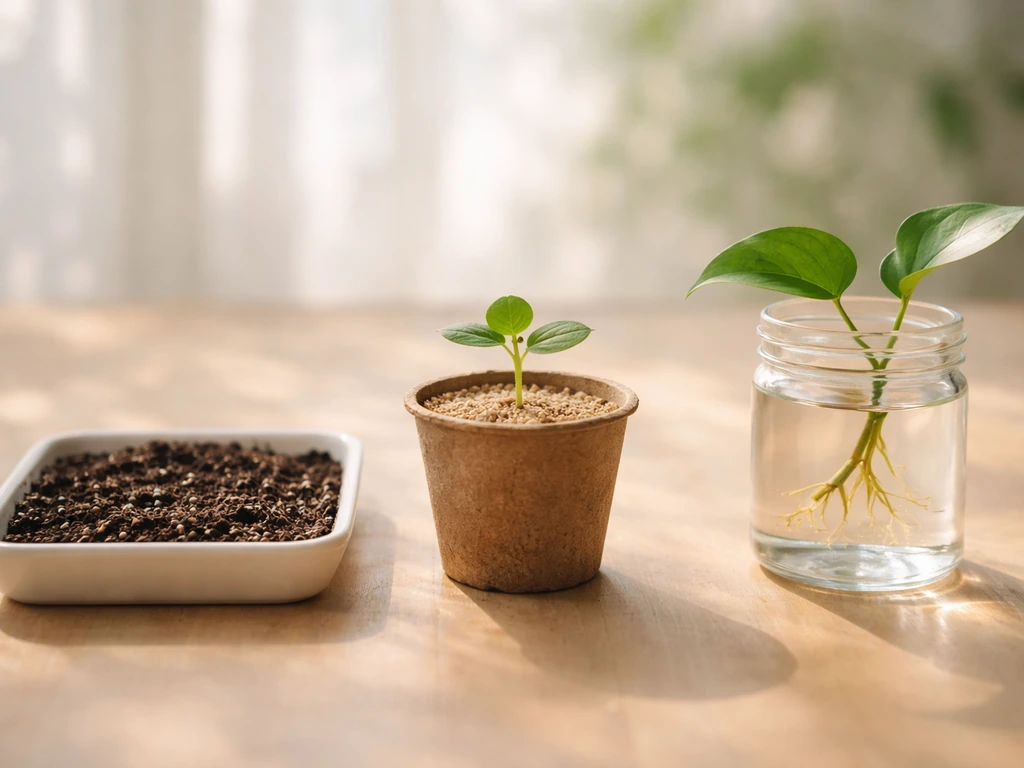
Every new plant has a starting point, and the three most common ones are seeds, seedlings, and cuttings. Seeds are the most common for vegetables and annuals. Seedlings are young plants that someone else already started, and they're a great shortcut if you're new to this. Cuttings are stem or leaf pieces taken from a mature plant and encouraged to form new roots. Each starting method has a slightly different set of early needs, but they all converge on the same goal: get roots established and get leaves making food.
If you're starting from seed, the biggest variable is seed viability. Old seeds or seeds stored in humid conditions may look fine but won't sprout. A quick way to test this before committing a whole tray: put 10 seeds on a damp paper towel, fold it over, seal it in a plastic bag, and leave it somewhere warm for the number of days listed on the packet. If fewer than 7 out of 10 germinate, your germination rate is low and you'll want to sow more densely or get fresh seeds. This is essentially the home version of the formal germination testing that seed labs run, and it works well enough to save you a lot of frustration.
Cuttings skip germination entirely, which sounds like an advantage, but they have their own vulnerability: they have no roots yet and can't take up water, so they're entirely dependent on humidity around their leaves and moisture in the rooting medium to stay alive while new roots form. A moist but airy medium (perlite, vermiculite, or coarse sand mixed with peat) with gentle bottom heat gives cuttings the best start. The same principles apply whether you're propagating a shrub, a houseplant, or a vine.
Germination basics: what has to happen first
Germination is the seed waking up. For that to happen, three things need to line up: the right temperature, enough moisture for the seed to absorb water (called imbibition), and in some cases, light. Get all three right and germination happens fast. Miss one and the seed just sits there, slowly degrading.
Temperature is probably the most underestimated factor. Lettuce germinates across a wide range, roughly 35 to 85°F, with an optimum around 75°F. Tomatoes want warmer conditions, with a minimum around 50°F but an optimum closer to 85°F, and germination becomes unreliable above 95°F. If your indoor space drops below 65°F at night, a seedling heat mat makes a real difference for warm-season crops. Without one, tomatoes and peppers can sit in the soil for weeks without sprouting, not because the seeds are bad, but because they're just too cold to trigger the internal chemistry needed to germinate.
Moisture matters too, but the goal isn't sopping wet soil. You want the growing medium consistently damp so the seed can absorb enough water to activate its enzymes. Covering seed trays with a humidity dome or plastic wrap keeps the moisture and temperature stable and cuts down on how often you need to water during this critical phase. High humidity around the seeds ensures they have enough water to imbibe without the medium becoming waterlogged.
Light is where a lot of beginners get surprised. Some seeds, including basil, petunias, snapdragons, lettuce, and celery, actually need light to germinate. These tiny-seeded plants should be pressed onto the surface of the medium rather than buried. If you cover them with soil, they may never sprout. For most other seeds, darkness is fine during germination, but as soon as you see the first sprout, get them under light immediately.
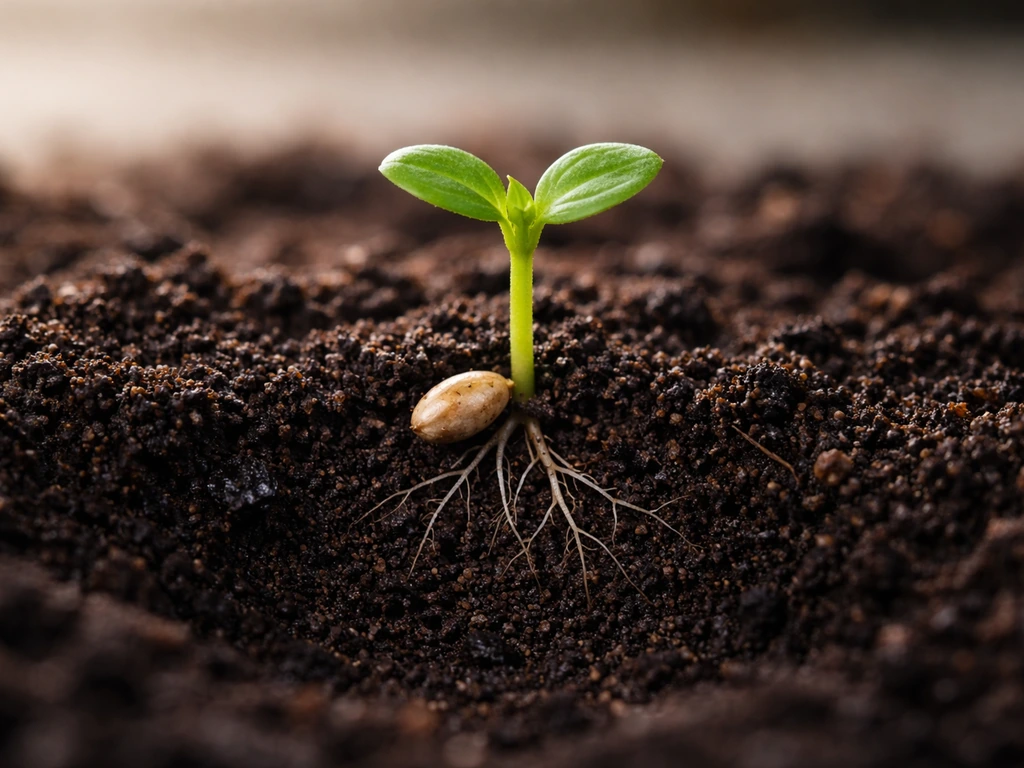
Root growth and early establishment: moisture, oxygen, and temperature
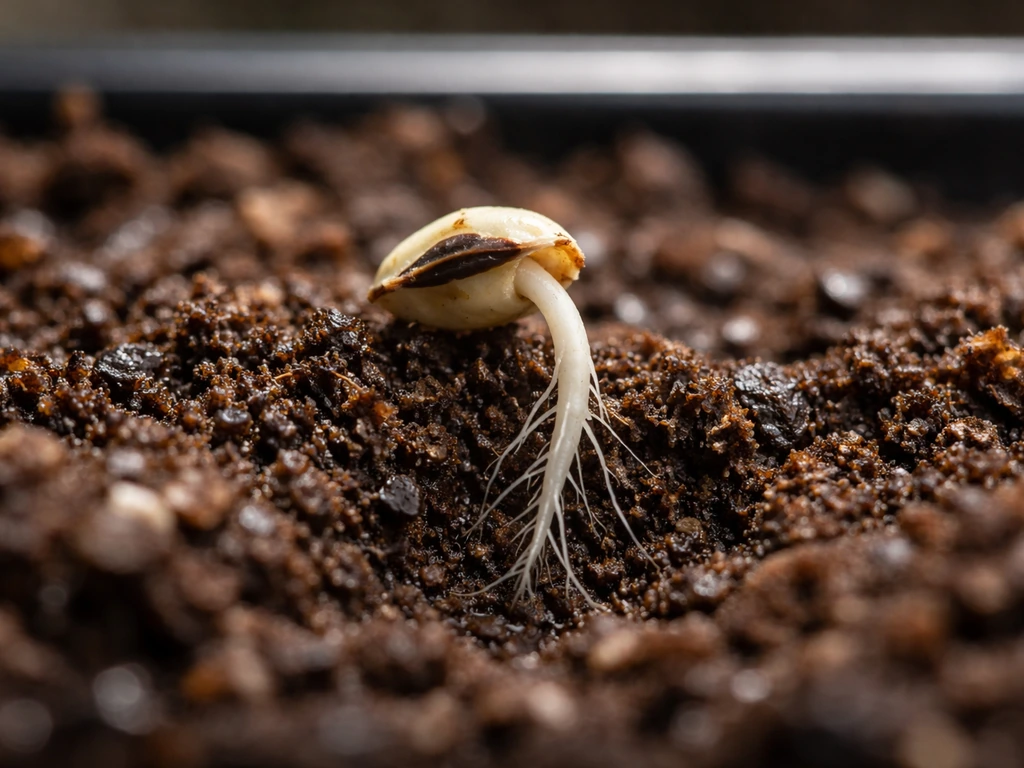
Once germination happens, the very first structure to emerge is the radicle, which is basically the baby root. Its job is to anchor the seedling and start pulling in water and dissolved minerals. If you’re wondering how to grow nursery plants, focus first on establishing healthy roots by avoiding overwatering and keeping the root zone oxygen-rich seedlings. At this stage, the seedling is burning through the energy stored in the seed, so the faster those roots can get established in a supportive medium, the better. This is when most seedling failures happen, and almost all of them come down to three things: too much water, too little oxygen in the root zone, or temperatures that are too cold.
Overwatering is the most common killer of new seedlings. When the growing medium is saturated, the pore spaces that normally hold air get filled with water instead, and roots start to suffocate. Roots need oxygen just like the rest of the plant, and waterlogged soil blocks that supply. The fix is simple: water when the top of the medium starts to feel dry, not on a fixed schedule. You want the medium to go through wet-to-slightly-dry cycles, not stay constantly wet.
Temperature in the root zone matters even after germination is done. Once seedlings are up, they actually benefit from slightly cooler conditions than during germination. A common recommendation for vegetable seedlings is around 55 to 60°F at night and 65 to 70°F during the day. This slight temperature drop helps seedlings develop sturdy stems rather than growing too fast and becoming weak. If your space is warm and you're growing under lights, watch your seedlings for signs of soft, floppy growth.
One more thing that matters here: sowing depth. Plant seeds too deep and the seedling runs out of stored energy before it reaches the surface, which also means more time in contact with any pathogens in the medium. A general rule is to bury seeds at a depth of about twice their diameter. For tiny seeds, press them onto the surface. For large seeds like beans or squash, an inch of depth is usually right.
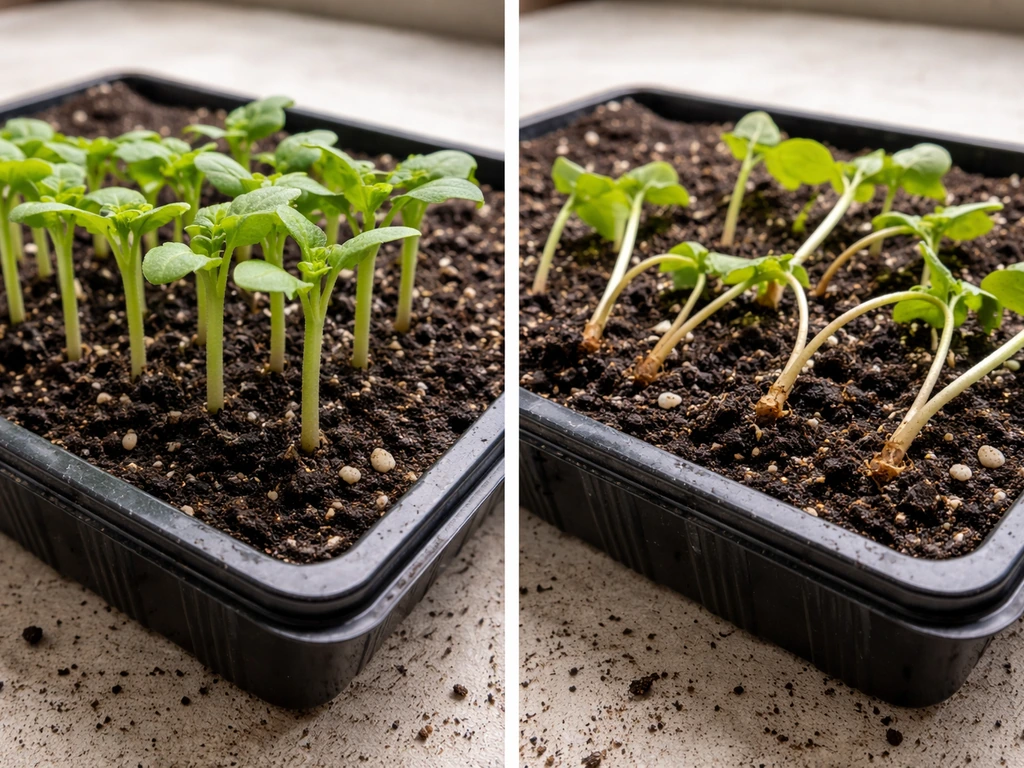
Light, photosynthesis, and why seedlings get leggy
Once the first leaves open, the plant starts making its own food through photosynthesis. Chlorophyll in the leaves captures red and blue wavelengths of light and uses that energy to convert carbon dioxide and water into sugars. This is the engine that powers all future growth. At this stage, light quality and quantity become the dominant factors in whether your seedling grows into a strong plant or a weak, stretched-out one.
Leggy seedlings, the kind that look tall, pale, and floppy, are the single most common complaint from people growing plants indoors. The cause is nearly always insufficient light. When a seedling doesn't get enough light, it stretches upward trying to find more, which uses up stored energy and produces weak, elongated stem cells. The fix is getting more light to the leaves, either by moving the light source closer, increasing the duration, or switching to a more efficient fixture.
For young seedlings under grow lights, a target light intensity of roughly 125 to 175 µmol·m⁻²·s⁻¹ PPFD at the leaf canopy is a practical starting point, which translates to a daily light integral (DLI) of about 8 to 12 mol·m⁻²·d⁻¹. If that sounds technical, here's the practical version: a basic shop light kept within about 2 to 4 inches of the seedling tops running for 14 to 16 hours a day will give most seedlings enough light. Keep the light on for 14 to 16 hours maximum since plants need a dark rest period and won't benefit from running lights 24 hours a day.
A window is rarely enough for starting seedlings unless it's a bright, unobstructed south-facing window in spring or summer. The light drops off fast the farther you get from the glass, and overcast days wipe out the DLI completely. If your seedlings are reaching toward the light, they're telling you they need more.
Water and nutrients across different growing methods
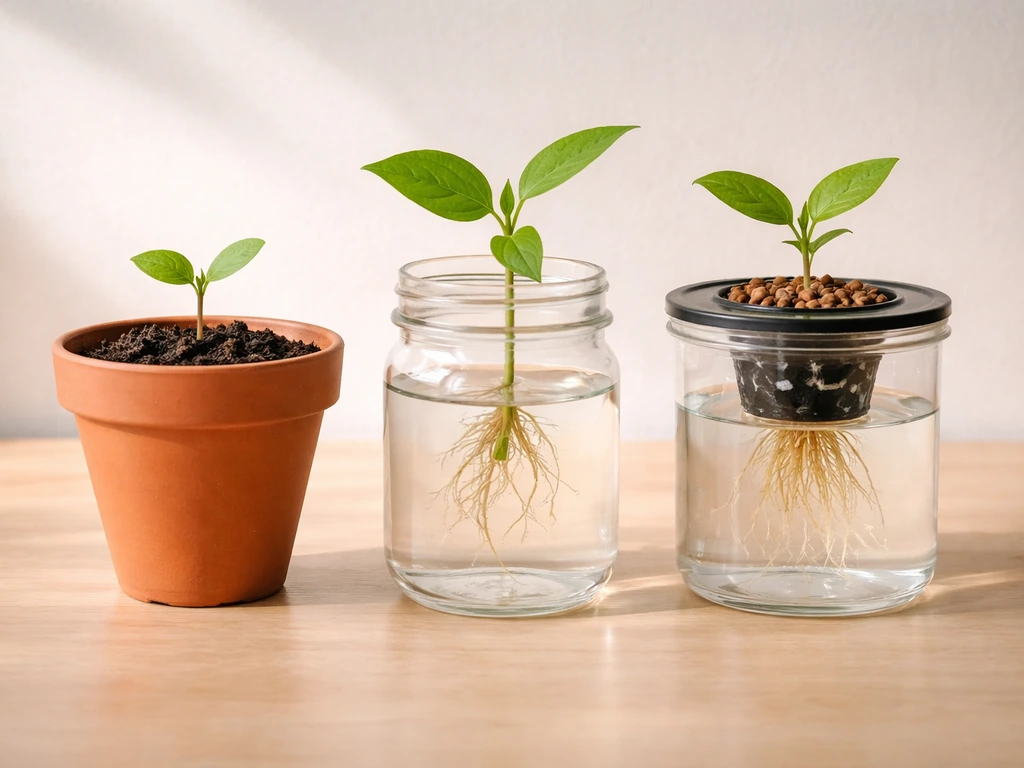
Whether you're growing in soil, propagating in water, running a hydroponic setup, or nurturing a new plant in a terrarium, the core needs are the same: water, oxygen at the roots, and the right nutrients. But each method delivers those things differently, and the failure modes are different too.
| Growing Method | Water Management | Nutrient Source | Biggest Early Risk |
|---|---|---|---|
| Soil | Water when top inch is dry; allow wet-dry cycles | Starter mix has little fertility; add diluted fertilizer after first true leaves appear | Overwatering and damping-off pathogens |
| Water propagation | Change water every 3 to 5 days to prevent stagnation | Minimal nutrients needed at cutting stage; transition to diluted liquid feed once roots form | Algae growth and oxygen depletion in stagnant water |
| Hydroponics | Continuous or timed circulation; keep dissolved oxygen high | pH-balanced nutrient solution (check pH drift daily; aim for 5.5 to 6.5 for most crops) | Nutrient lockout from pH drift; root rot from warm, low-oxygen solution |
| Terrarium | Mist walls lightly; avoid pooling water at the base | Slow-release fertilizer sparingly or very diluted liquid feed | Fungal problems from excess humidity and poor airflow |
Seed-starting mixes are designed to be lightweight and well-draining, but they contain very little nutrition. Once your seedlings push out their first true leaves (the ones that come after the initial seed leaves, or cotyledons), they've used up most of what was in the seed. That's the moment to start feeding with a diluted liquid fertilizer, at about half the recommended strength. Starting too early can burn tender roots; waiting too long means slow, pale growth.
In hydroponic systems, pH is the variable that trips up most beginners. Nutrients can be fully present in the solution but completely unavailable to the roots if the pH drifts outside the optimal range (roughly 5.5 to 6.5 for most vegetables and leafy greens). Check pH every day when plants are young, and correct it with pH-up or pH-down solution in small increments. Dissolved oxygen in the nutrient solution is equally important: warm water holds less oxygen, so if your reservoir temperature climbs above 70°F, root health starts to suffer.
Common problems and quick fixes when a new plant won't grow
Most problems with new plants fall into a short list of categories. Here's how to diagnose and fix the most common ones quickly.
Seed won't sprout
- Check soil temperature first: most seeds need at least 65 to 70°F in the medium, not just the air
- Verify sowing depth: tiny seeds like basil or lettuce need light and should sit on the surface
- Test viability with the damp paper towel method before assuming the conditions are wrong
- If using tap water, let it sit overnight to off-gas chlorine before watering seeds
Damping-off (seedling collapses at the base)
Damping-off is a fungal disease that causes seedlings to suddenly fall over with a mushy, tan constriction at the stem base. It's caused by overwatering combined with fungal pathogens that thrive in wet, cool conditions. Once it appears in a tray it spreads fast through the medium and shared water. Prevent it by using sterile potting mix and clean containers, watering from the bottom rather than overhead, keeping soil temperatures at 70 to 75°F, and not overwatering. If damping-off hits, remove affected seedlings immediately and stop watering until the medium dries out. There's no cure once a seedling collapses, but you can save unaffected neighbors.
Leggy, stretched seedlings
- Move grow lights to within 2 to 4 inches of the seedling canopy
- Increase photoperiod up to 14 to 16 hours if currently running fewer hours
- Slightly bury a leggy seedling deeper when transplanting to stabilize it
- Run a small fan nearby for 30 to 60 minutes a day: gentle air movement stimulates stronger stems
Yellow leaves
Yellow leaves are not a diagnosis on their own. Before assuming a nutrient deficiency, look at where the yellowing is (older lower leaves vs. new growth), and consider the likely blockers: overwatering, root rot, pH problems in hydro systems, or high salt buildup in the medium. If roots look healthy, the medium isn't waterlogged, and pH is in range, then a diluted balanced fertilizer is a reasonable next step. Jumping straight to more fertilizer when roots can't absorb it makes things worse.
Algae or odor in water propagation or hydro
- Change water propagation containers every 3 to 5 days
- Use opaque containers to block light and prevent algae from establishing
- In hydroponic systems, check dissolved oxygen and reservoir temperature
- Clean and sterilize containers between uses with diluted hydrogen peroxide or bleach solution
Slow growth after transplanting
Transplant shock is normal, especially if roots were disturbed. The plant is rebuilding its root system before it can redirect energy to above-ground growth. Minimize it by transplanting seedlings when they're small and showing just the first true leaves rather than waiting until they're root-bound. Keep newly transplanted plants out of direct intense light for a few days and keep the medium consistently moist (but not wet) while they settle in.
What to do today: a practical checklist for your new plant
Whether you've just sown seeds, stuck a cutting in water, or brought home a seedling, here's what to check and set up right now. Nurseries grow plants by controlling light, water, temperature, and nutrients while seedlings establish strong roots.
- Check your soil or medium temperature: if it's below 65°F, get a heat mat under warm-season crops like tomatoes, peppers, or basil
- Verify sowing depth: press tiny seeds onto the surface, bury larger seeds to about twice their diameter
- Cover seed trays with a humidity dome or plastic wrap to maintain moisture and temperature until germination
- Set your grow light timer to 14 to 16 hours and position the light 2 to 4 inches above the seedling tops (or as close as the fixture allows without burning)
- Water from the bottom when possible: place the tray in a shallow dish of water and let the medium wick moisture up, then remove after 20 to 30 minutes
- Once the first true leaves appear, start feeding with a diluted liquid fertilizer at half strength
- If growing in hydroponics, check pH today and every day this week: adjust to stay in the 5.5 to 6.5 range
- For water propagation, replace the water and rinse the container if it's been more than 3 to 5 days
- Give seedlings a gentle breeze with a small fan for 30 to 60 minutes daily to build stem strength
- Transplant seedlings when the first true leaves are established and keep the move gentle to minimize root shock
New plants are more resilient than most beginners expect, but they also give clear signals when something's off. Leggy growth means more light. Mushy stems mean too much water. Pale, slow growth after the first true leaves usually means nutrients. Once you learn to read those signals, you'll be able to course-correct quickly no matter what method or medium you're using. The biology is the same whether you're growing in soil, water, a hydroponic system, or a terrarium. Get the temperature, light, moisture, and oxygen right at each stage, and the plant will do the rest.
FAQ
Do new plants always start as seeds?
No. Seedlings are already past germination, and cuttings start with tissue that must form new roots before real growth can accelerate. If you use cuttings, plan for a humid environment until roots appear, because leaves can’t function normally without an active root system.
How long should germination take before I assume something is wrong?
It depends on the plant’s temperature and the specific species, but a good beginner rule is to use the seed packet’s germination days and compare against your test results. If most seeds fail to sprout in the expected window, temperature is often the first thing to adjust, not fertilizer.
Can I speed up how do new plants grow by soaking seeds first?
Soaking can help some seeds absorb water faster, but it’s not a universal fix and can cause problems for species that are sensitive to waterlogging. A safer approach is to focus on correct temperature and consistent medium moisture, then only soak if the packet specifically recommends it.
Should I keep seedlings covered with plastic or a humidity dome after they sprout?
Keep it just long enough to maintain steady moisture and temperature, then gradually vent once sprouts appear. Stopping too late can raise the risk of damping-off, because the medium stays wet and airflow stays low around the stem bases.
What’s the right watering method once seedlings are up?
Watering from the bottom (or carefully watering the medium, not the leaves) reduces the chance of keeping stems constantly wet. Use the “top of the medium starts to dry” cue rather than a strict schedule, and ensure excess water can drain away.
Why do my seedlings look fine at first, then suddenly collapse?
That pattern often points to damping-off, especially if the base turns mushy and seedlings fall over. Common contributors are cool, wet conditions, non-sterile mix, overhead watering that splashes the stems, or reusing contaminated trays.
How can I tell if it’s too cold or too dry when seeds won’t germinate?
Cold slows the internal chemistry needed to start germination, while dry medium prevents seeds from absorbing enough water. If your area is below the seed’s minimum or you see no change after several days, measure or raise temperature first, then verify the medium stays consistently damp but not waterlogged.
Can leggy seedlings recover if I move them under stronger light now?
They can improve, but the stretched stems will not fully “un-stretch.” Strengthen light immediately and consider moving the light closer, increasing daily hours (within reasonable limits), and watching for new growth to become darker and sturdier.
When should I start feeding, and how do I avoid burning roots?
Start after the first true leaves appear, not at germination. Use a diluted liquid fertilizer at about half strength, and if seedlings are still small or pale due to low light, fix lighting first because fertilizer won’t help if the plant cannot produce energy.
In hydroponics, what should I check first when plants stall?
Check pH before anything else, then verify dissolved oxygen by keeping the reservoir temperature under control (warm water holds less oxygen). Also confirm you’re using the right nutrient concentration, but avoid chasing problems by only adding more nutrients.
How do I adjust sowing depth if my seeds don’t sprout?
If seeds are too deep, they may run out of stored energy before reaching the surface. Use the “about twice the seed’s diameter” guideline for most seeds, and press tiny seeds onto the surface, then keep the medium consistently moist for the entire germination window.
What’s the best way to reduce transplant shock?
Transplant when seedlings are small and showing just their first true leaves, then protect them from intense direct light for a few days. Keep moisture steady but not soggy, and avoid disturbing roots more than necessary.
Do new plants need nutrients before they have true leaves?
Usually not. Seeds provide the initial energy, and problems often come from environment issues like oxygen, temperature, and moisture. Feeding too early can burn tender roots, especially when the root system is still establishing.